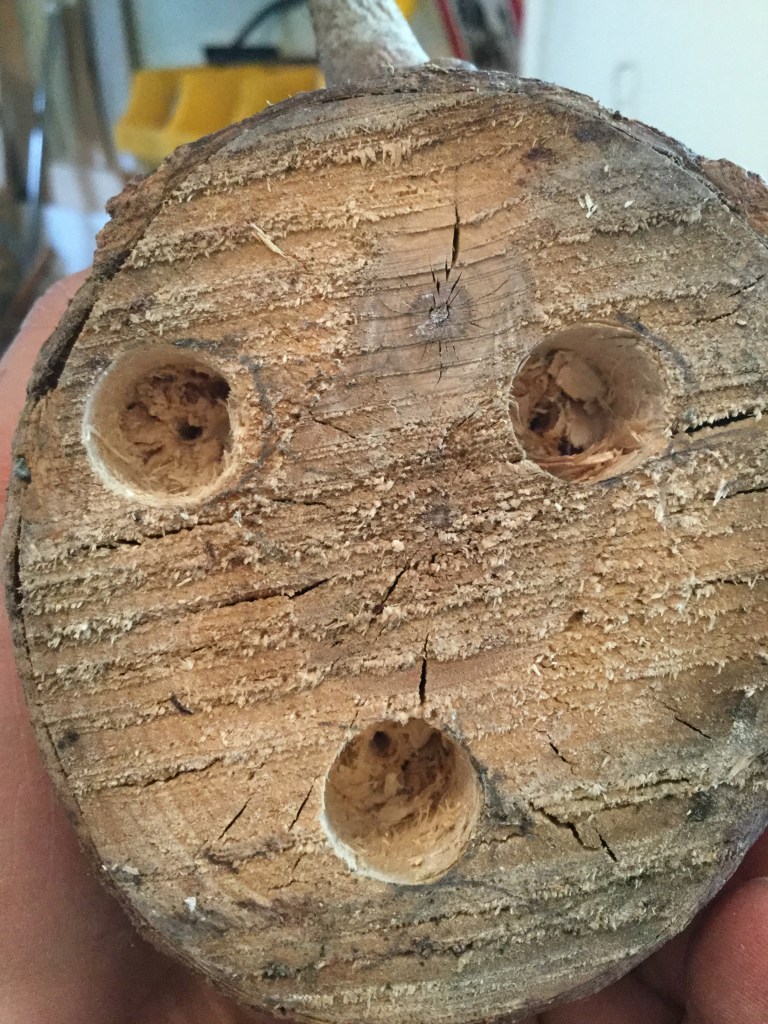
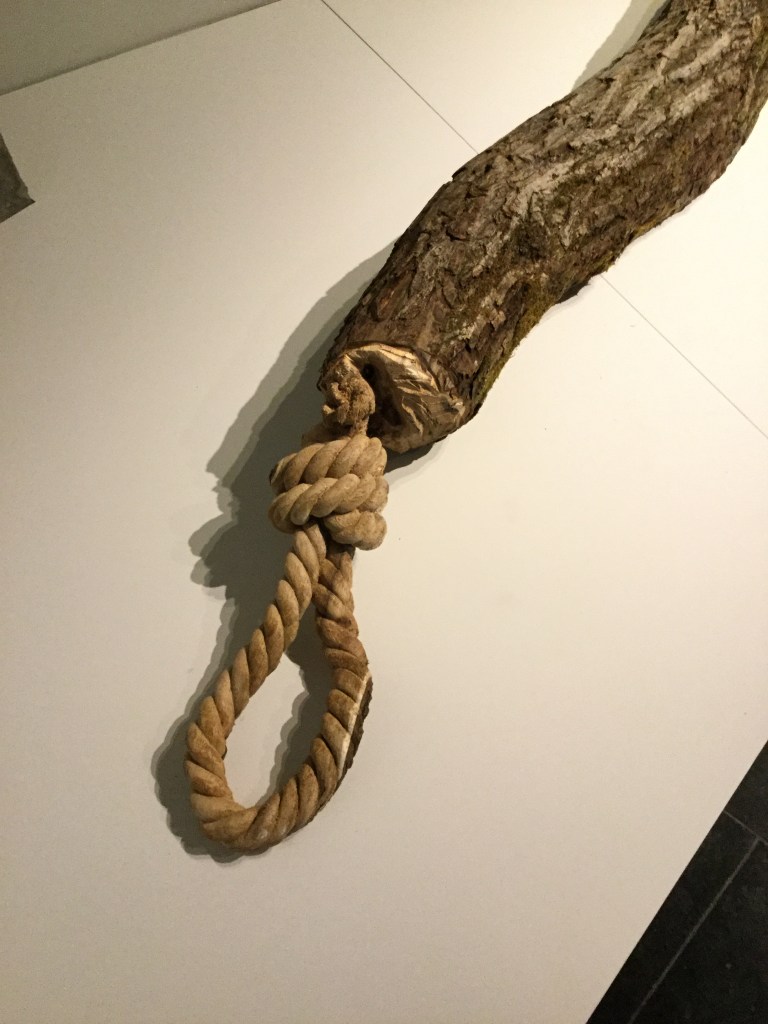
The next step in this sculpture will be to grind the wood to get ride off holes and imperfections and paint it again.
d
Self-assessment
How did I use a range of techniques to create a skilful and effectivesculpture?
The technique used with clay was the manipulation of its materiality: it feels very corporeal. Physically speaking clay is quite inviting to the touch, it practically engulfs your hands with itself, it is so immersive, a pleasure to shape it into new forms.
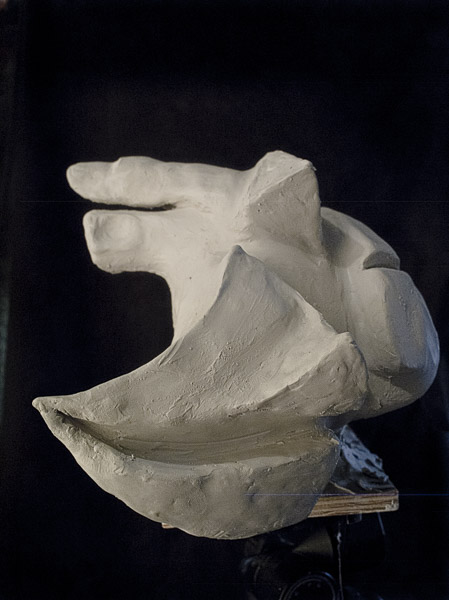
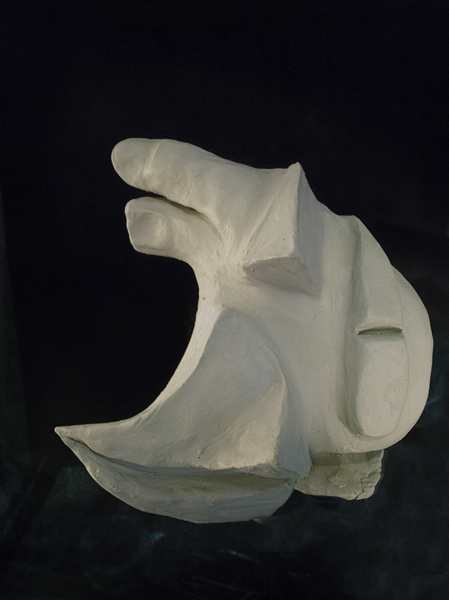
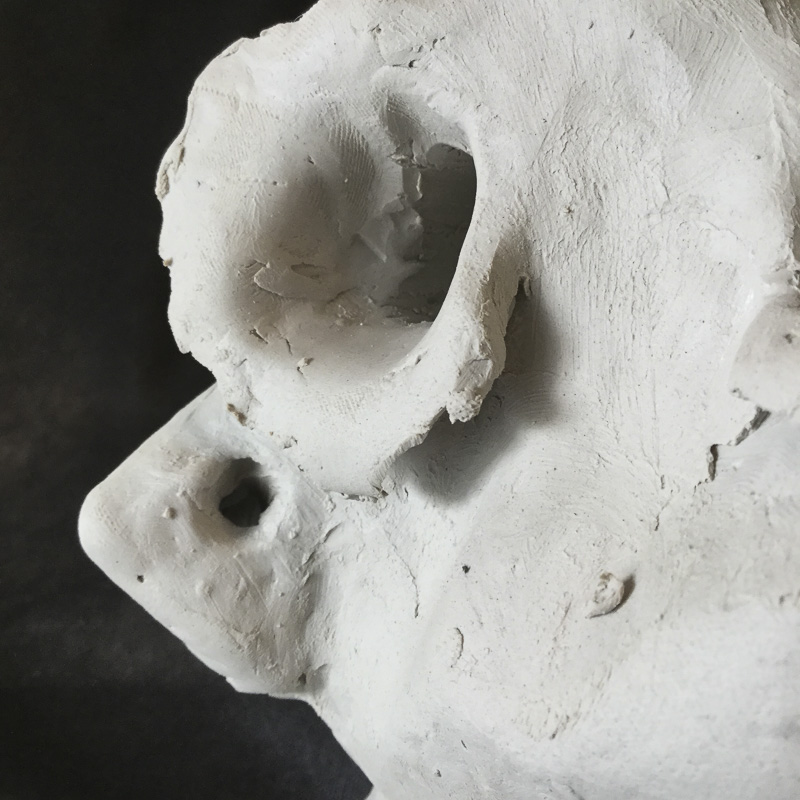
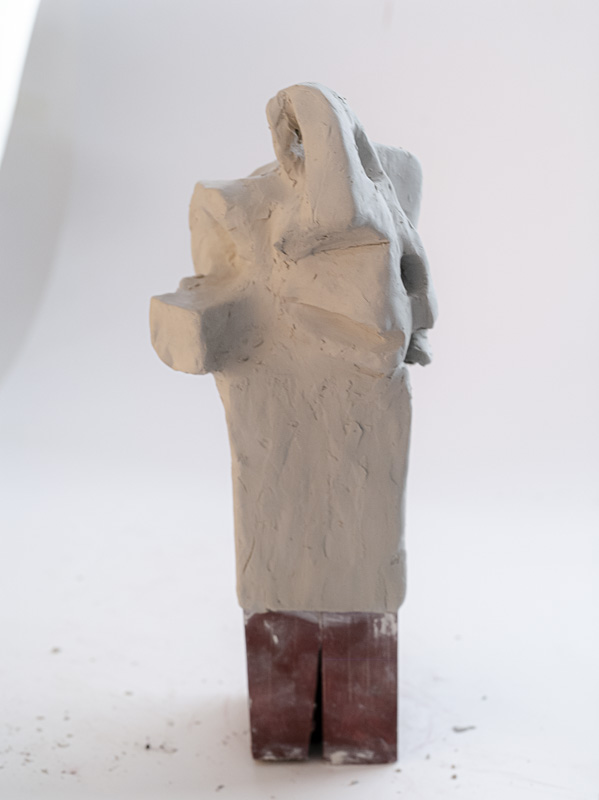
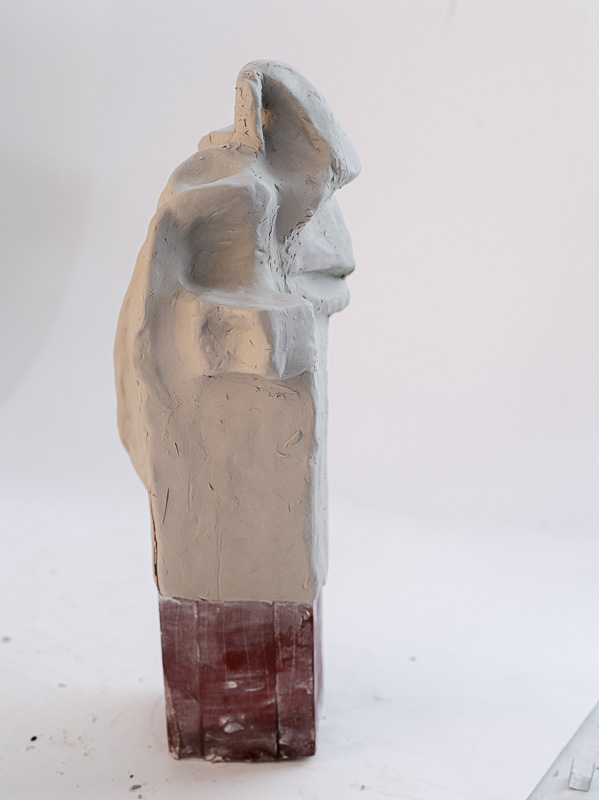
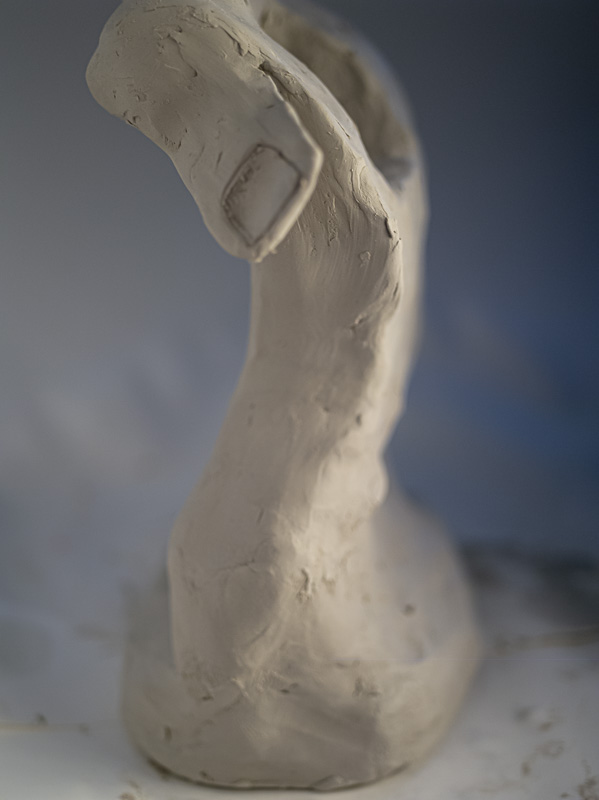
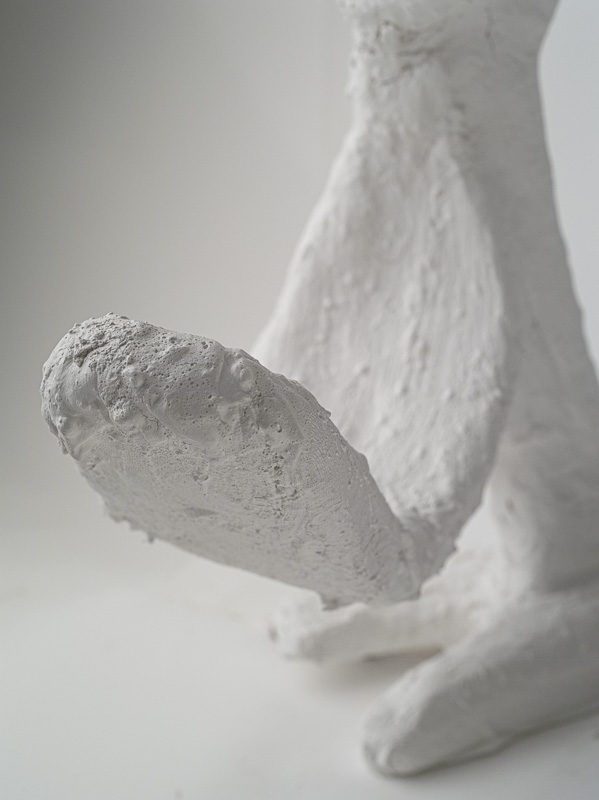
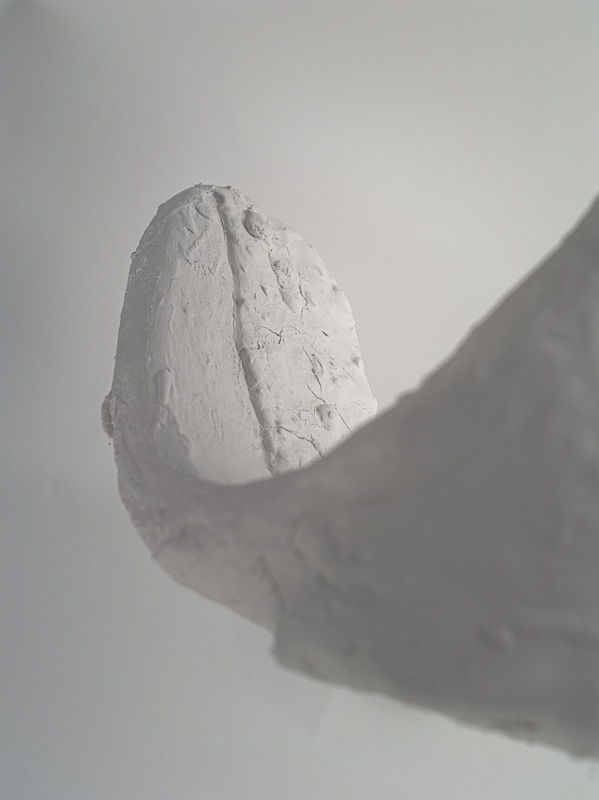
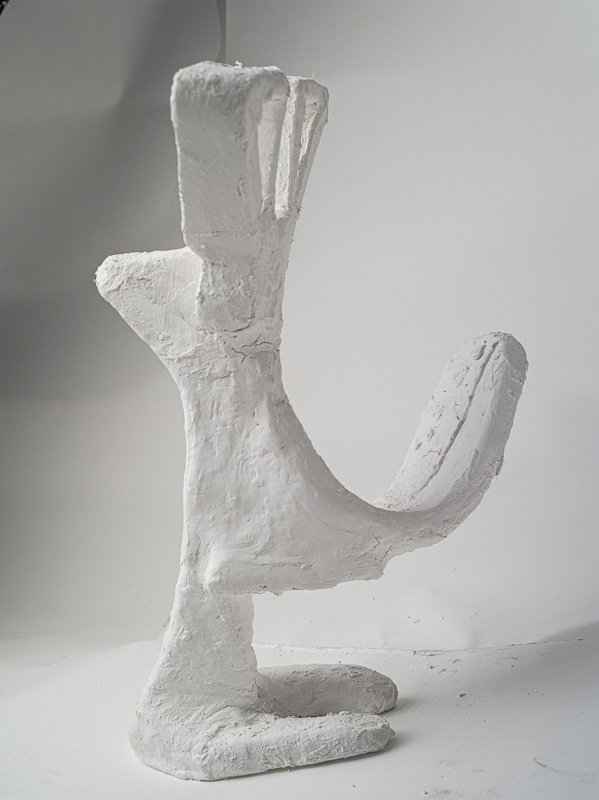
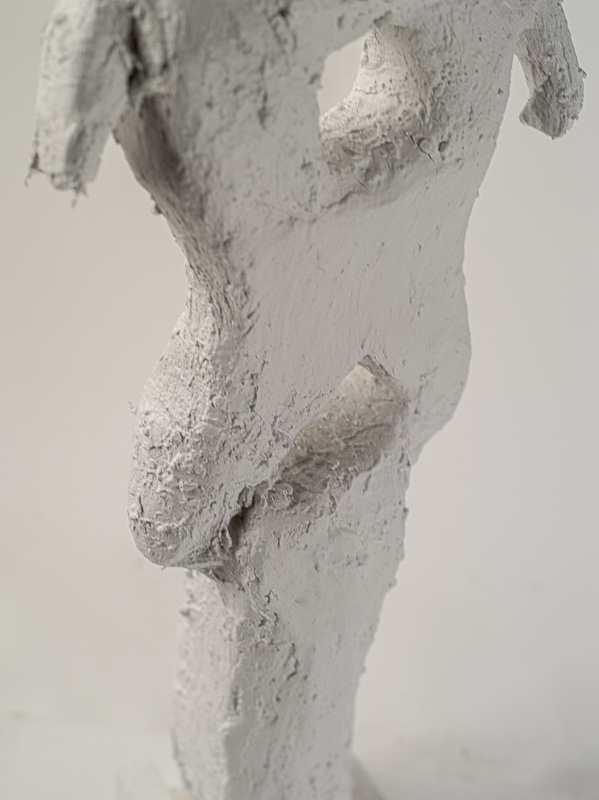
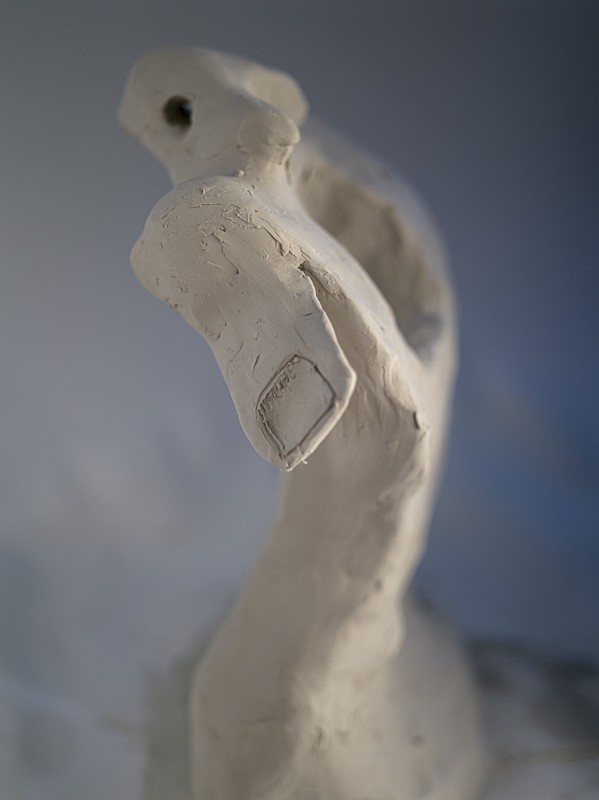
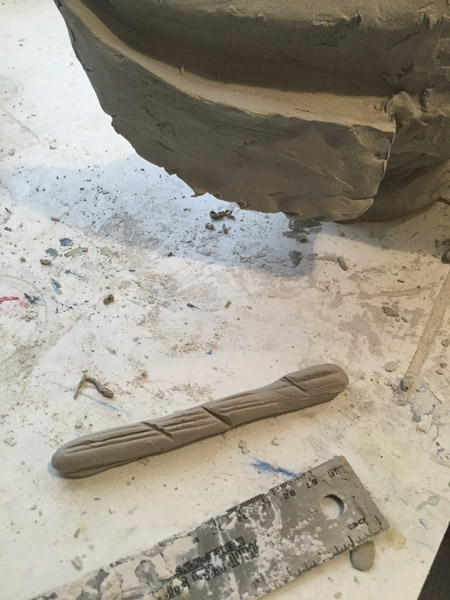
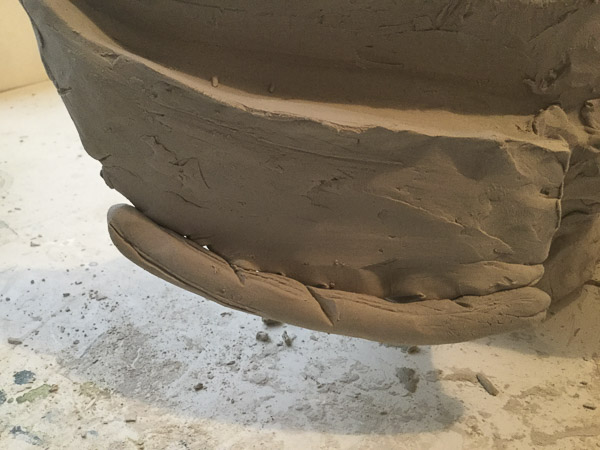
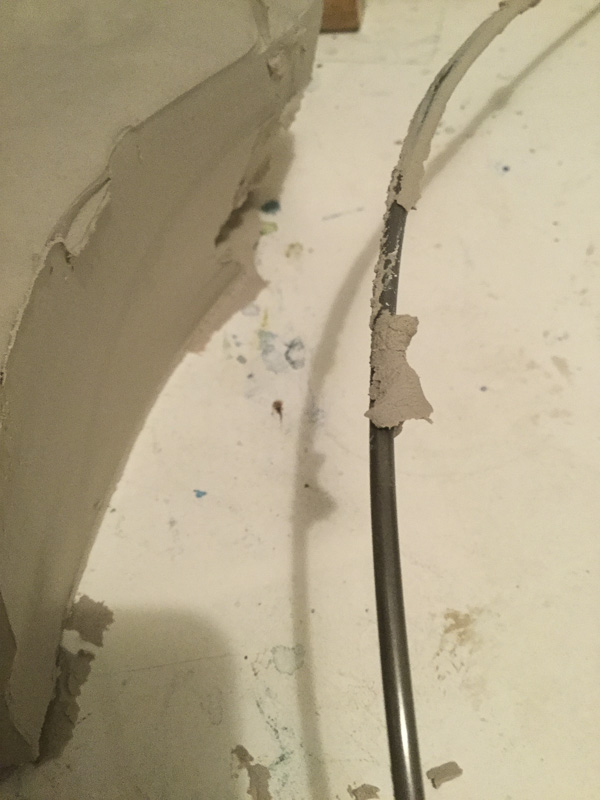
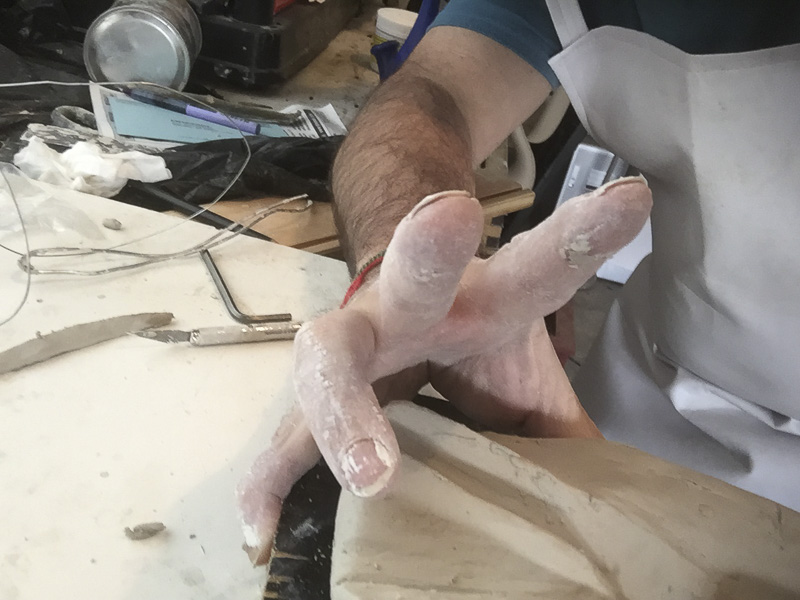
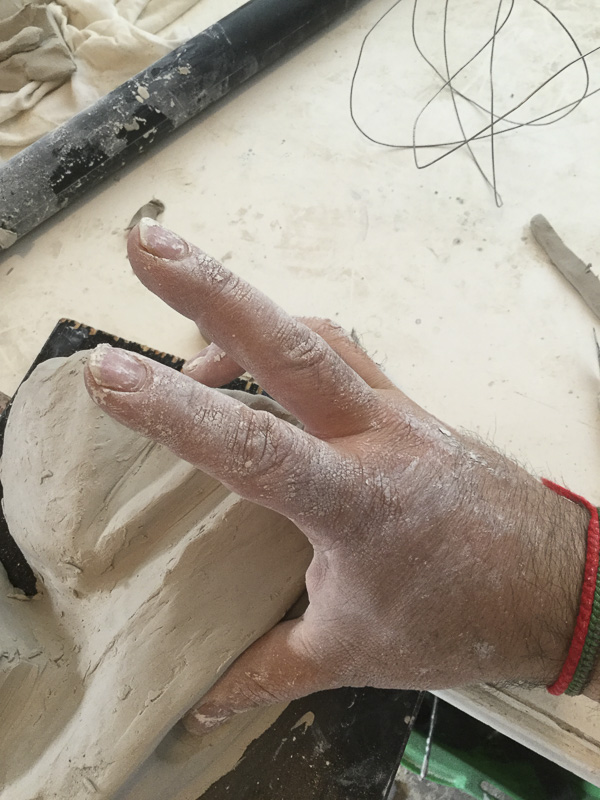
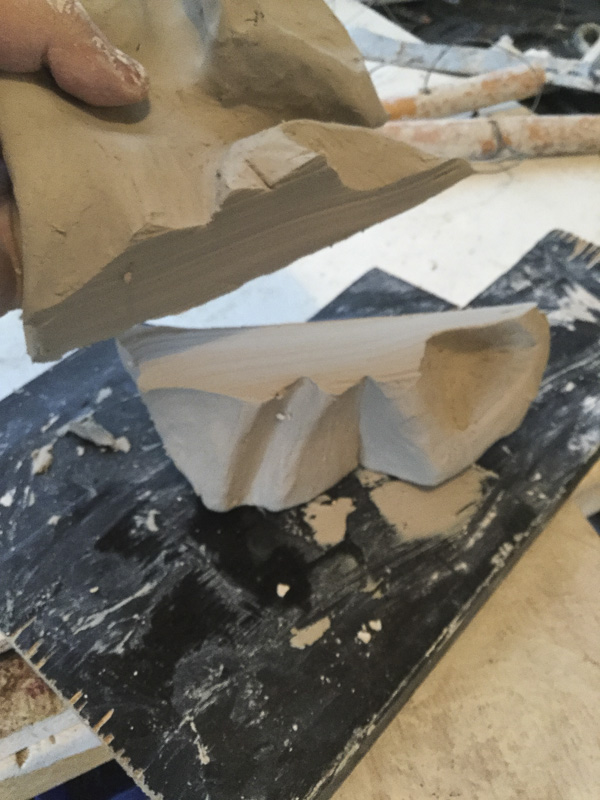
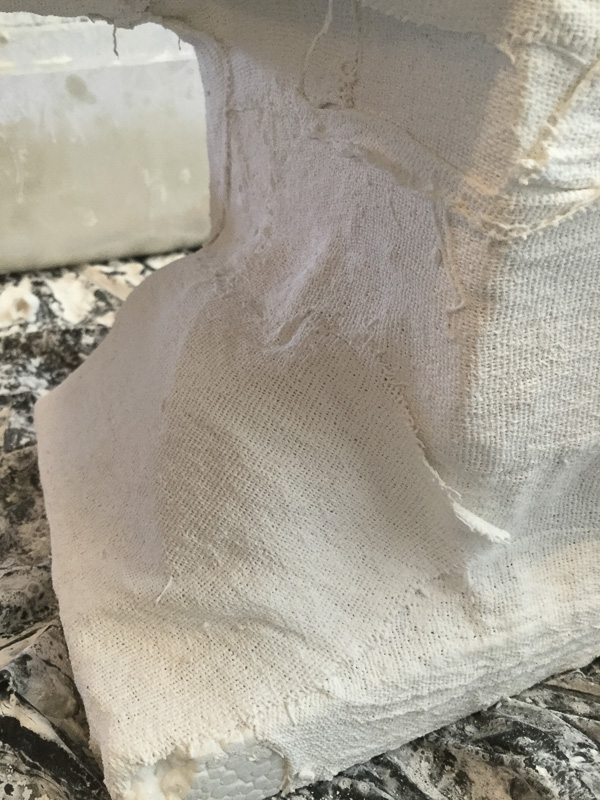
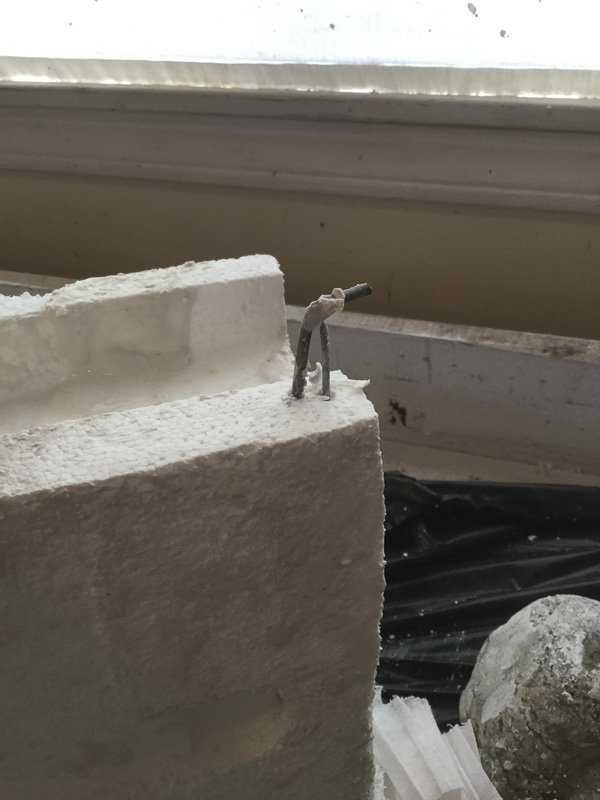
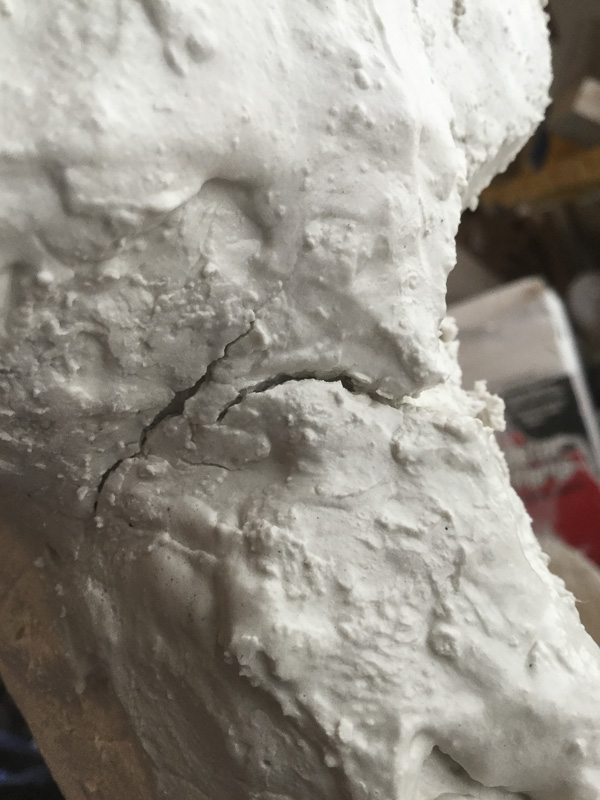
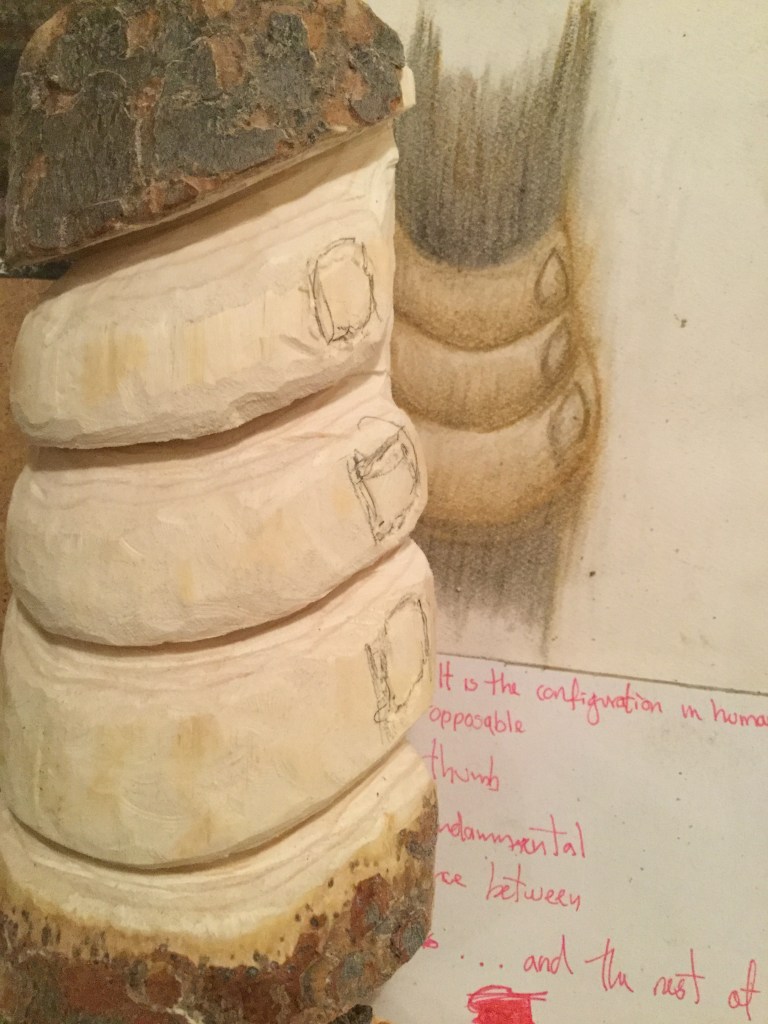
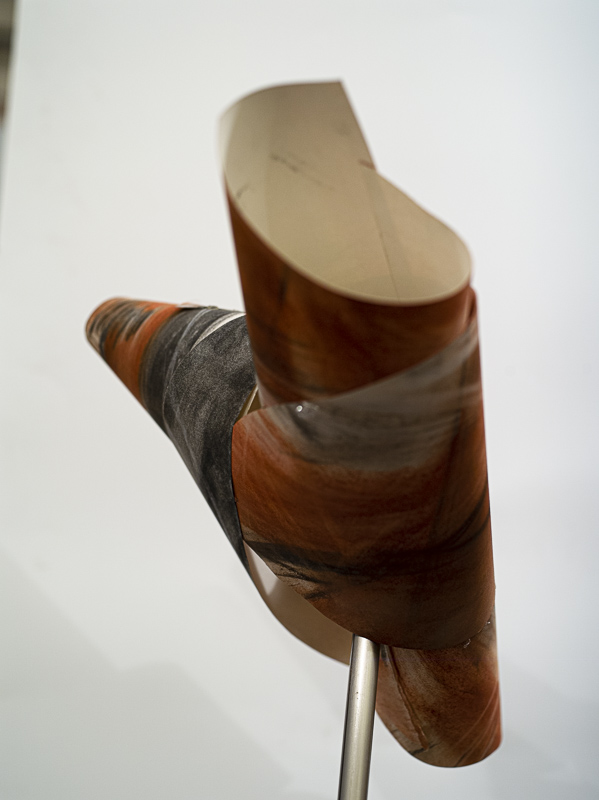
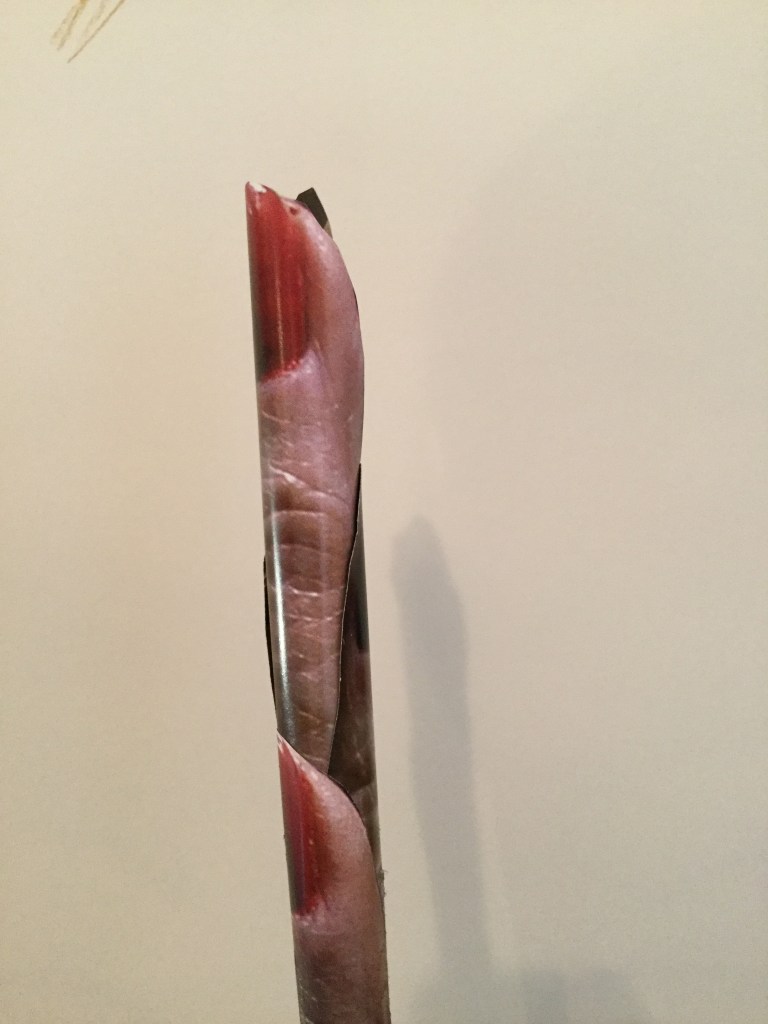
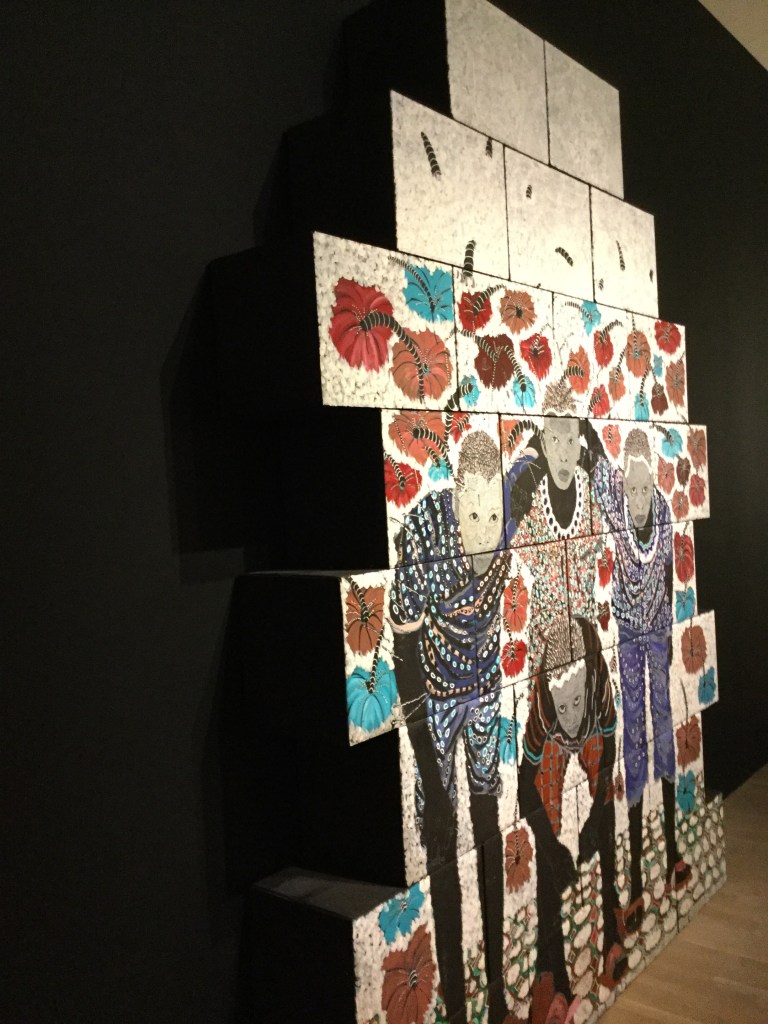
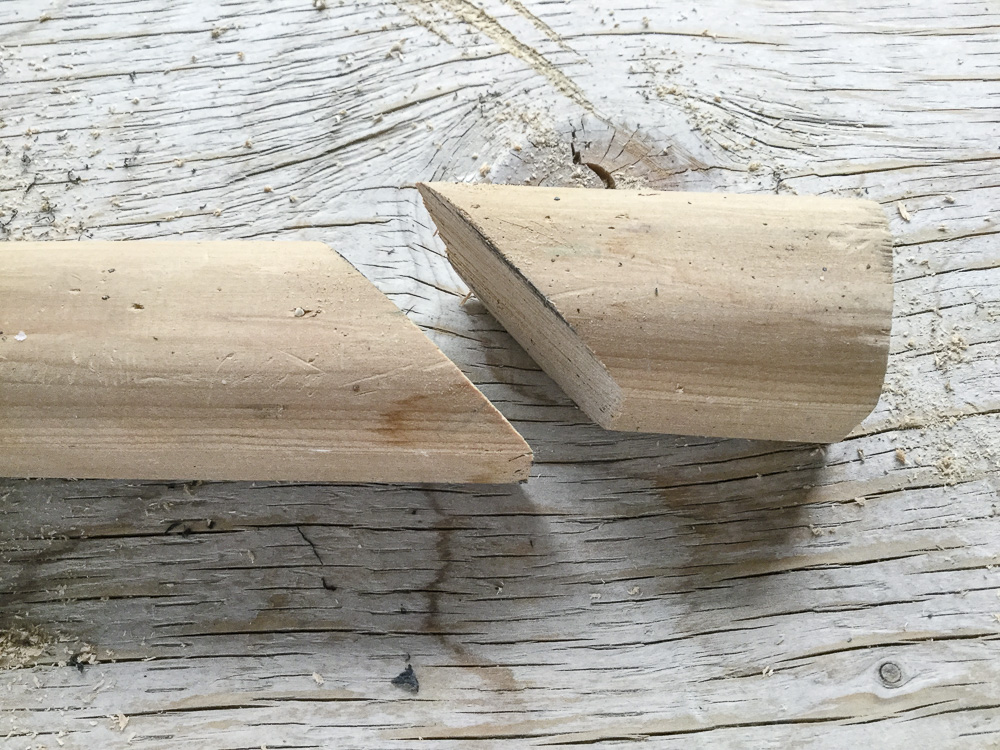
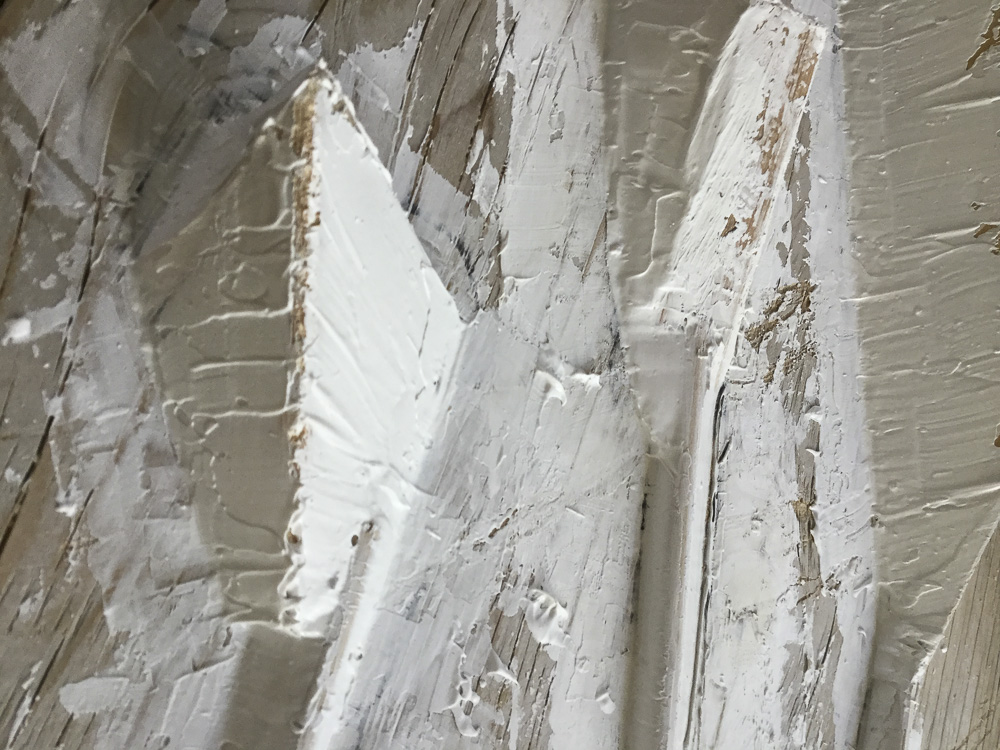
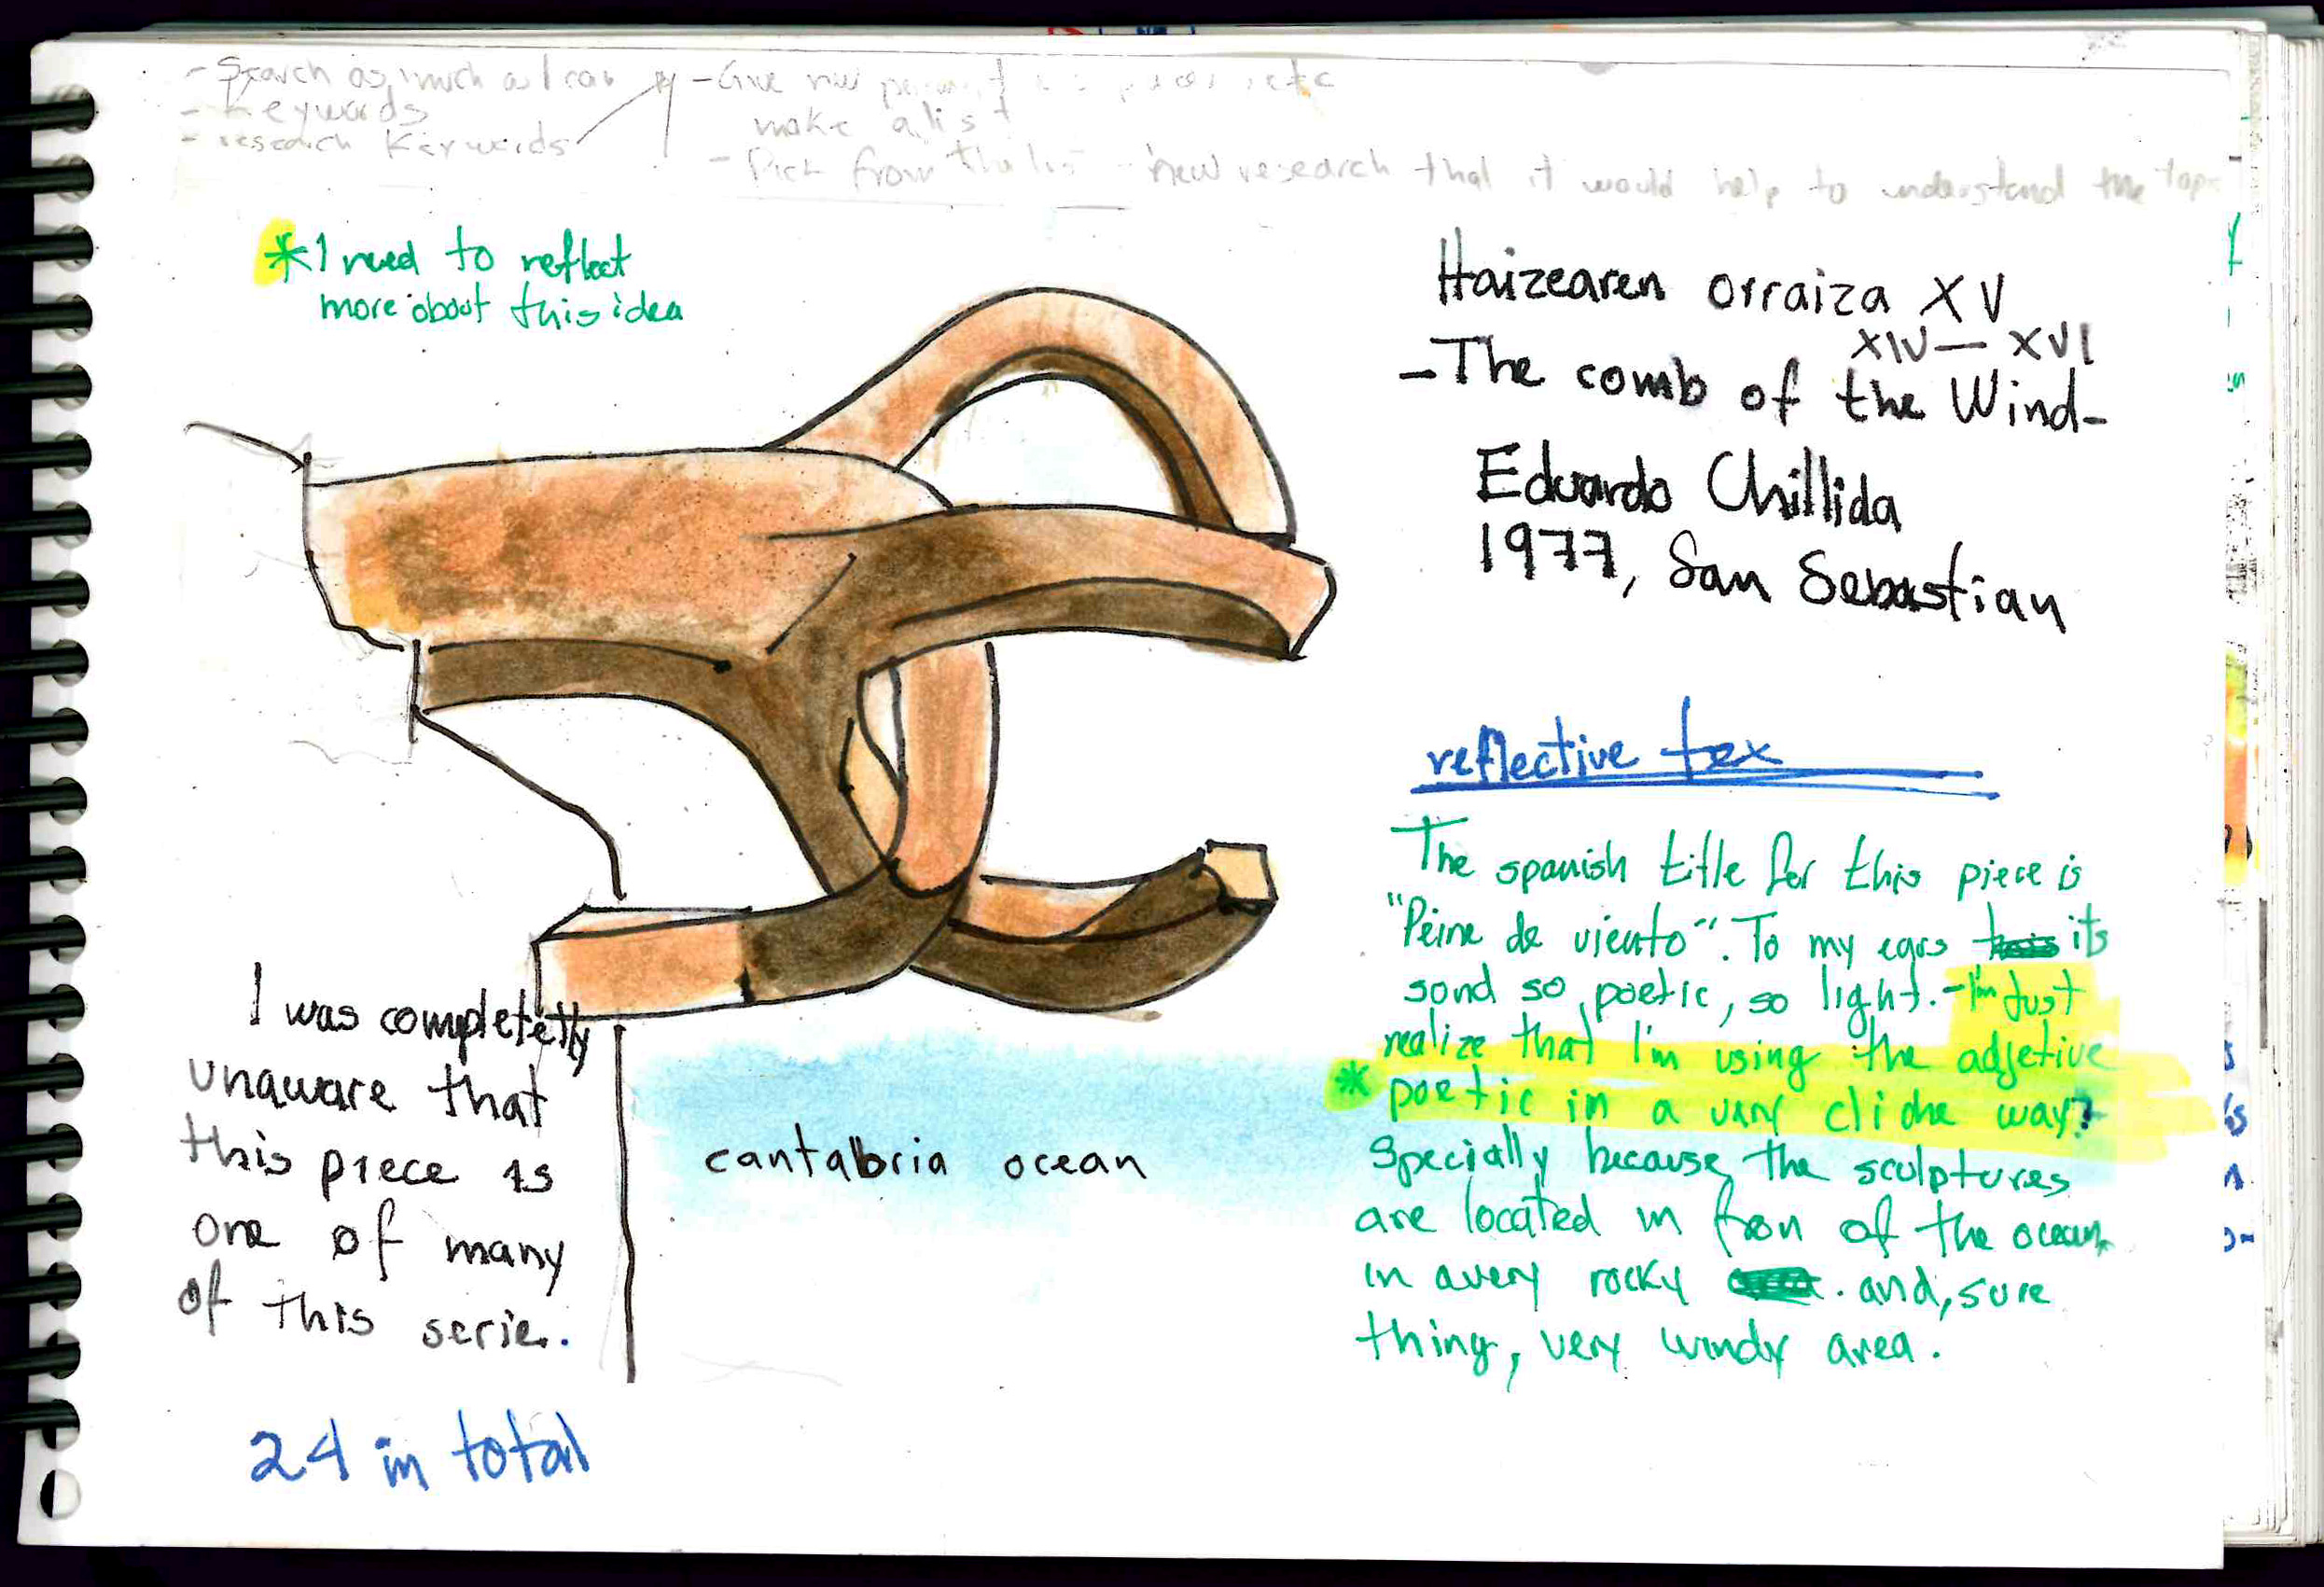
Also, I think I got good results having presented my topic inquiry about darkness and human intelligence. Little details that I really like regarding this idea are, for example, the thumb and pinky foot of plaster Sculpture 1. (See Image 1) Or the finger hands of clay Sculpture 4. (See Image 2)
Image 1. In this pre plaster version, thumb and pinky foot are well defined.Image 2. Thumb side view of clay Sculpture # 4. Pinky is on the other side
How did I use construction techniques involving a variety of media and tools?
While working with clay I used mostly my hands to shape my sculptures also other essential tools help me too: a flexible to bend metal ruler, a can of beer, scrap-wood and 3 different-in-width types of wire to cut the clay. Learning about the Slab and Coil methods was also quite useful; it allows me to move forward quickly with excellent results.
Plaster was a different experience. I also used my hands a lot, but It was not as pleasant as working with clay. This plaster stuff burns and it can be quite messy while working so, not ideal for me.
How I developed basic skills in drawing and used those drawing to develop my ideas
I love to draw, and I think somehow this construction sculpture process is helping me to draw better in less time. Or perhaps I’m getting used to draw regularly but either way, I draw better now, so ideas flow smoothly while been developed with colours lines, charcoal, watercolour, etc.
t
Respond to Tutors’s feedback
The text in light grey are my tutors comments (Kimberly Foster) and the black text are my answers.
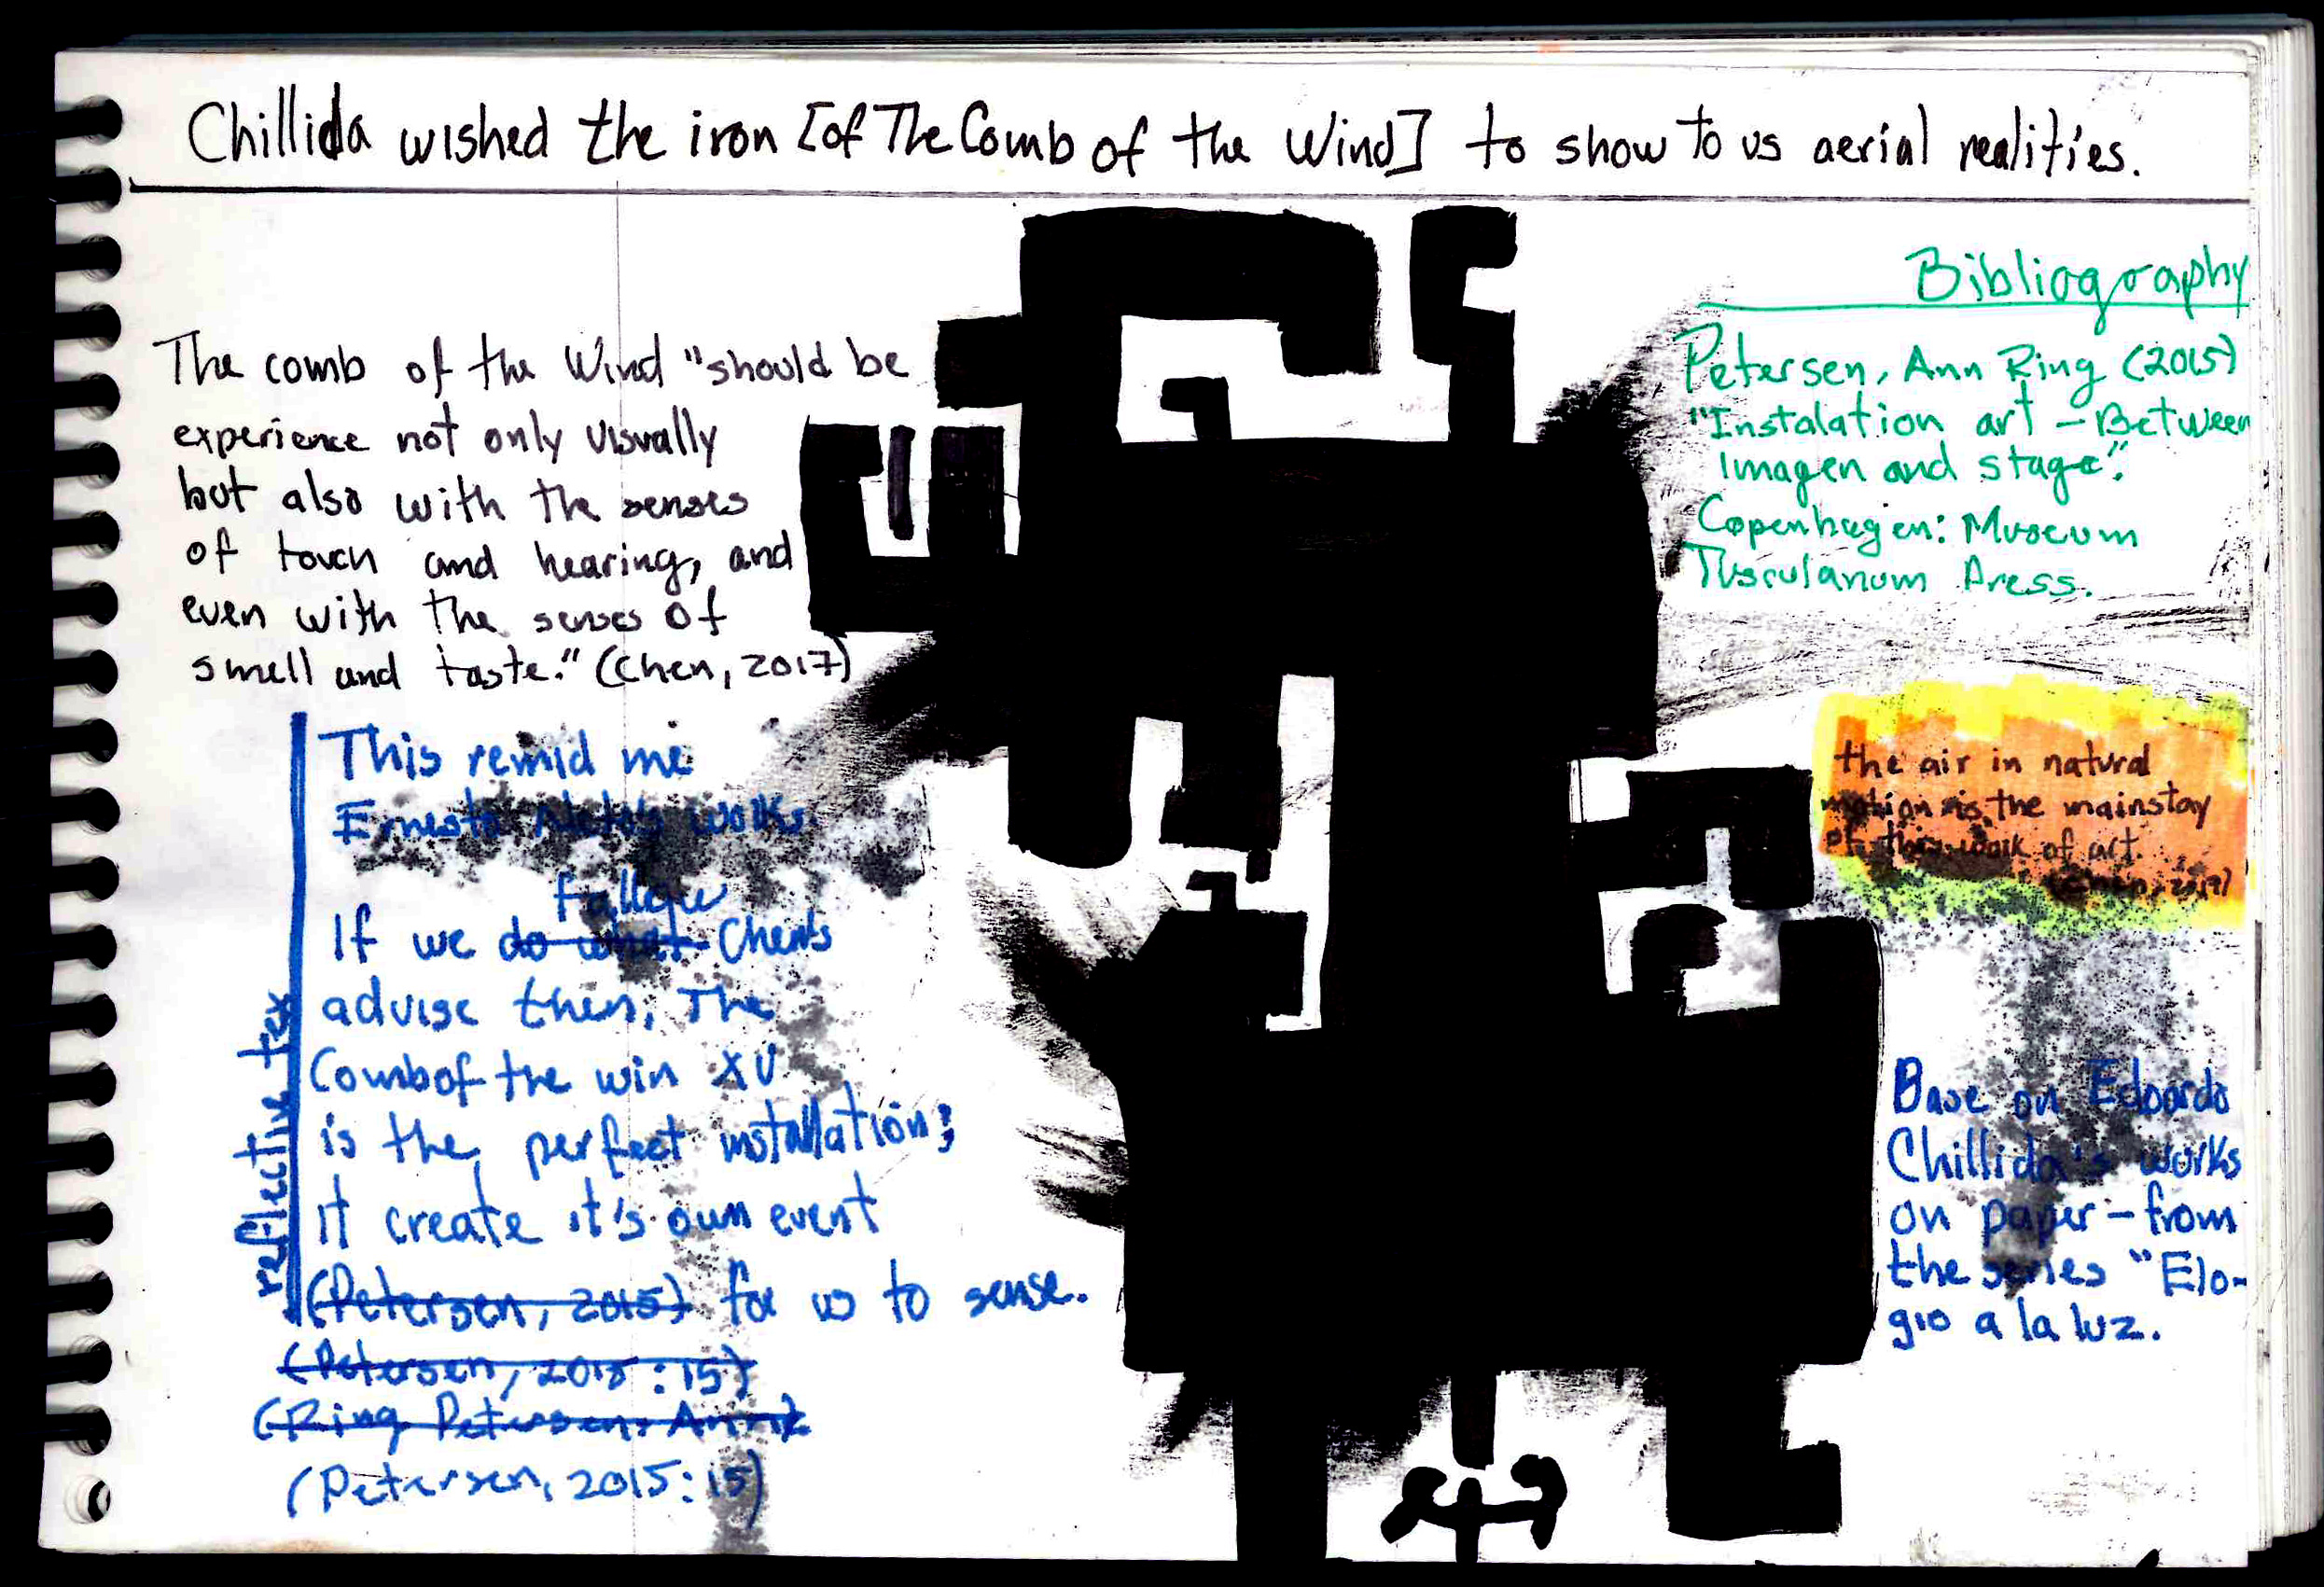
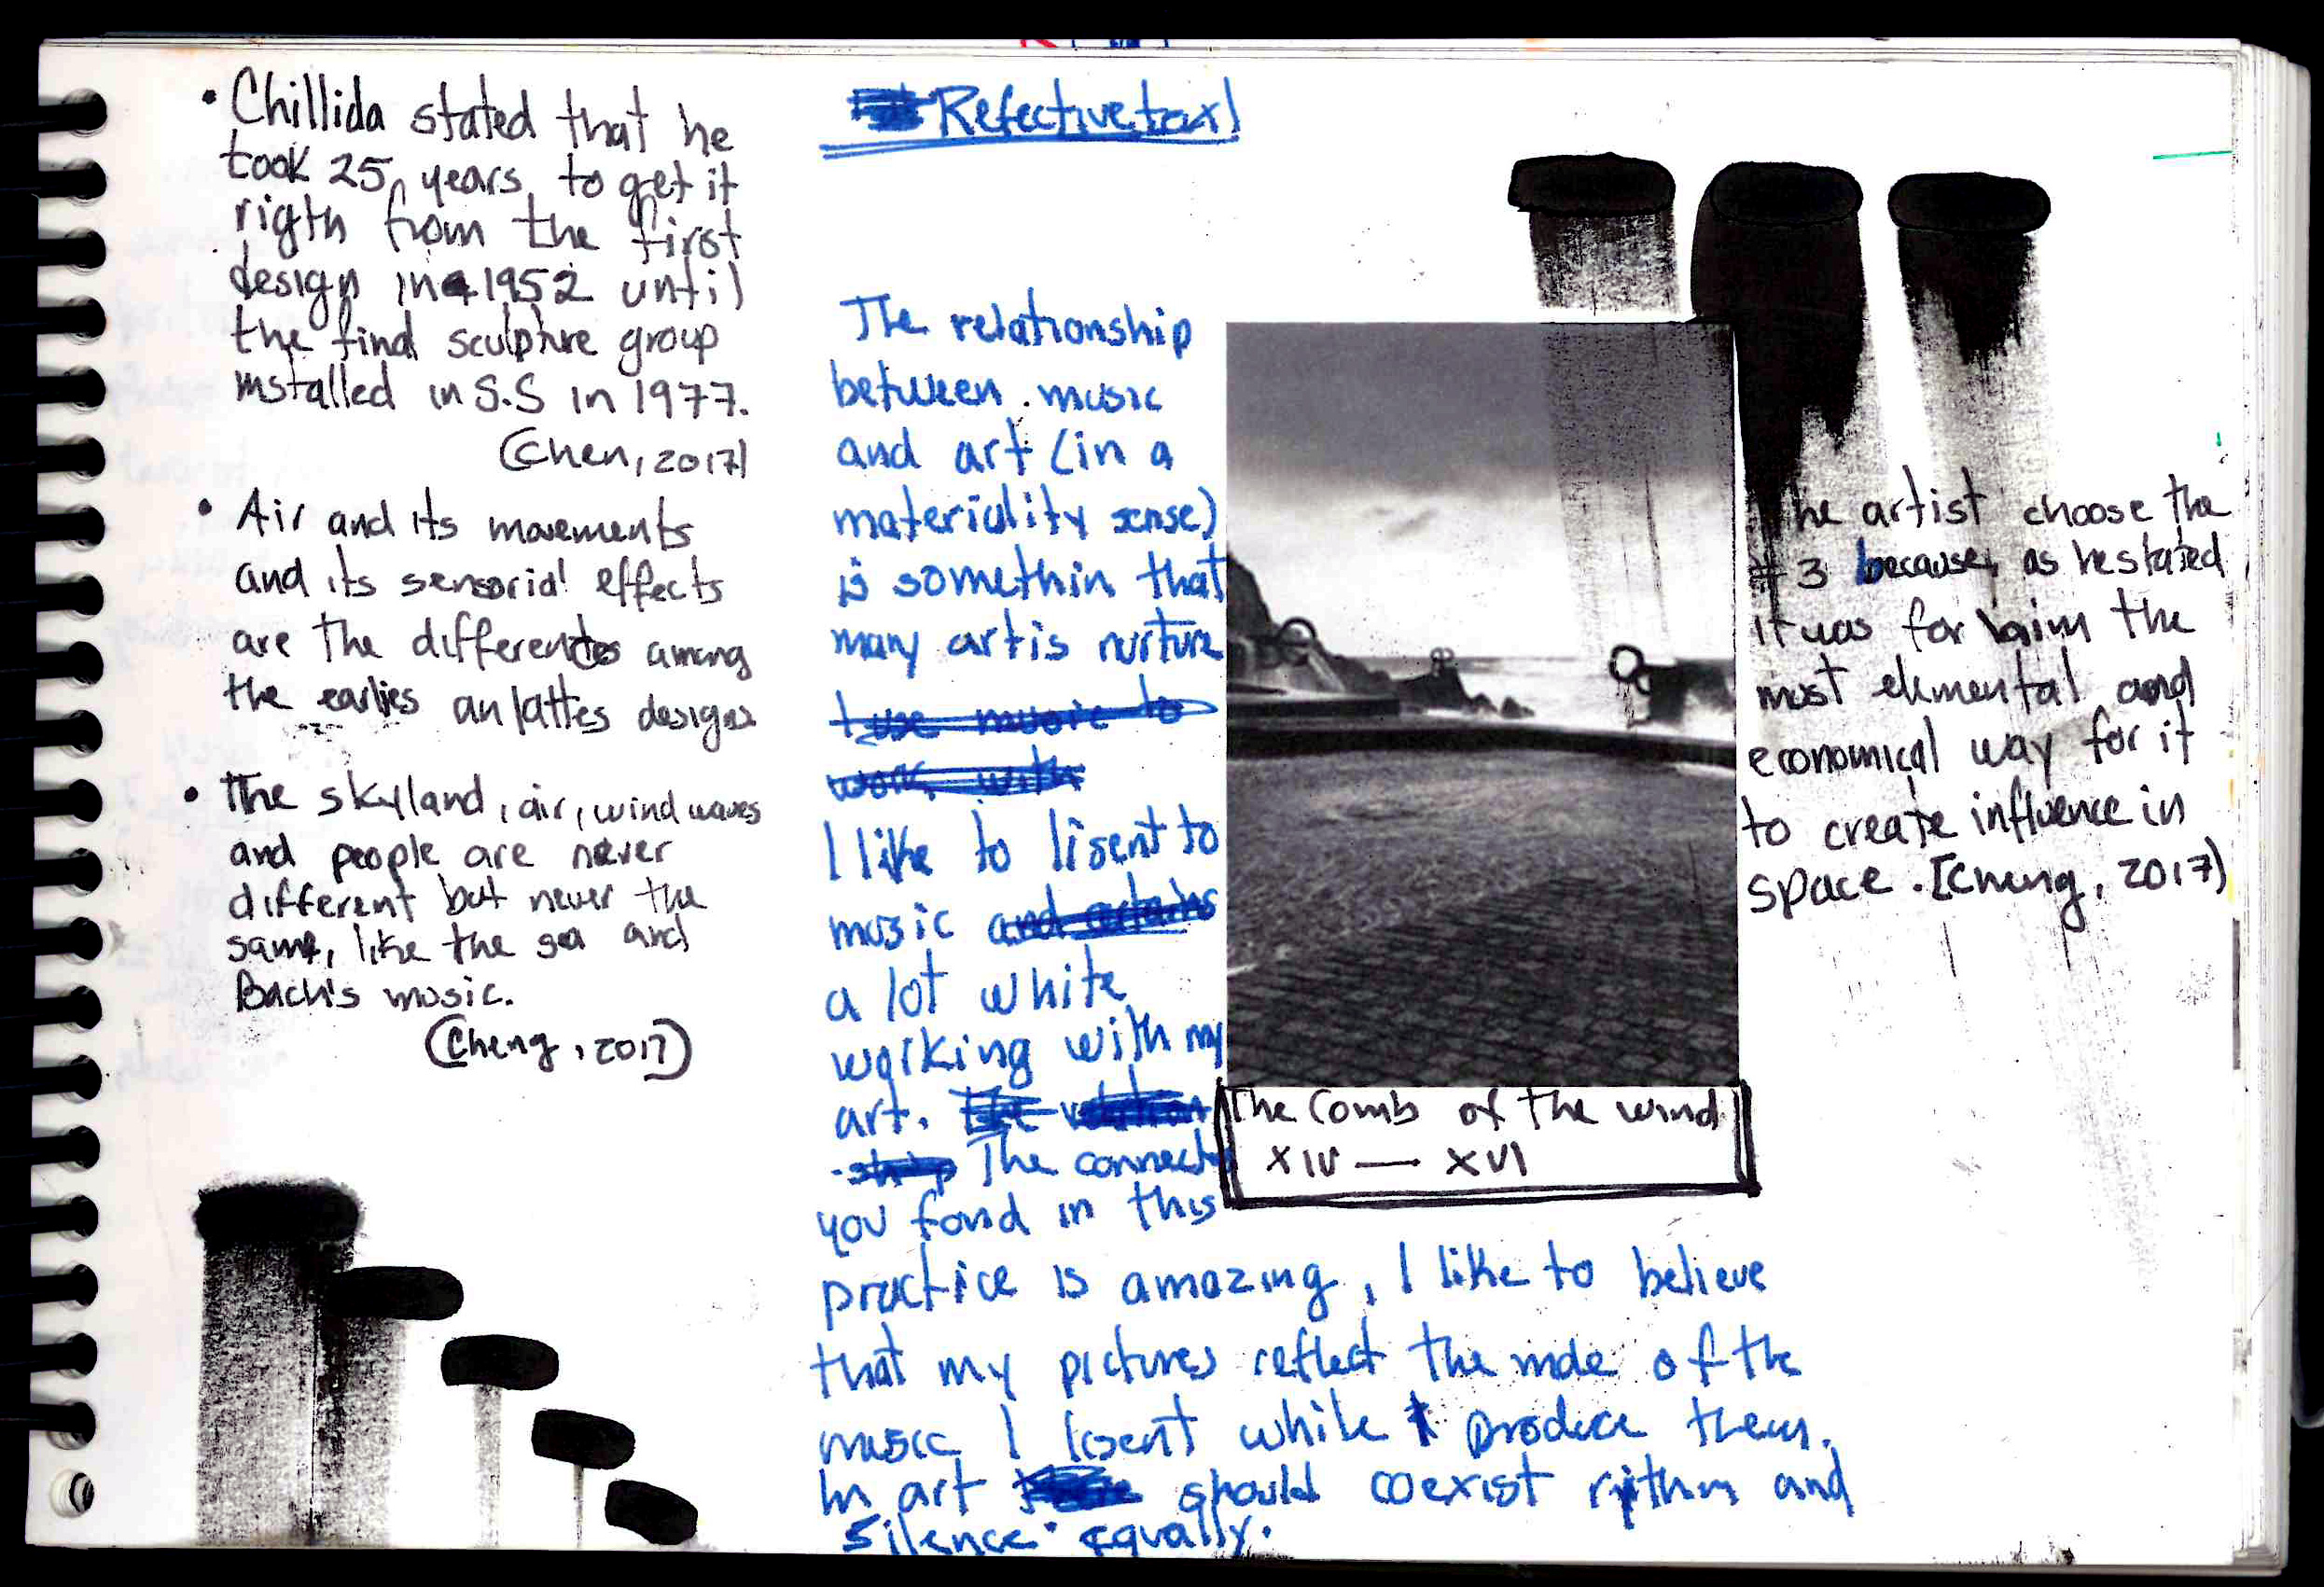
It would be good to see more of your reflection on the research as seen in part 1. You mention artists with an obvious knowledge of their work but do not always unpack what their practice is or particular aspects that are important and relevant to you.
Even though it is true that I not always unpack what is relevant for me of the work of others artists that I admire I have to say that it is still not clear to me what I am precisely extracting from them. In the case of Hannah Höch on Assignment 2, it was not clear that what I find particularly interesting was the playful feeling of her works. That was not evident until I finished working on my own pieces.
… continue to consider the strength and fragility- the stubborn material and the ephemeral. The found and the made. This will be interesting to consider with clay and plaster
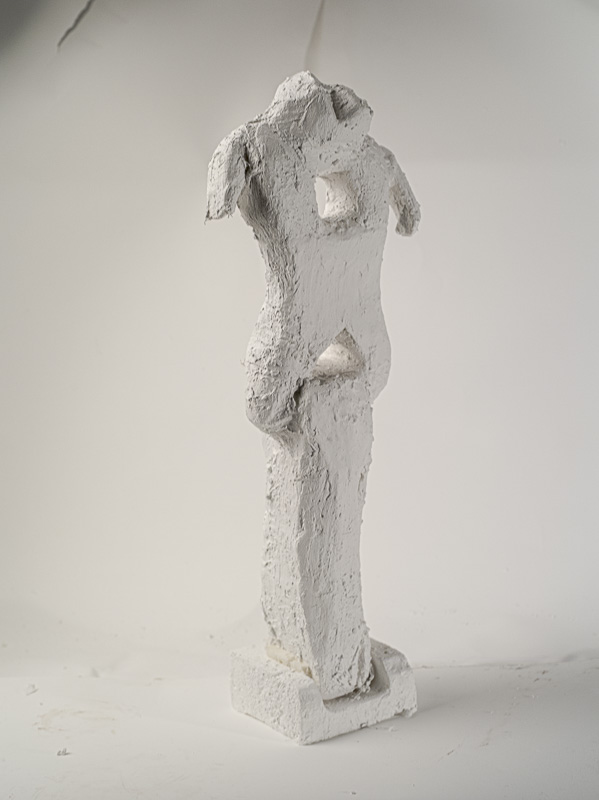
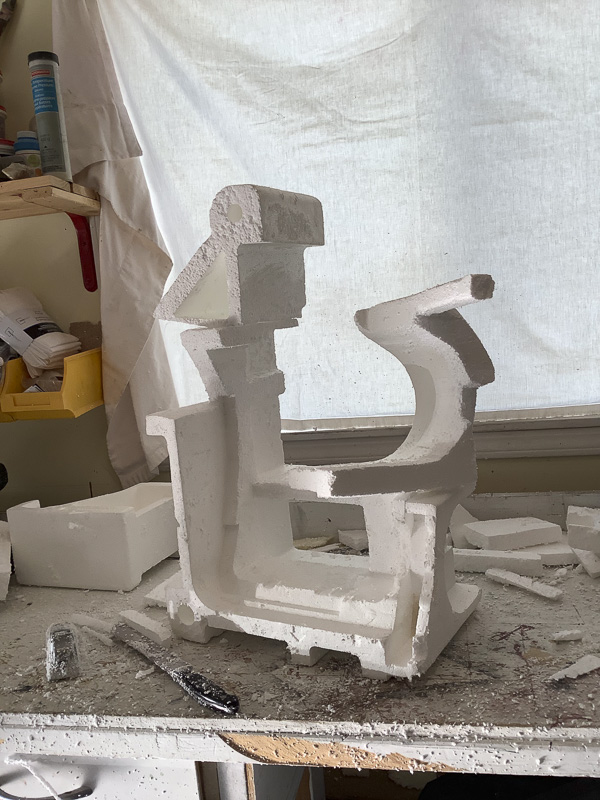
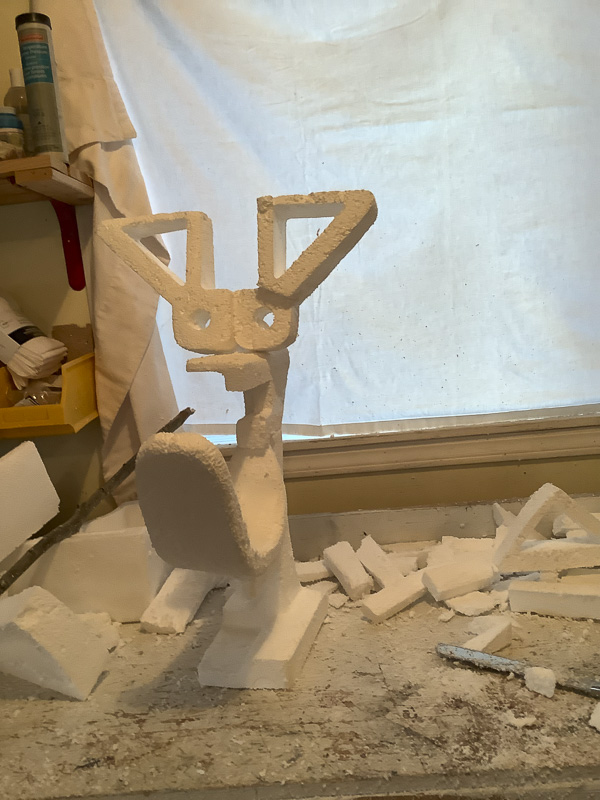
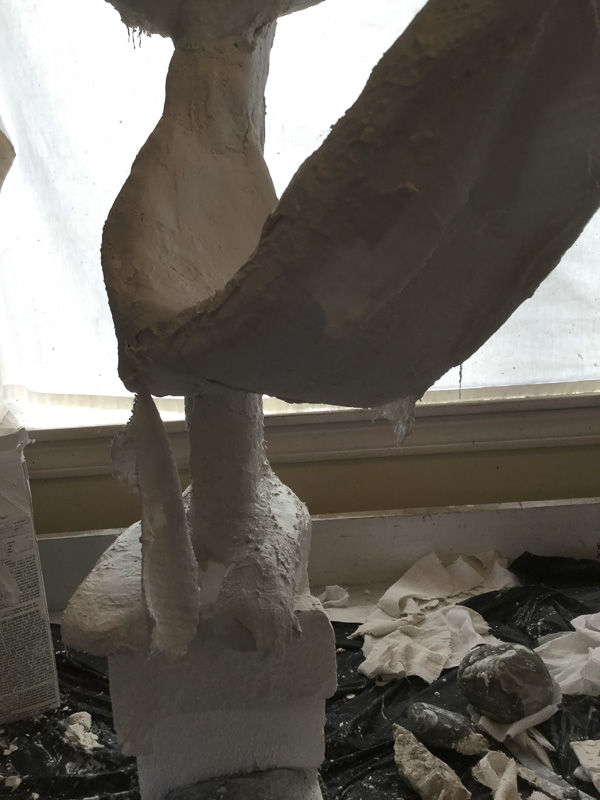
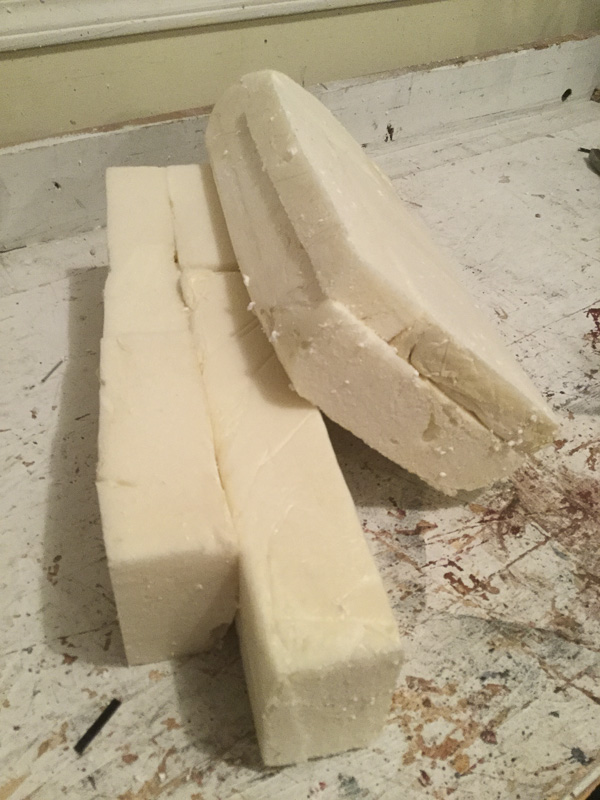
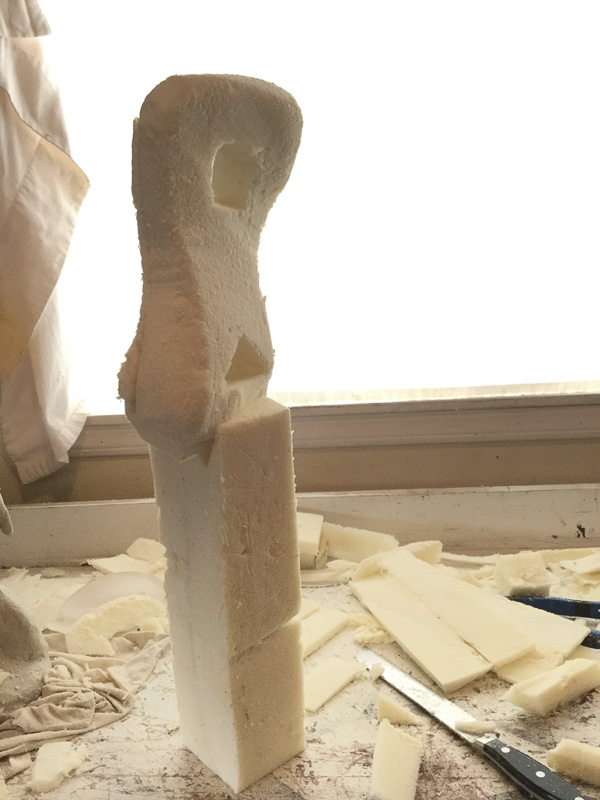
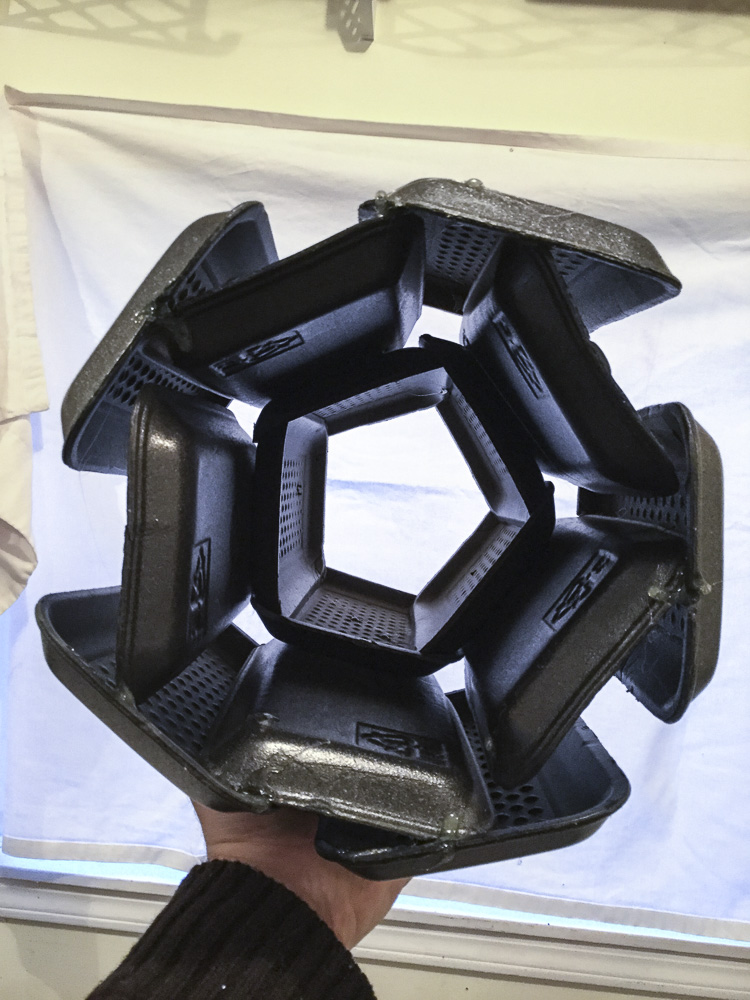
It was quite interesting on the plaster pieces, especially on plaster sculpture #1, to discover on ready-made styrofoam forms embedded onto the original utilitarian shape of the material.
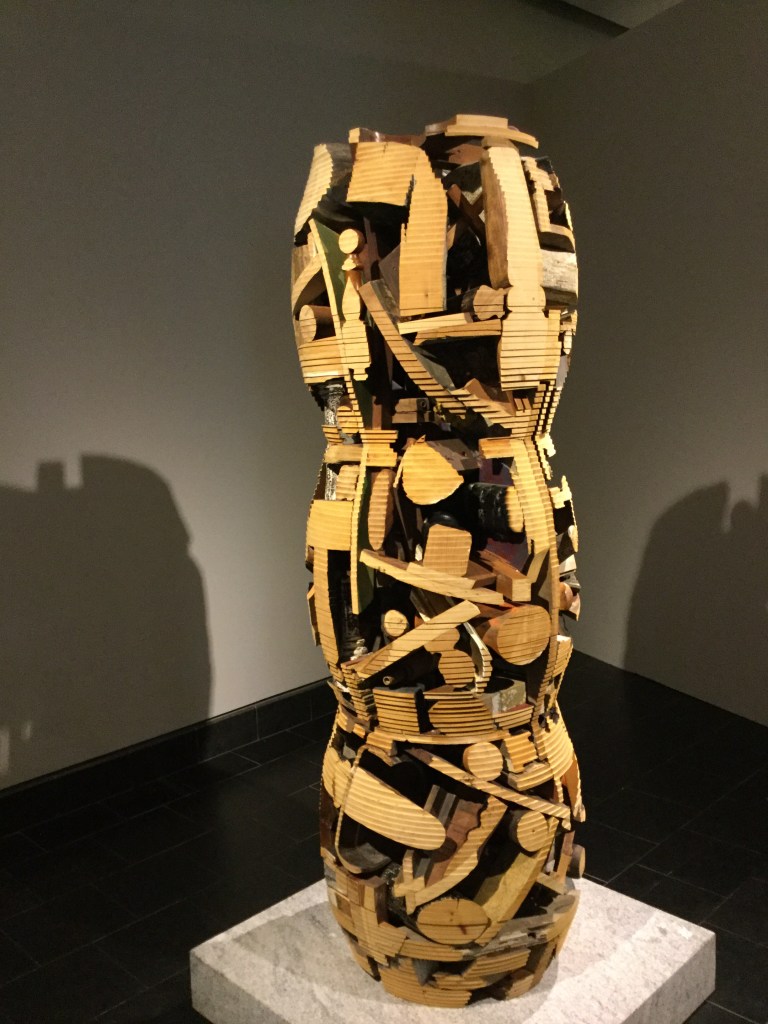
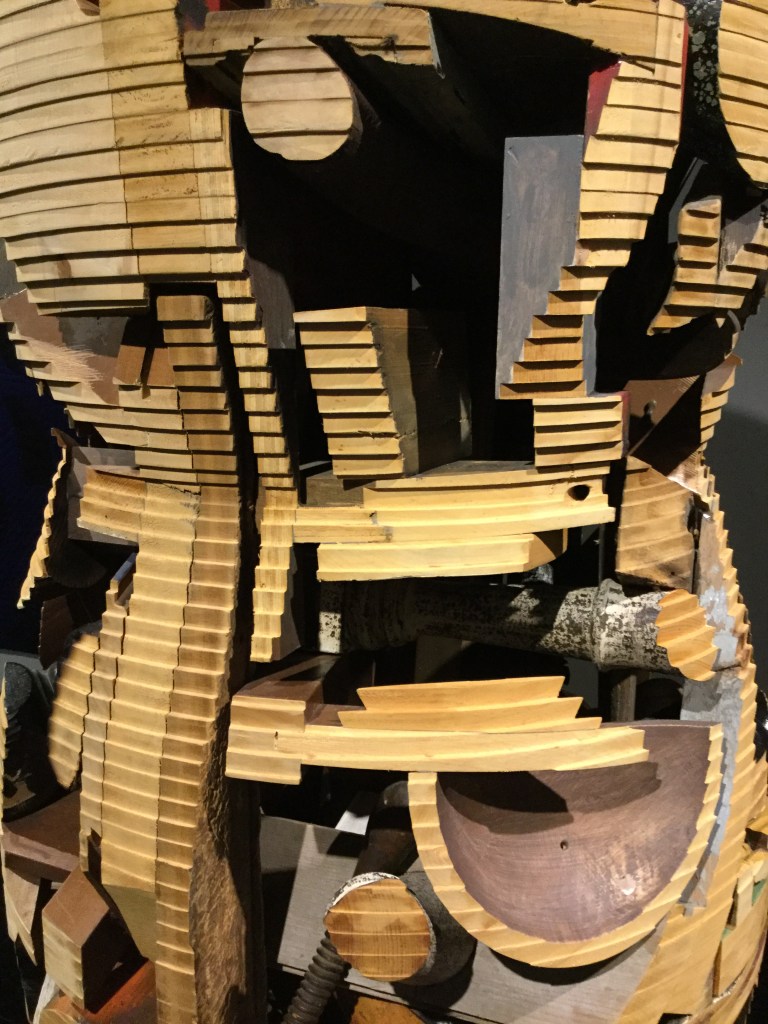
I went directly from the end of the Second Module to the beginning of the Third one. No waiting period, not “let’s take a break” event. The working rhythm continues steady what changed was the materials I used for the sculptures. It was fantastic to work with wood and discarded objects, and I’m going to keep using those materials in the future, but now, is clay time.
First impressions
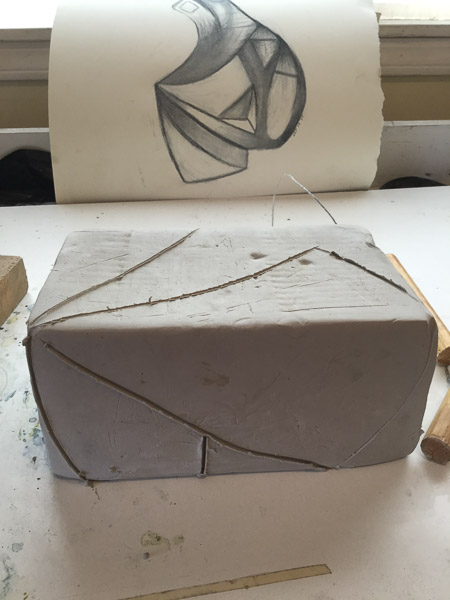
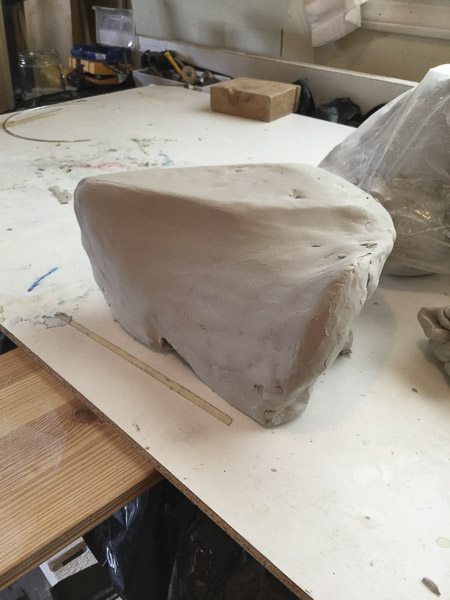
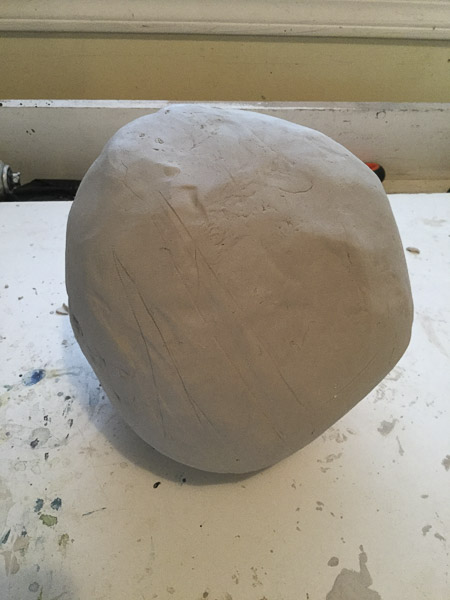
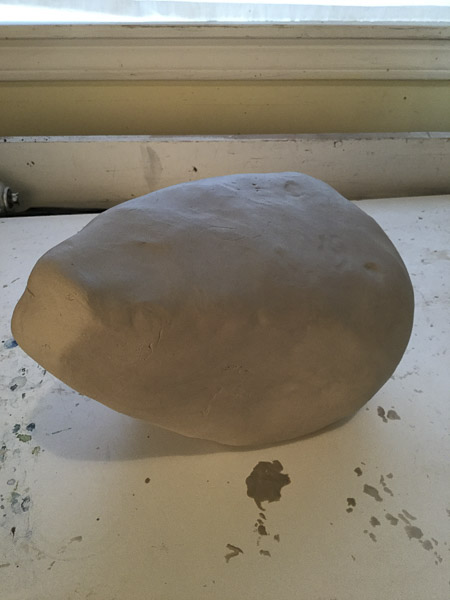
” Wow, this is massive,” that was the first impression I had when I unpacked the 10 kg of clay. After working with pieces of wood and discarded objects, the big block of clay has a lot of body, and it was really heavy. In just one second, I felt my hands full of materiality, it was wild.
A soft deep density: clay
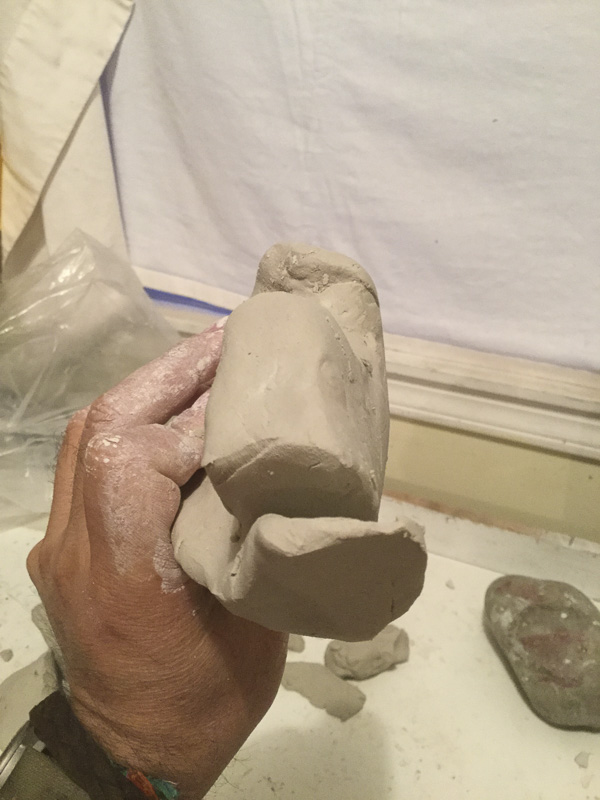
I think the creation of sculpture has to do with the delimitation of new contours, new edges and limits and also with displacing and upsetting one inhabitant space with another. Rosalind Krauss says: Lessening asserts that sculpture is an art concerned with the deployment of bodies in space, (Krauss, 1998:3). Working with clay gave me a full sensation of implementation all the time: is constant action in place. Clay is deep, heavy and dense and at the same time is very soft. However, I did not really appreciate its softness until I sliced it.
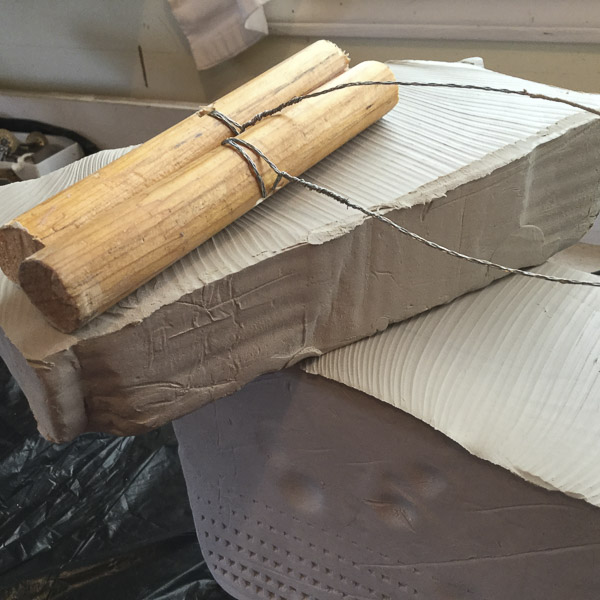
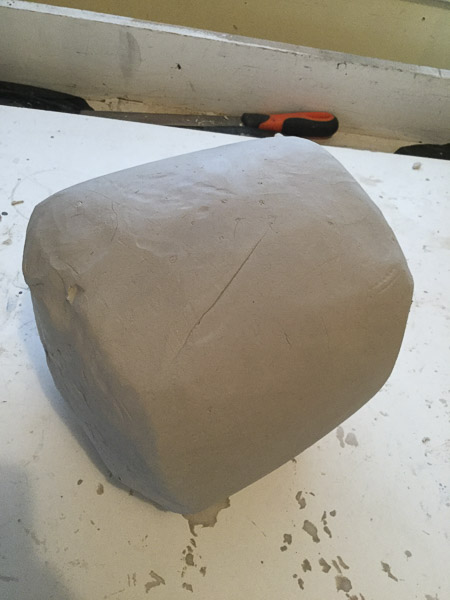
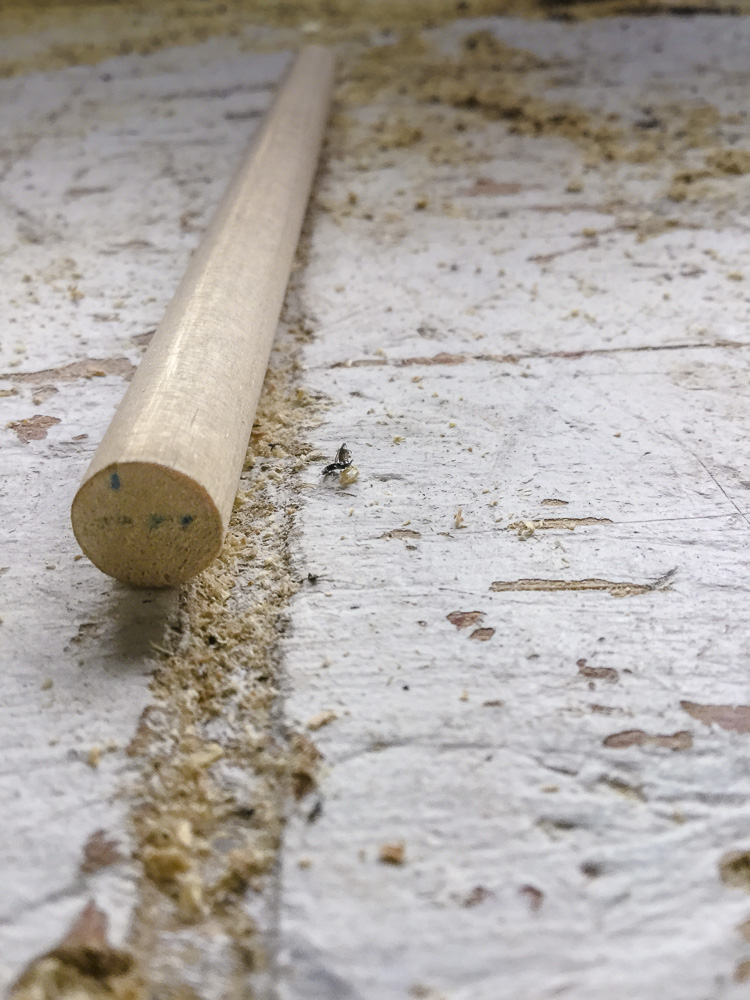
The first thing I did before start working with clay was to make myself a wire cutter. It was quite simple to create and very easy to use but most importantly super useful: to remove a big chunk of clay, pretty much effortless, slicing it with a wire cutter was fascinating.
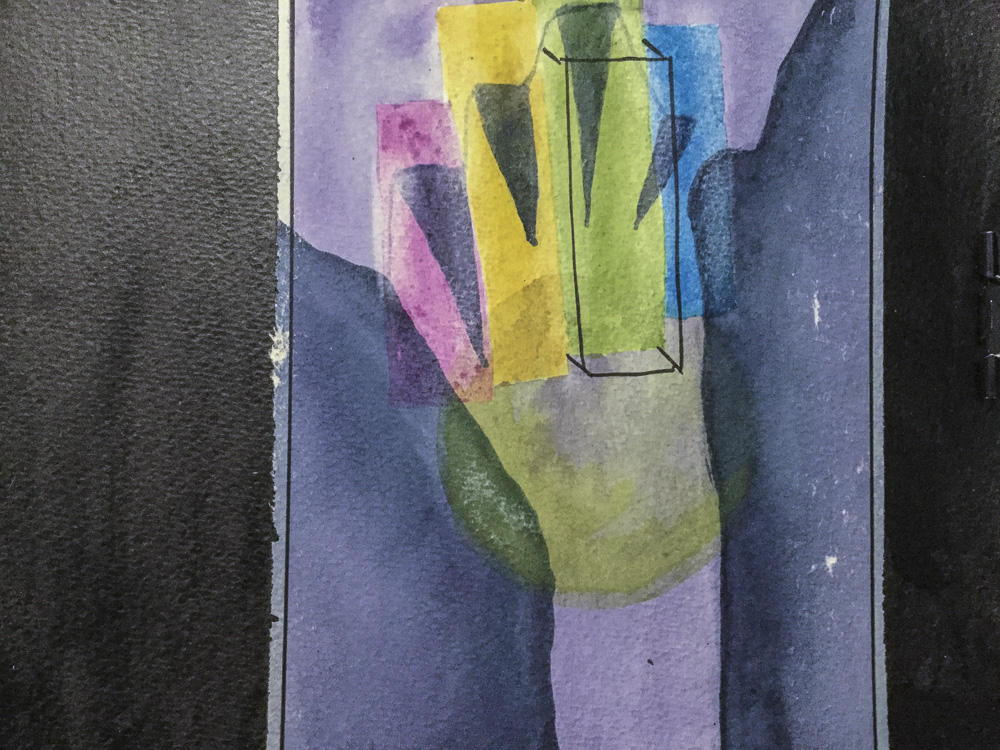
On the same idea
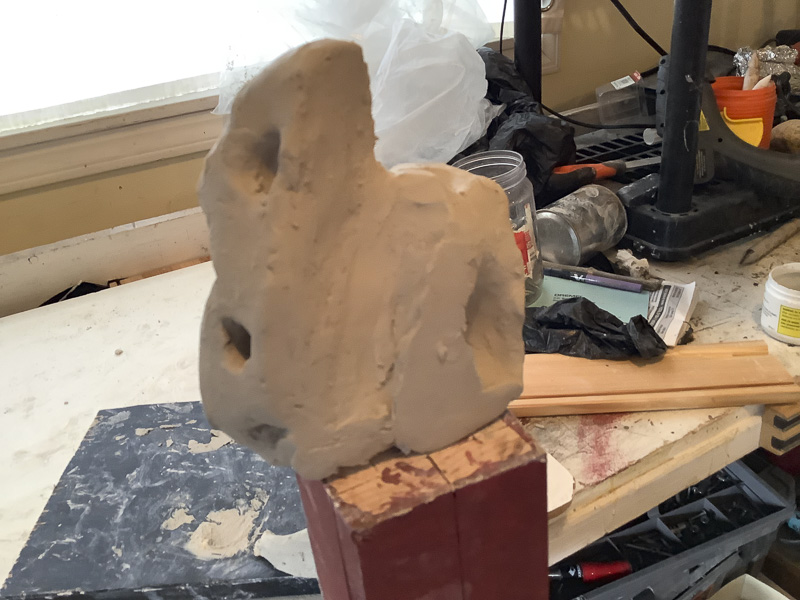
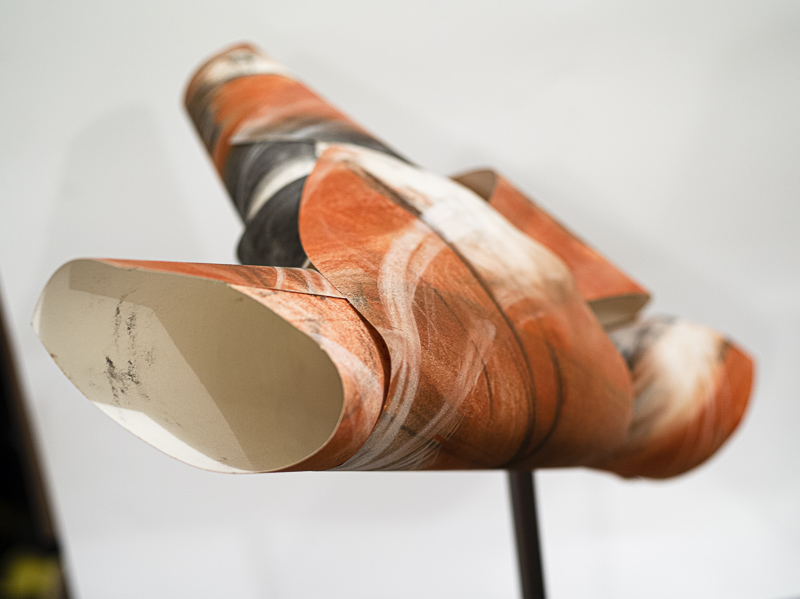
Image 1. Materialization of a hand IV
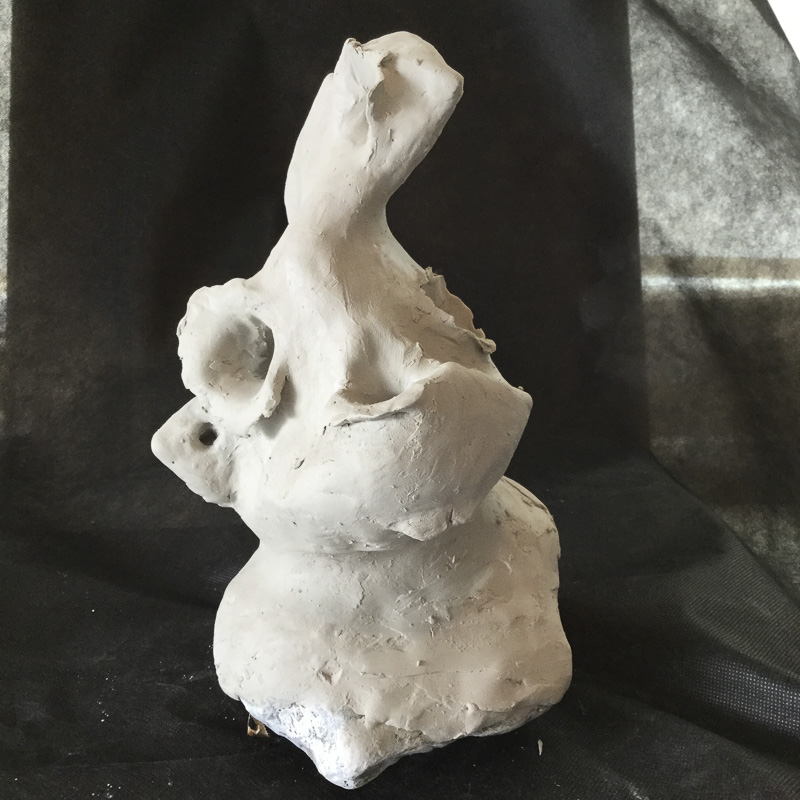
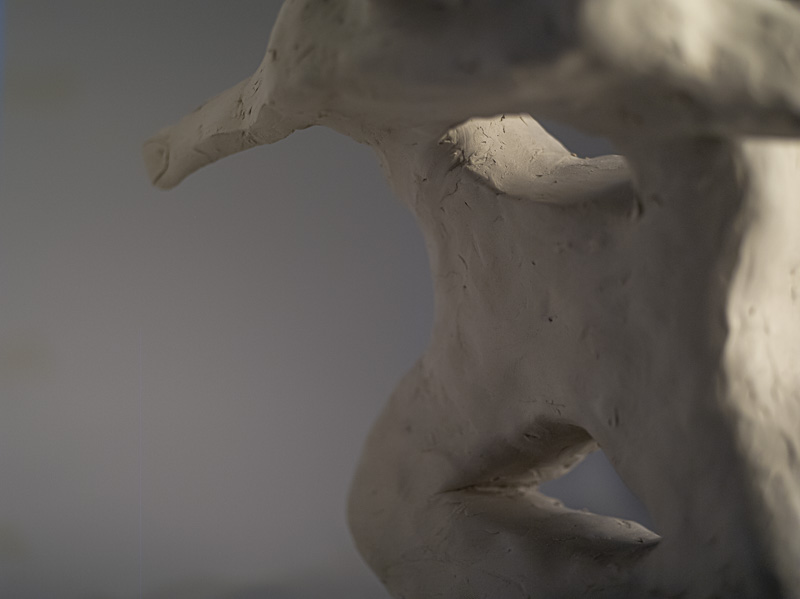
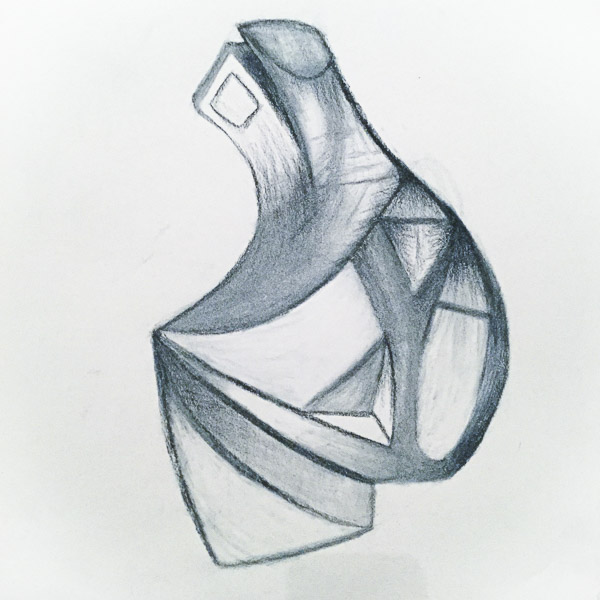
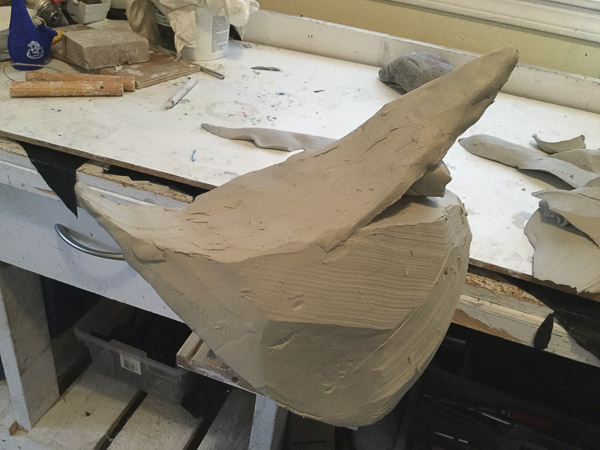
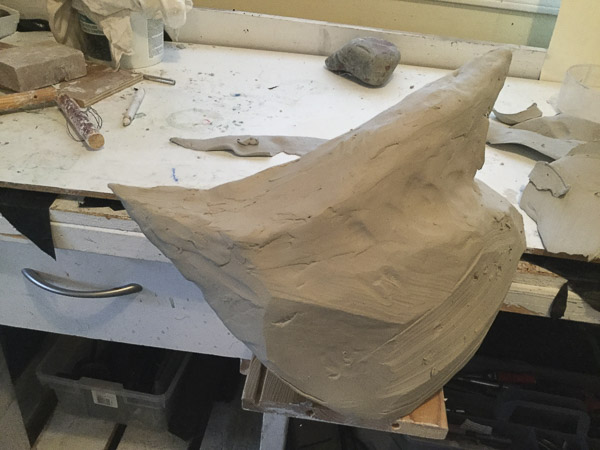
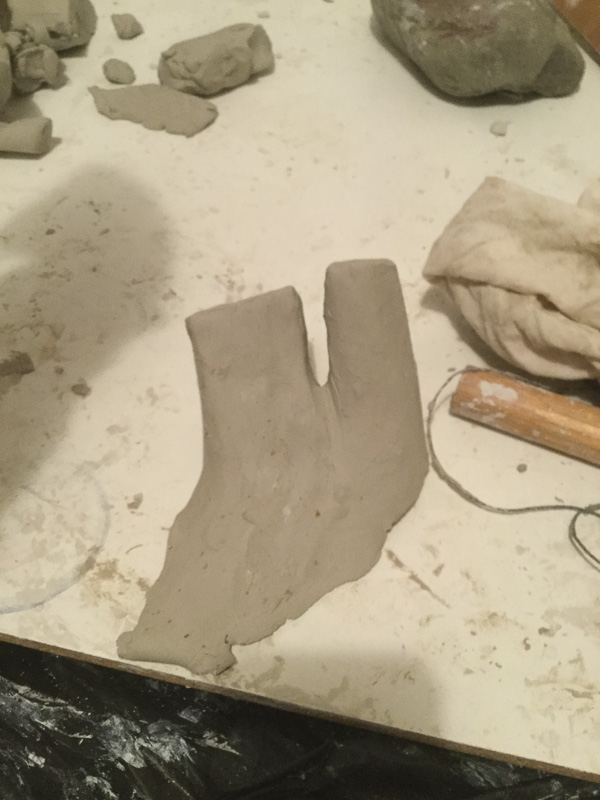
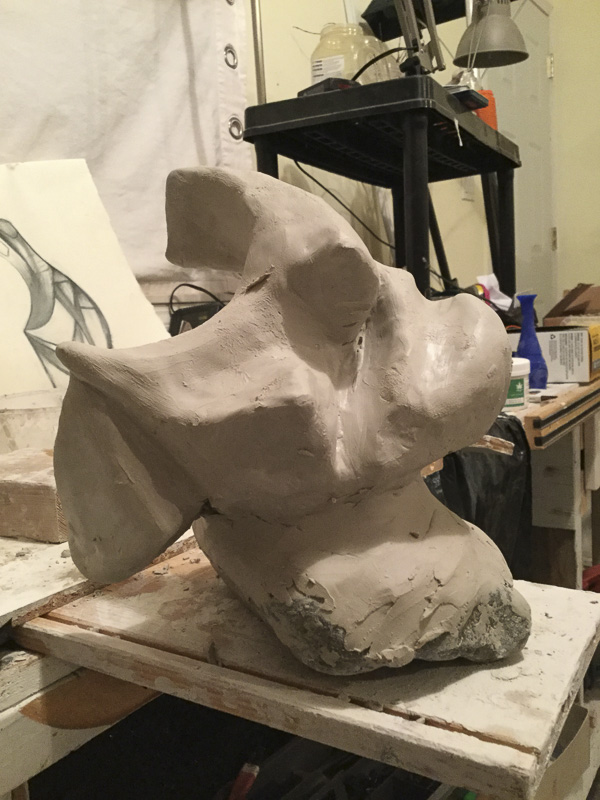
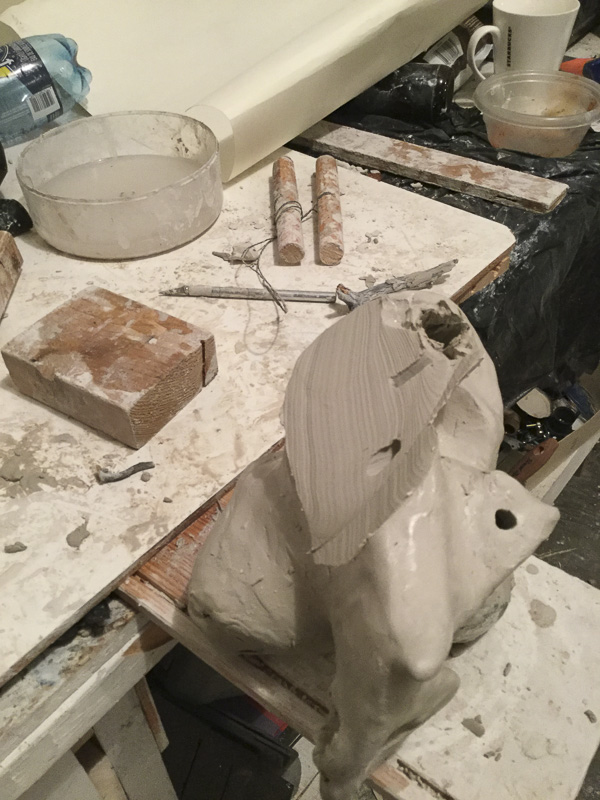
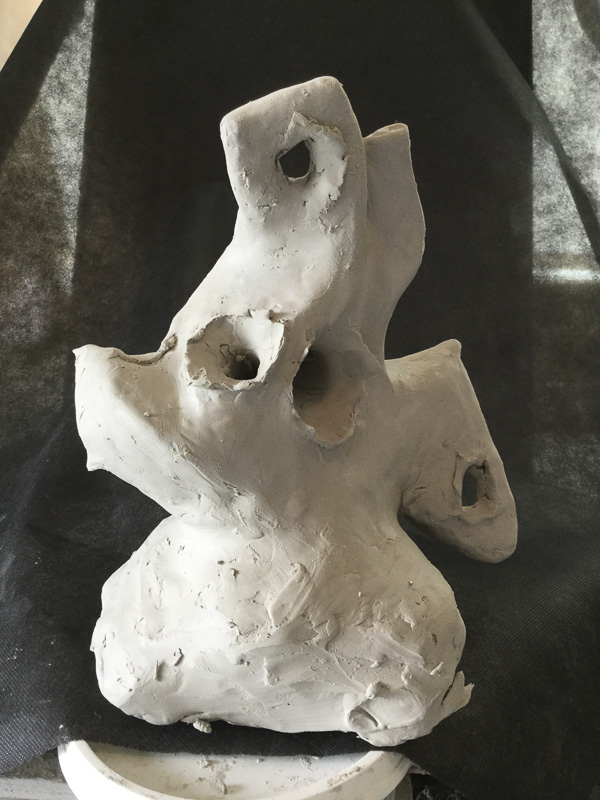
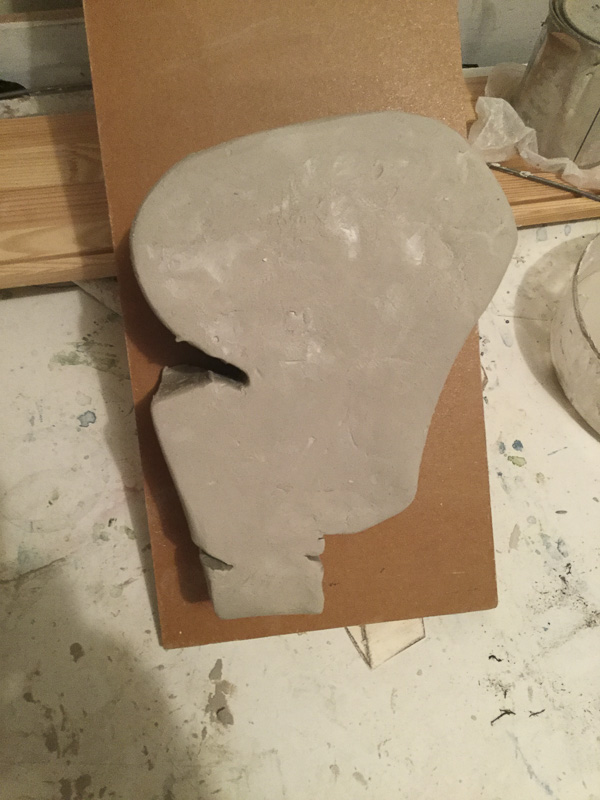
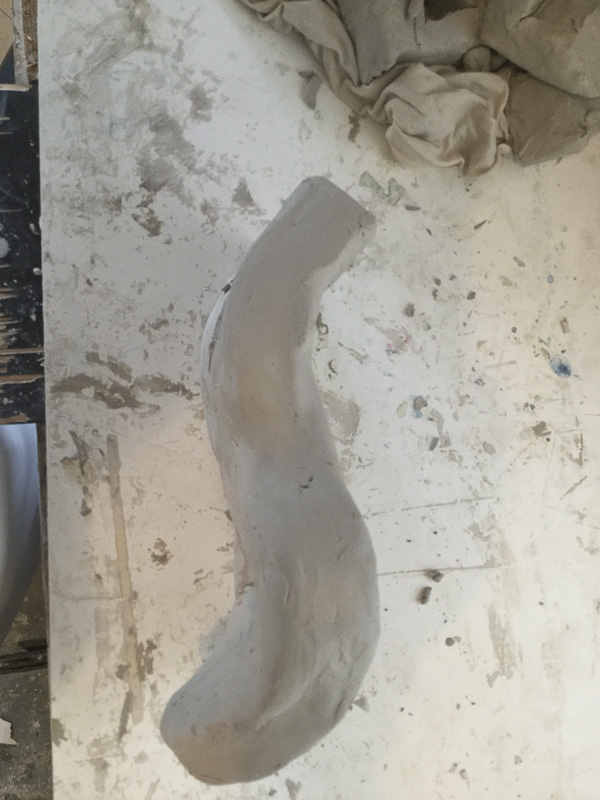
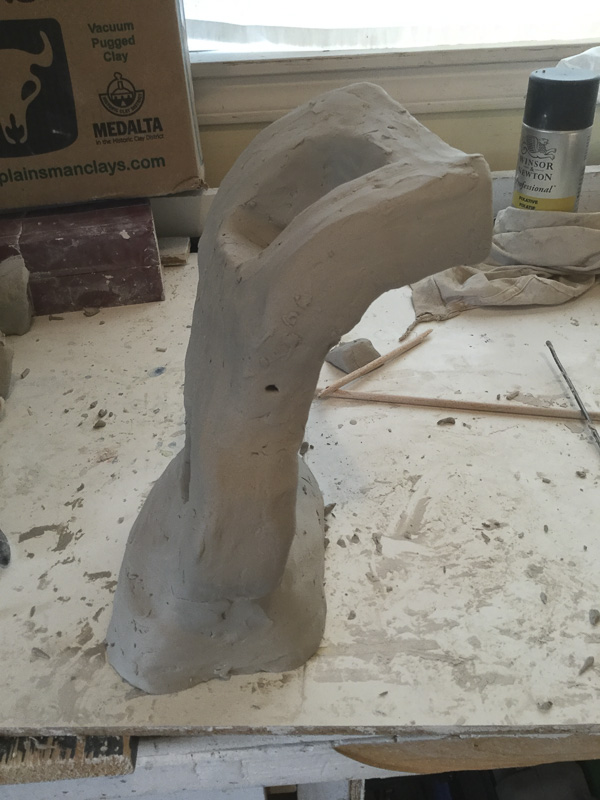
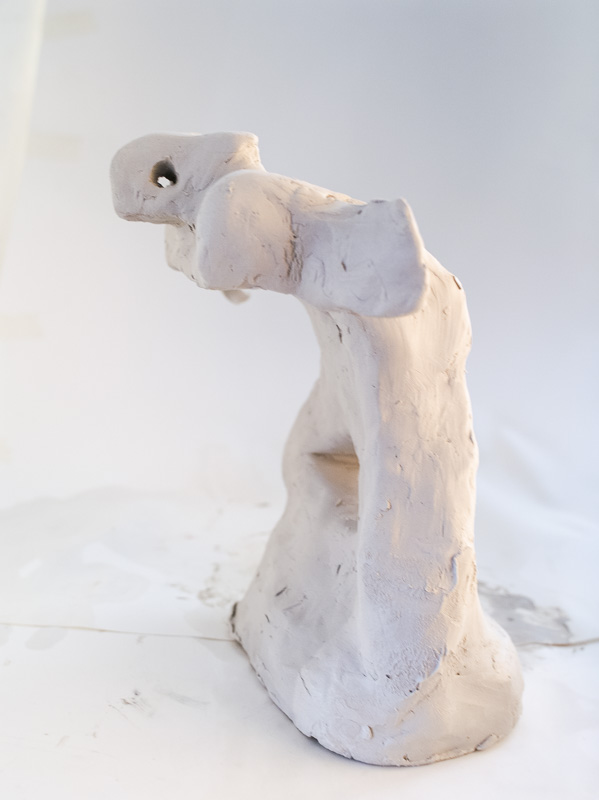
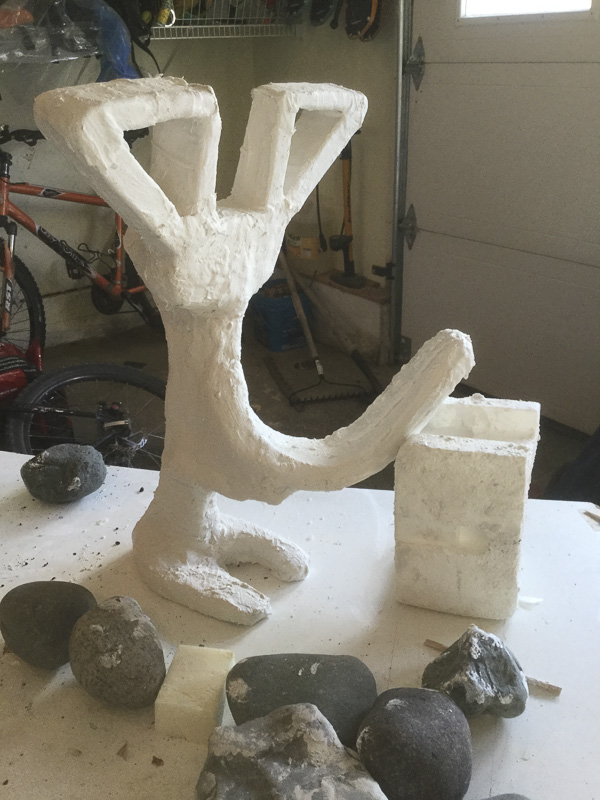
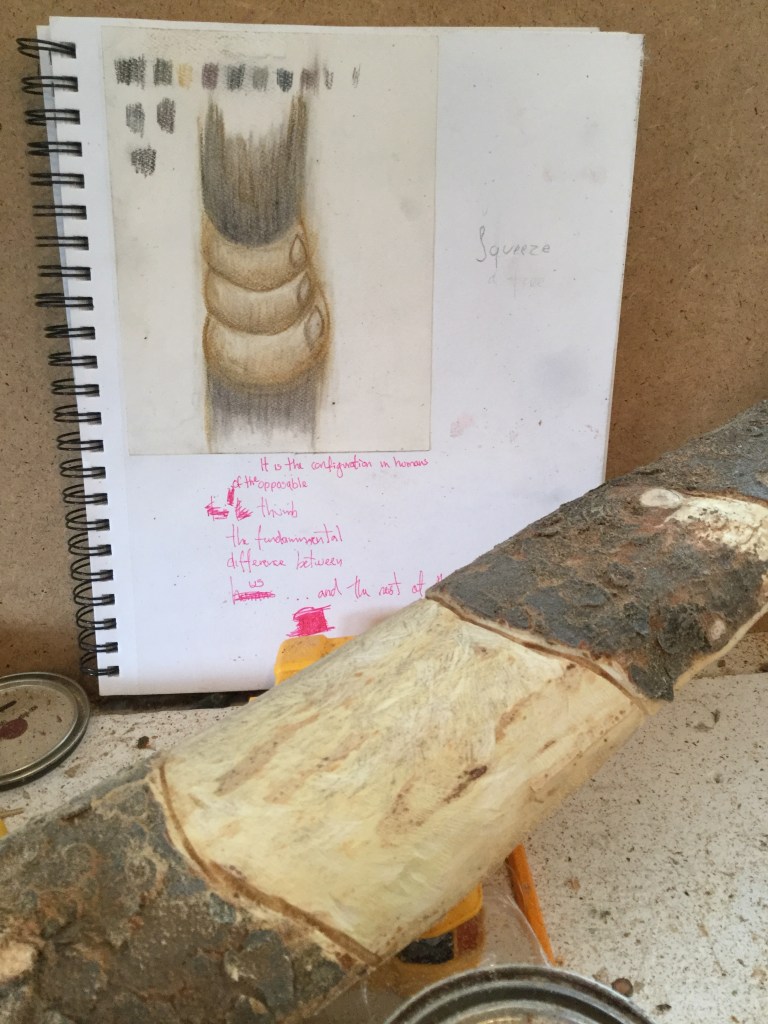
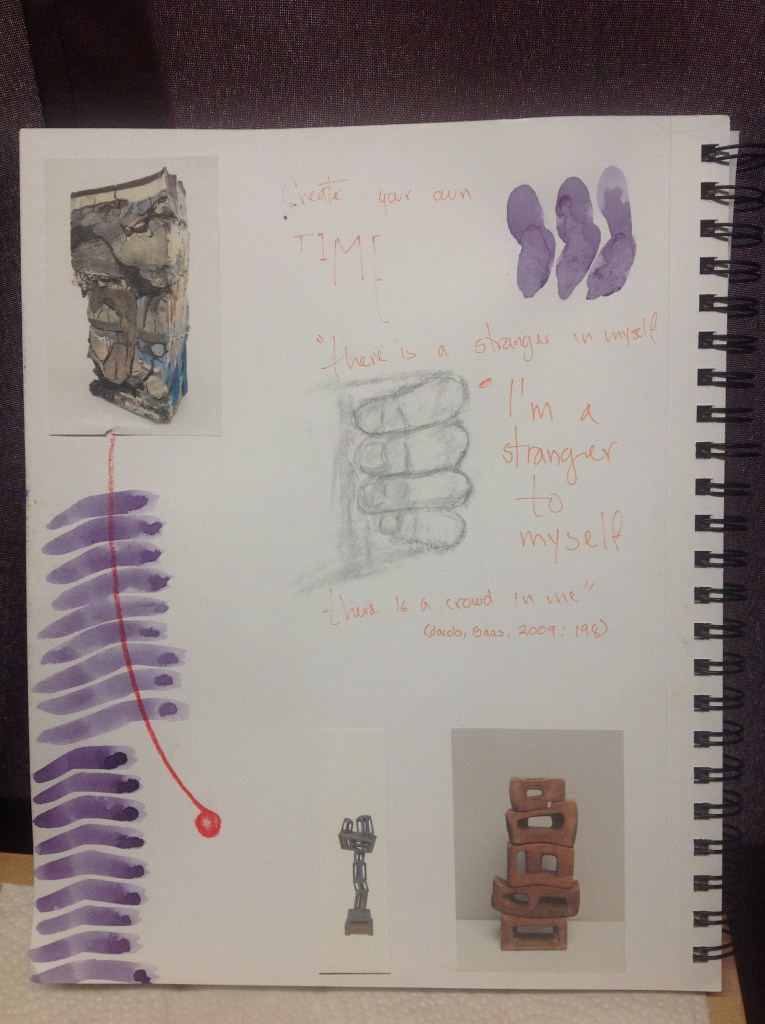
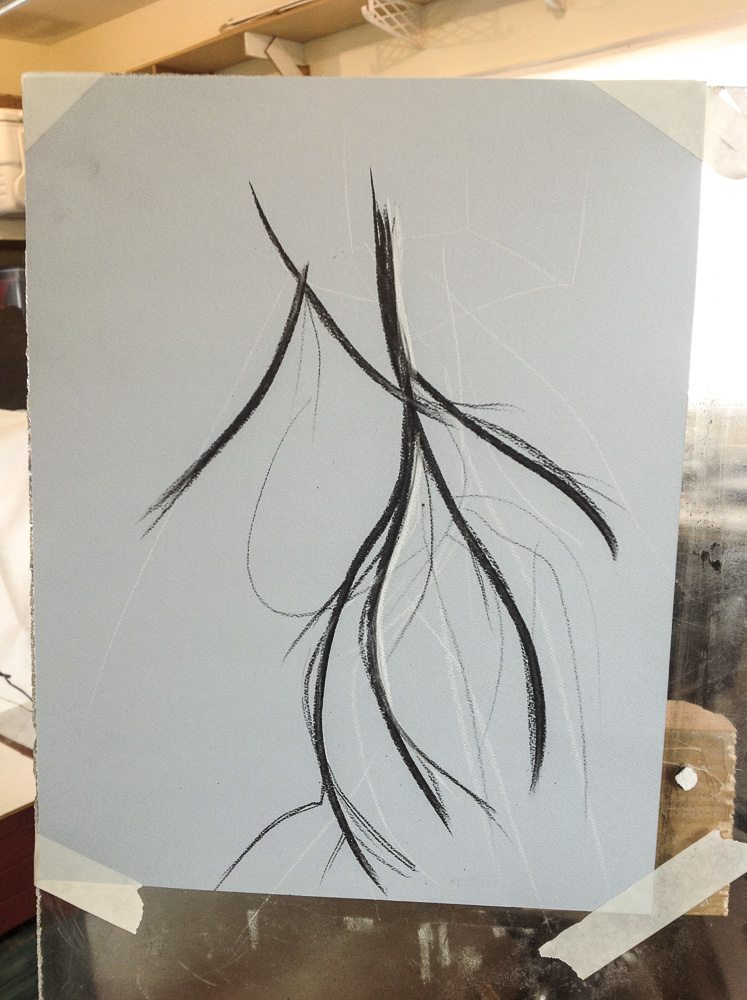
My endeavour in the inquire of what lies between darkness, as something that can cause harm, and human intelligence is still going on. Image 1, Materialization of a hand IV is a representation of the thumb, the fifth finger (pinky), the three bones at the base of the pinky, the ulnar nerve and the palmaris and abductor muscles. This drawing was my guide for my first two clay sculptures.
Sculpture 1 – Materialization of a hand VI
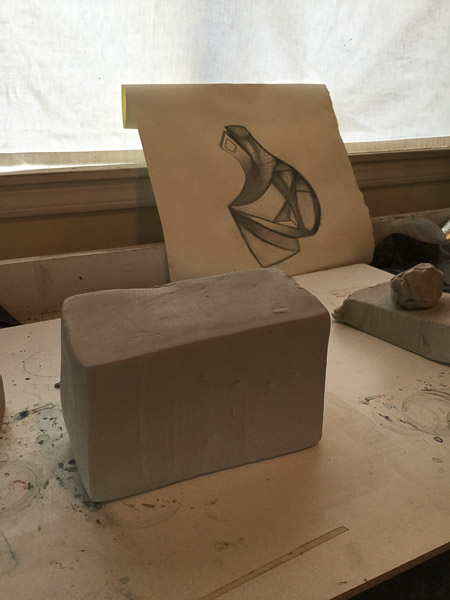
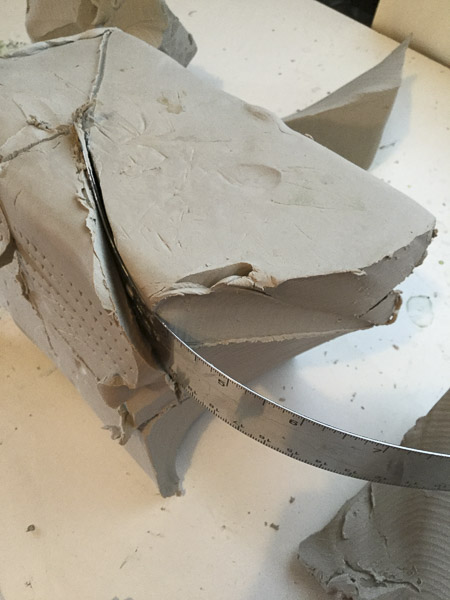
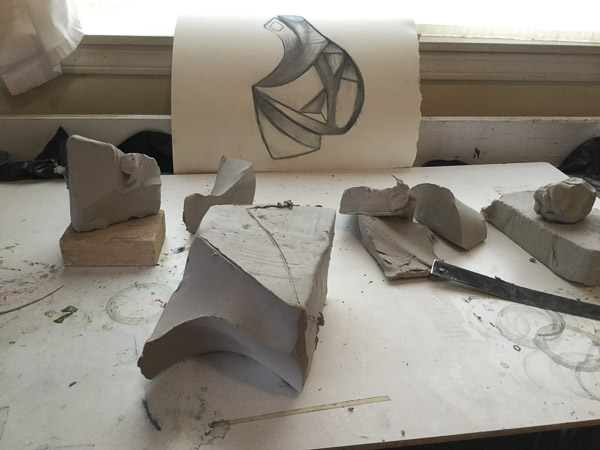
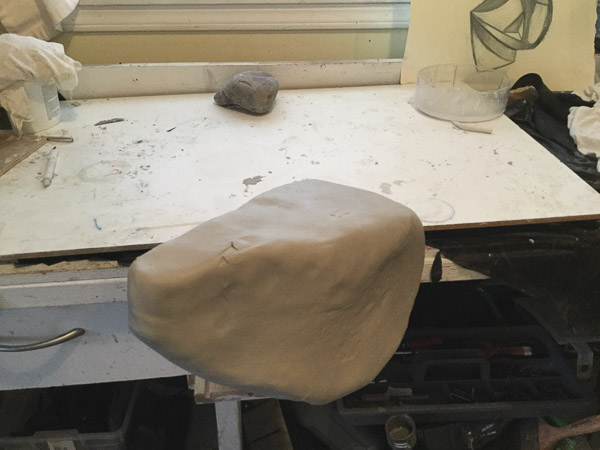
The below galleries show the creation process of this first sculpture. I started from a rectangular block of clay, the same shape the clay came from the store. I drew on the surface the main structural lines of the drawing, and I started from there. Besides the wired cutter, I used a metal ruler and some pieces of wood to help me shape the clay.
In a quick google search, I found that the two most common clay hand-building techniques are coil and slab methods and a tried to use both in my sculpture, I also made holes to add other parts.
g
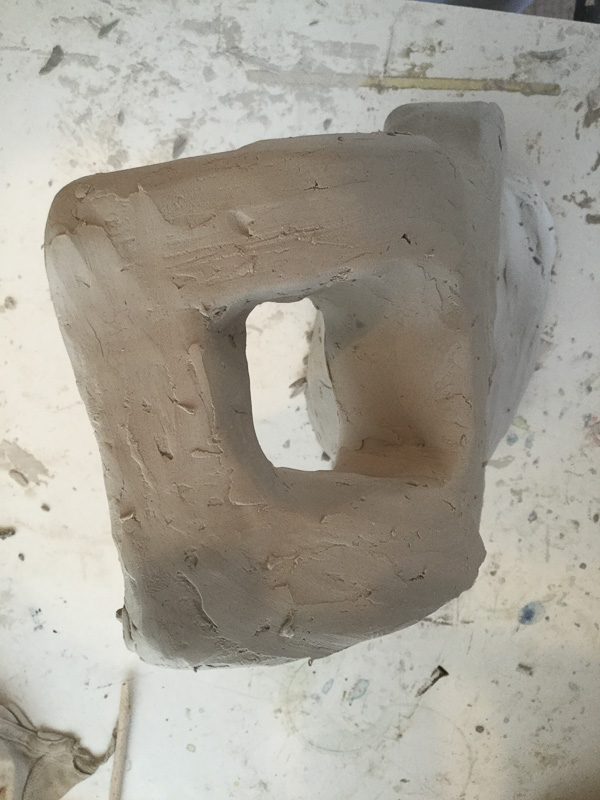
I was delighted with the final result of this first sculpture. However, it did not precisely match the drawing.
. / .
k
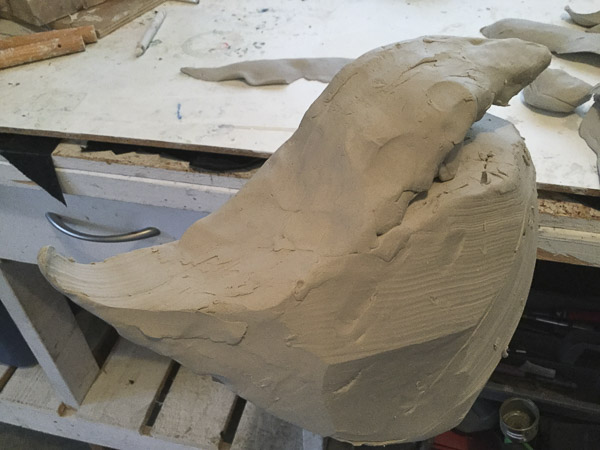
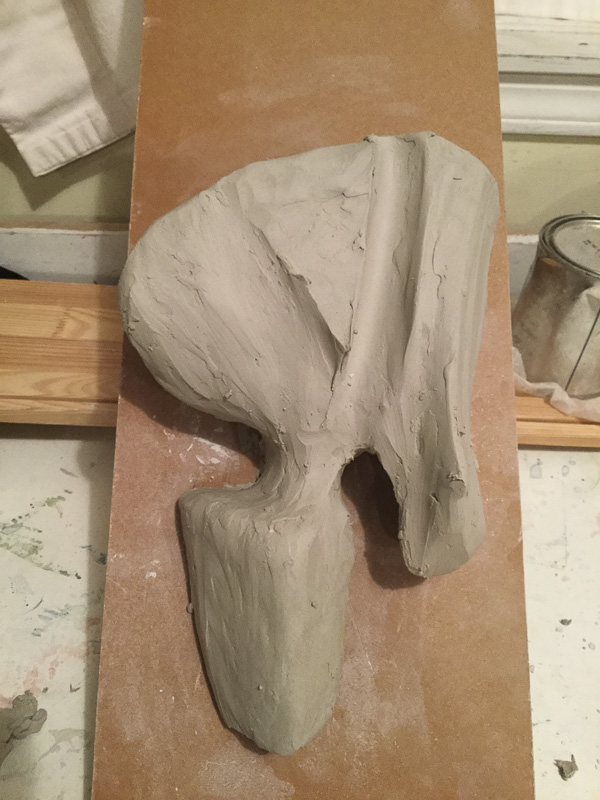
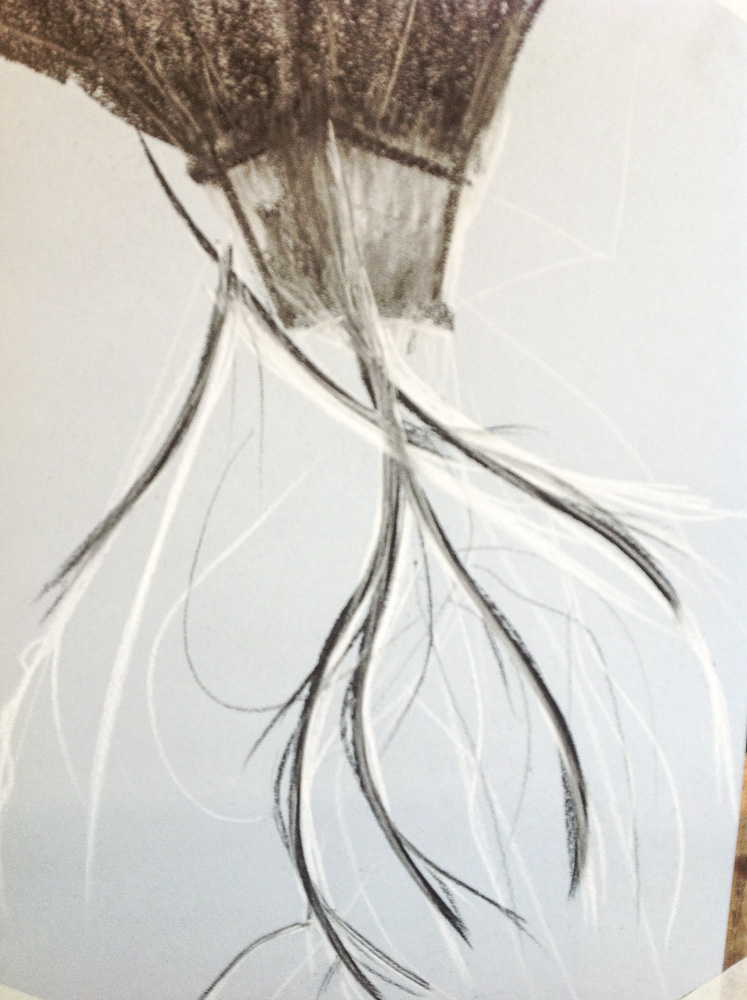
Sculpture 1 – Materialization of a hand VII
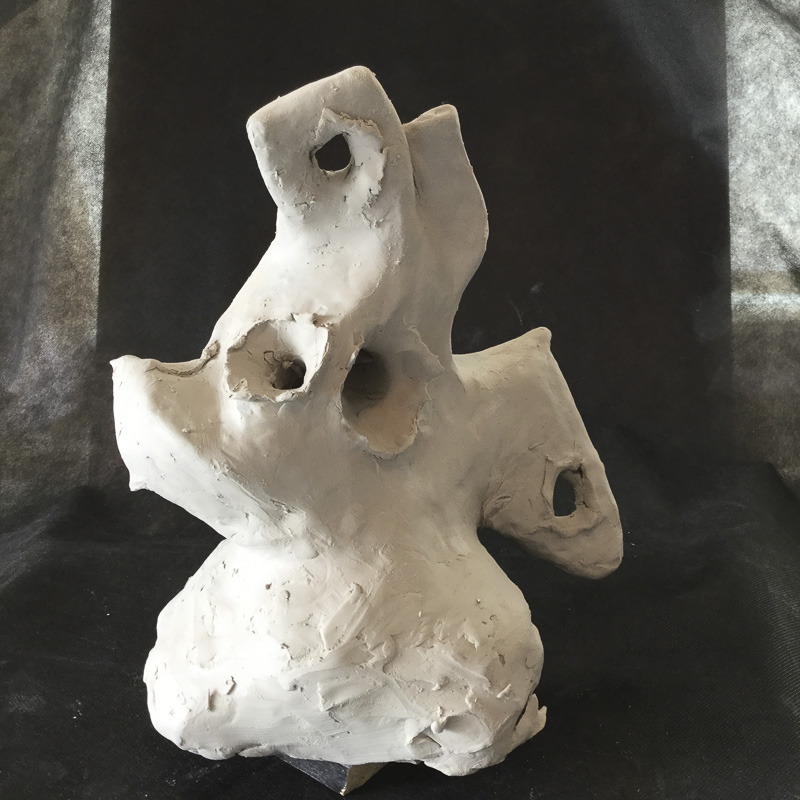
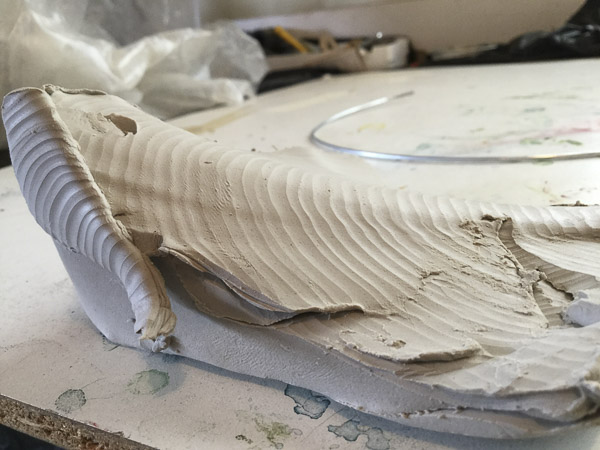
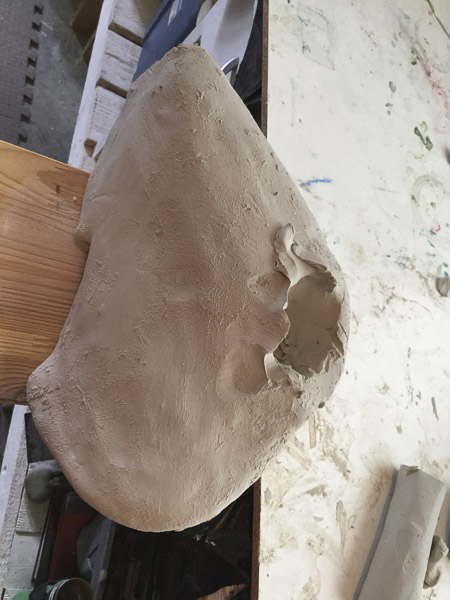
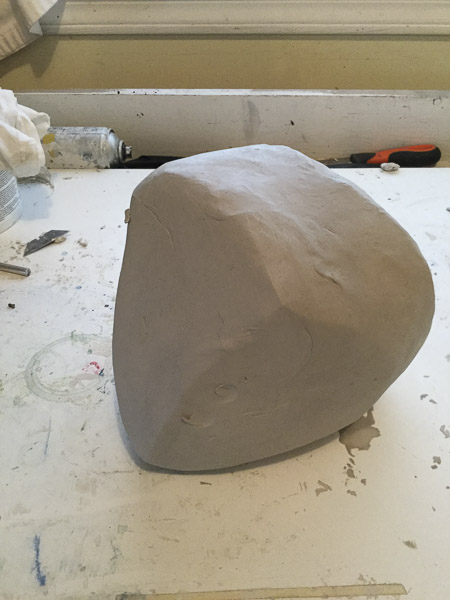
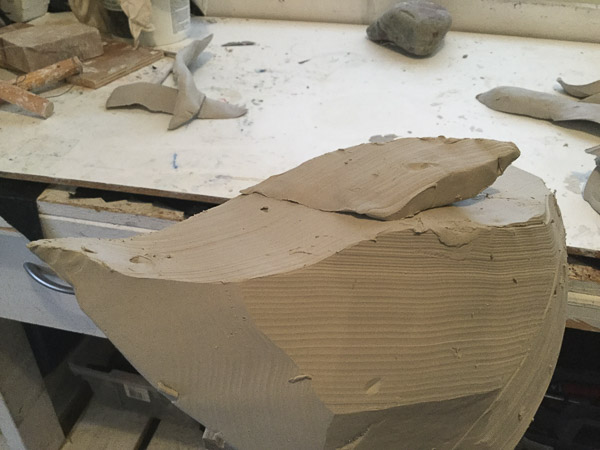
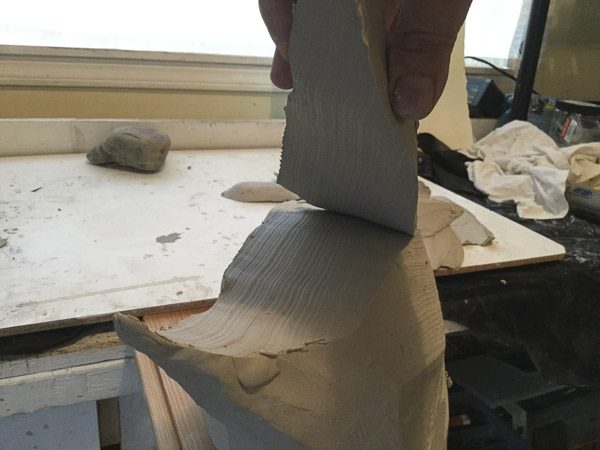
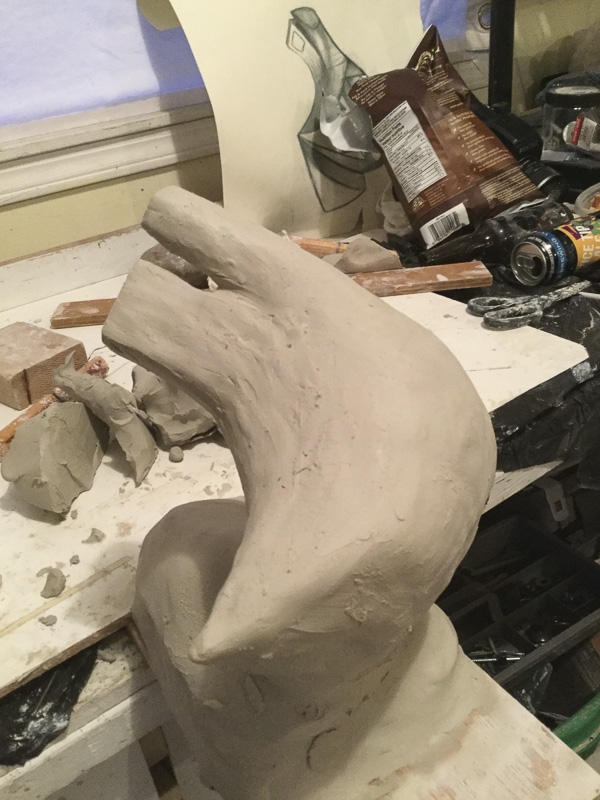
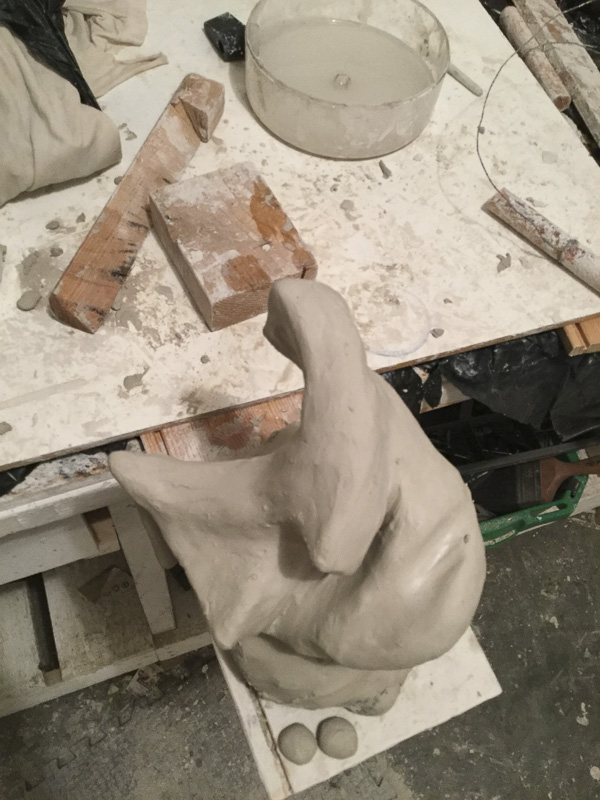
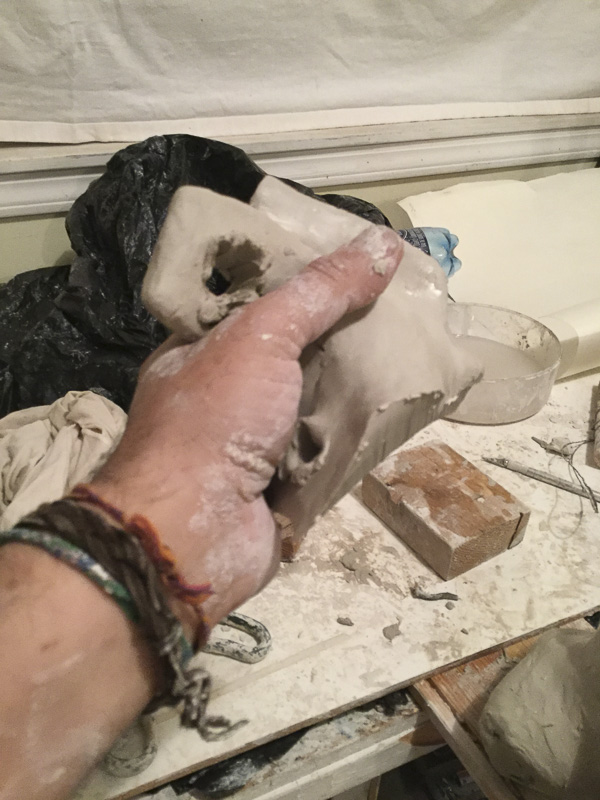
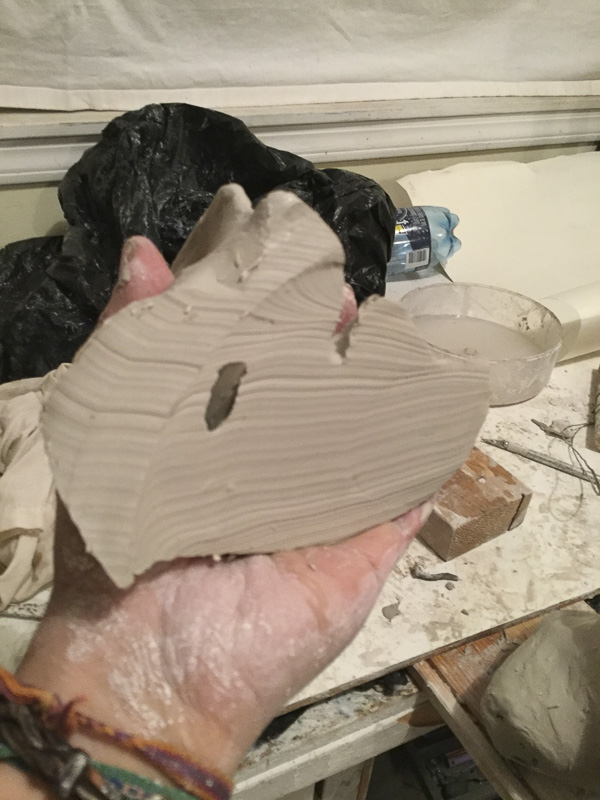
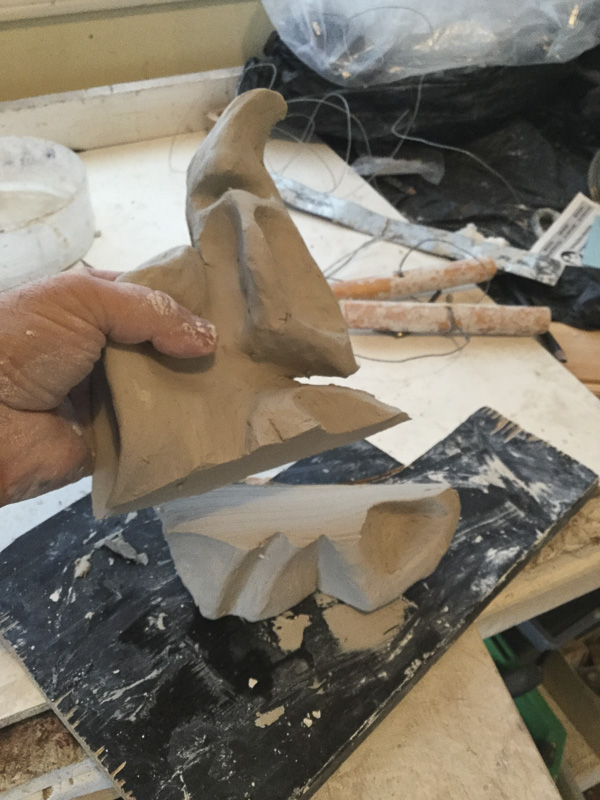
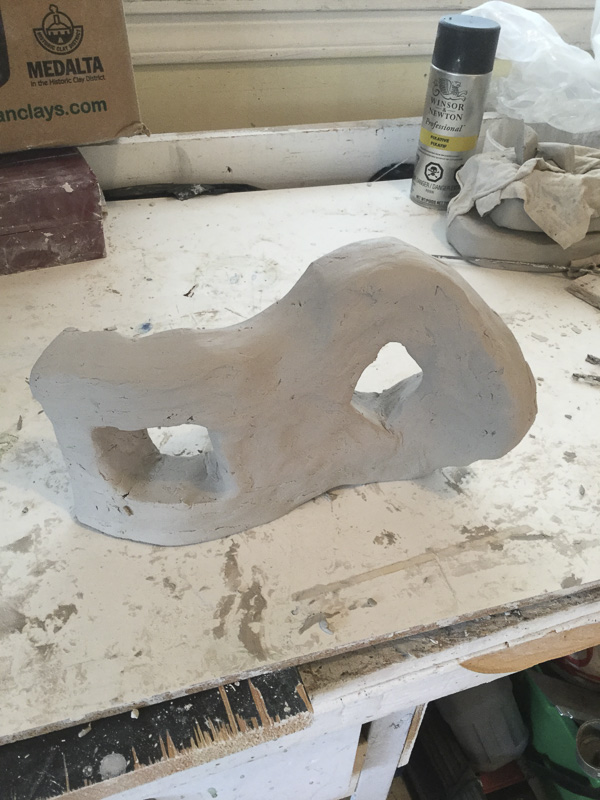
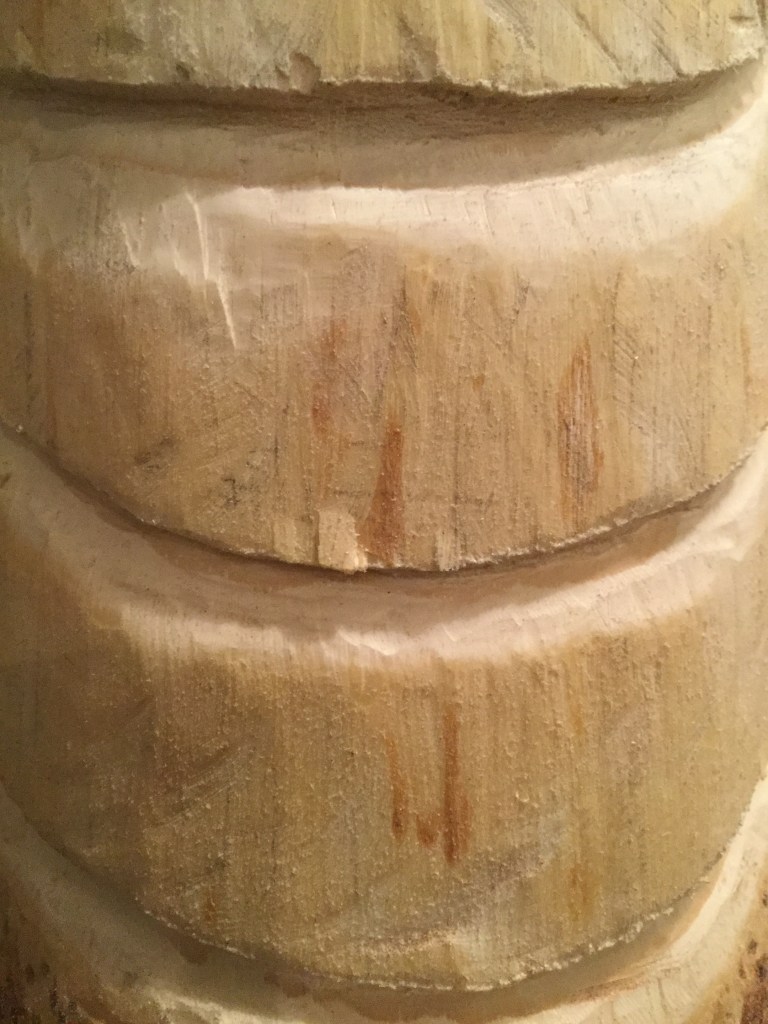
For my second sculpture, I started from a round shape of clay instead of a rectangular form. This time instead of using the wire cutter to shape the primary form of the sculpture, I threw the clay onto the working table several times to create a new form.
Once the basic shape formed, I started to take out the excess of material. One thing I discovered was that if I cut out a big chunk of clay with the wire cutter and then rotate it 180 degrees on its same axis and turn it around I could use to construct another level of the sculpture that fit naturally. The last images of the below gallery shows this process.
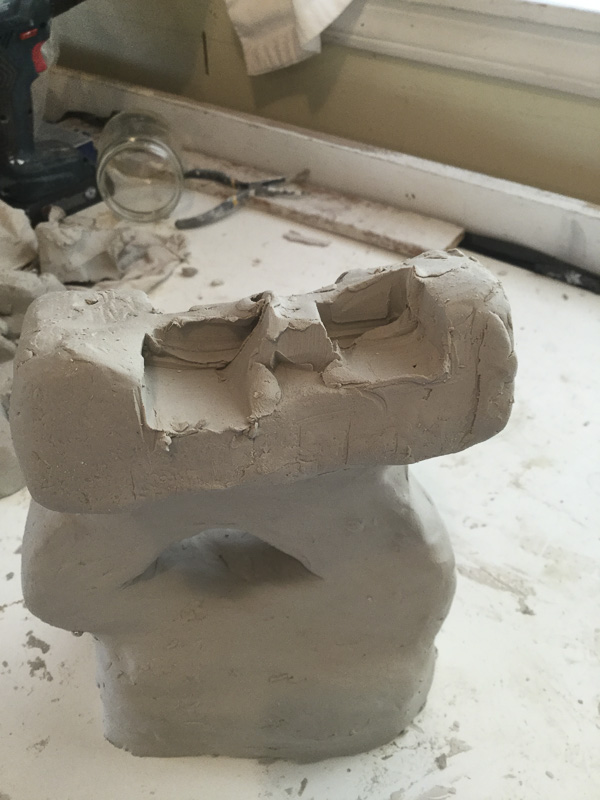
One of the things that cost me a lot of difficulties to do was the fingers of the sculpture. So this time a decided to create them from a different piece of clay and add it to the central sculpture.
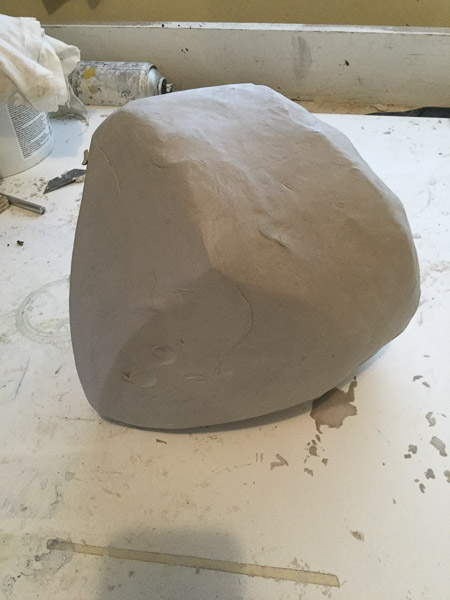
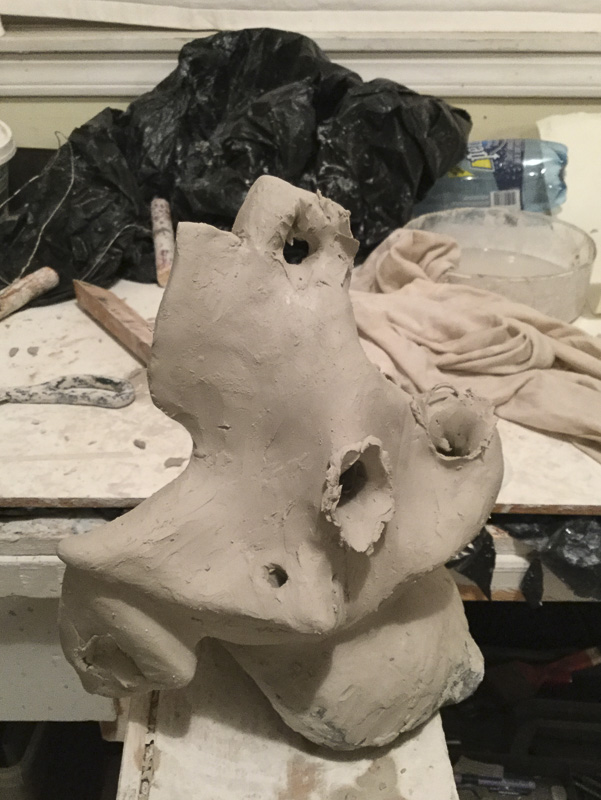
The below gallery shows how my progress creating this sculpture. In my opinion, at that moment everything was looking ok. However, I quickly change my mind.
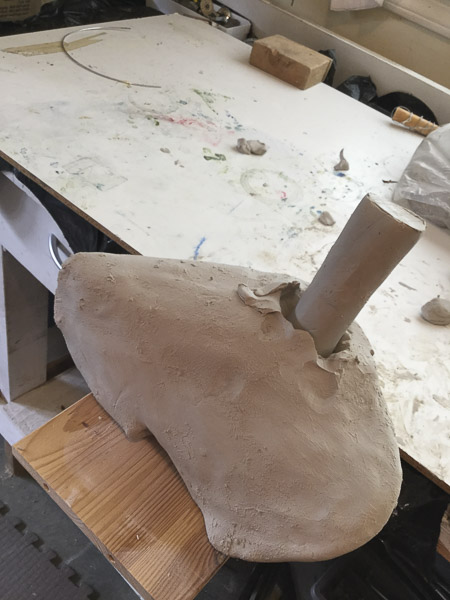
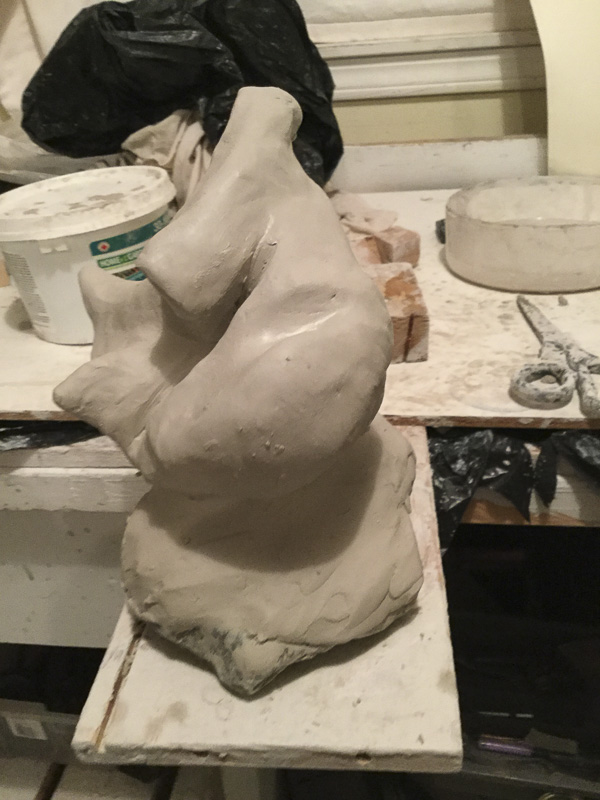
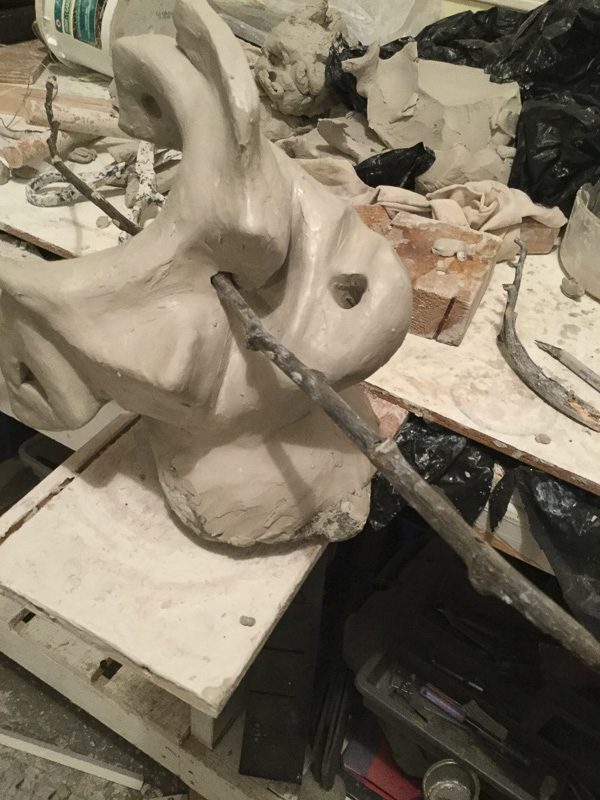
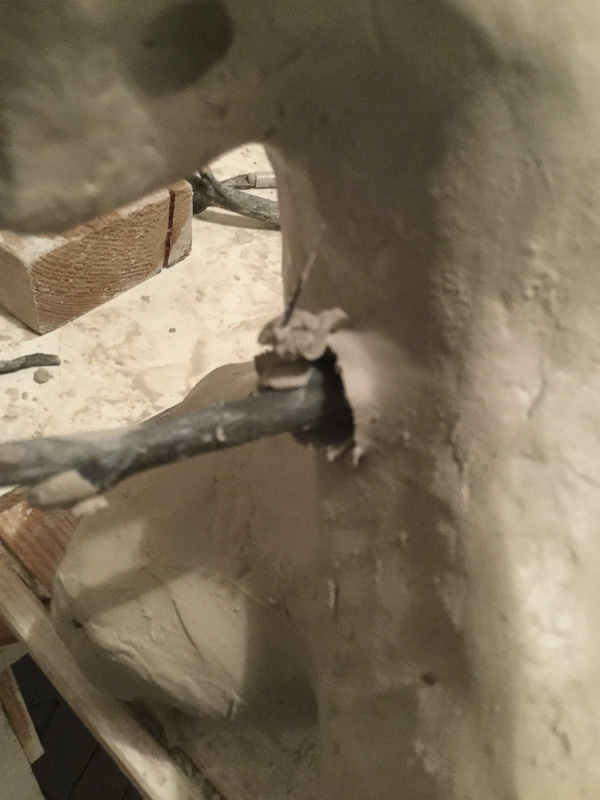
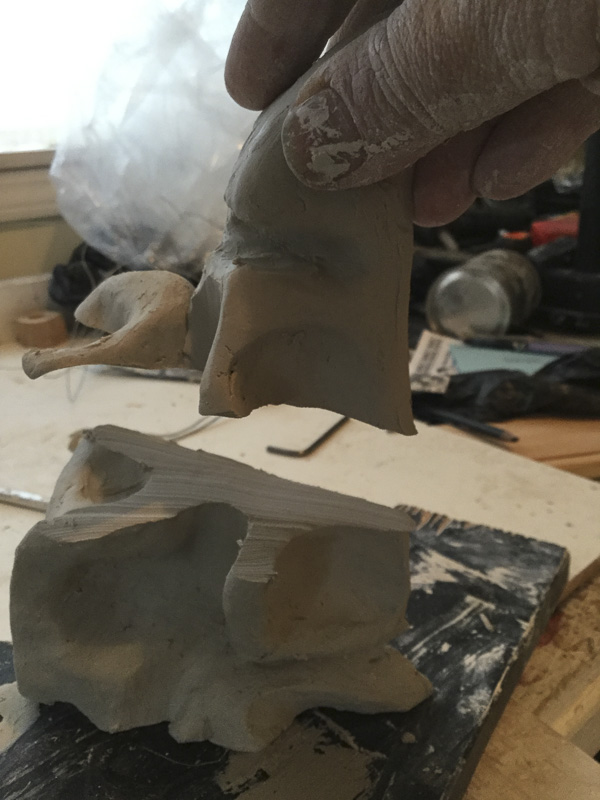
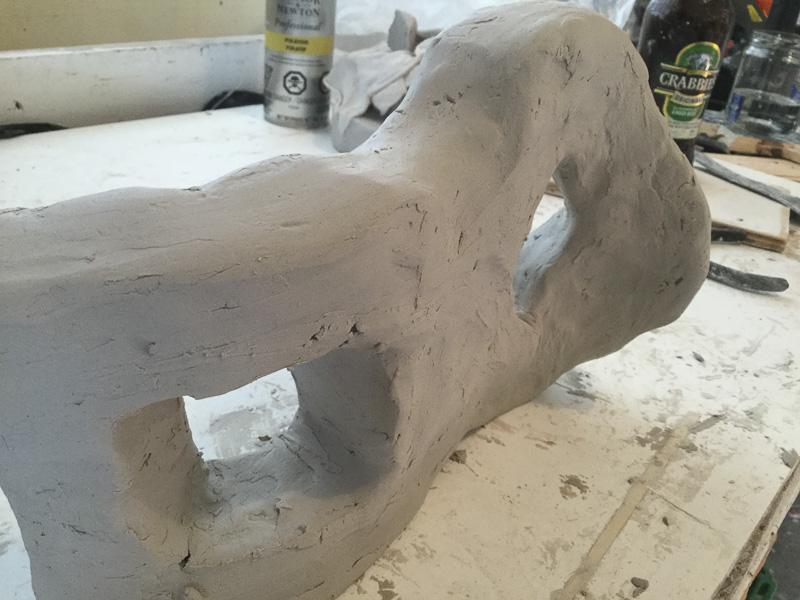
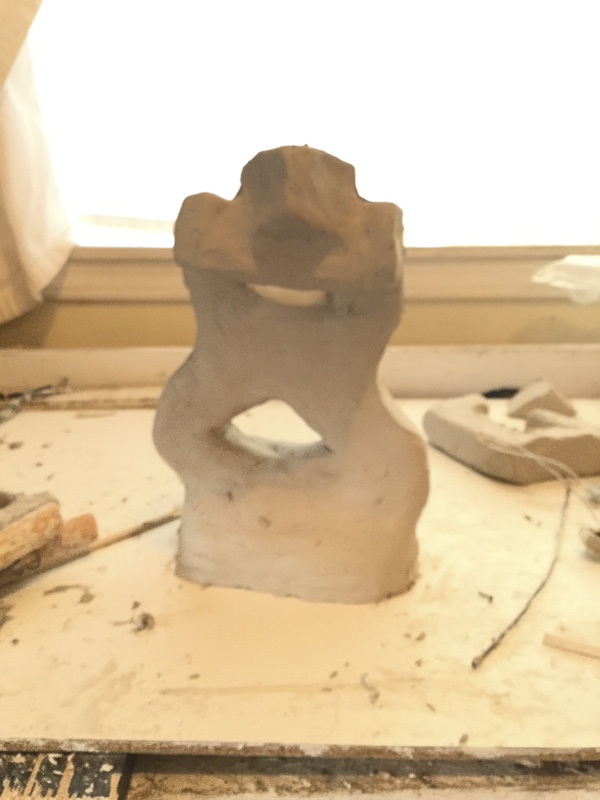
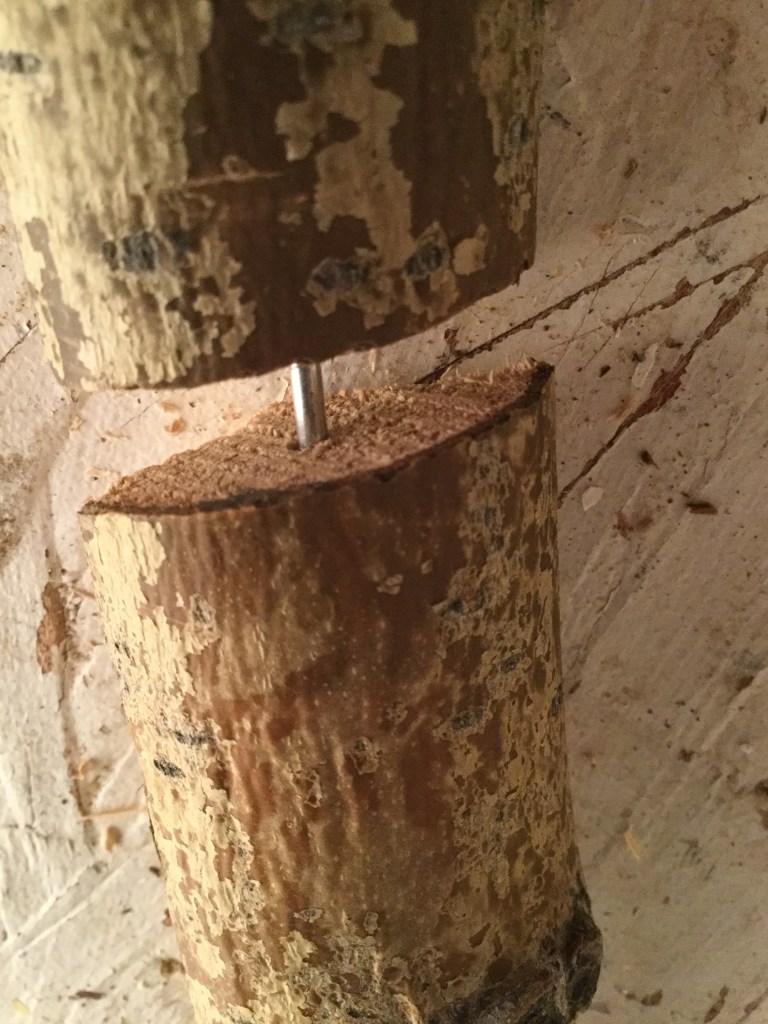
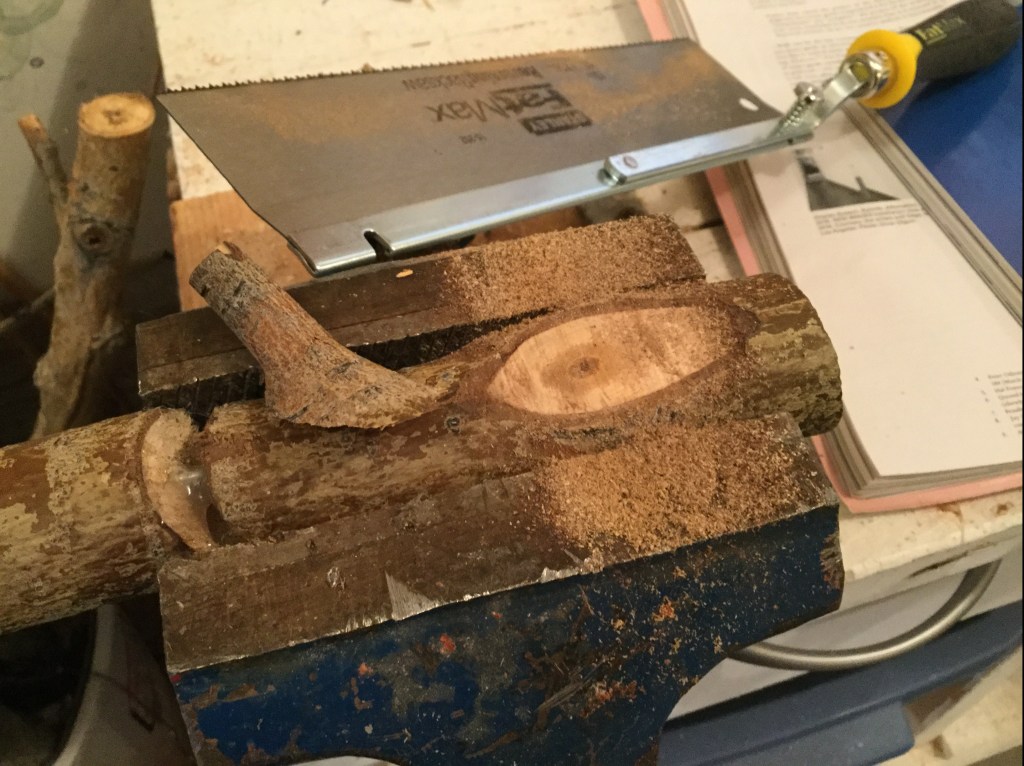
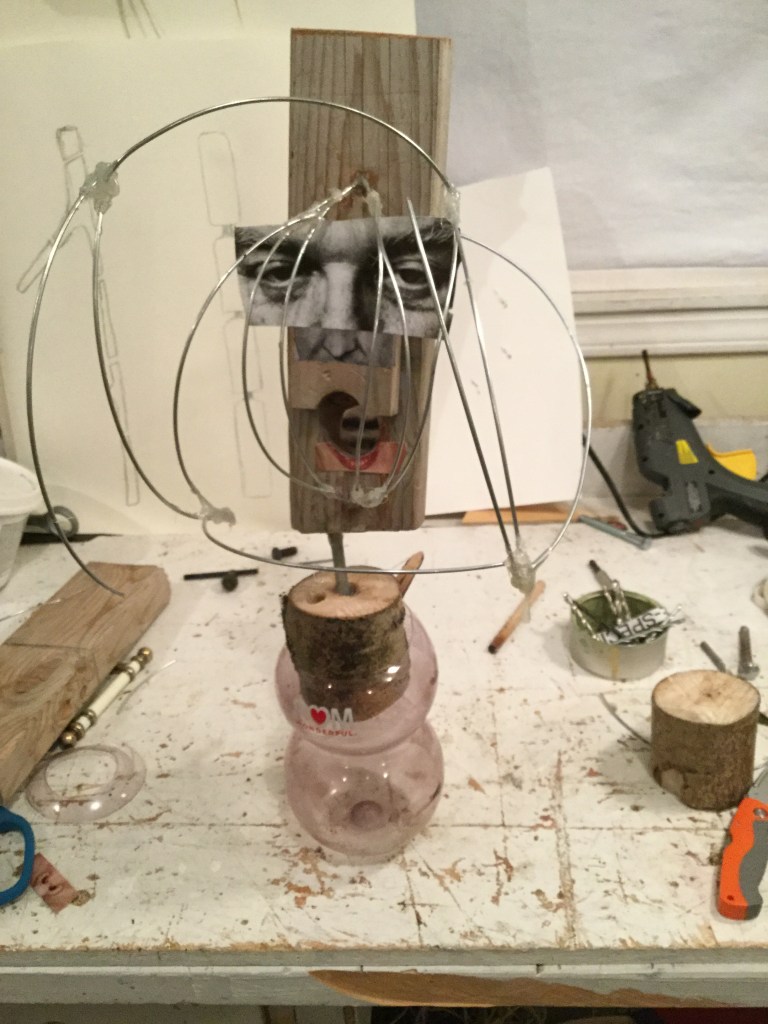
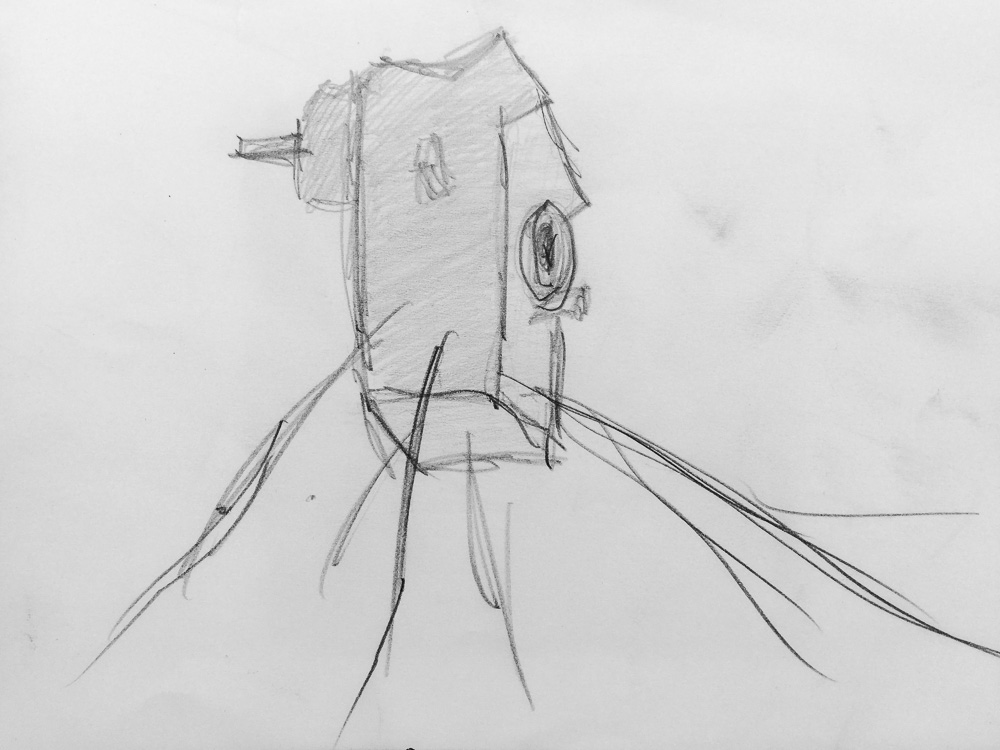
At this point, I felt that I was getting a real sense of form and space. I was feeling or thinking more in a 3d space, and this makes me do things completely different from my original plan, so I decide to behead the sculpture or to put it more directly to cut the top part of the sculpture and to put the front on the back and vice versa. I have to tell you that in the mood of thinking about darkness and human intelligence, I made some holes on the piece in a violent way. I really believe that violence is one of the main components of those two elements that I have been researching. So what I did was to stick a tree branch on different sides of the sculpture to make holes. At the end, those holes, I think, look like if a projectile had perforated the sculpture.
The end result looks very good to my eyes. It is a different end result, but it works. Definitely, I will use this technique of cutting one part of sculpture and then rotating it 180 degrees to achieve new results.
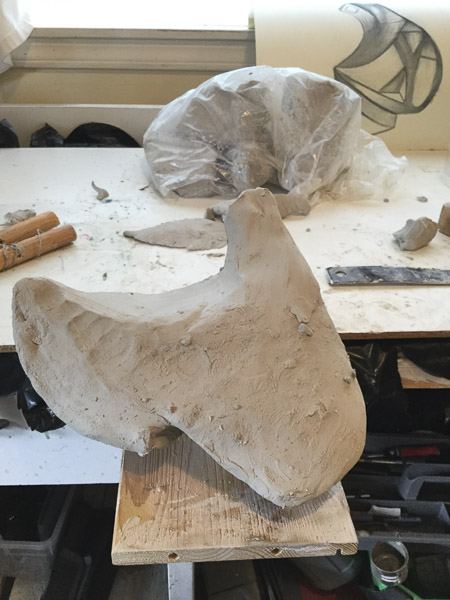
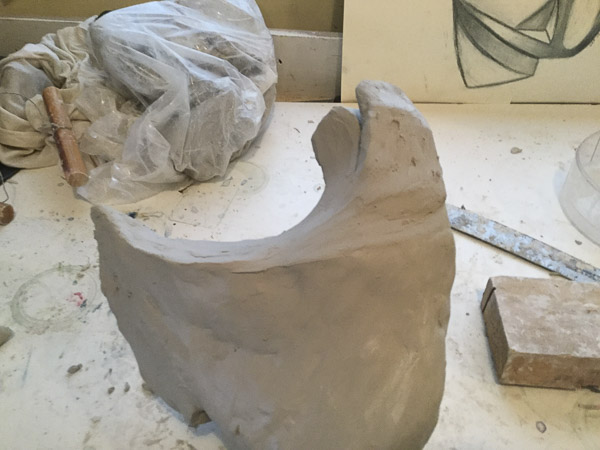
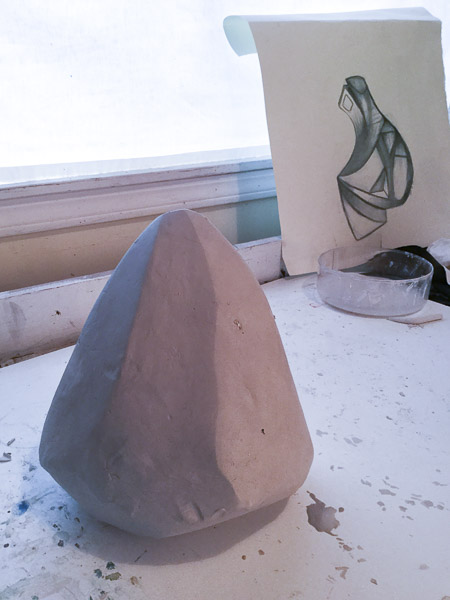
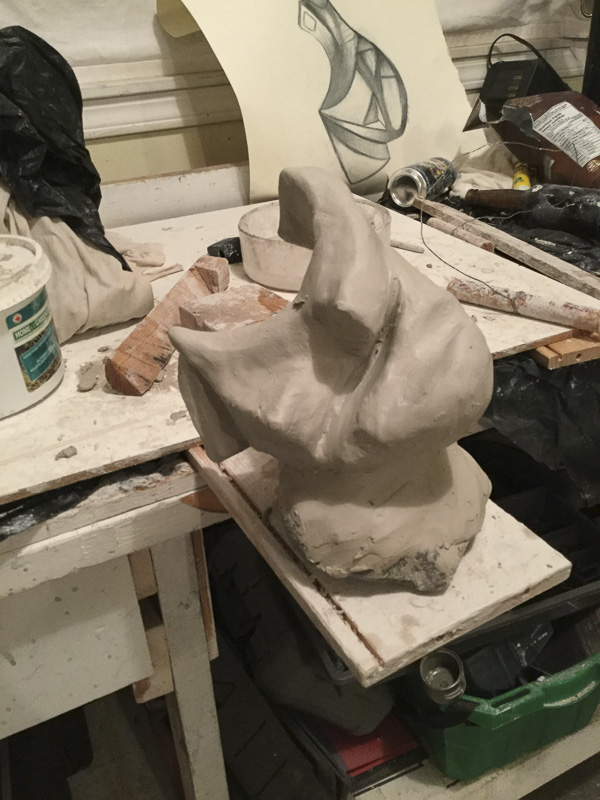
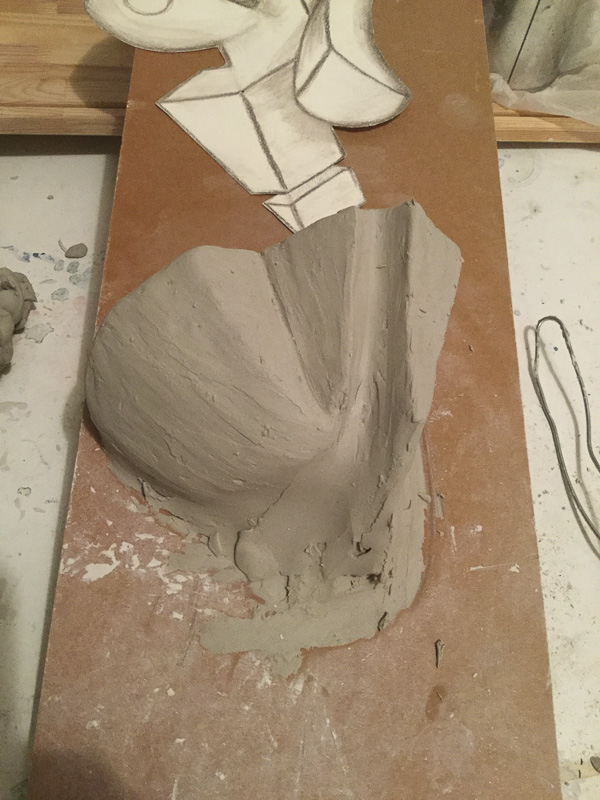
Sculpture 3: Materialization of a hand VIII or Moving form through space
Starting point
Again, it is a drawing. I love to draw.
The Galleries
The below three galleries show the whole creation process of sculpture number 3: Materialization of a hand VII or Moving form through space.
Gallery 1: Starting from 2D represent the general action-event-feeling of the piece as one-third of it is the construction process: a general feeling of some kind of flatness.
In Gallery 2: Using only the little finger and thumb as a tool, the flatness sensation starts to vanish.
It is not until Gallery 3: Moving form through space that the sculpture starts being visible on all its sides. Moving big chunks of the sculpture from its original place to other areas of the space was a great idea.
General speaking. It was an intricate sculpture to translate from a 2D drawing to clay space, especially the 3D depiction of an odd form on the paper.
The photographs in these galleries are self-explanatory: they just depict the constructions process of the piece, a linear succession of events.
Gallery 1: Starting from 2D
Gallery 2: Using only little finger and thumb as tool of molding
Gallery 3: moving form in space
Final piece
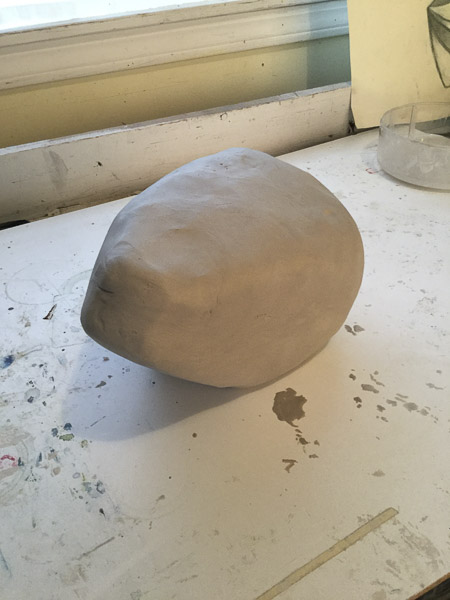
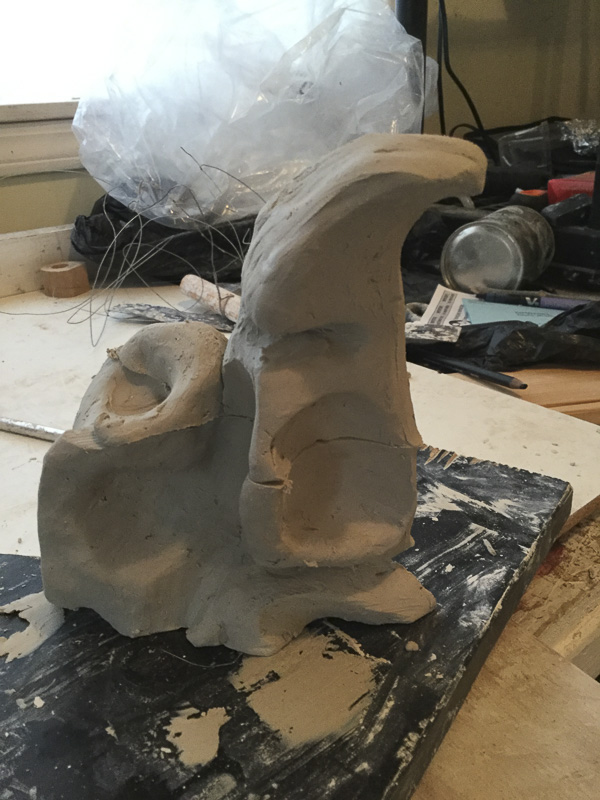
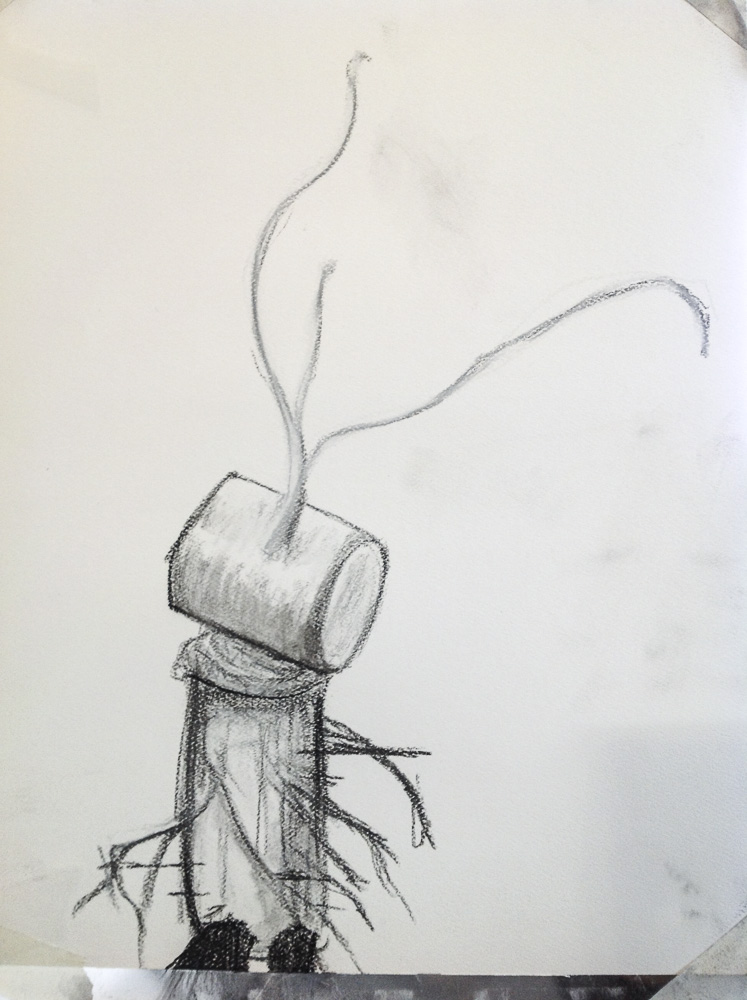
Sculpture 4. Untitled
Starting point
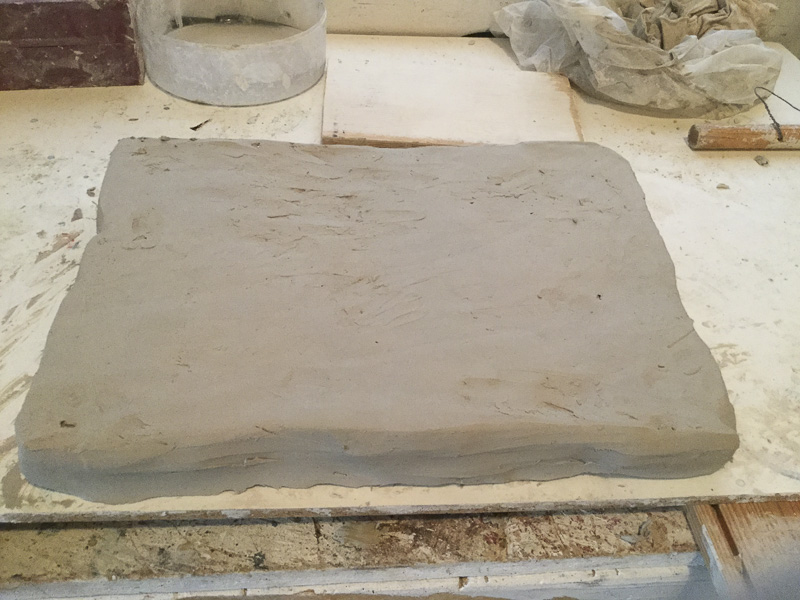
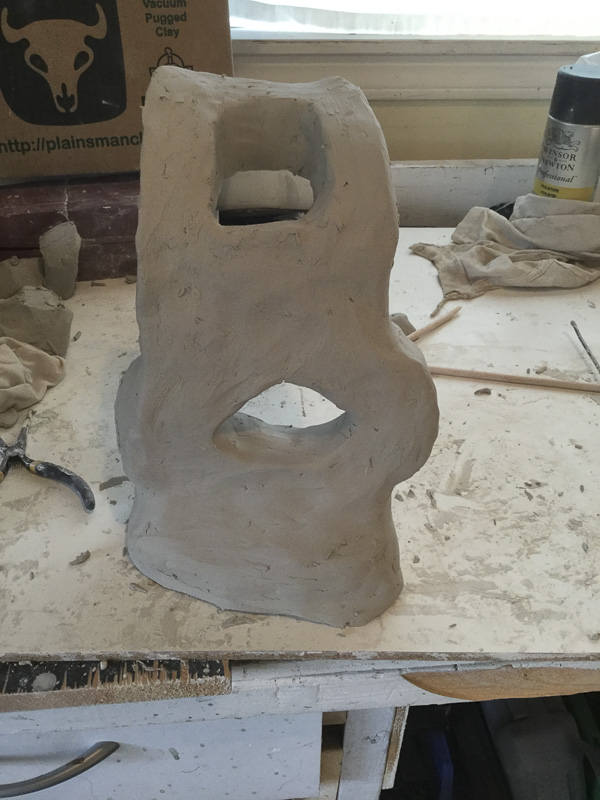
At this point in the process, I wanted to create something quickly. I spent a lot of time on the last three sculptures that I had the feeling that I need to move faster. I spent between 4 and 5 hours in total with this sculpture with no clear plan. I just wanted to construct something from a big flat block of clay. I thought about it as a picture plane to bend.
The Galleries
The three galleries show the whole creation process of sculpture number 4.
Gallery 1: Materiality to shape, depict my decision of having a big block of clay to bend and to twist.
Gallery 2: Materiality to rise. Clay is flexible, but it can fall off from its own weight. There were some “poses” of the sculpture that were not feasible to maintain.
Gallery 3: Materiality to anthropomorphize. It was in this part when I went into the path of my current research theme, and I use one more time the idea of darkness and human intelligence along with the image of the two most distinguished fingers on the human hand: the pinky and the thumb.
Gallery 1: Materiality to shape
Gallery 2: Materiality to rise
Gallery 2: Materiality to anthropomorphize
Sculpture 5. (Not done yet)
I really enjoy working with clay, and I think I did a decent job. It was my first time working with clay. However, it was quite a disappointment to use the same clay over an over to create a new piece, destroying the previous one.
The construction of Sculpture 5 needs to wait until I get a new clay, paper clay this time, to work with.
X
Plaster
Working with plaster was a bag of mixed feelings. First, because gypsum is quite a problem if your breath its dust. I was using the proper gear however I work on the garage of my house, and sometimes I was too worried to bring dirt inside the home where I do not want to put any plaster at all. My wife suffers from asthma, and I have 4 cats that smell everything.
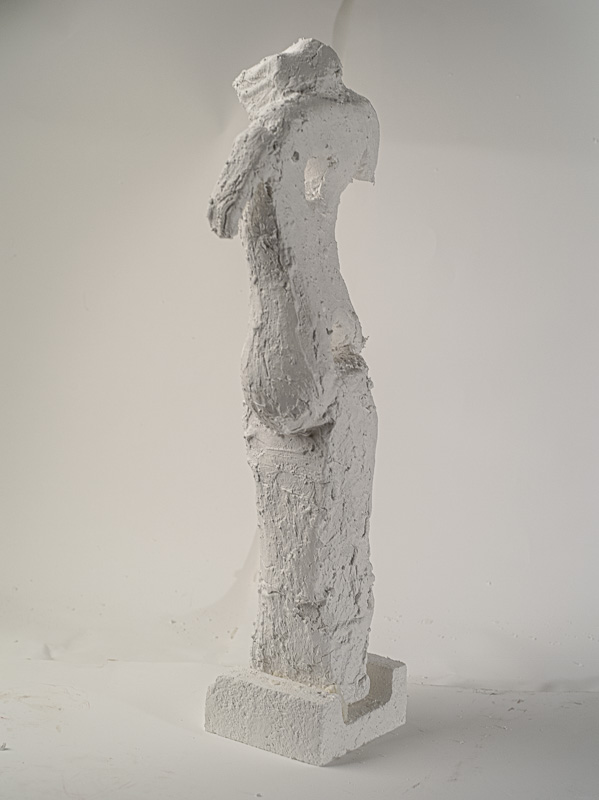
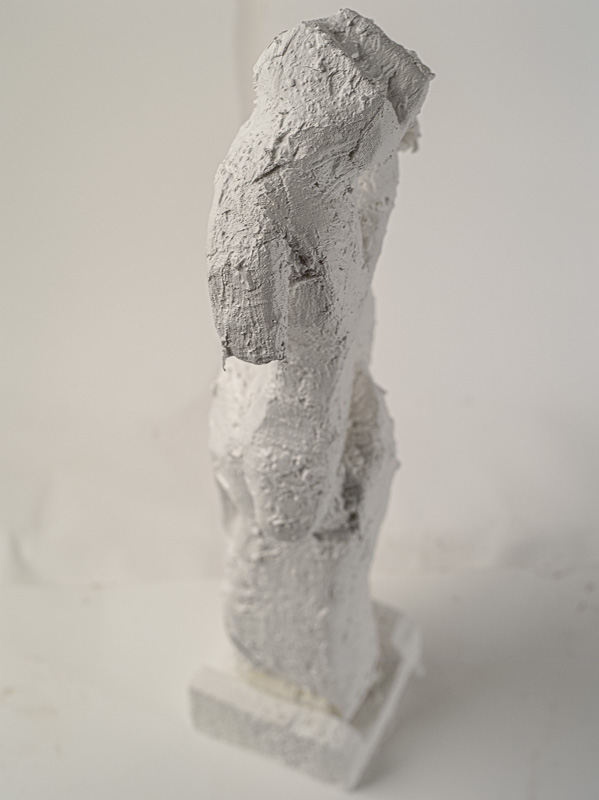
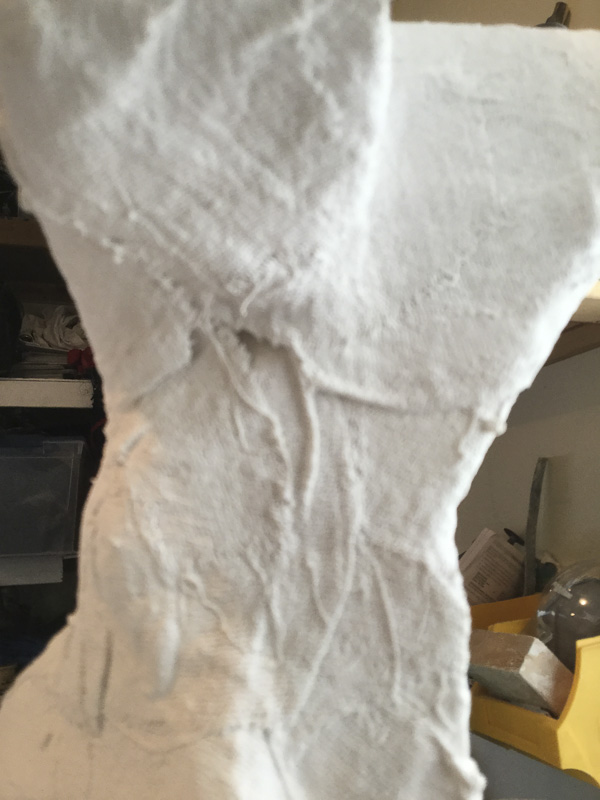
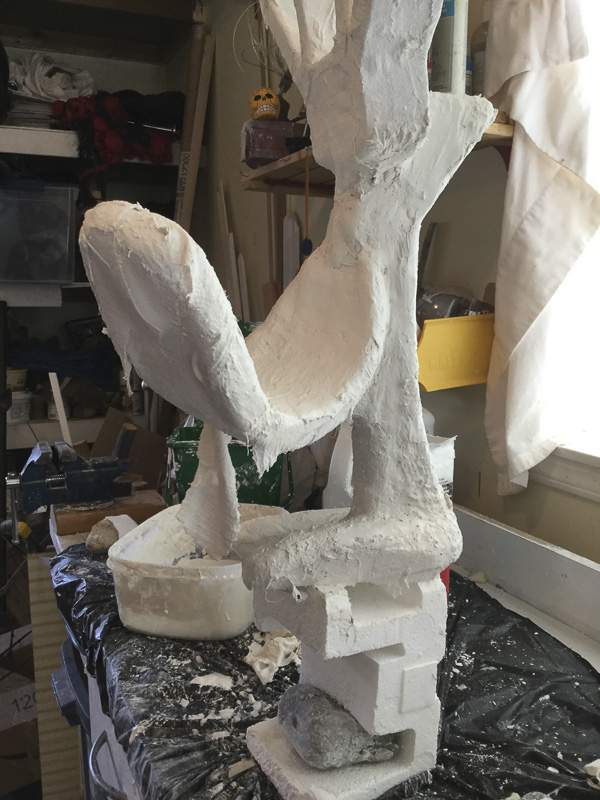
I like the final plaster sculptures, but I think I did not really get precisely how plaster behaves. I guess I have a better idea of two things that went wrong: 1) in the first sculpture, I did the mix for the scrims to thin, and it was on some areas too fragile. And 2) when I put the second layer of plaster on both sculptures I made too much mix that started to dry very fast and granulate. I really do not mind the result: the course surface on the sculptures, but that was not what I was looking for.
Gathering and glueing the styrofoam
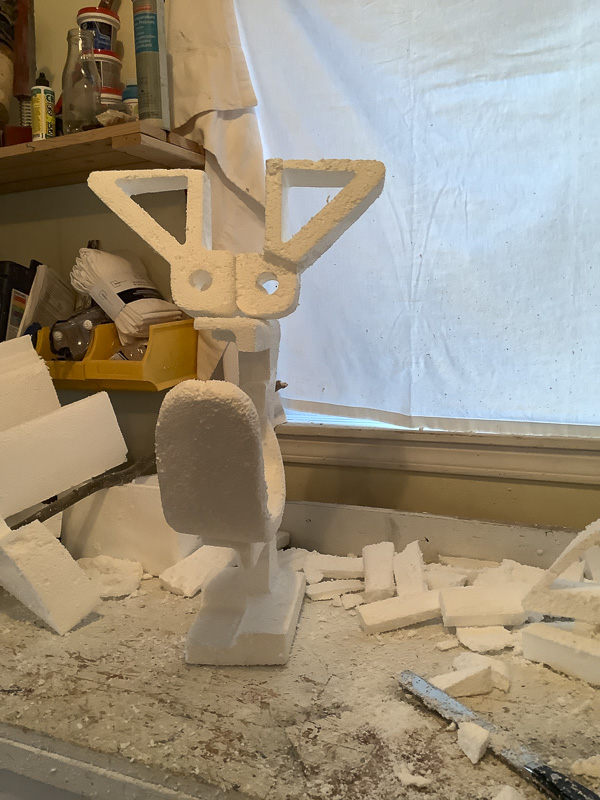
Plaster sculpture 1
Starting point
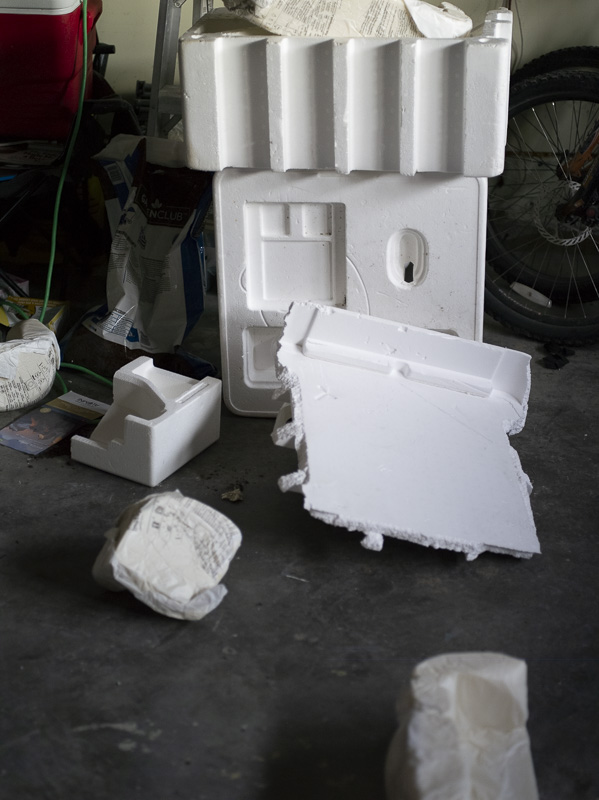
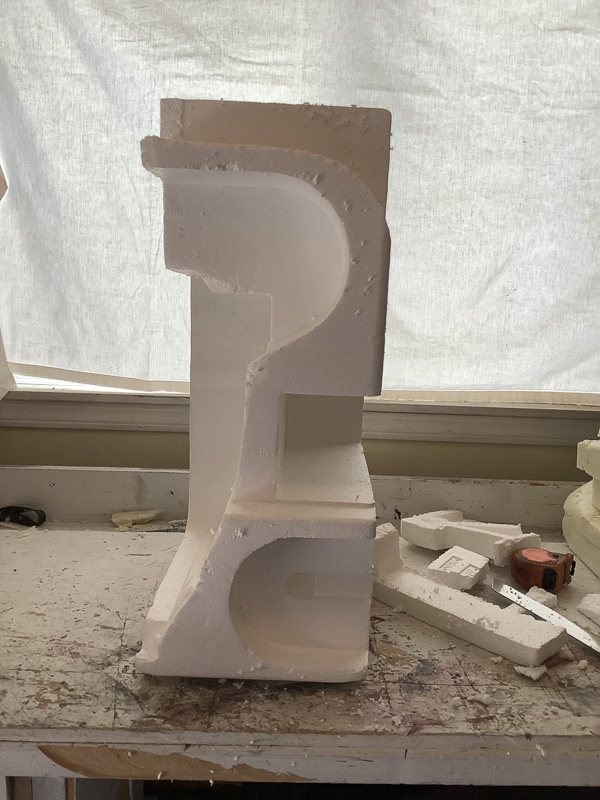
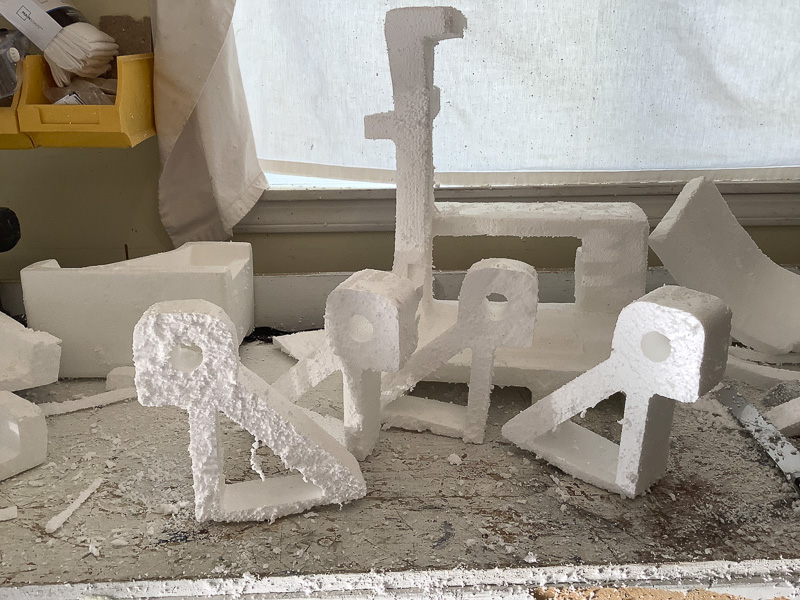
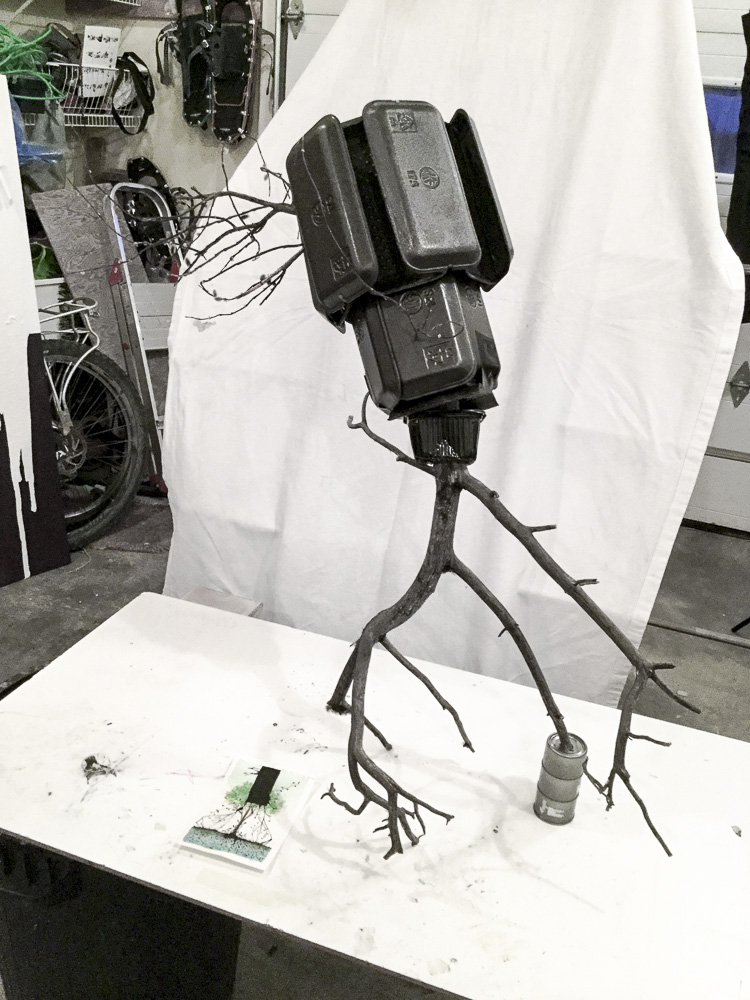
A big styrofoam protecting enclose of a computer: a ready made to discover.
The Galleries
The below five galleries show the whole creation process of plaster sculpture number 1.
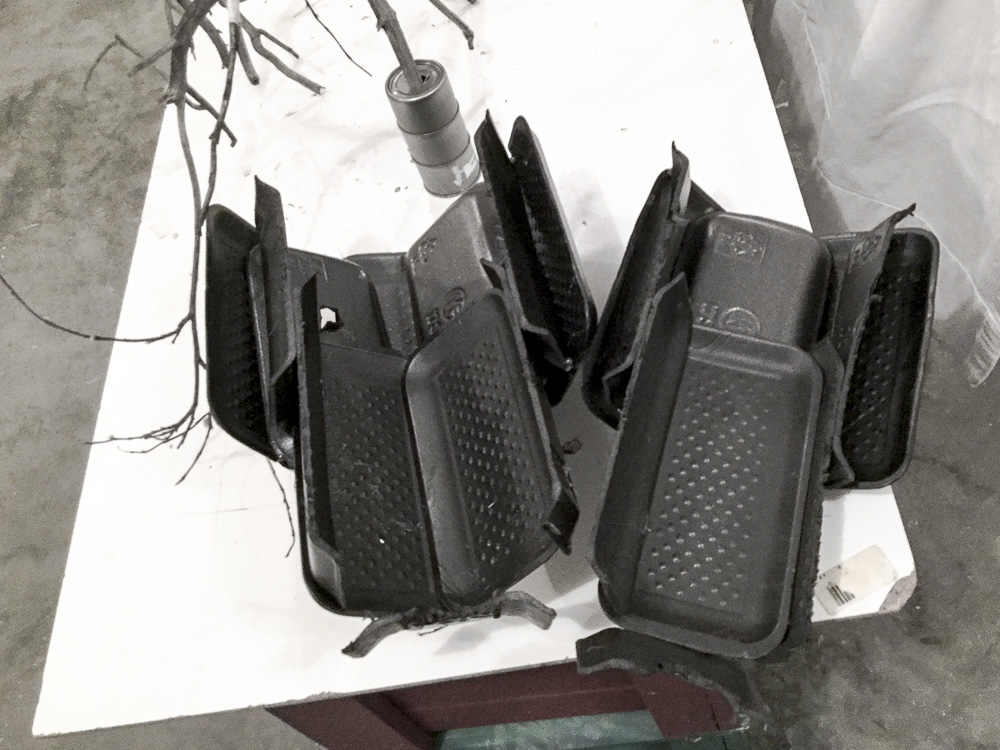
Gallery 1: Discovering the already-there forms on the styrofoam. The first time I re-saw that big styrofoam cube I noticed right away is utilitarian forms: curves, holes, depressions, spaces that were made with a purpose to protect something. It was too much temptation not to use them, so I decided to carve them out and let this preexisting forms to guide me in the creation of this sculpture.
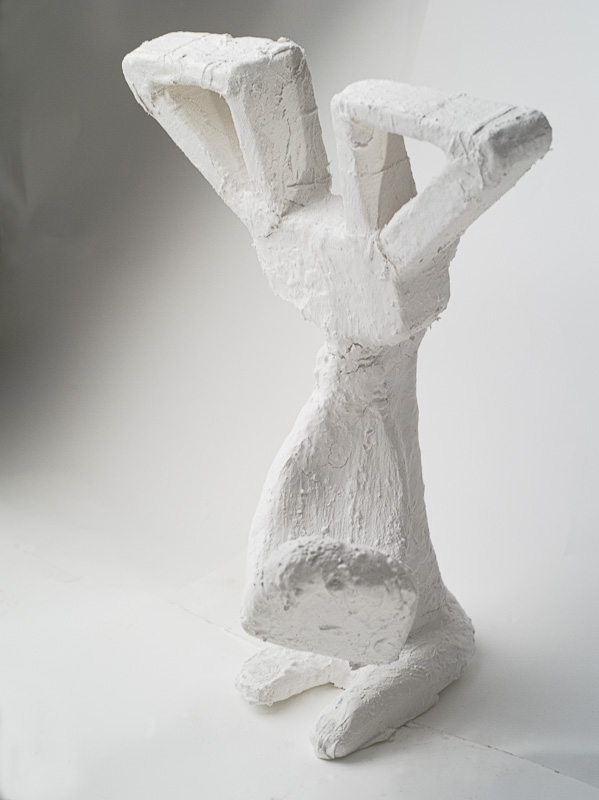
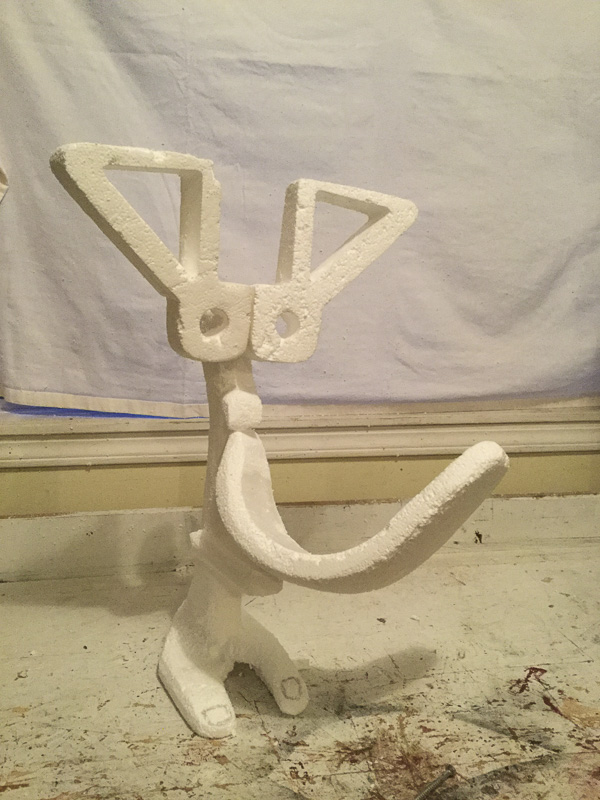
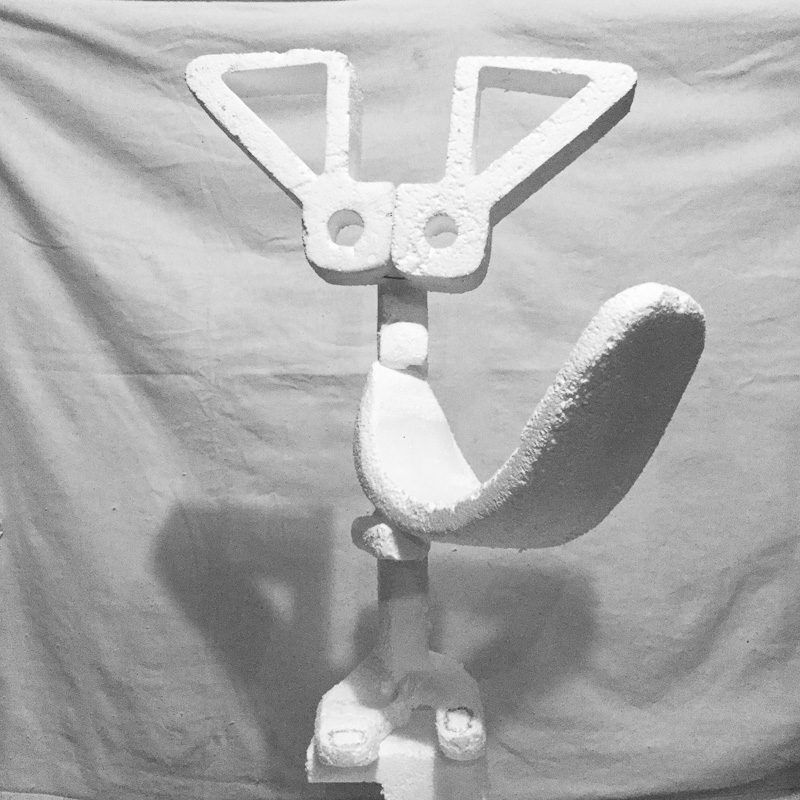
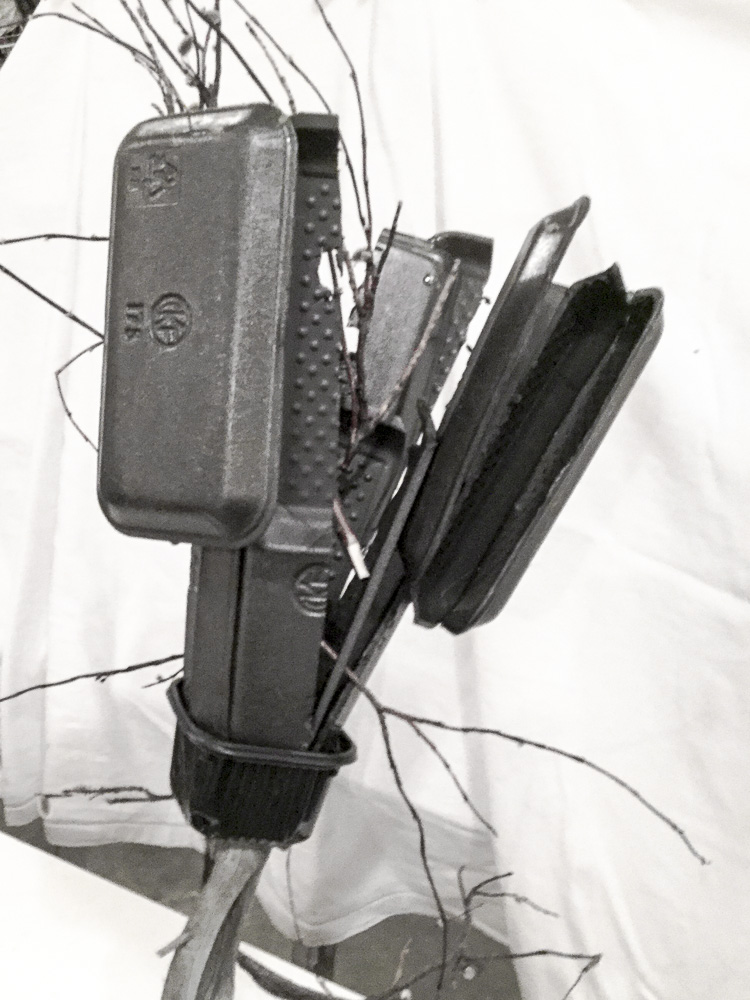
Gallery 2: styrofoam is a ready-made. Once the forms were carved out, the final assemblage of the piece was natural. I had all the time in my head my recurrent theme on this course: what lies between darkness and human intelligence. So for me, it was easy to see a big tongue coming out from a being that looks like a rabbit. A prominent tongue that licks everything and is insatiable and devours whatever it encounters.
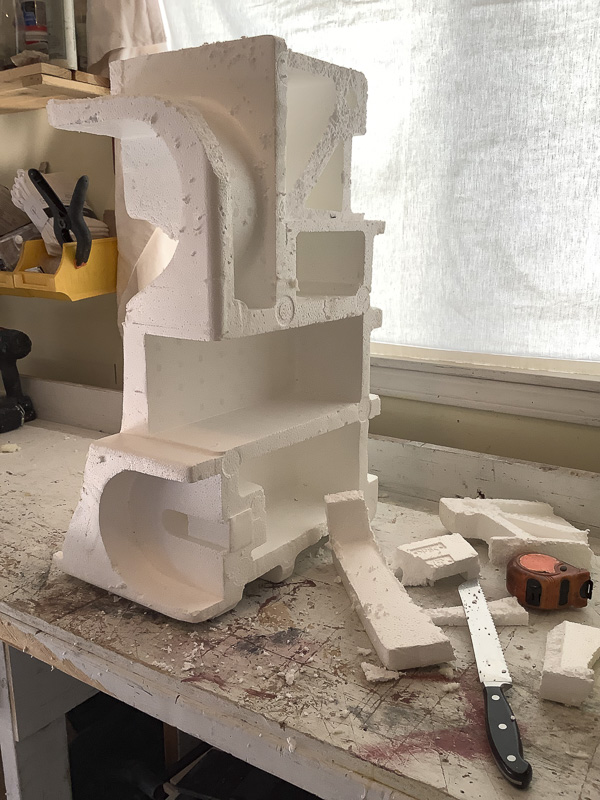
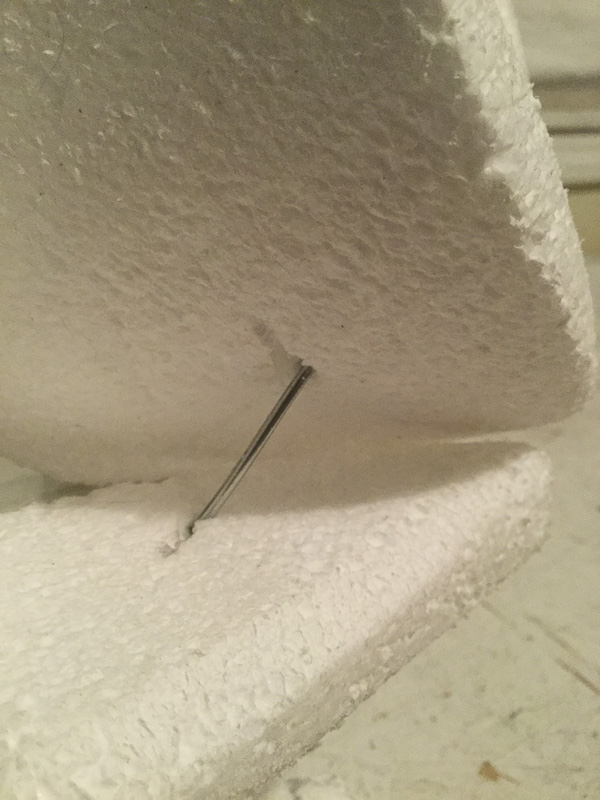
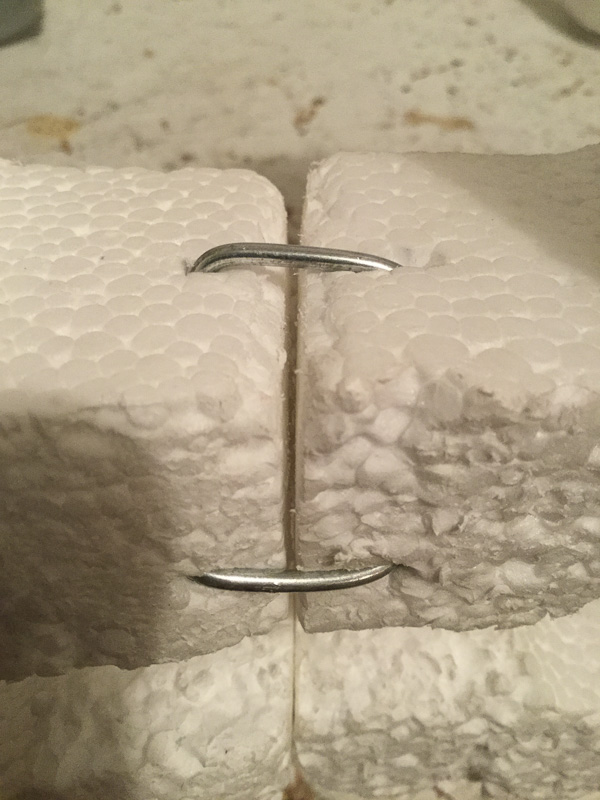
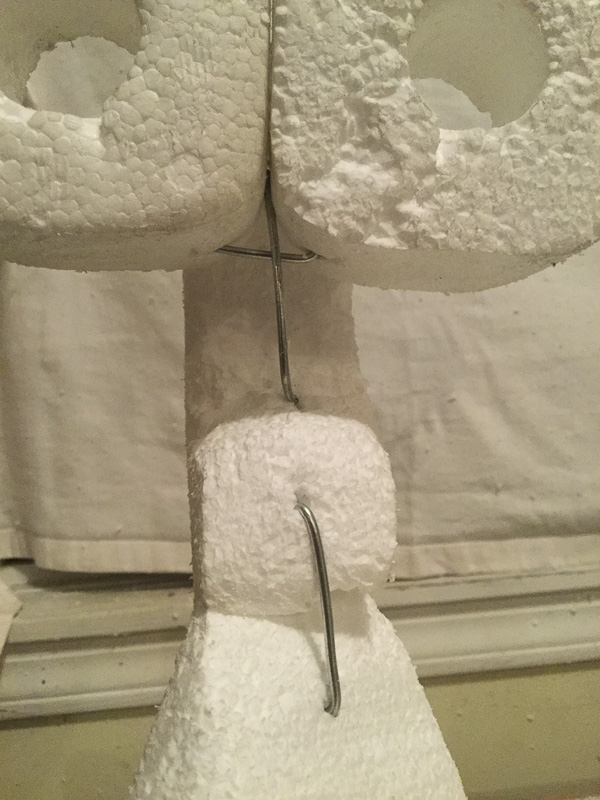
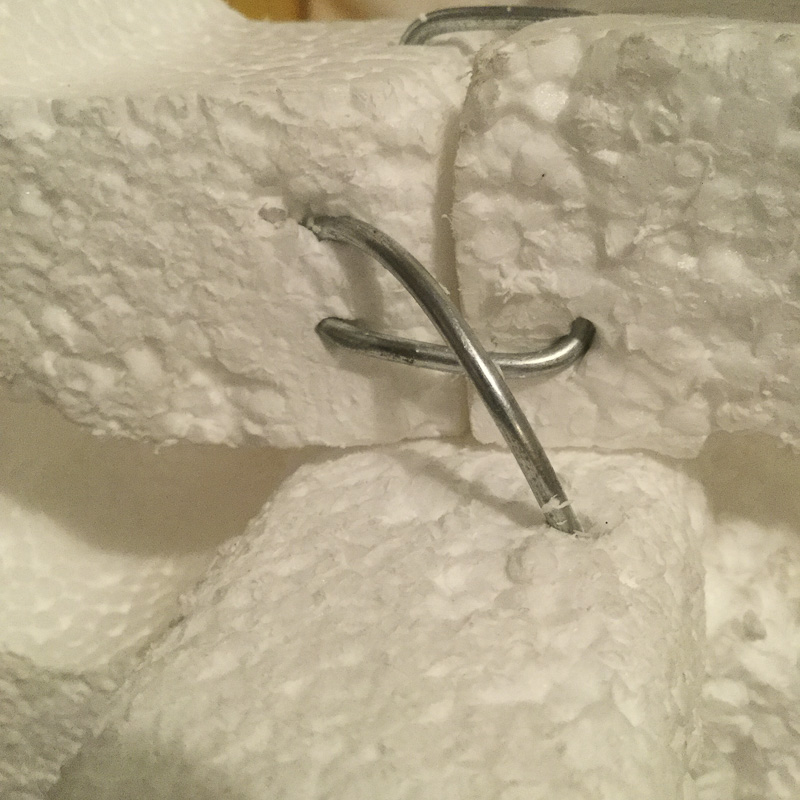
Gallery 3: Joining the pieces. A self-explanatory gallery, nothing to add except that those pieces of wire work perfectly.
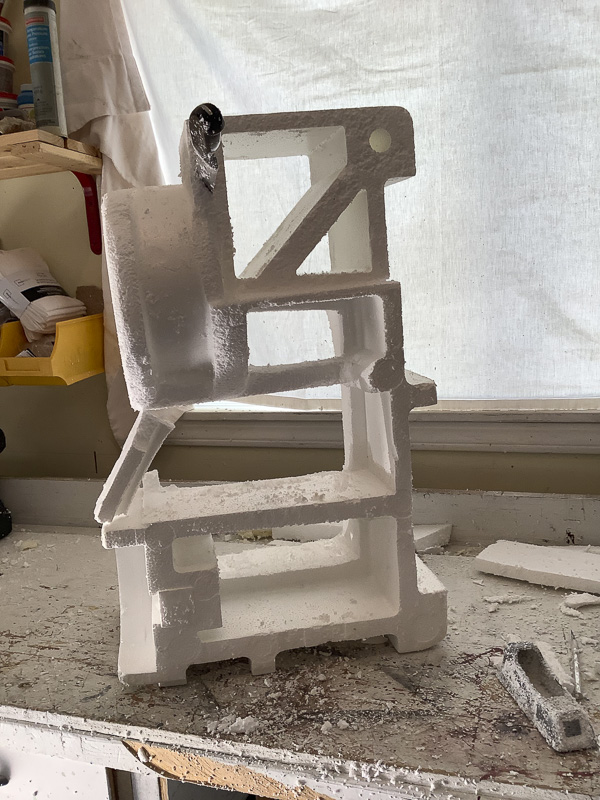
Gallery 4: A thin scrim. This is where things started to go not so well. At this point it was not that obvious to me how bad the situation was until I put the rest of the plaster.
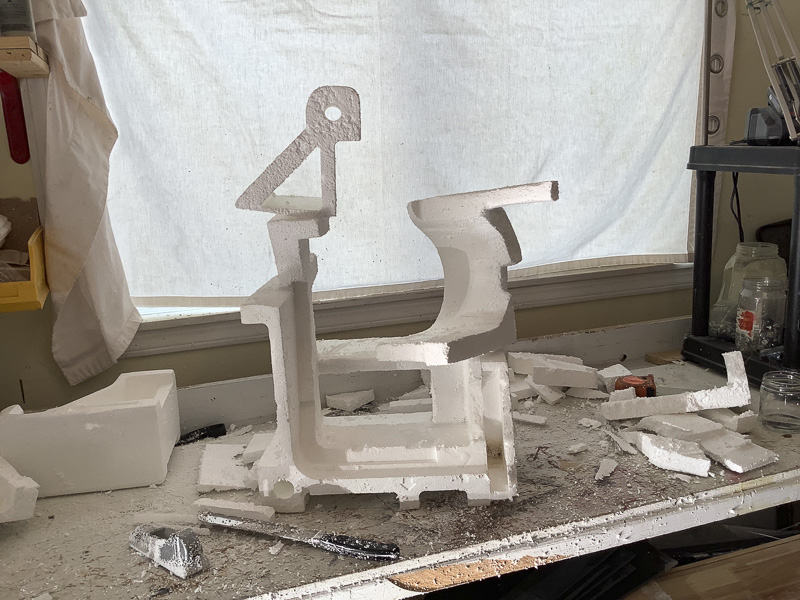
Gallery 5: Disaster 1. The whole back part of the mouth fell as soon as I started putting the thick layer of plaster. It was frustrating, as hell for a few minutes. I had no idea what was happening. Because it was only that part, I continued’ otherwise, I would’ve been forced to start all over again. Later I realized that the first layer of plaster with the scrim was too diluted and that a plaster structure all around the sculpture was not being formed.
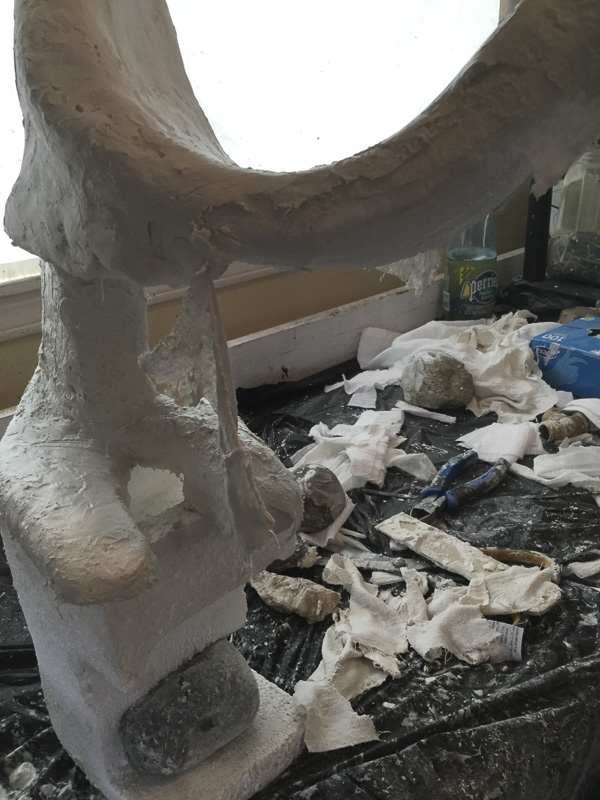
Gallery 6: Disaster 2. To meet the height requirement for this sculpture, I mounted it over another piece of styrofoam. The width of the thick layer of plaster makes it very unstable, and it broke from one of its feet (yes, the feet are actually fingers, not difficult to guess which ones).
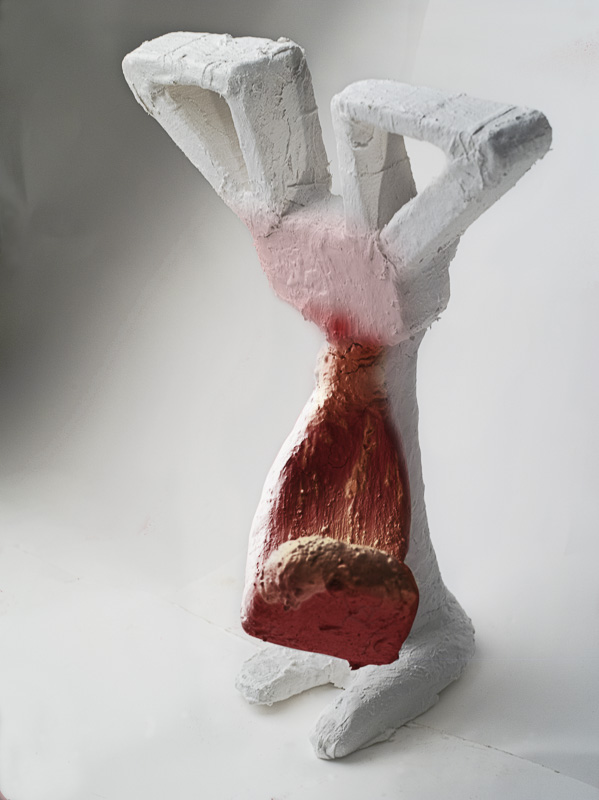
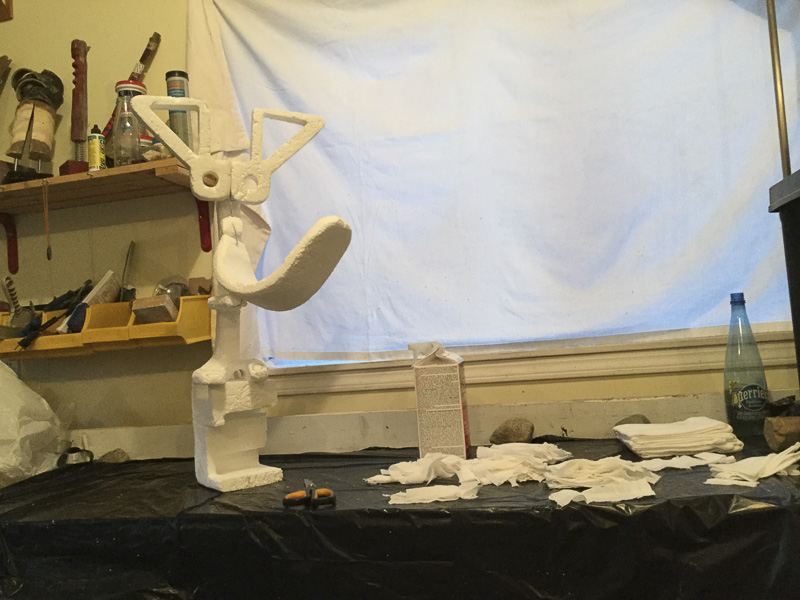
Gallery 7 : Final piece. After all those accidents I finished the sculpture. I pour over the top of the tongue the rest of the plaster to make it look like if it was grotesquely devouring something. Definitely, I will try to make this sculpture one more time, I think it is very interesting.
Gallery 1: Discovering the already there forms on the styrofoam
Gallery 2 : styrofoam is a ready made
Gallery 3 : Joining the pieces
Gallery 4 : A thin scrim
Gallery 5: Disaster 1
Gallery 6 :Disaster 2
Gallery 7 : Final piece
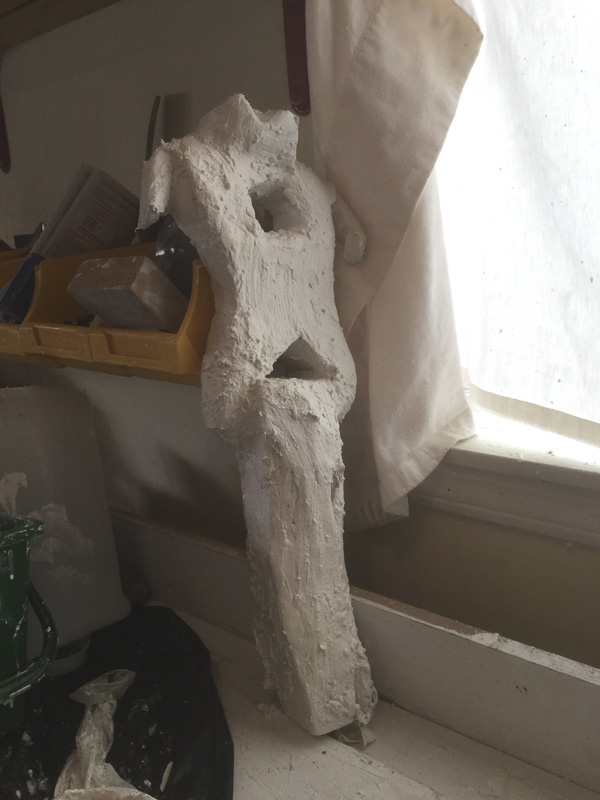
Plaster sculpture 2
Starting point
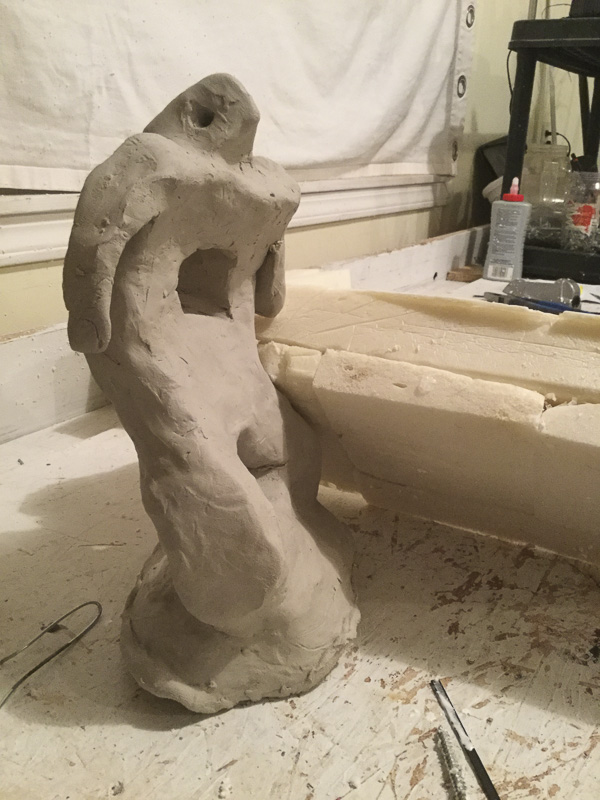
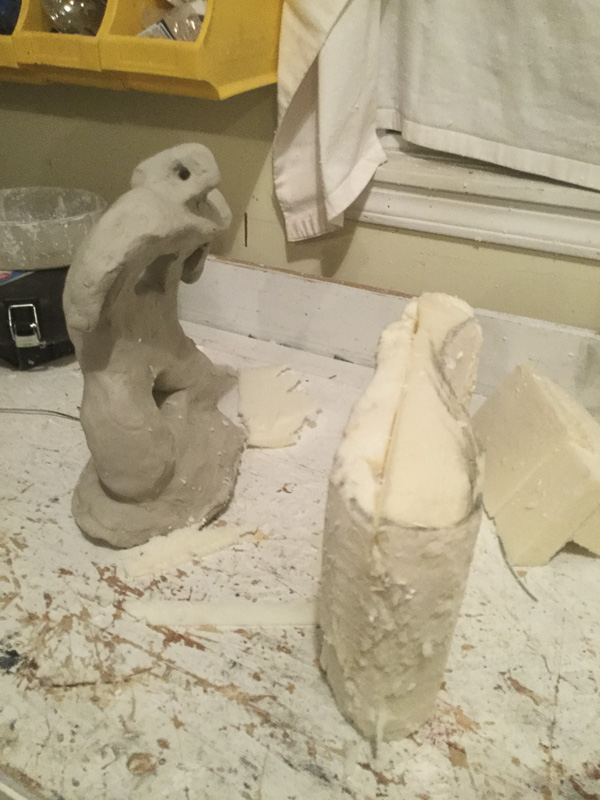
For this final sculpture I tried to duplicate clay Sculpture 4.
The Galleries
The below four galleries show the whole creation process of plaster sculpture number 1.
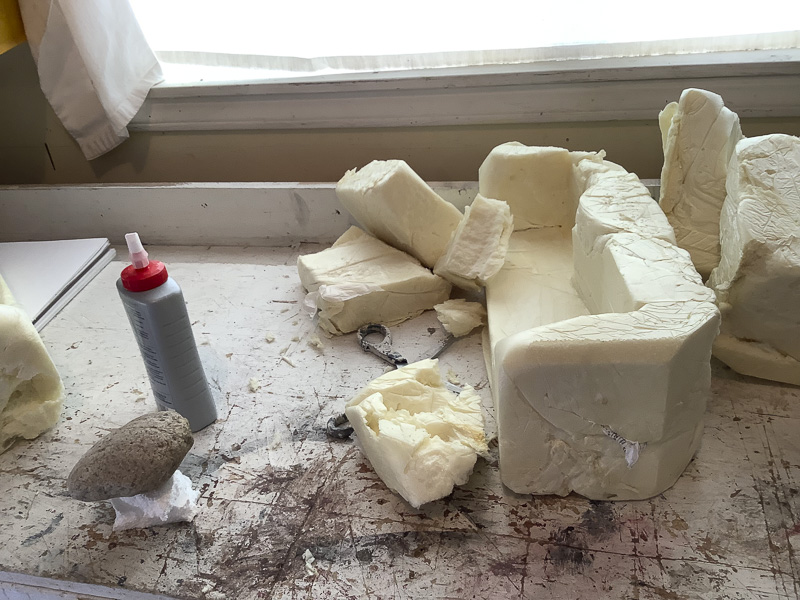
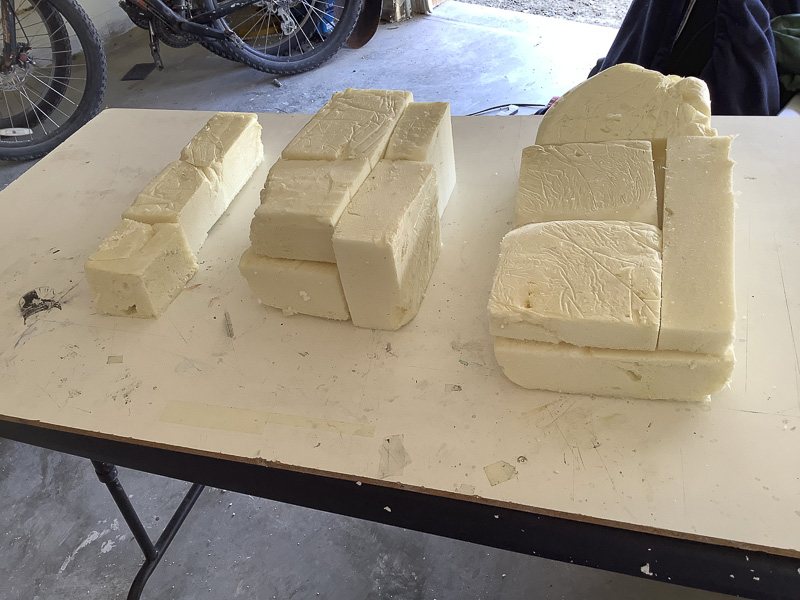
Gallery 1: A different kind of foam. The raw material for this sculpture was a different kind of foam. It was not styrofoam but something different: more comfortable to work with as it was more manageable and somehow softer. I had to glue the pieces of this foam to create an initial working block
Gallery 2: One single big shape. To carve this block of foam I use a bread knife, it was a fantastic tool to work with. It was quite easy and less messy than styrofoam.
Gallery 3: Gaining height. A self-explanatory gallery, nothing to add but those big bases of foam work great.
Gallery 4: Final Piece. I did not have the same setbacks with this piece as the previous one. The only thing that happened was the course surface of the sculpture. As I stated previously, I really do not mind, but it was not what I was looking for: something way more smoother.
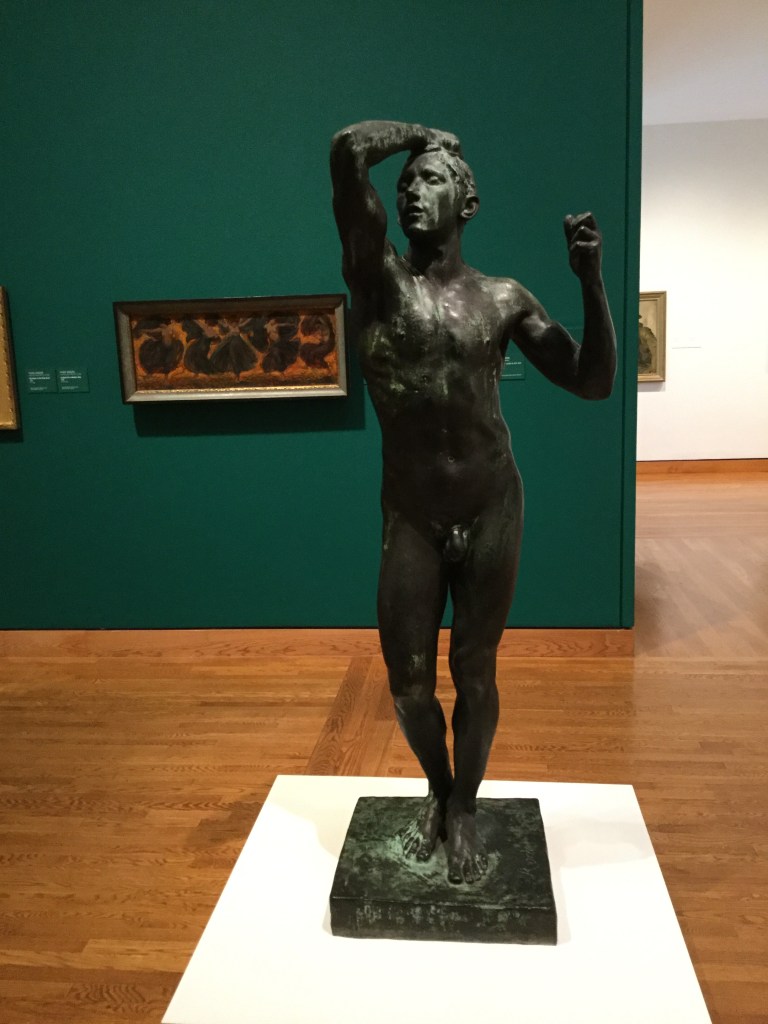
Funny, but I do find some kind of comfort knowing that clay was used by artists like Rodin. In in my head, he was in the category of metal sculptures and metal casting and bronze… but not in clay.
I watched a documentary about Rodin life’s work and the narrator mentioned something exciting: “In mythology, humans are created from earth. Going back to nature, going back to the starting point on humans beings and moulding in clay Roding delved deeply into human emotions…” (Auguste Rodin: Modeler and Sculptor, Episode 1, 2018)
I’m wondering if the consciousness sensation of creation that I have in my hands after working with clay and the similarities among clay and mountains, has something to do with this mythic idea of human origin: Perhaps … not,
I took this photo for assignment two.
g
Clay Mountains
I went for a hike yesterday, the mountains at the distance resemblance the clay I’m working with. I think, both the hills and the clay, have the same materiality in form, shape and texture. At some point, I was sure that some forms of the mountains were made the same way I shaped my sculpture with clay. Colossal finger modelling the land in front of my eyes.
.
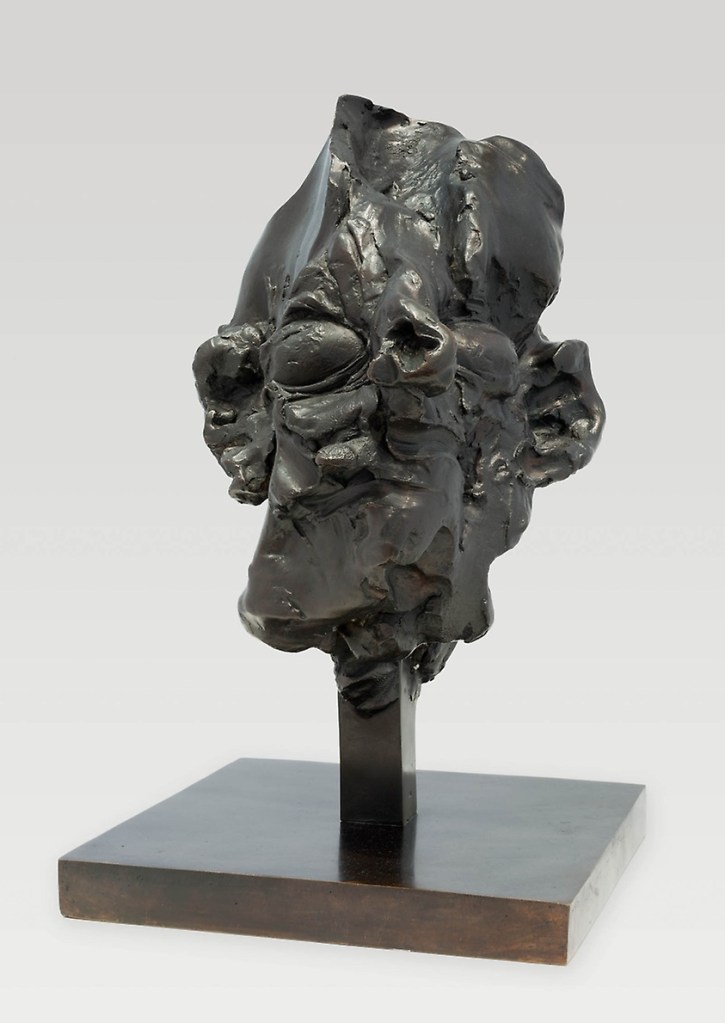
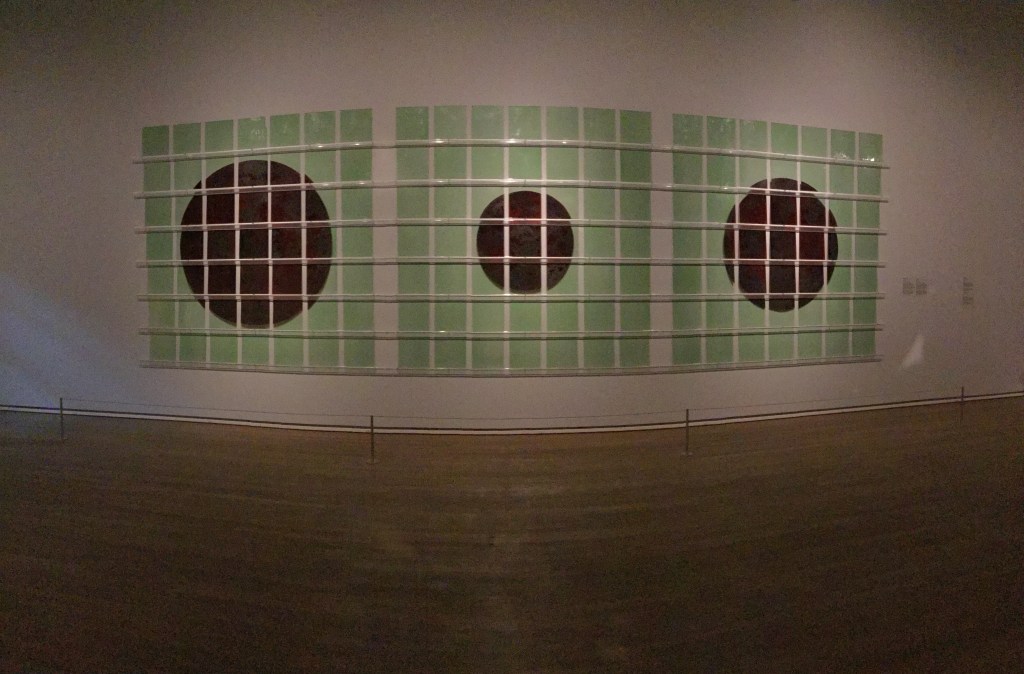
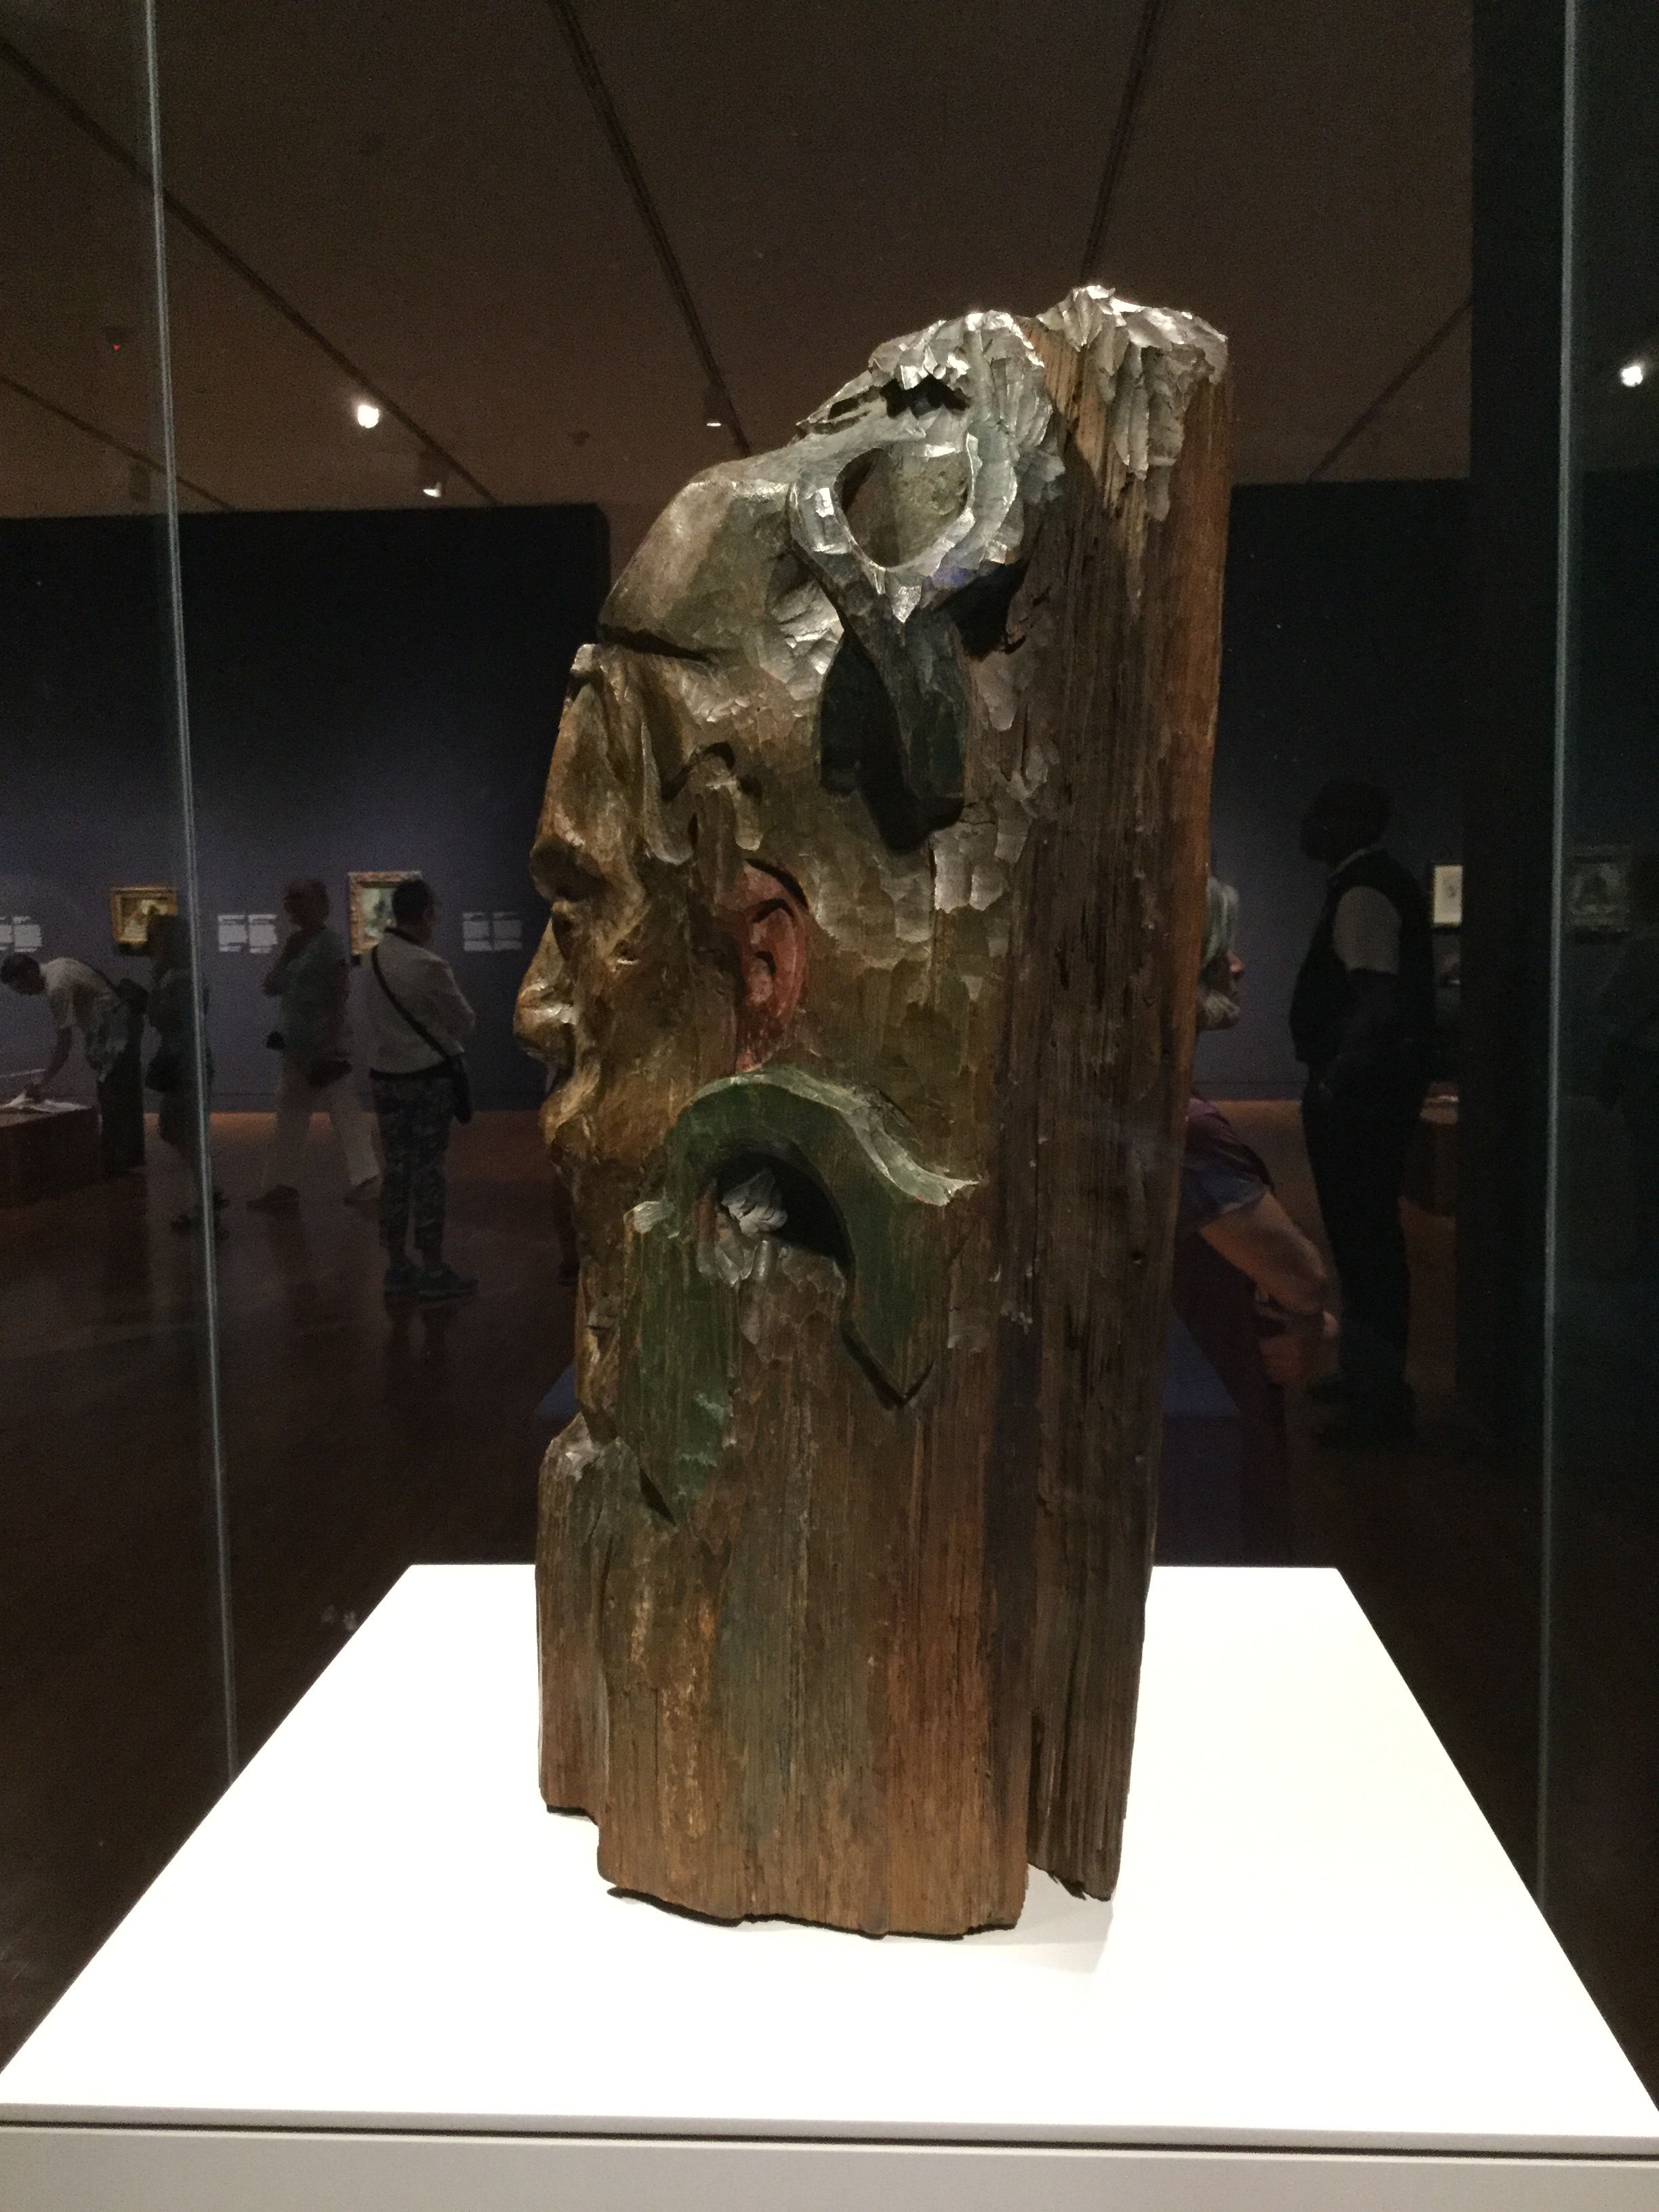
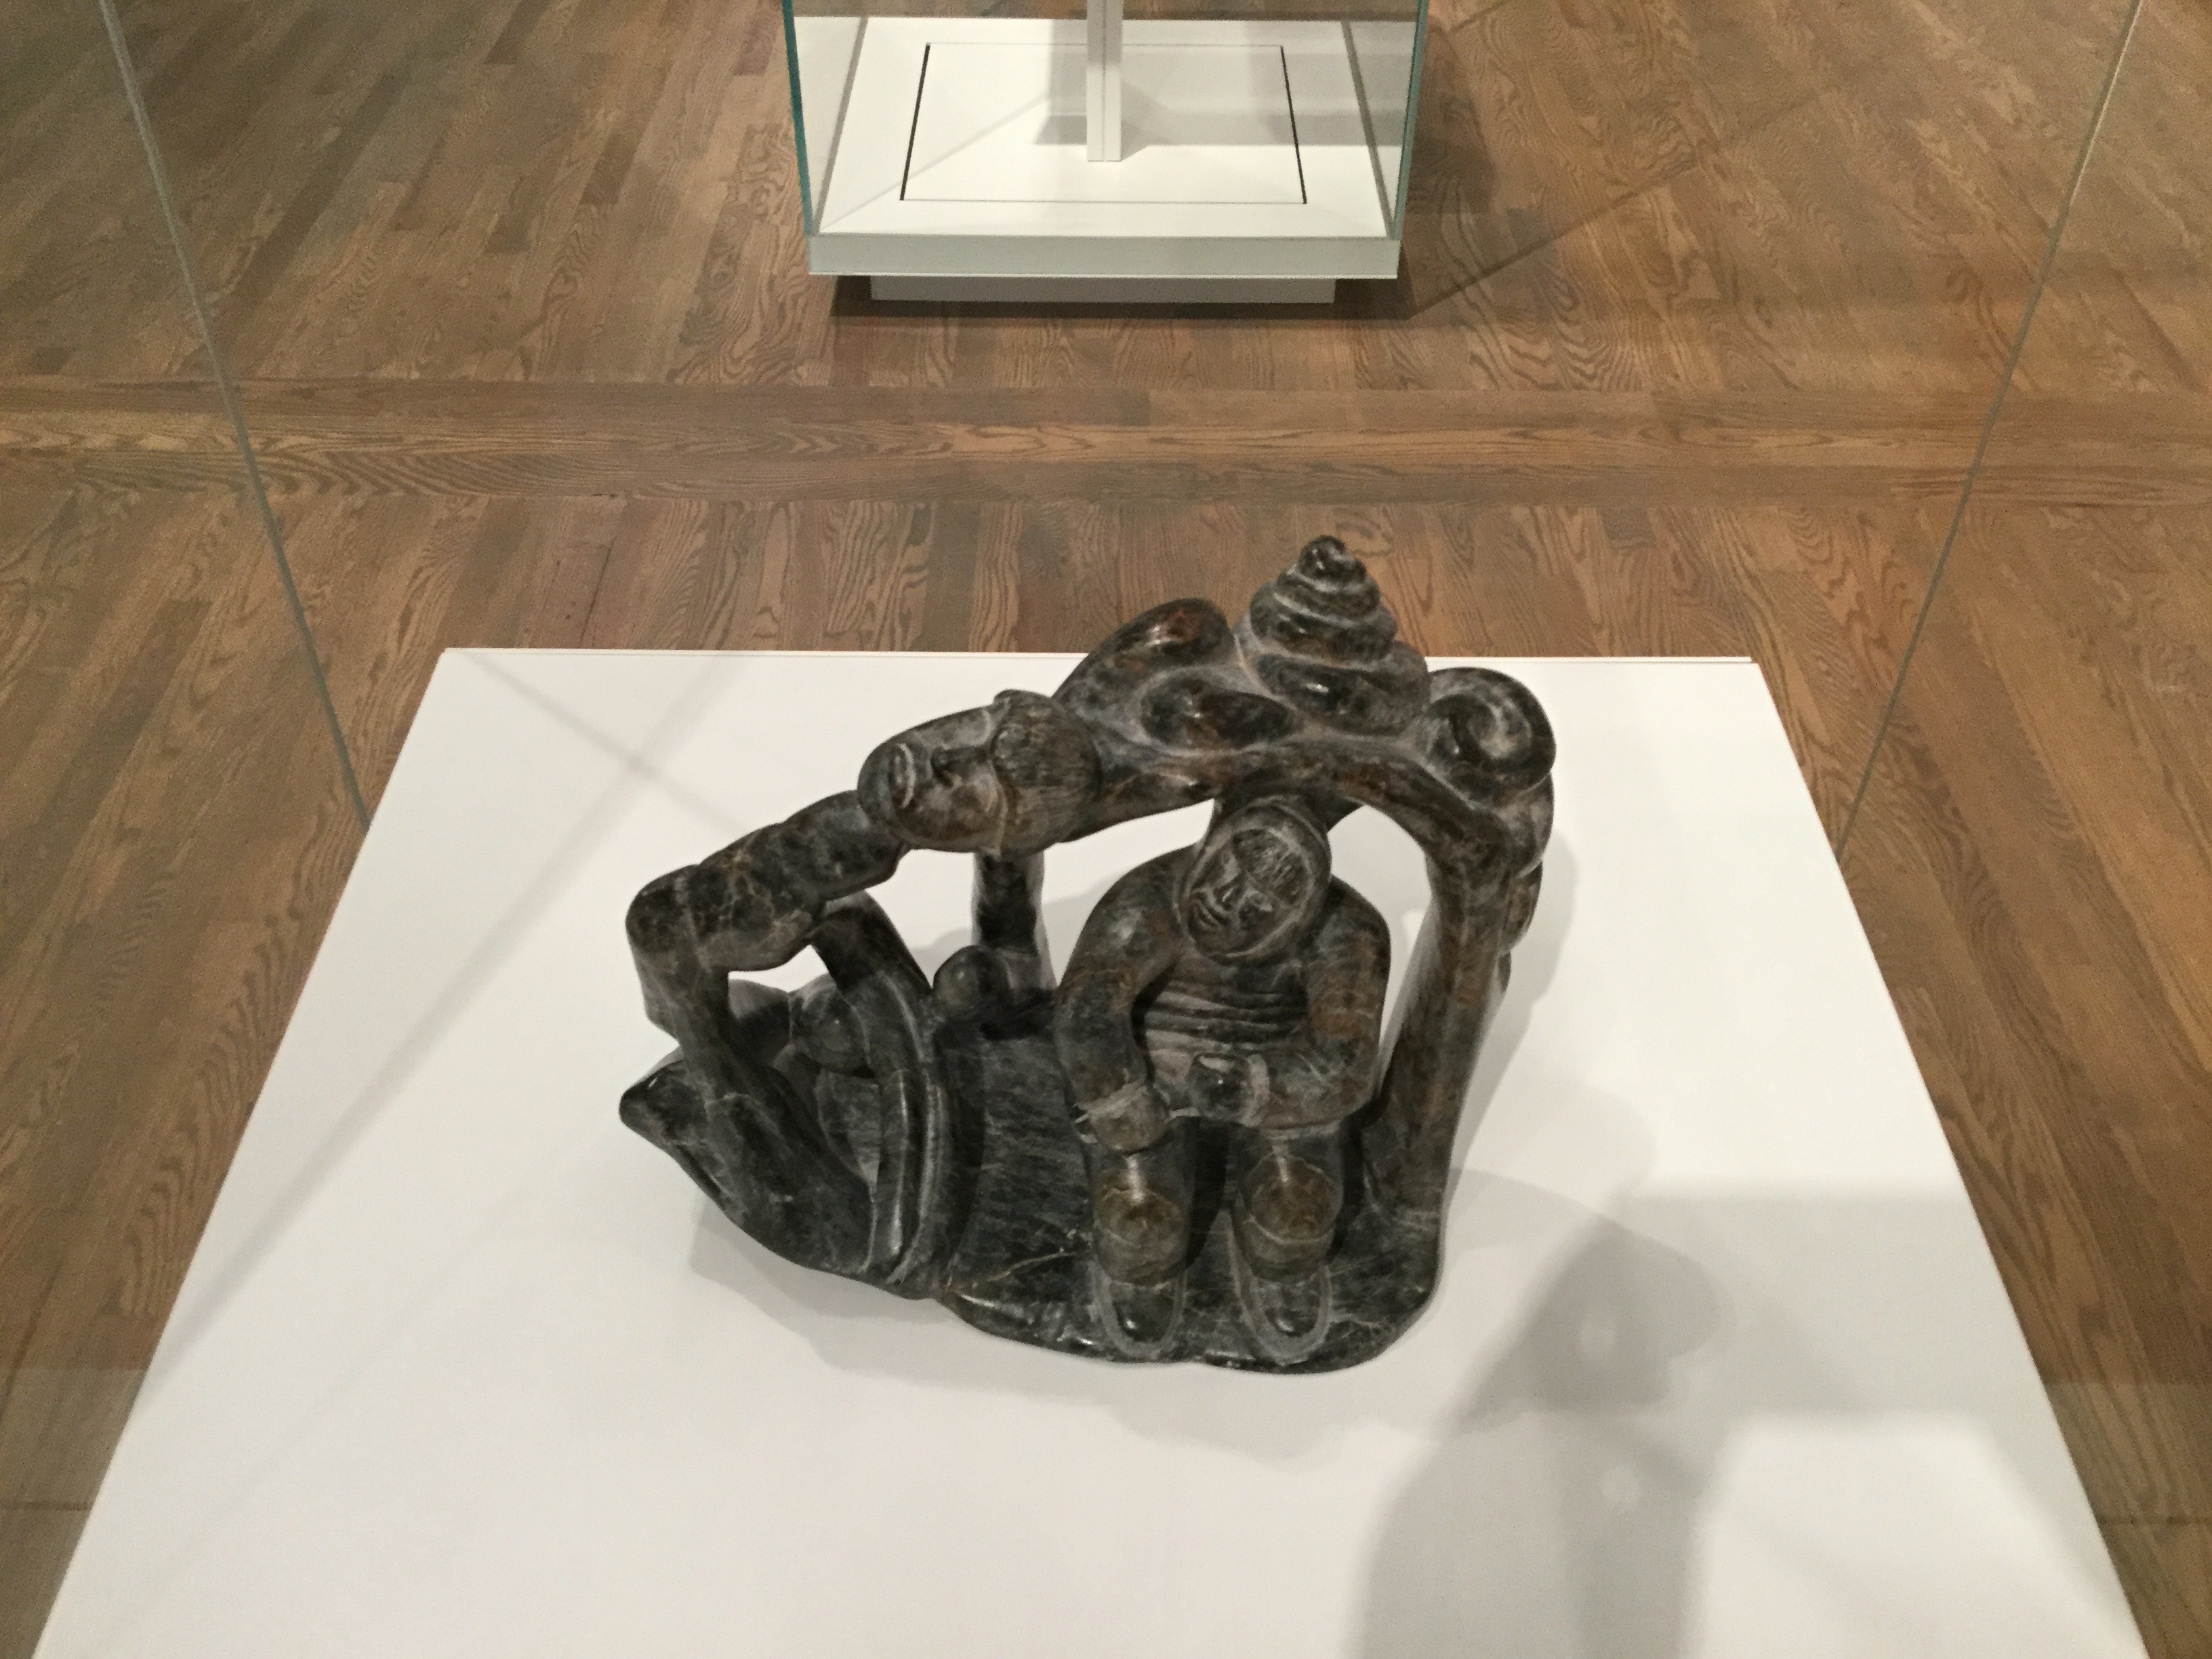
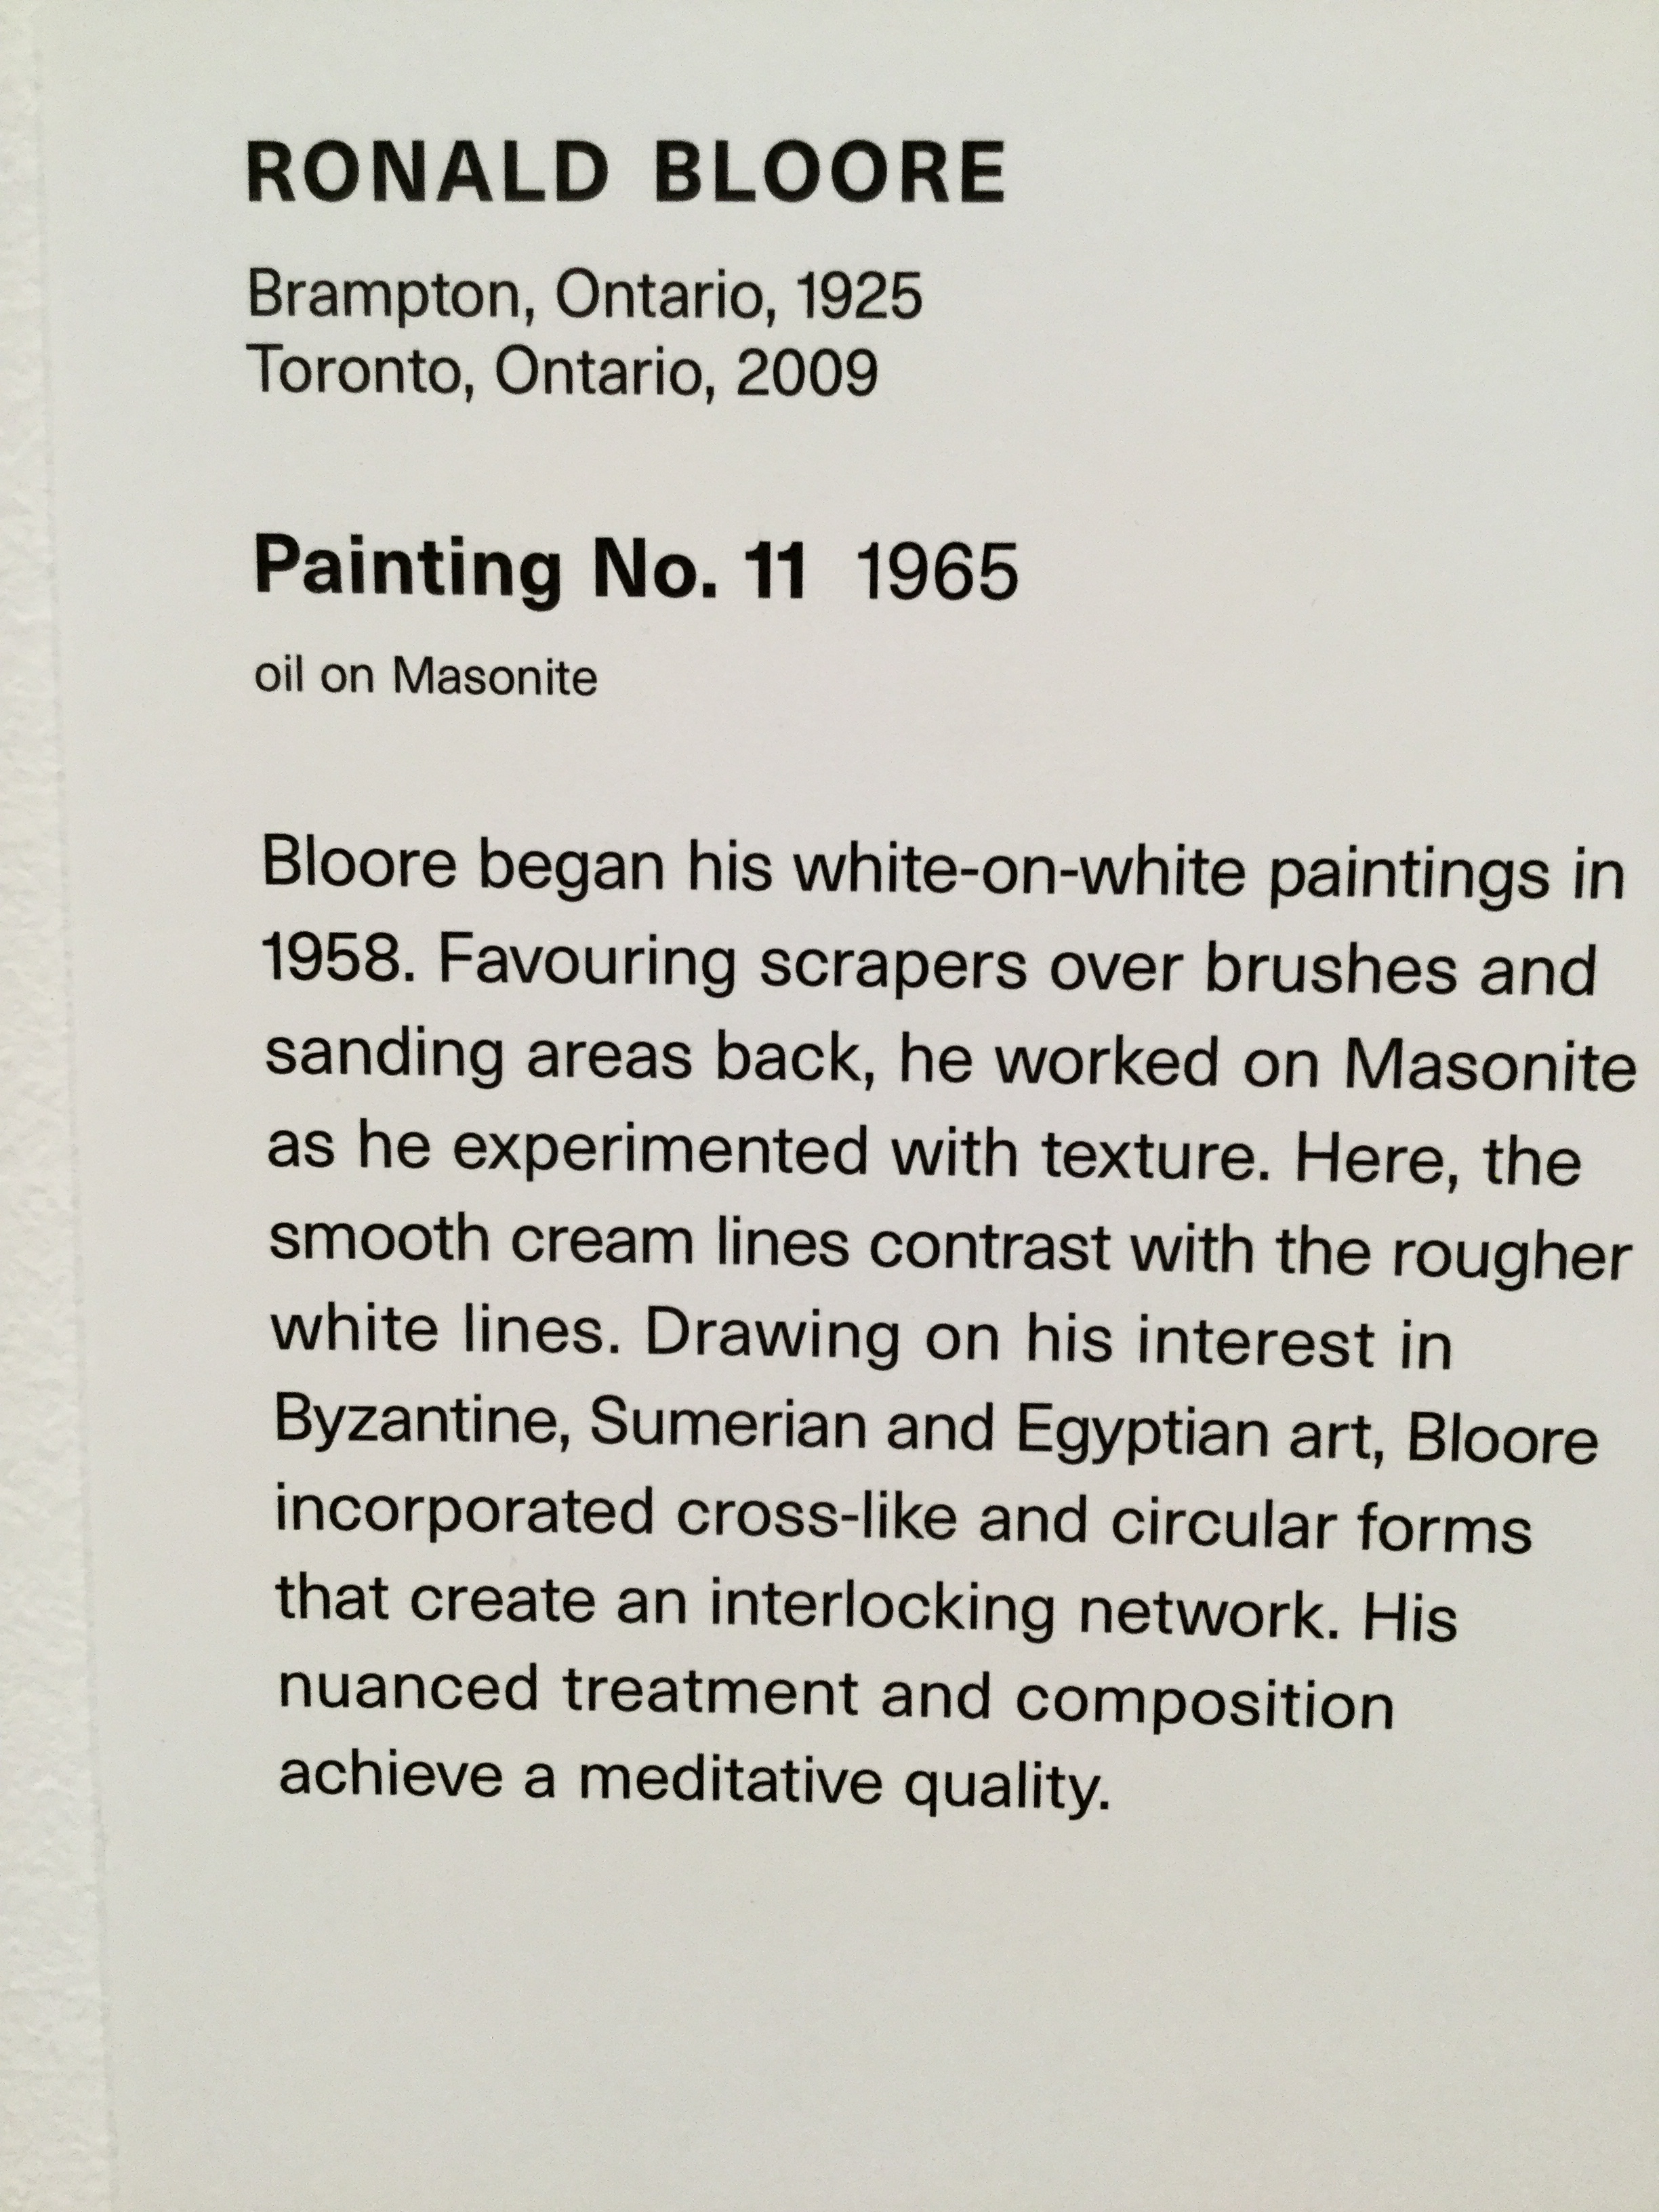
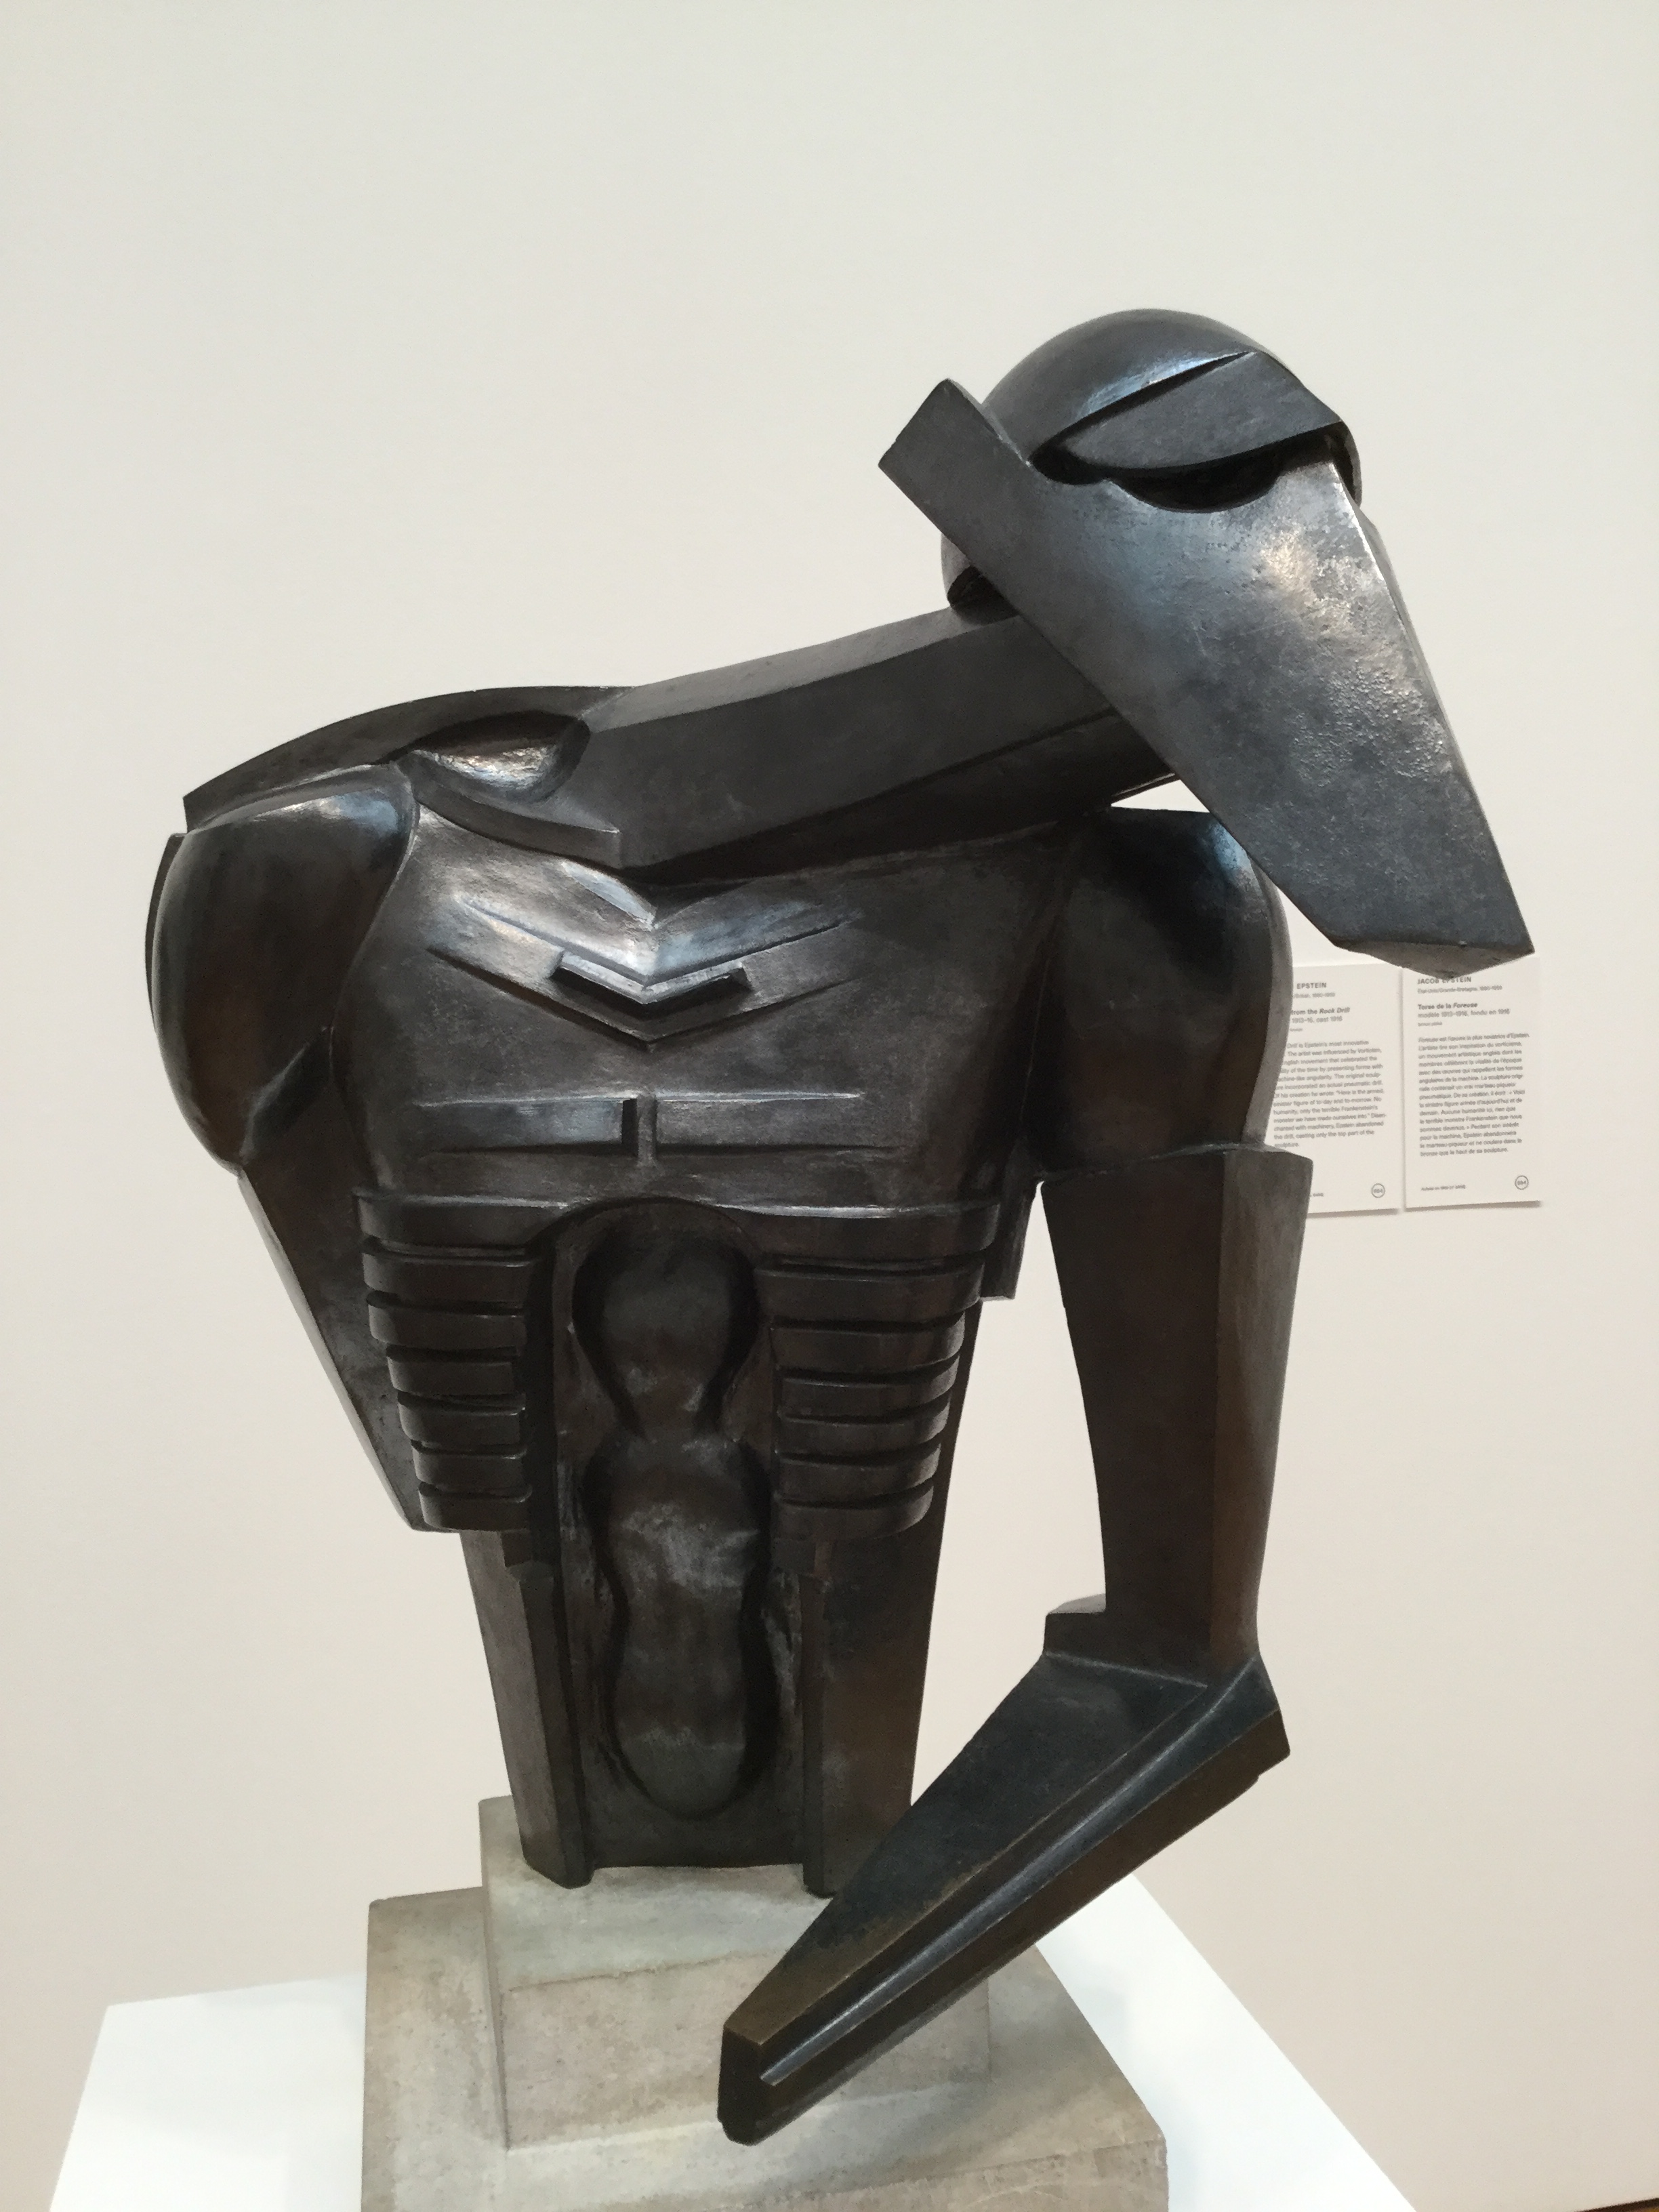
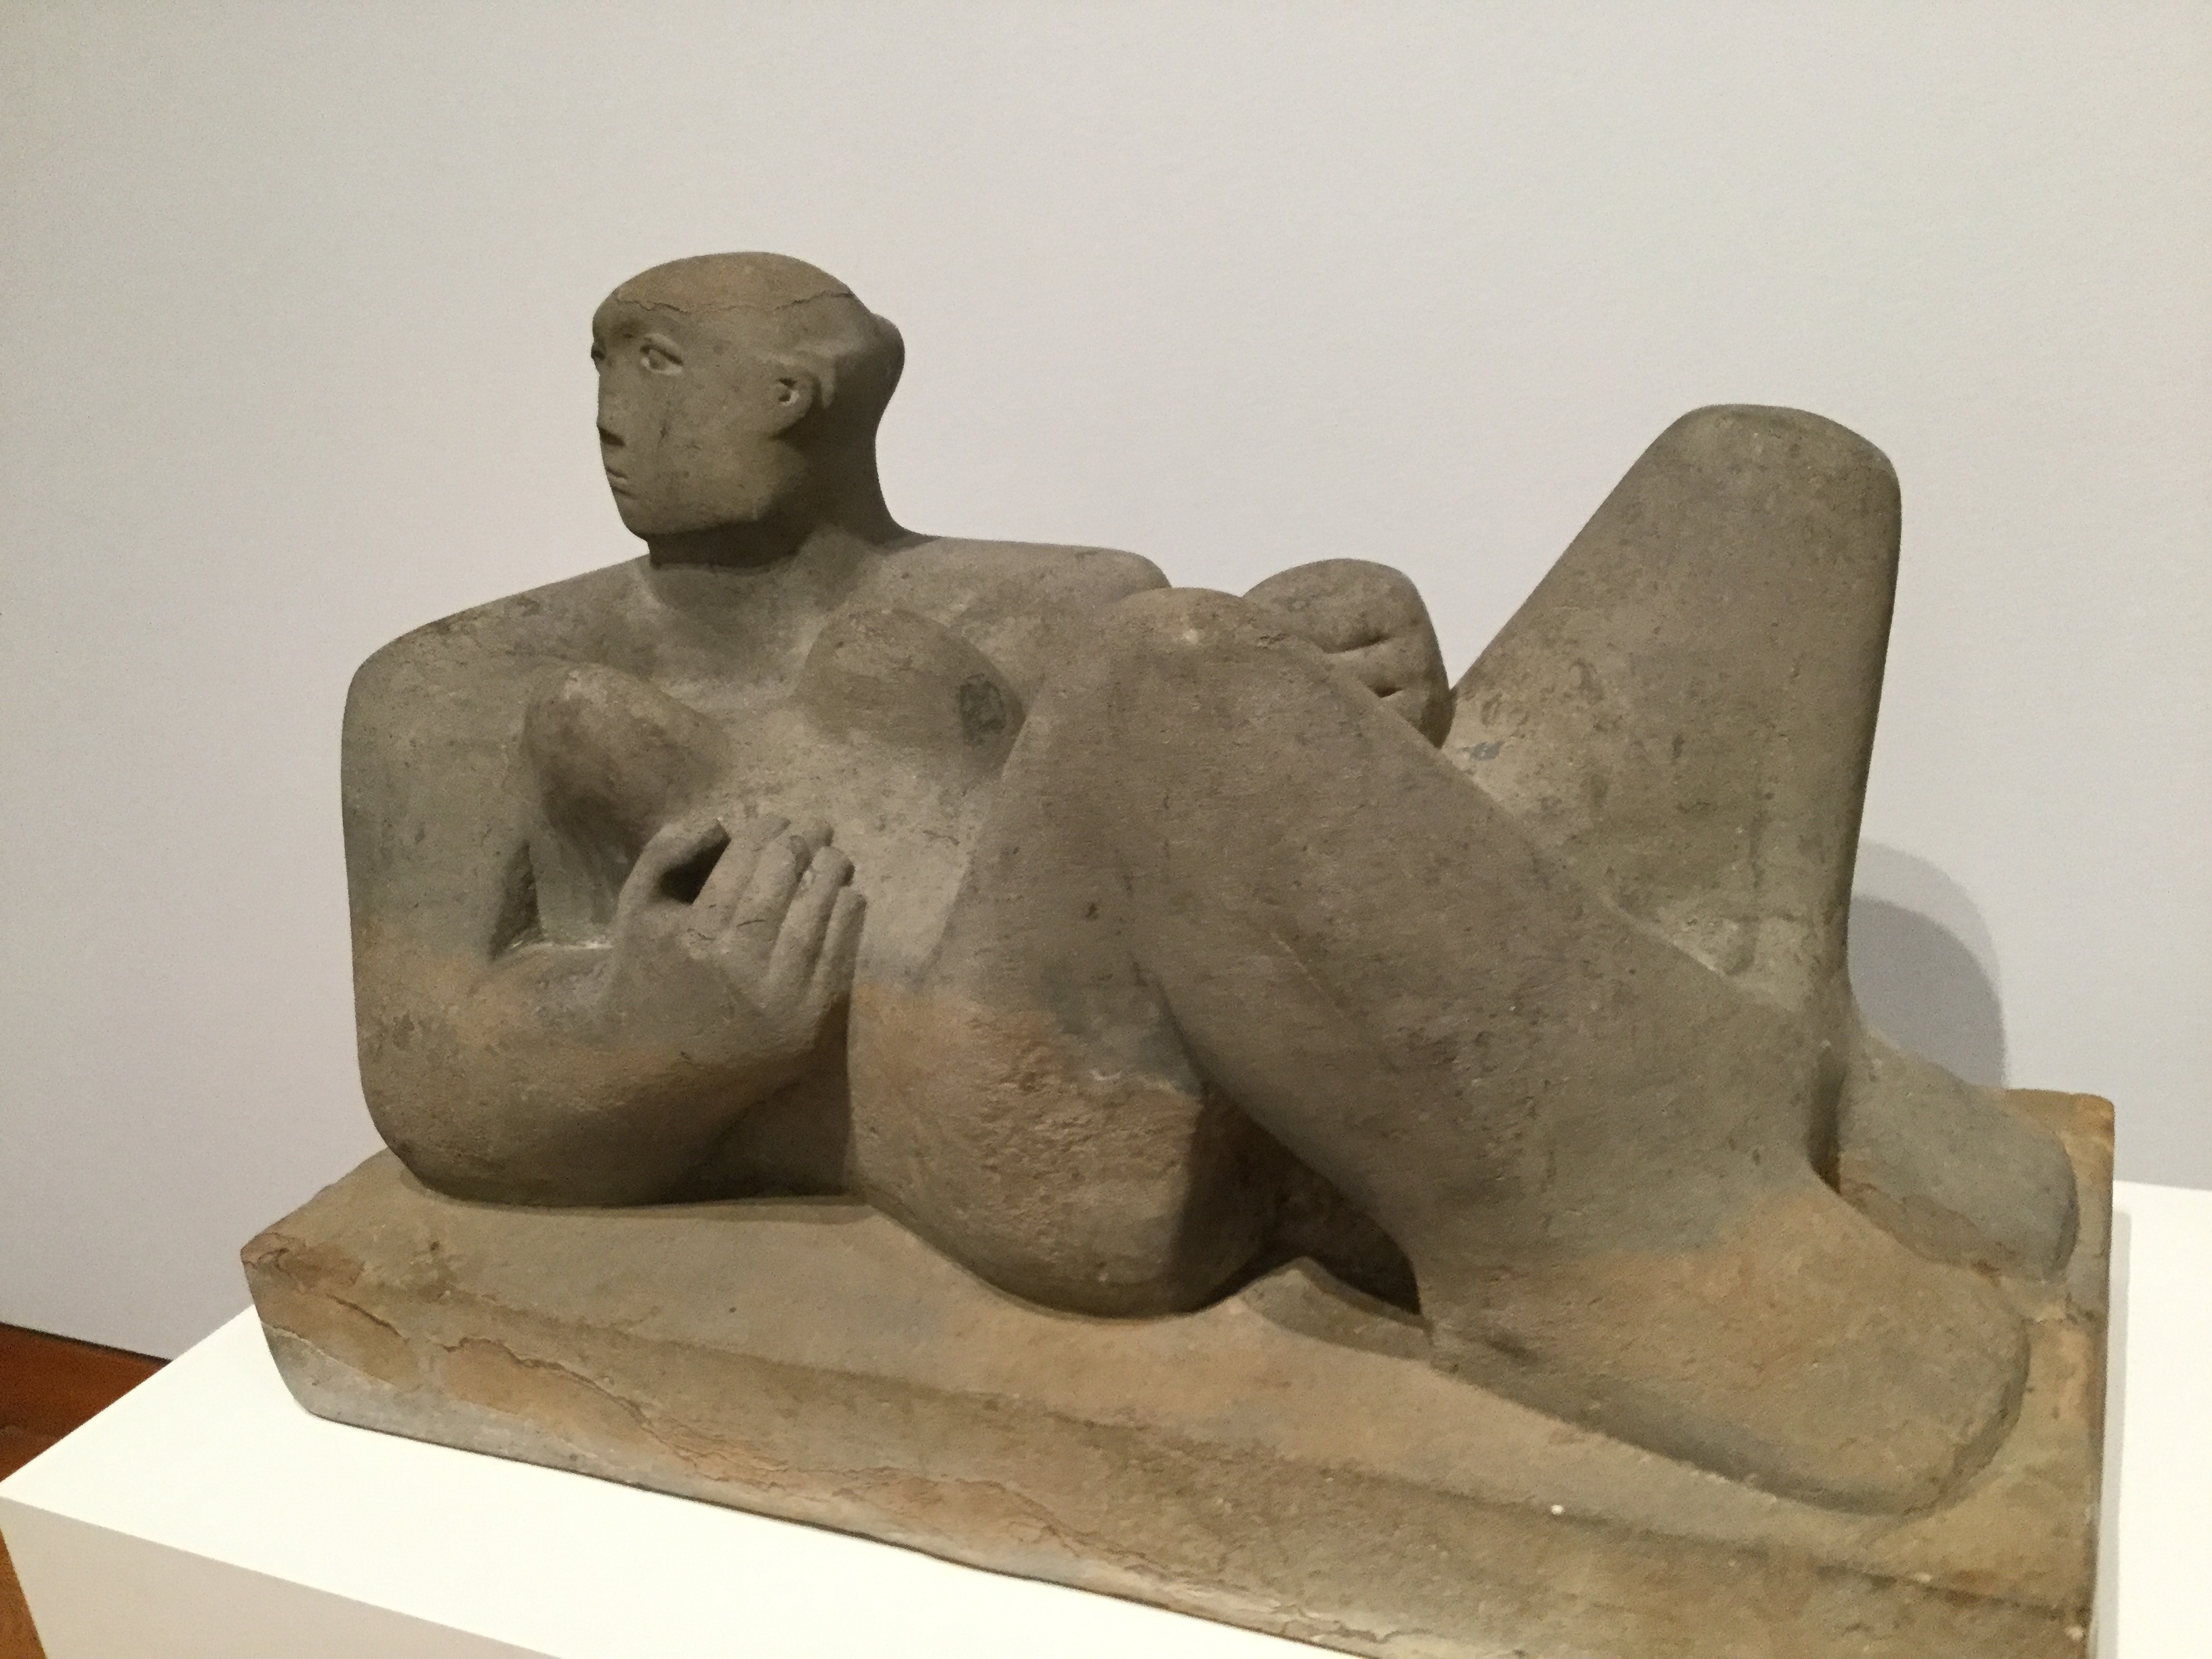
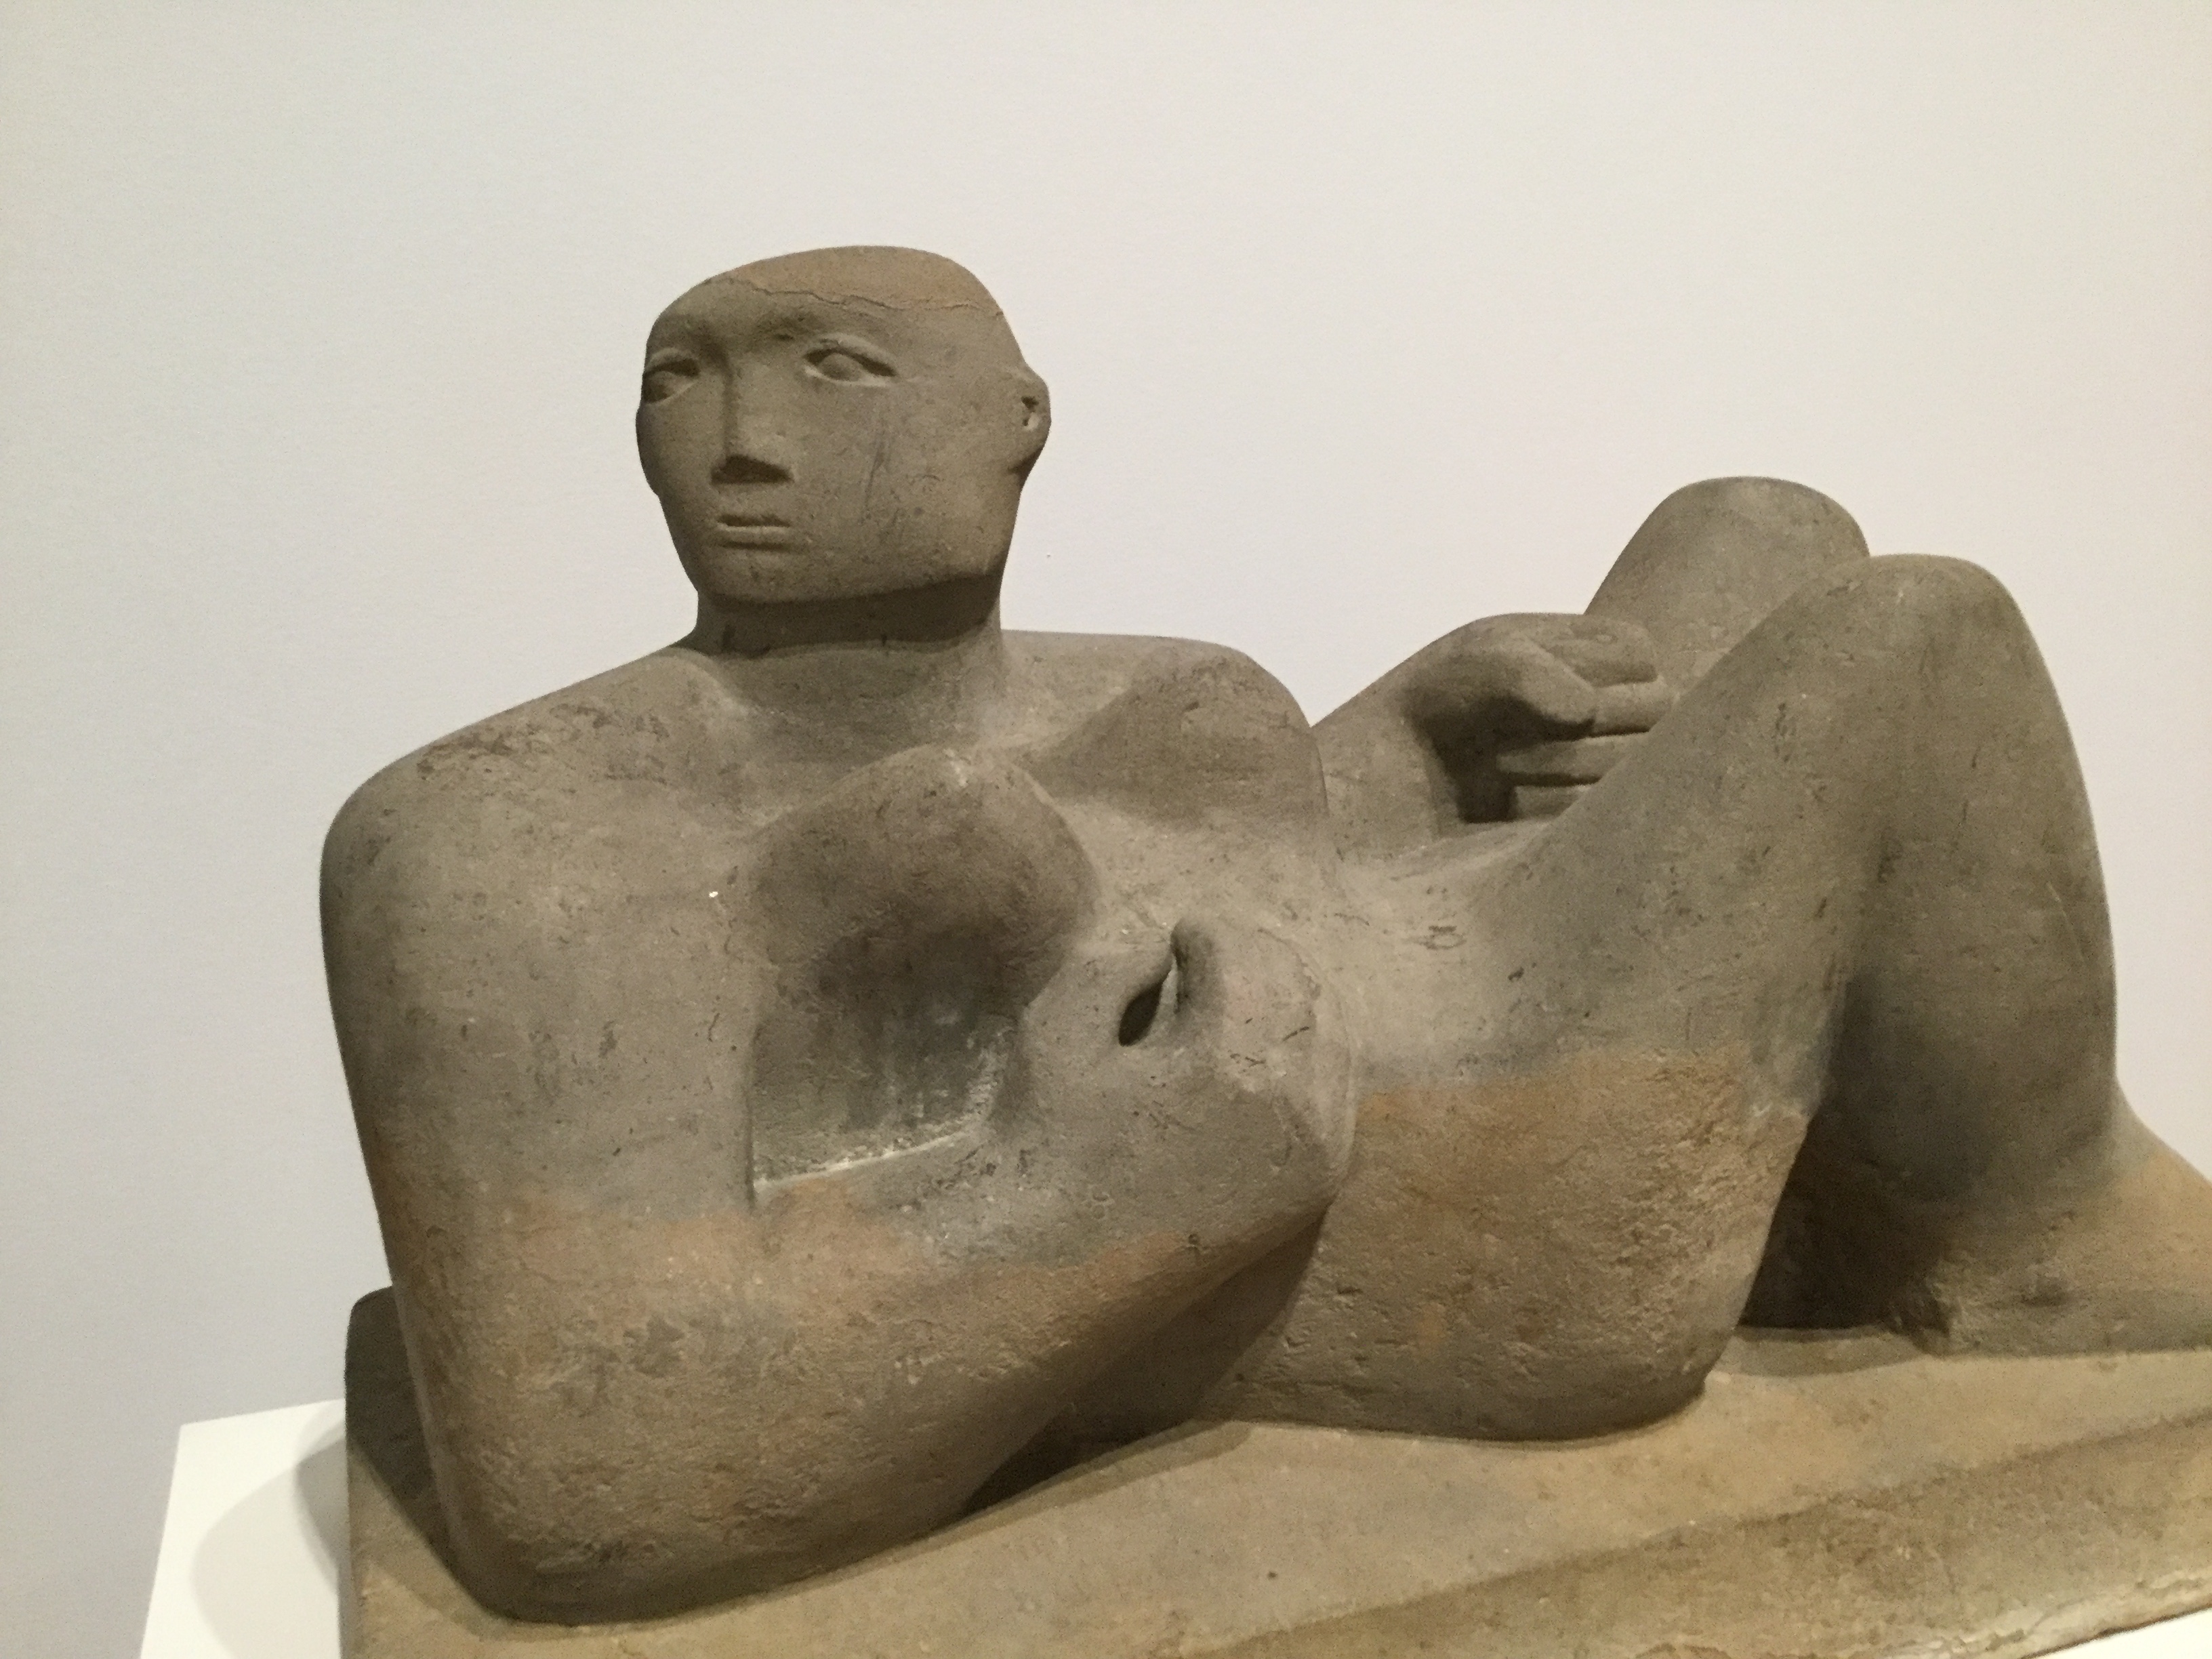
Head #3 Date: 1973 Artist: Willem de Kooning
Figure 1. Williem de Kooning, “Head # 3” (1973)
I did not research Willem de Kooning in depth until I had finished the sculpting laboratory. I did not regret this decision. Head # 3 of (see fig. 1.) is a new revelation. Now that I know how clay feels and I have a little knowledge of how clay behaves, I can appreciate this fantastic work in a much more powerful way. I have seen this de Kooning work in my brief initial research. It impressed me since the beginning. However, it feels different now that I see it again. I can see how easy it is to reshape the physicality of clay, I really like it.
p p p
After Williem de Kooning. That sanguine colour looks a little weird here, eh?
.po
o
Every one of us believes that the centre of the universe is oneself but there is a black hole there, at the centre, in every one of us.
We live in loops
We’re capable of anything, no surprises here unless we believe everything spin around our own selves.
Spinning
We know this darkness, and we keep going towards it, in some kind of perpetual motion, like the universe itself.
g
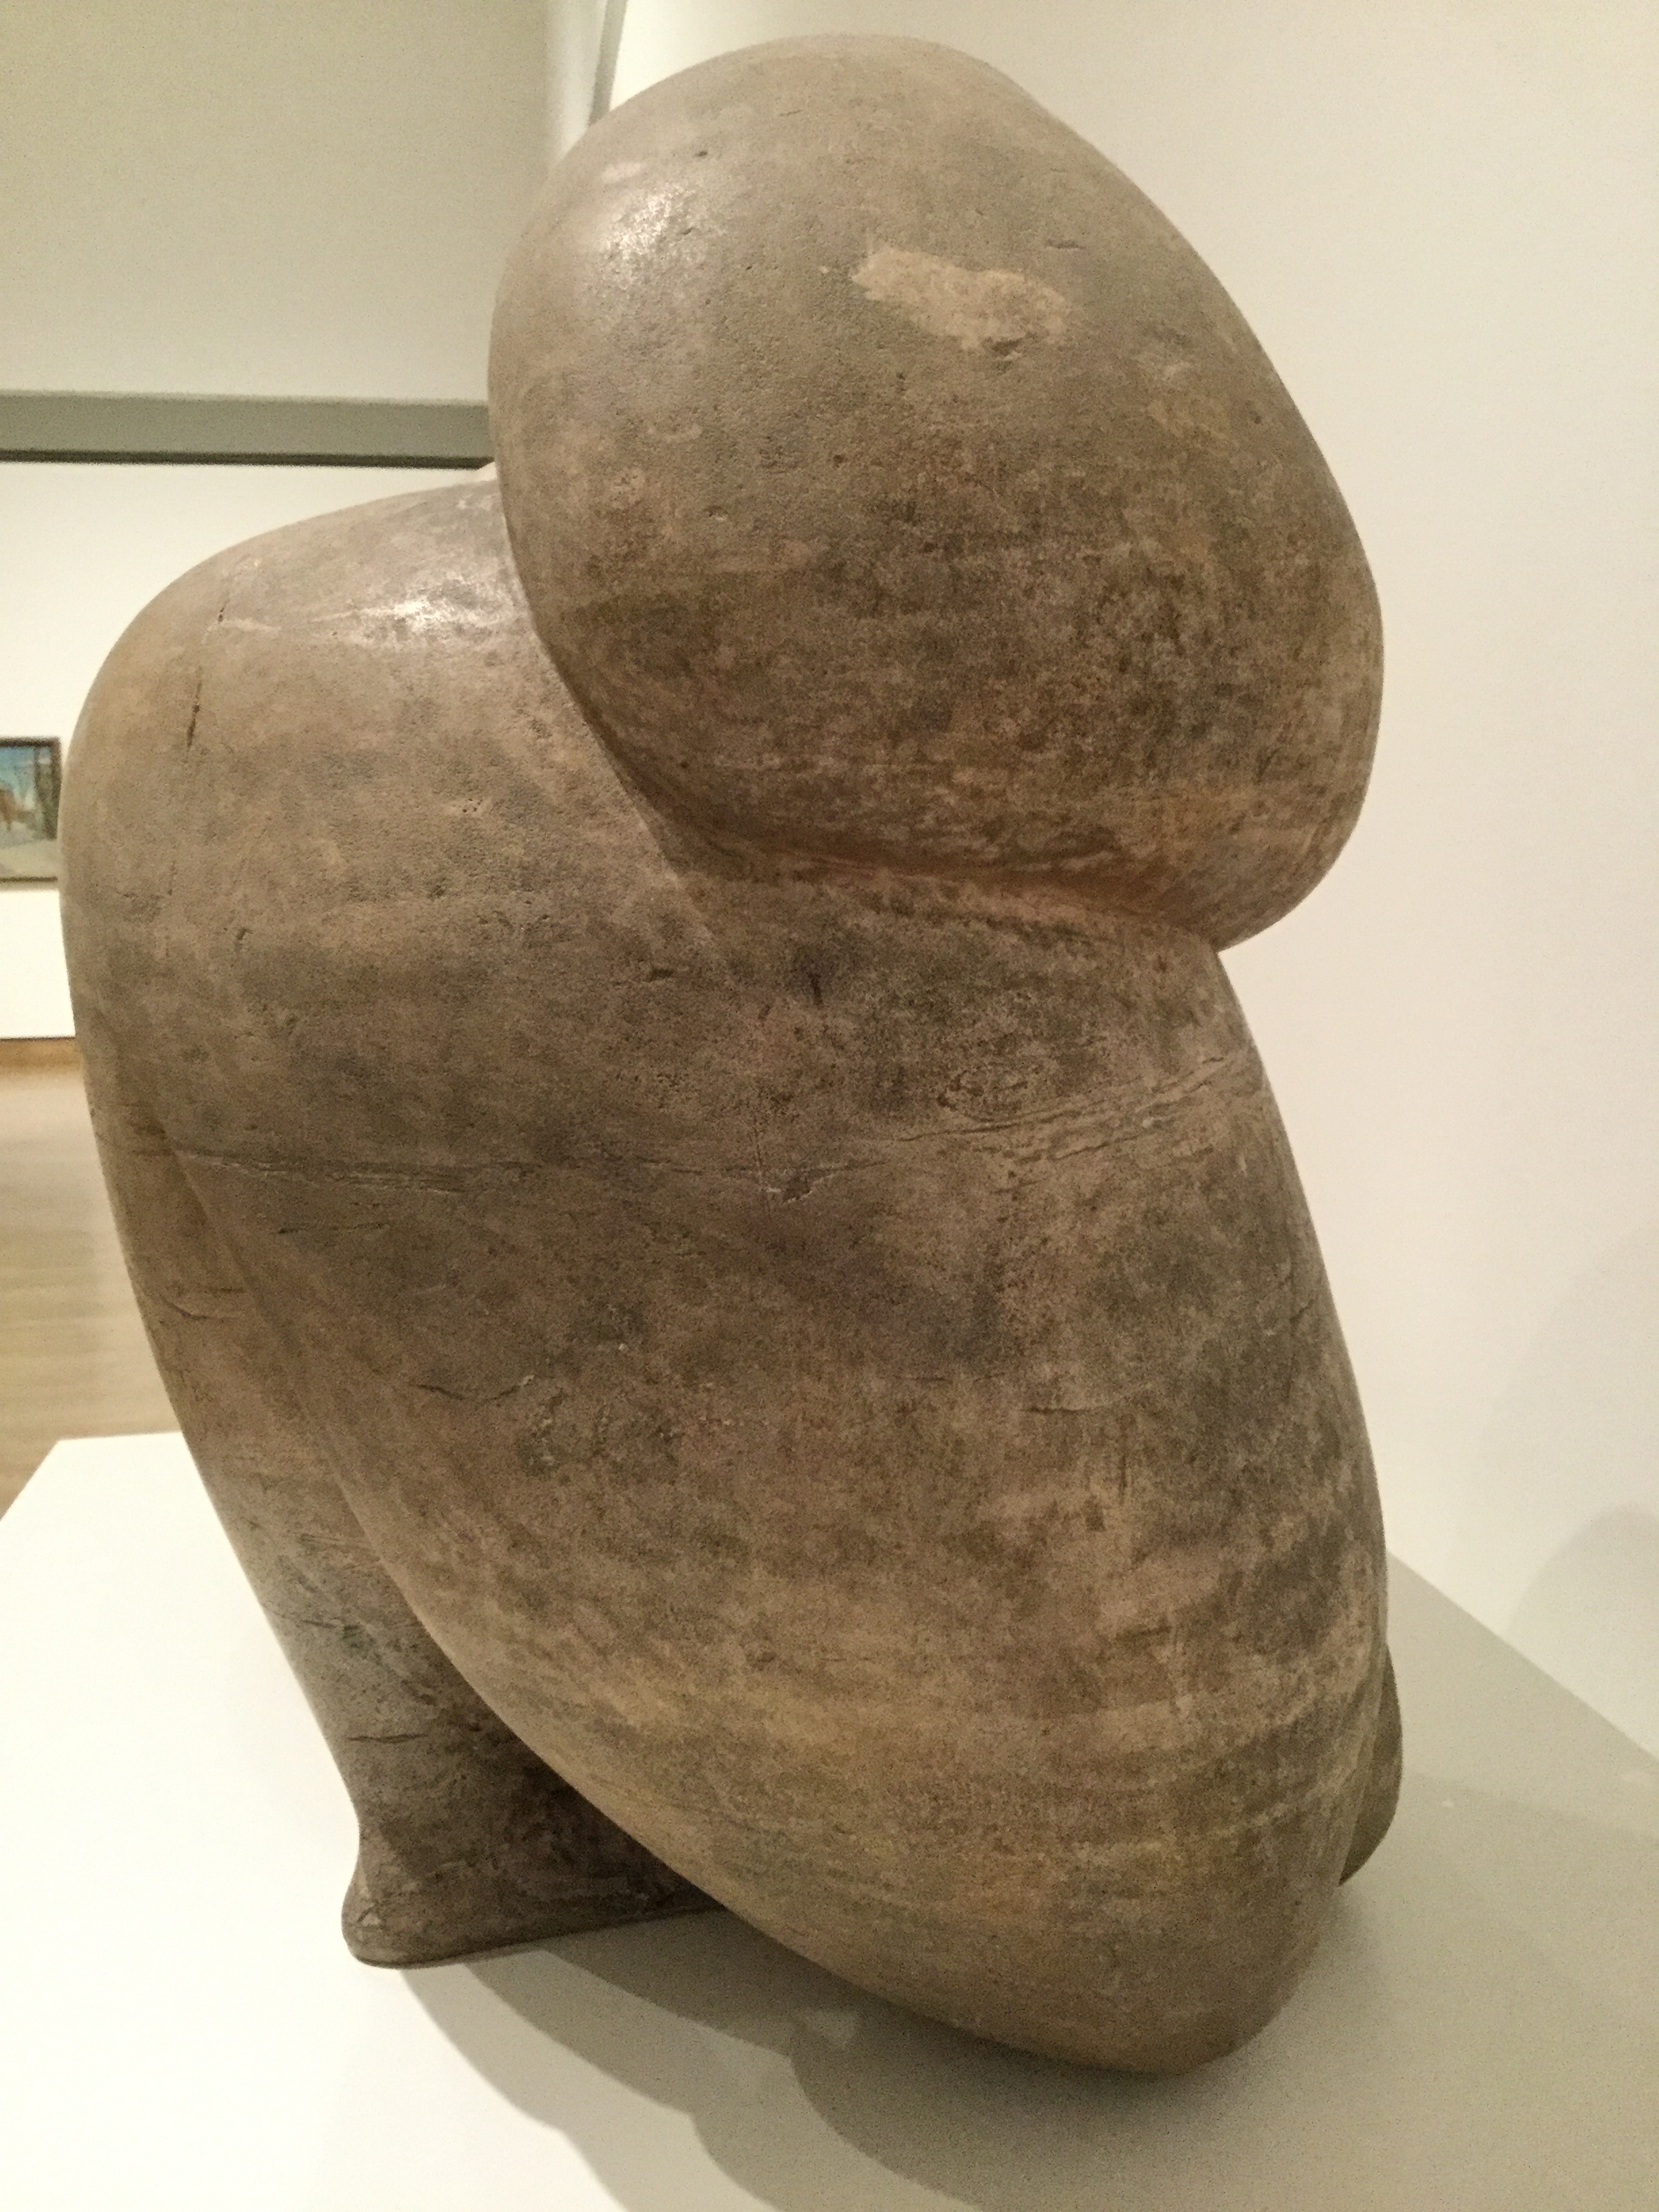
Harbinger Bird III Date: 1960 Artist: Elisabeth Frink
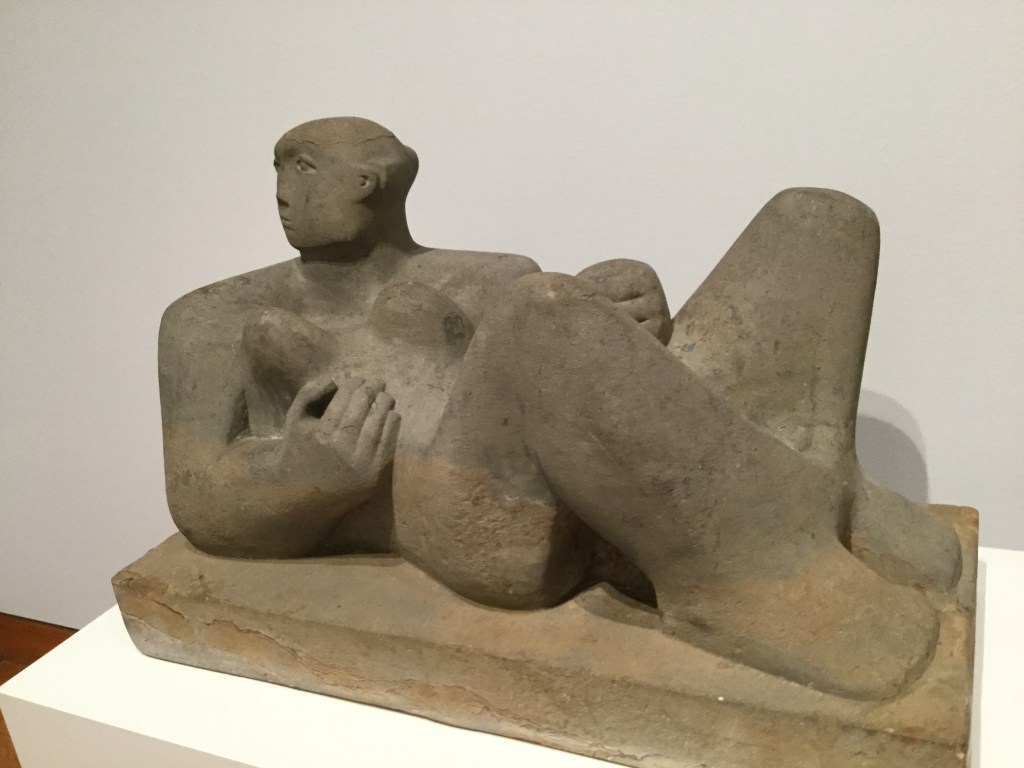
Standing Figure (Knife Edge) Date: 1961 Artist: Henry Moore.
t
This piece is located at the end of a long corridor, the first time I saw it I was located in the opposite end. It looks small at distance, I recognize it right away. Museum of Fine Arts in Ottawa, Ontario, Canada.
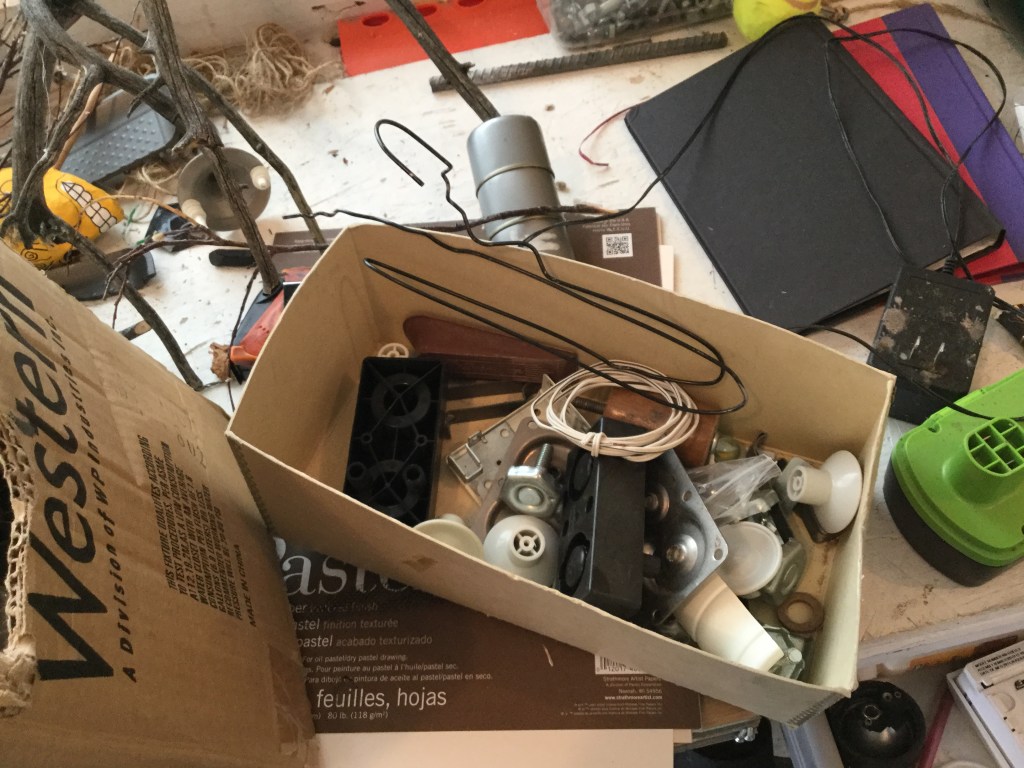
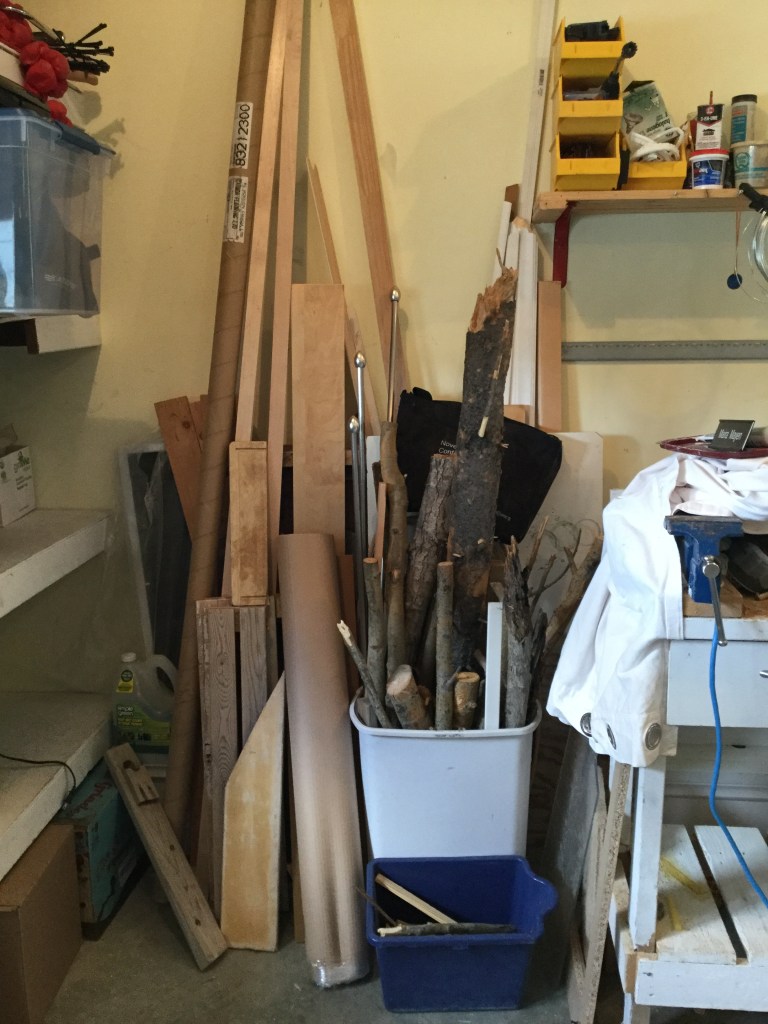
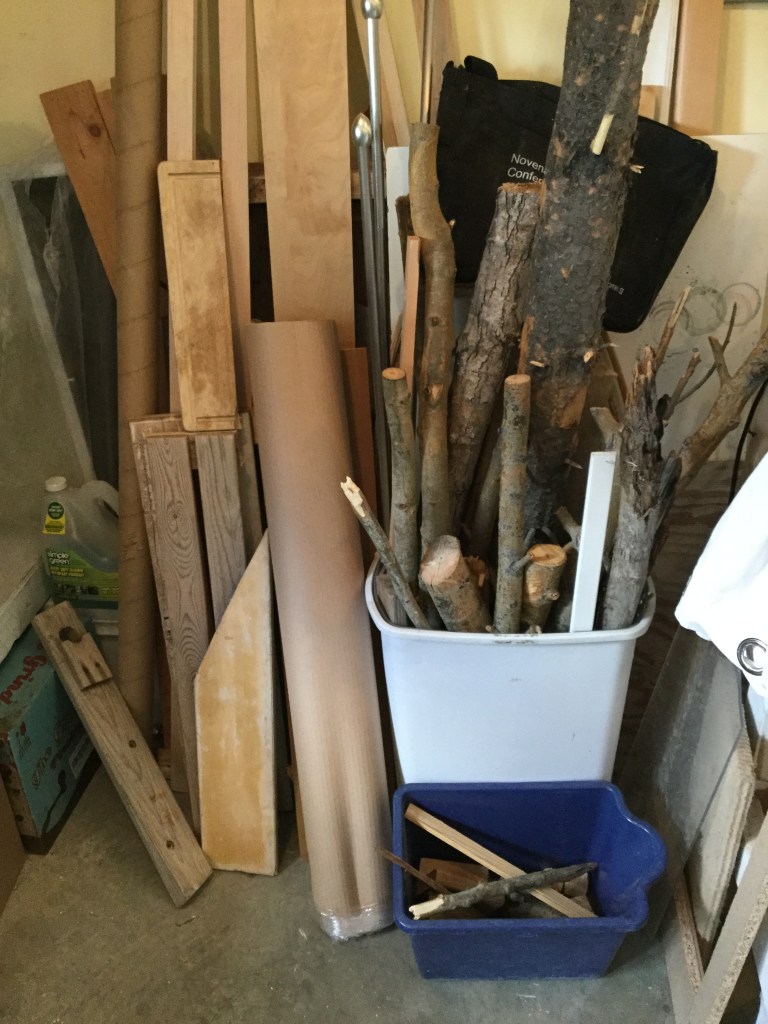
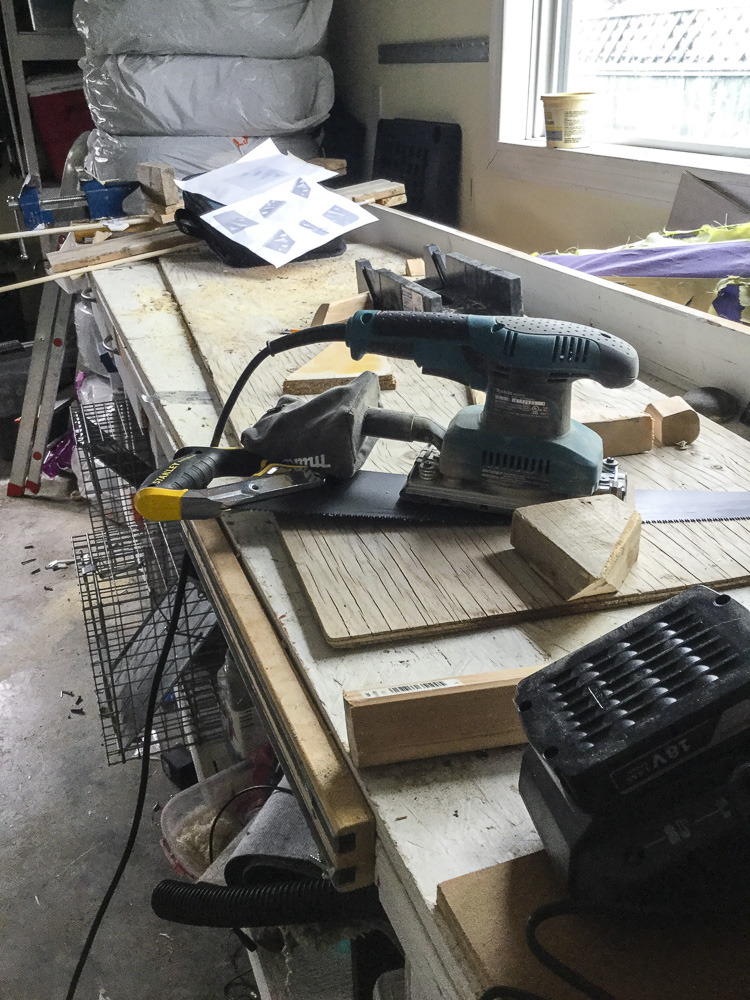
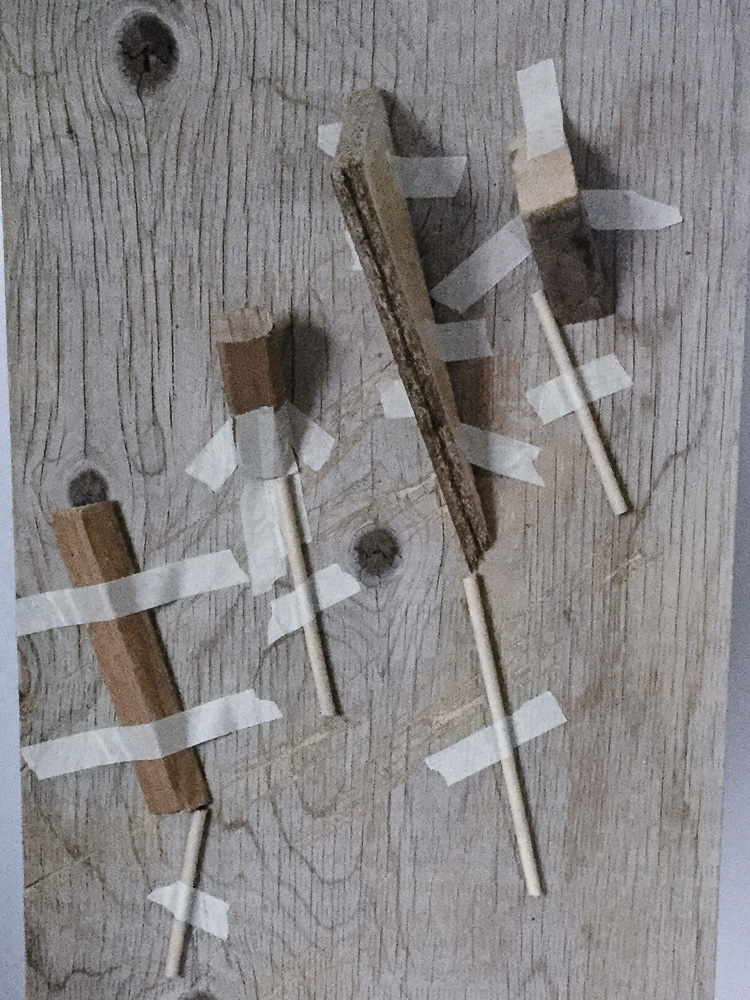
For this new part of the course, I did the same as the last time: I collected all the materials from my own home: pieces of wood, discarded objects from towels hangers, scrap metal, old magazines, tree branches from my yard. I have to admit that I was tempted at the beginning to go to the hardware store to see what kind of things I could find there especially to see what type of wood they sell. I’m quite happy I did not go to the store because I had plenty of materials at home.
There is a movement in photography that says that there is no need to create any more images because the world is full of them. I think this concept applies quite well to the sculptures I created for this project: there is no need for new materials if you want to create a sculpture, the world is full of discarded objects to work with.
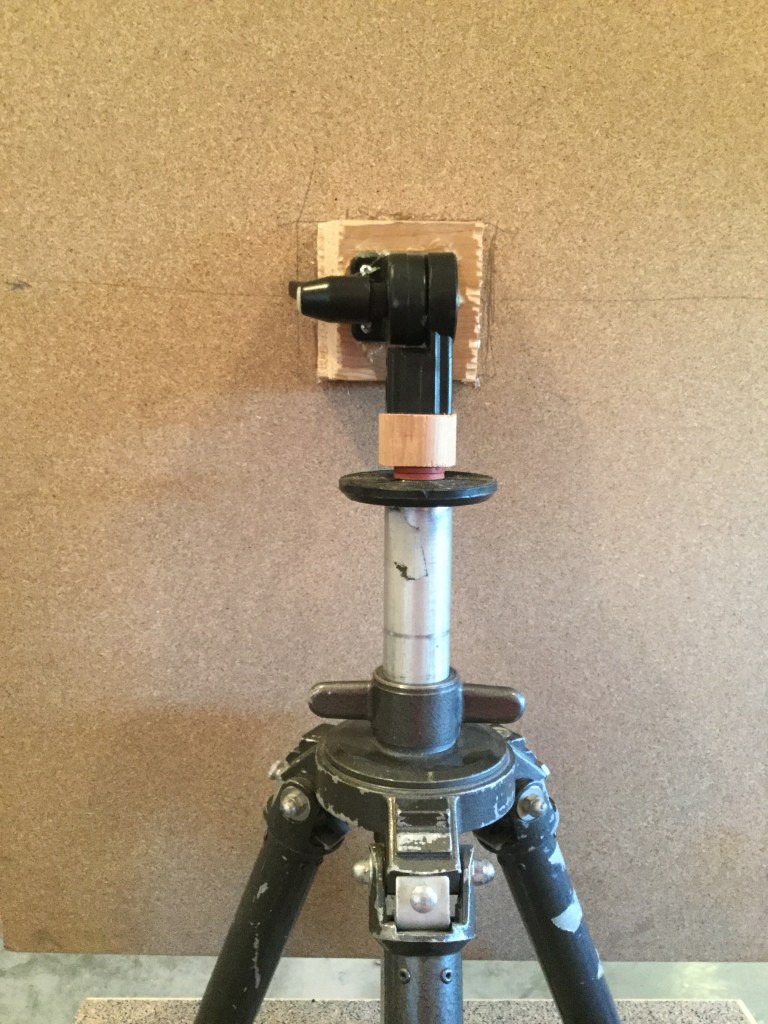
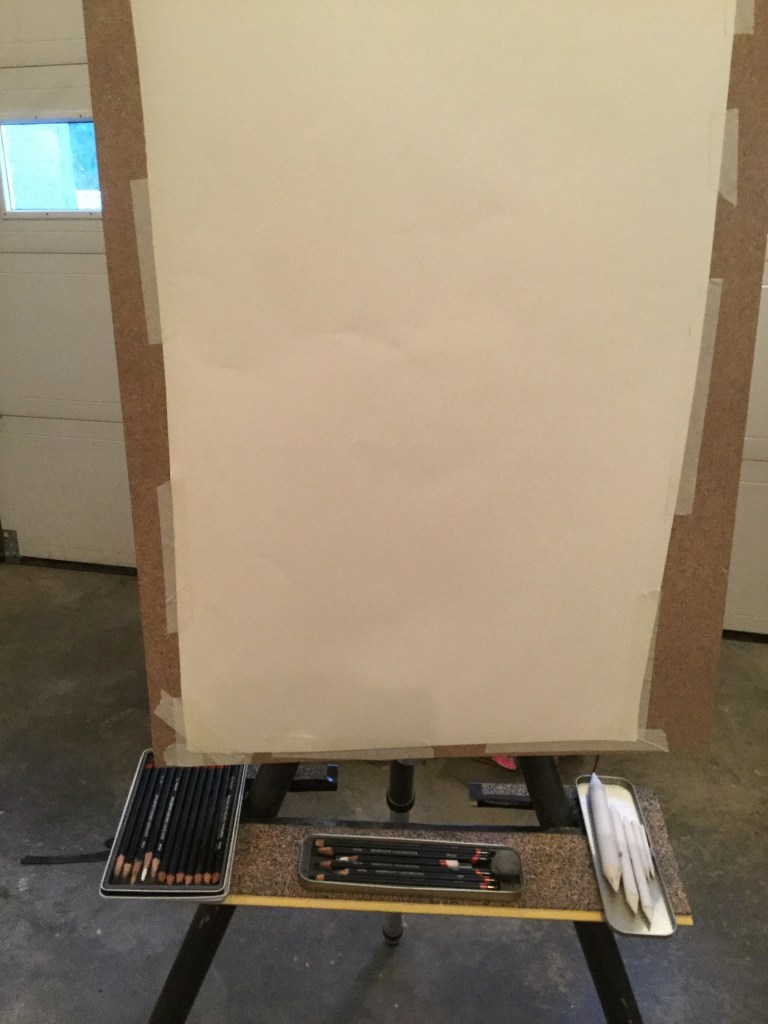
Easel for the large Drawings
One task I did just after collecting the materials for my sculptures and before starting working on them was to construct a large easel for Project Four. Also, Project Four requires that the drawings need to be created at the same time as the sculptural process.
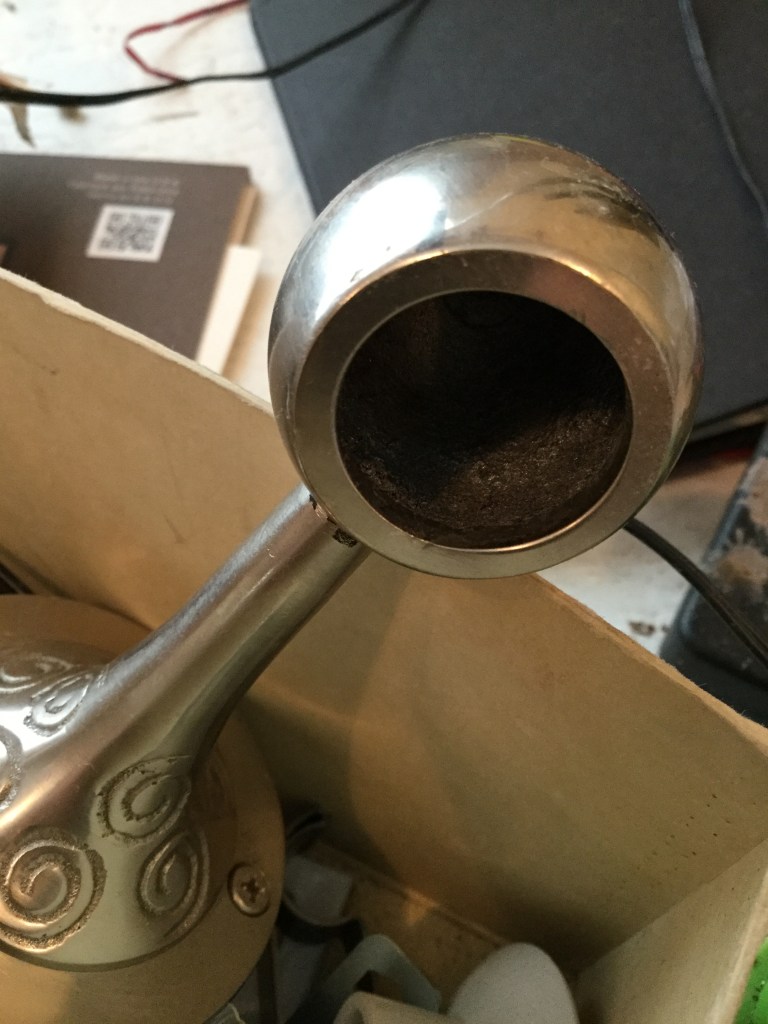
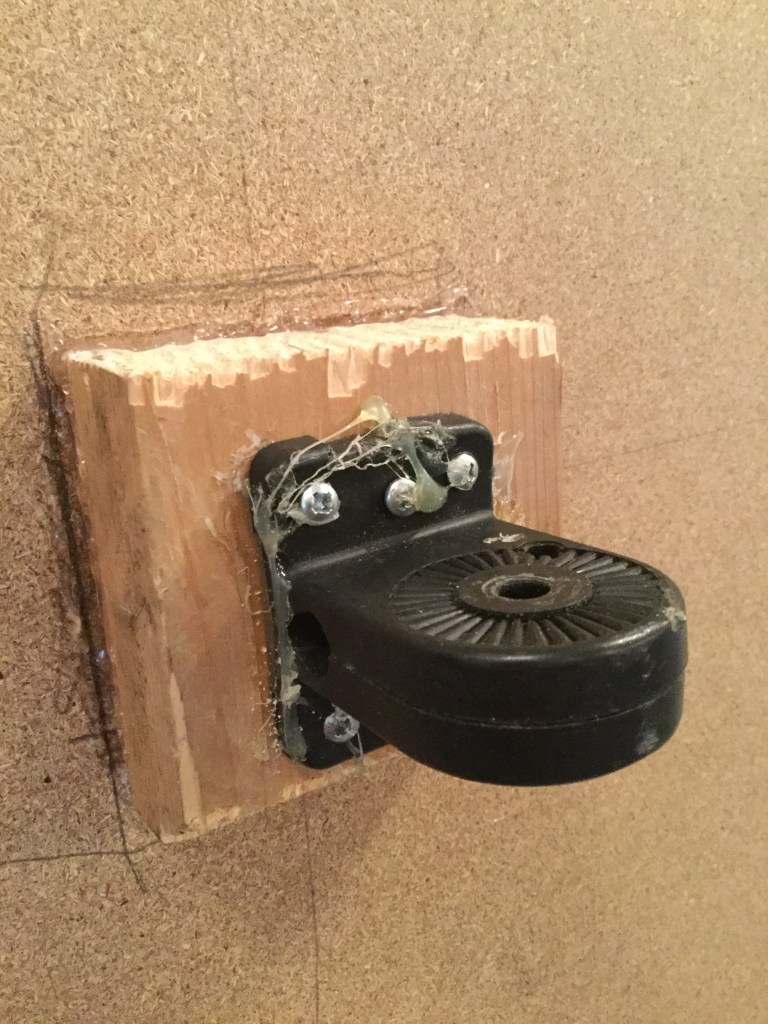
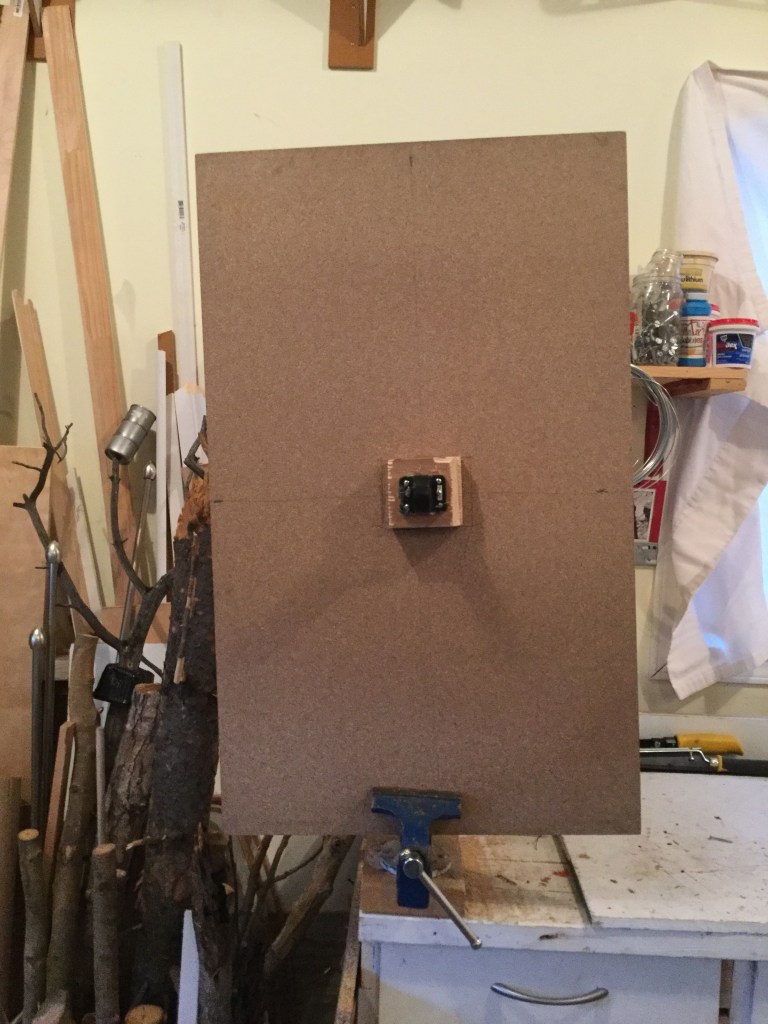
Again, the power of reusing things took place: with a sturdy tripod, a large piece of chipboard and the folding mechanism of an old studio photography light I built a big easel in less than 30 minutes. If I take into consideration the prices of a new easel, my DIY easel is fantastic!
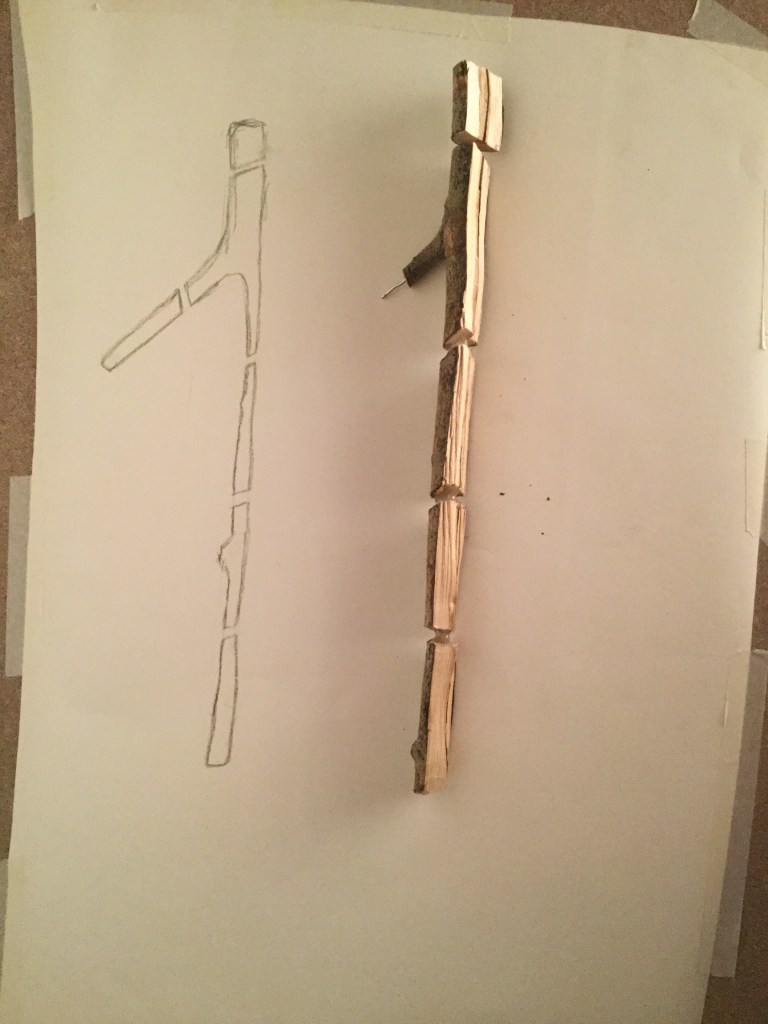
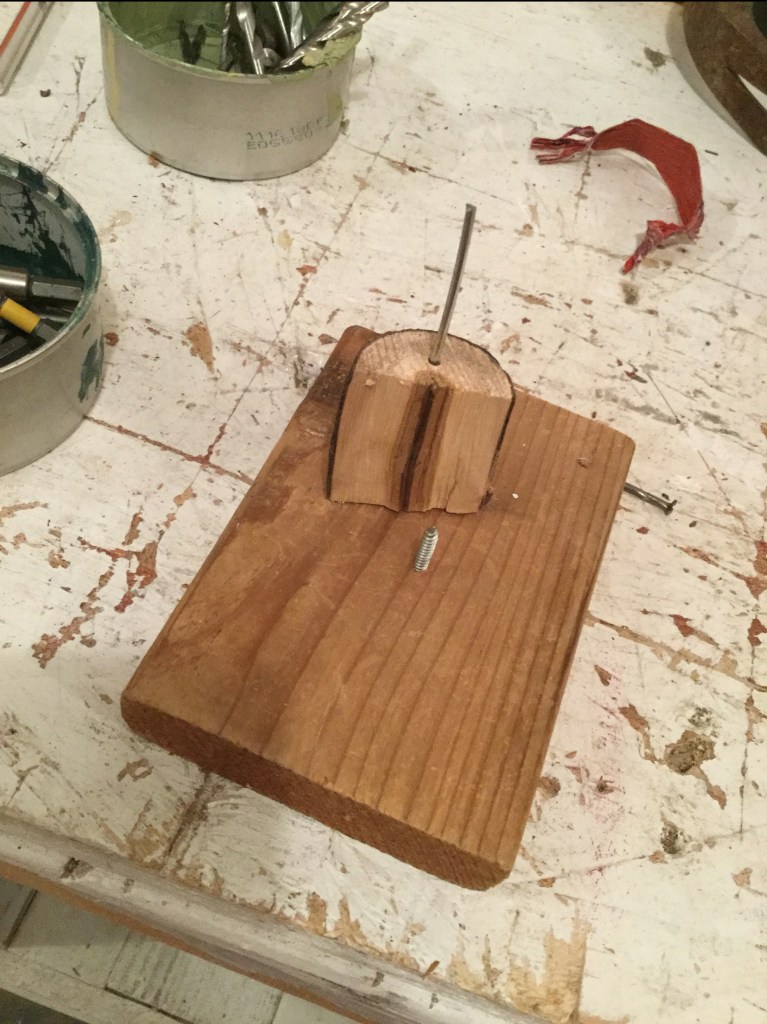
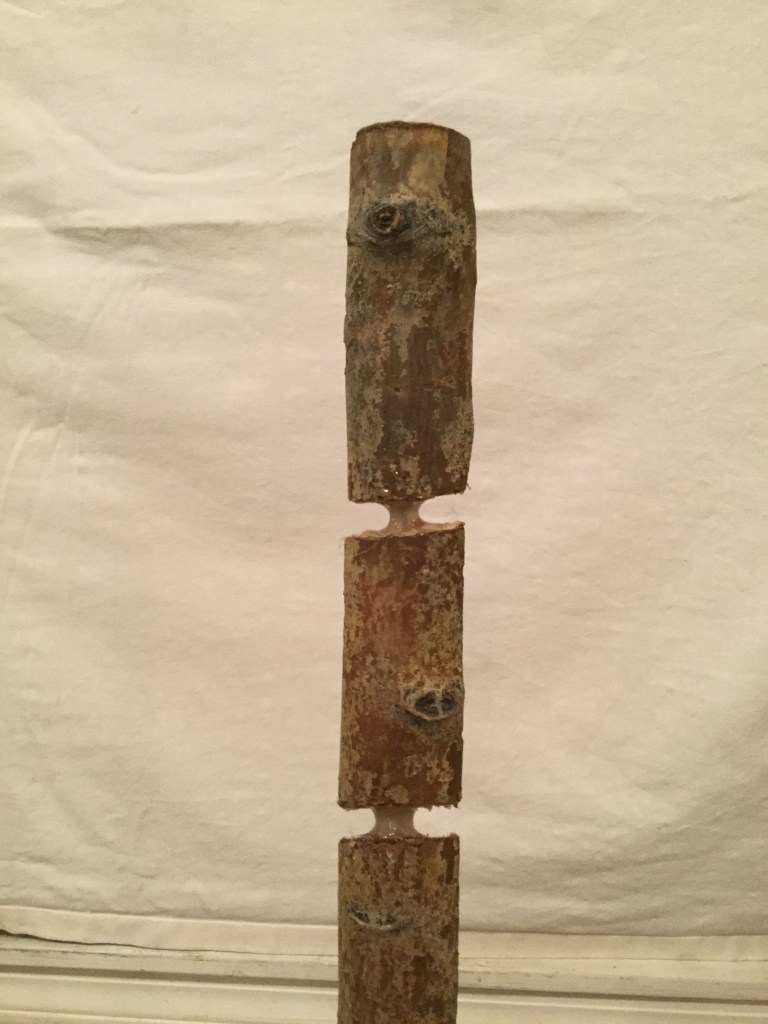
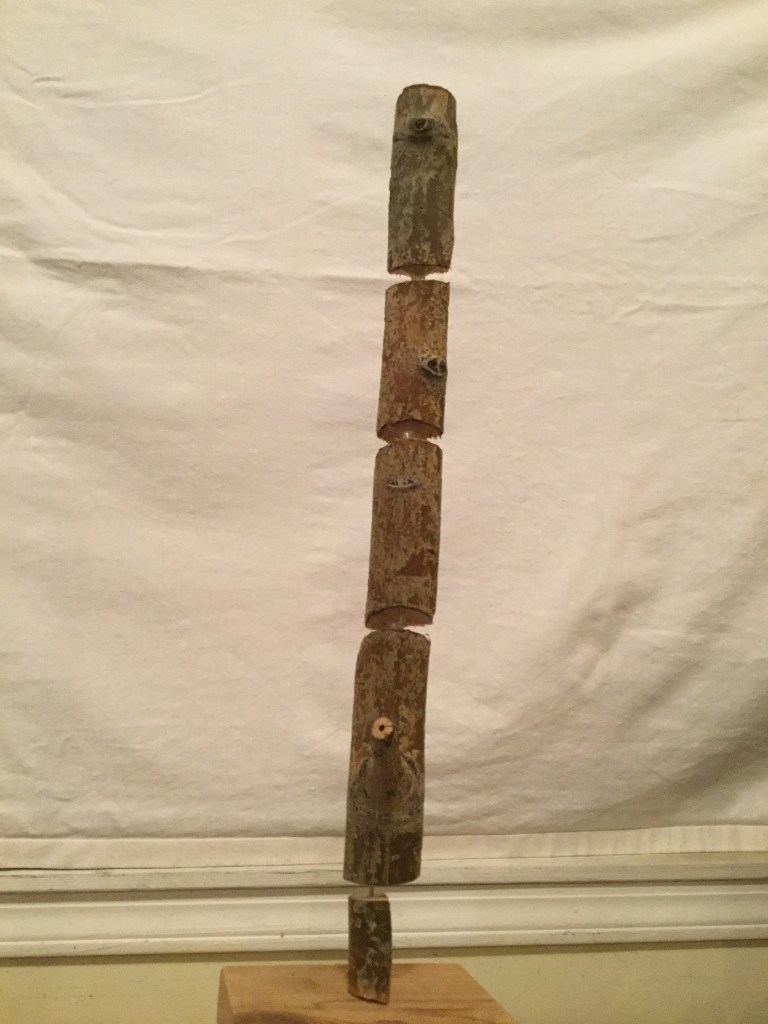
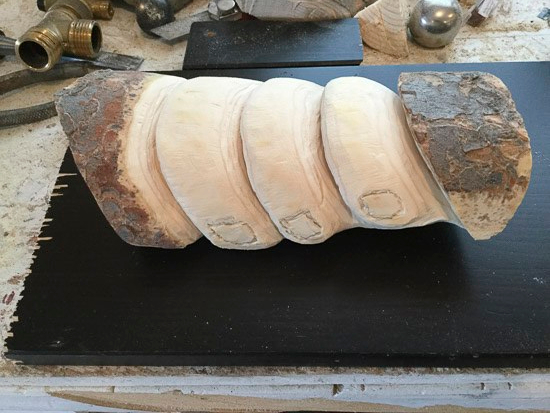
Small first sculpture
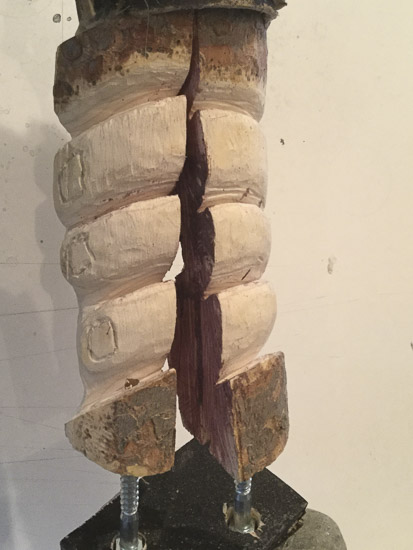
The first thing I decided when I started the construction of this first stacked sculpture was that I wanted to do something simple, to begin with, I did not wish to just stack random objects, one on top of another, and have my fist sculpture ready in less than five minutes. Yes, it was a challenge.
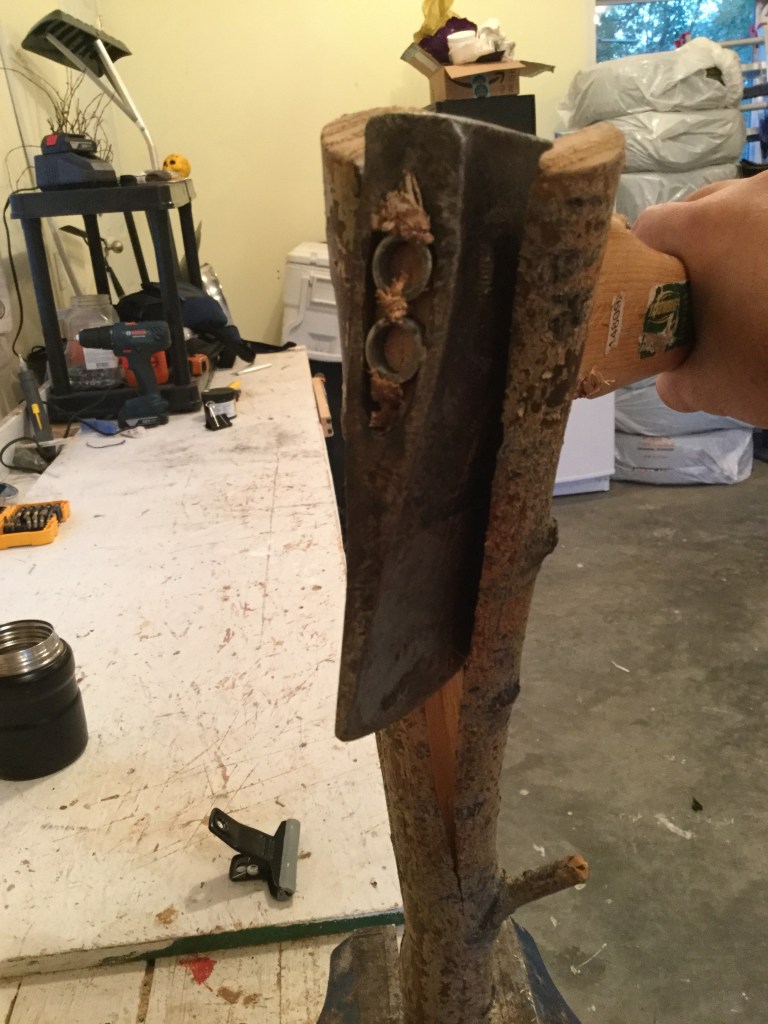
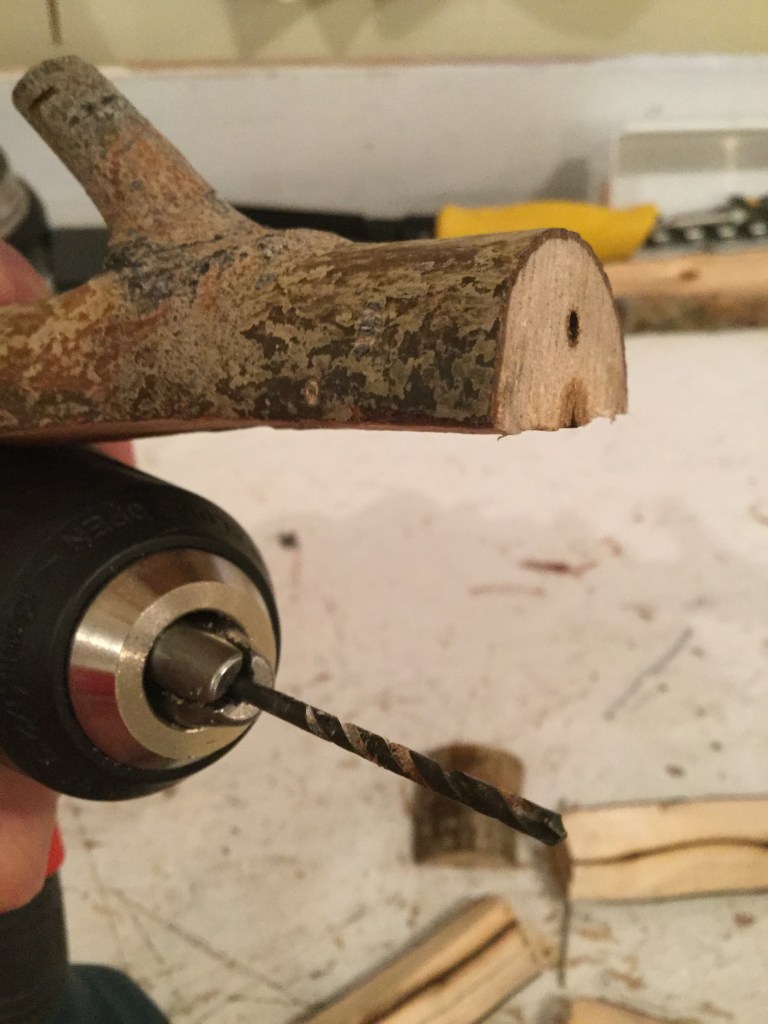
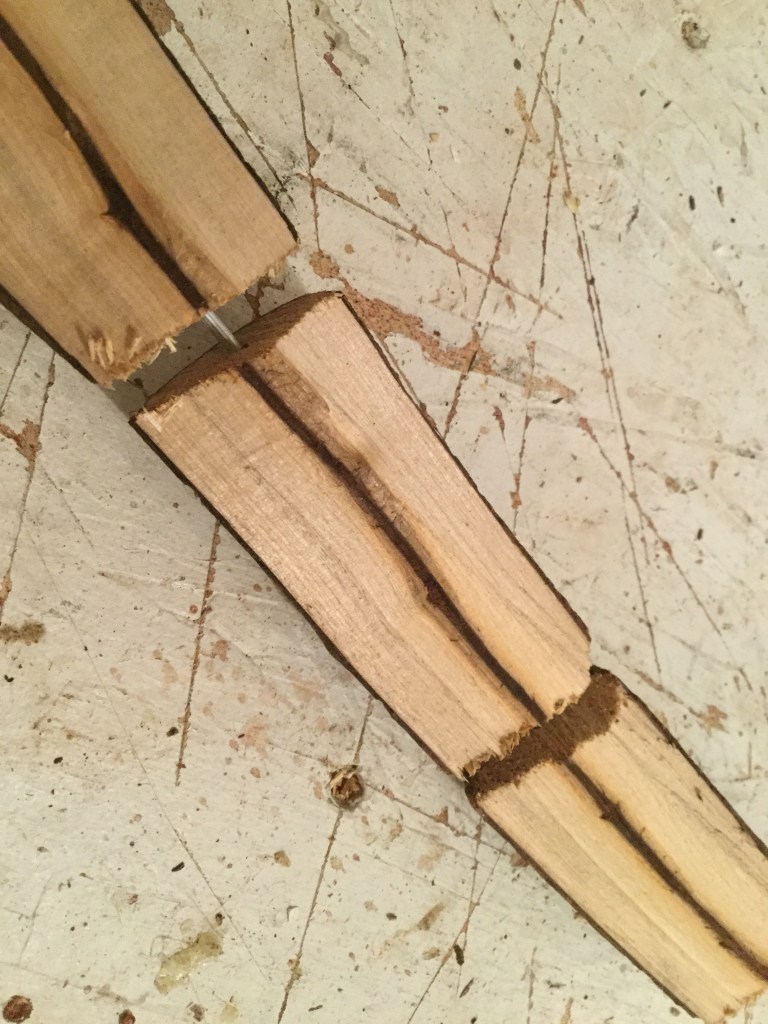
So, I started with an old dry tree branch that I cut in half and drew it on my new easel.
BTW I live in a small town, and we do not have too many choices when we want to buy art materials, in this specific case: big sheets of paper, like the A2 required for some of the drawings. However, yes, we have internet of course, so I bought two big rolls of Strathmore 400 medium (36″x10ft) online. As you can see on the photos I had difficulties cutting the paper to the size of the chipboard. I can’t believe how hard it is to deal with such big rolls of paper if you do not have the proper equipment (a roll paper dispenser, I guess).
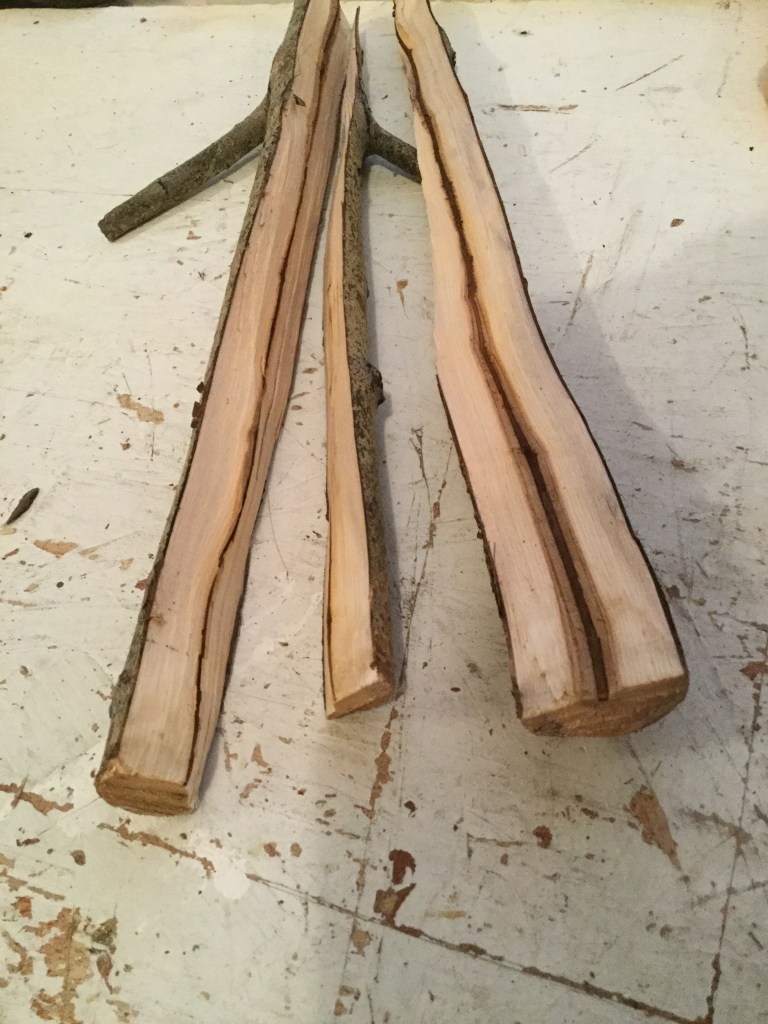
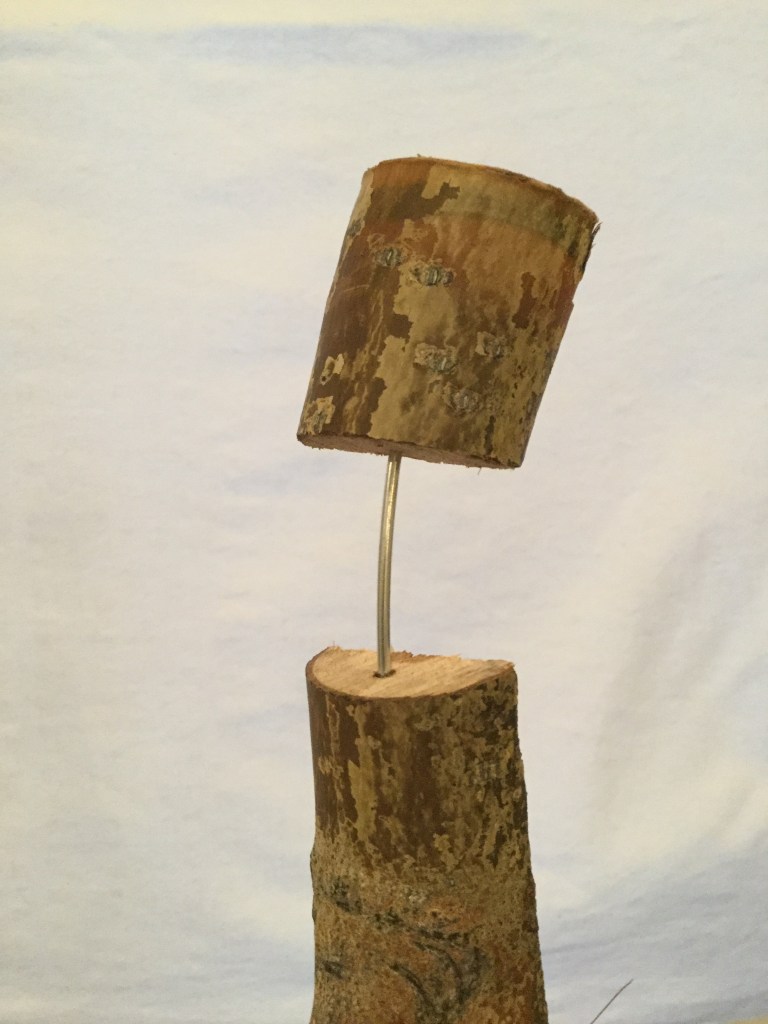
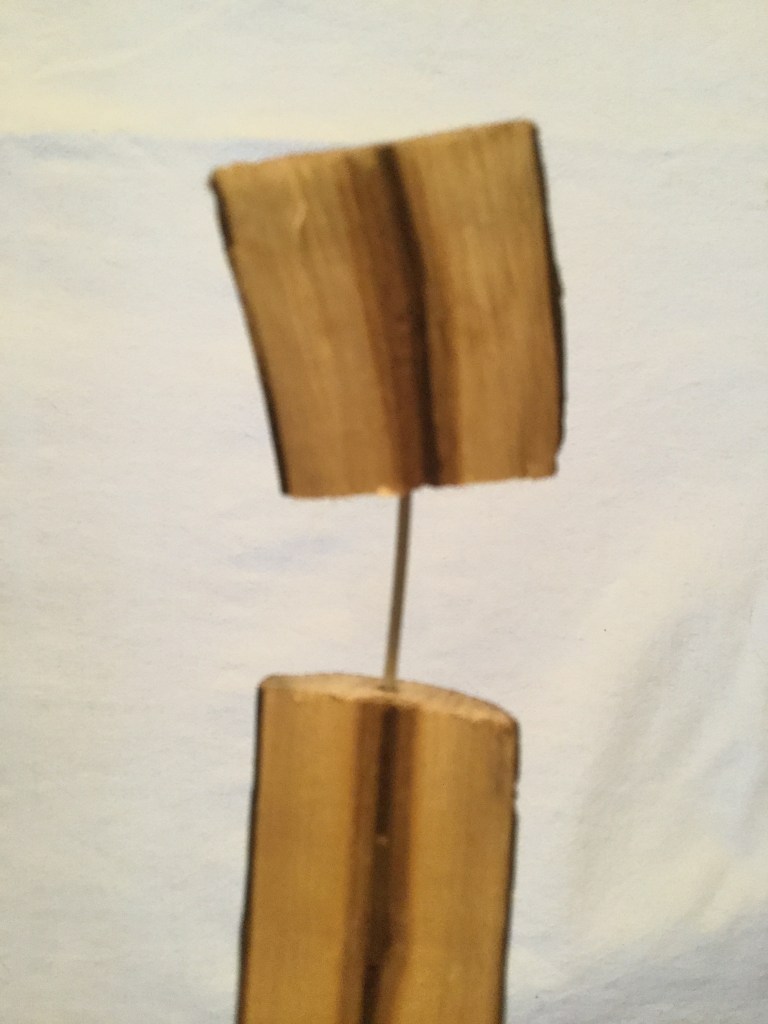
Anyway, so after drawing the tree branch and thinking a little bit about what I was going to do next I decide to use the old saying of “divide and conquer”, and that is what I did: I divided the drawing into small pieces by erasing some parts of it, and I did the same on the branch, I cut it off on the same number of pieces my drawing states. Once the brach was cut it into pieces, I needed to stack it to make it a sculpture, and for that, I used wire and glue.
Going from a drawing to sculpture and vice-versa is a quite fascinating process of creation. The drawings I developed for my three first pieces were very helpful but not revealing. Those early drawings taught me that sometimes it is not possible to go from the sketch to the sculpture and is necessary to make the necessary adjustments to the materials to look as close as possible to the drawing.
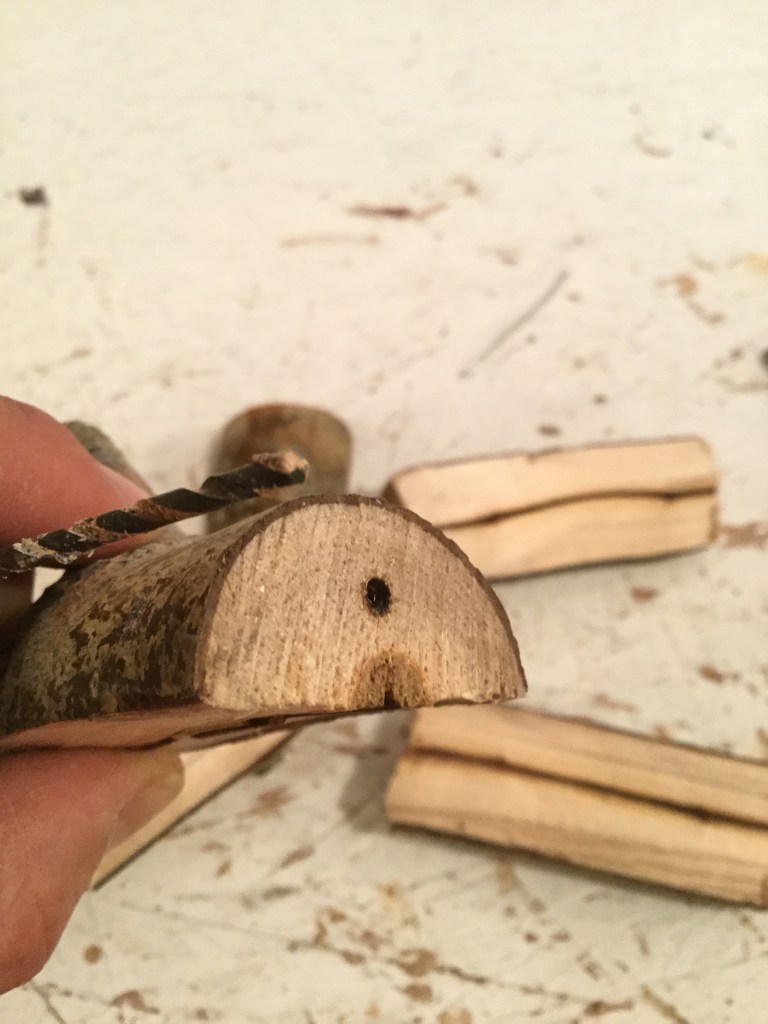
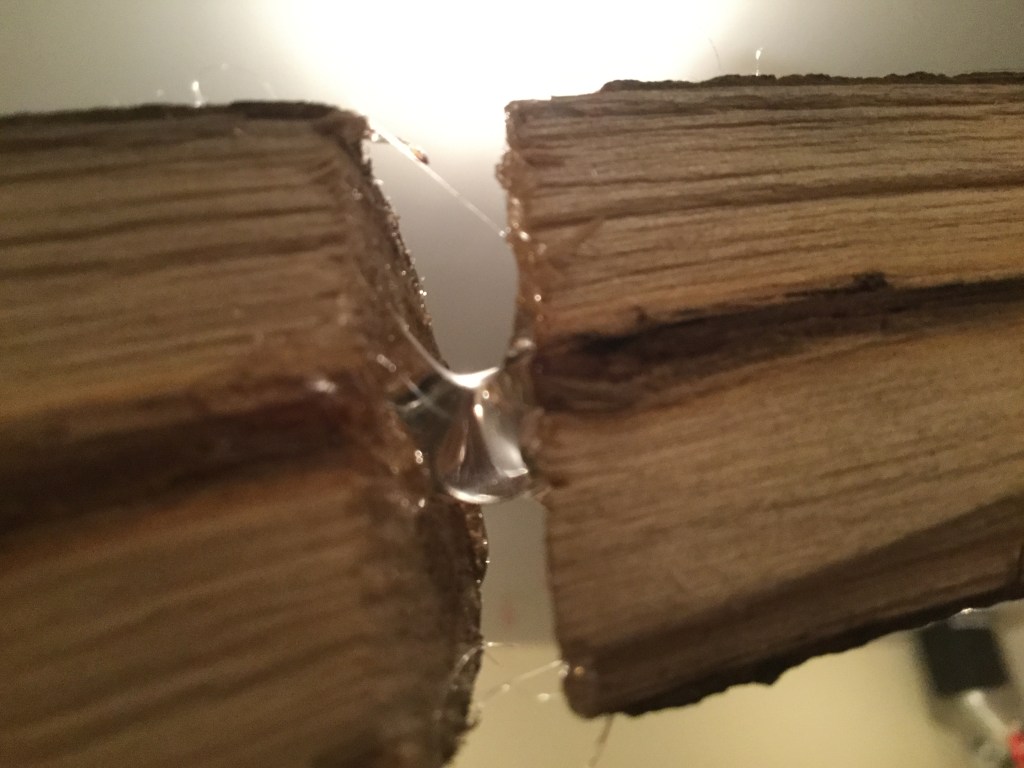
The stacked process of the pieces was quite straightforward: I drill a little hole at the end of the wood pieces, both ends, and I stuck a piece of wire in it. Easy to do but not what I wanted, the parts were not fixed, and they can rotate 360 degrees freely. So, yes! The hot glue gun came to my help. I like this kind of glue since the last module when I discover it, it is excellent.
Once all the pieces were glued and fixed, it was time to create the base where the sculpture can stand. As you can see in the last picture on the below gallery, the sculpture is complete: stacked elements in a vertical position that can stand by itself on a stable base.
Pareidolia
Pareidolia is defined as “the tendency to interpret a vague stimulus as something known to the observer, such as seeing shapes in clouds, seeing faces in inanimate objects or abstract patterns, or hearing hidden messages in music. Common examples are perceived images of animals, faces, or objects in cloud formations…” (Wikipedia.org, 2019)
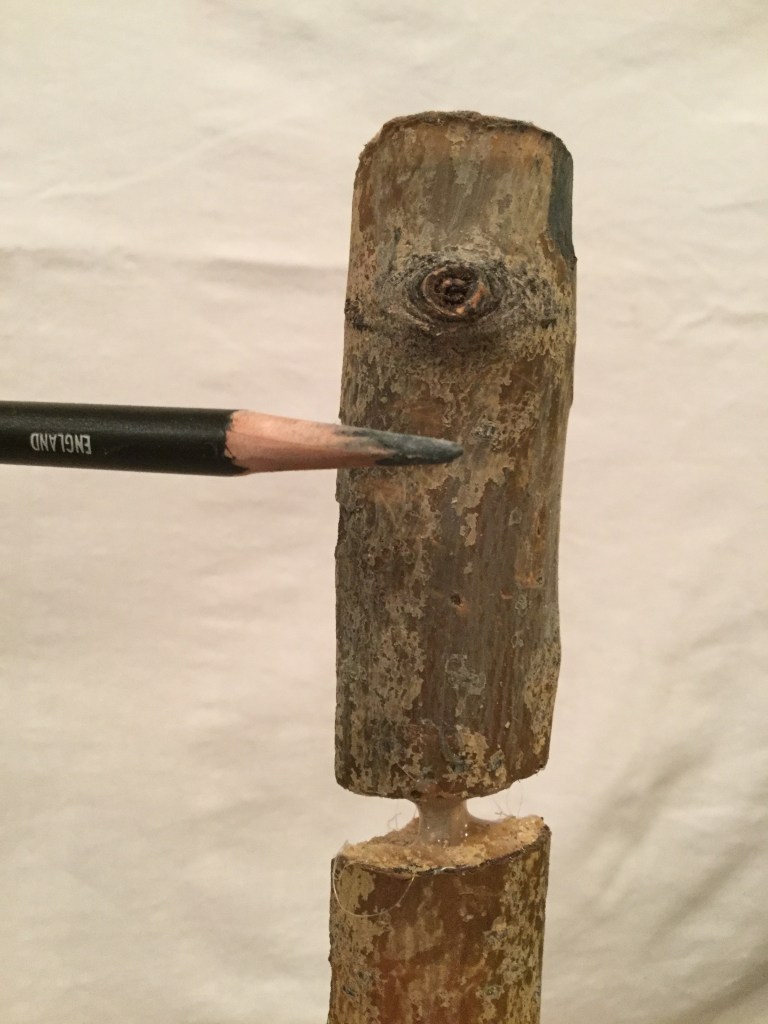
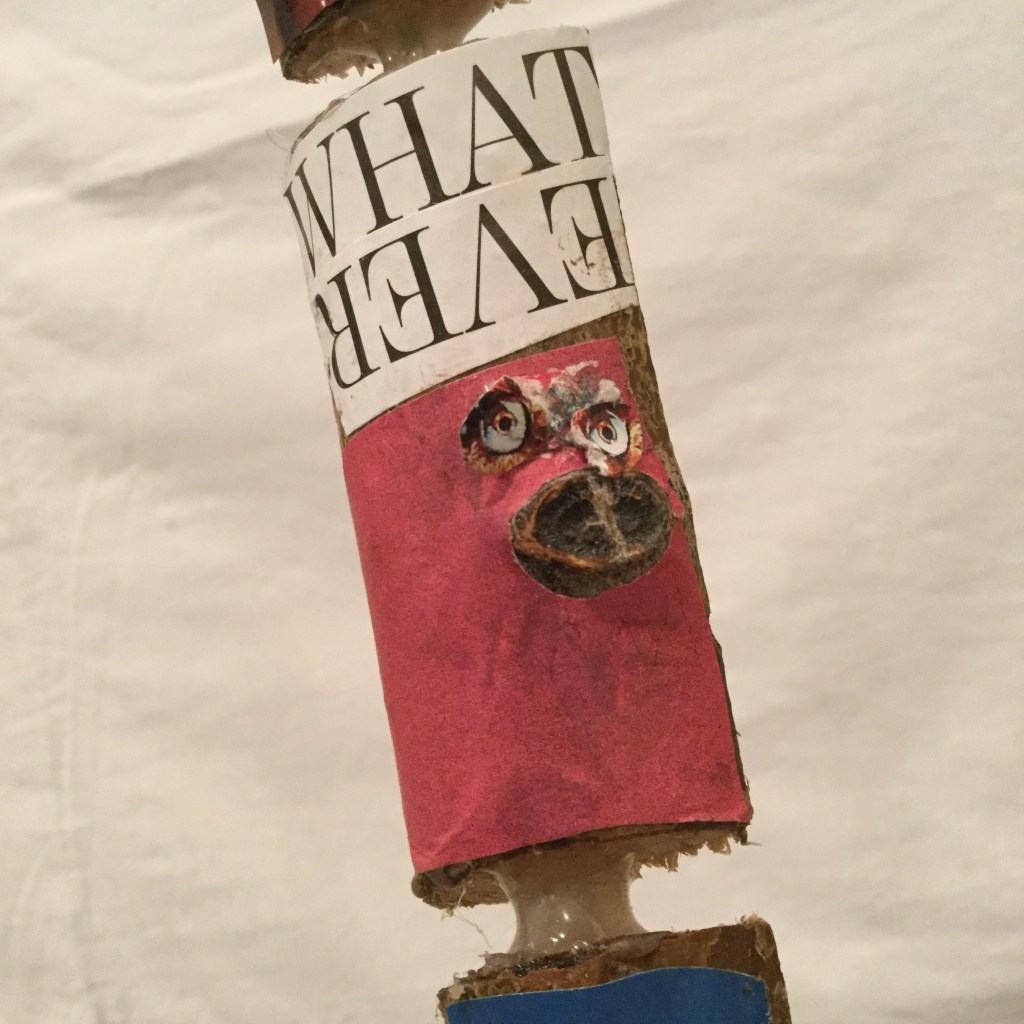
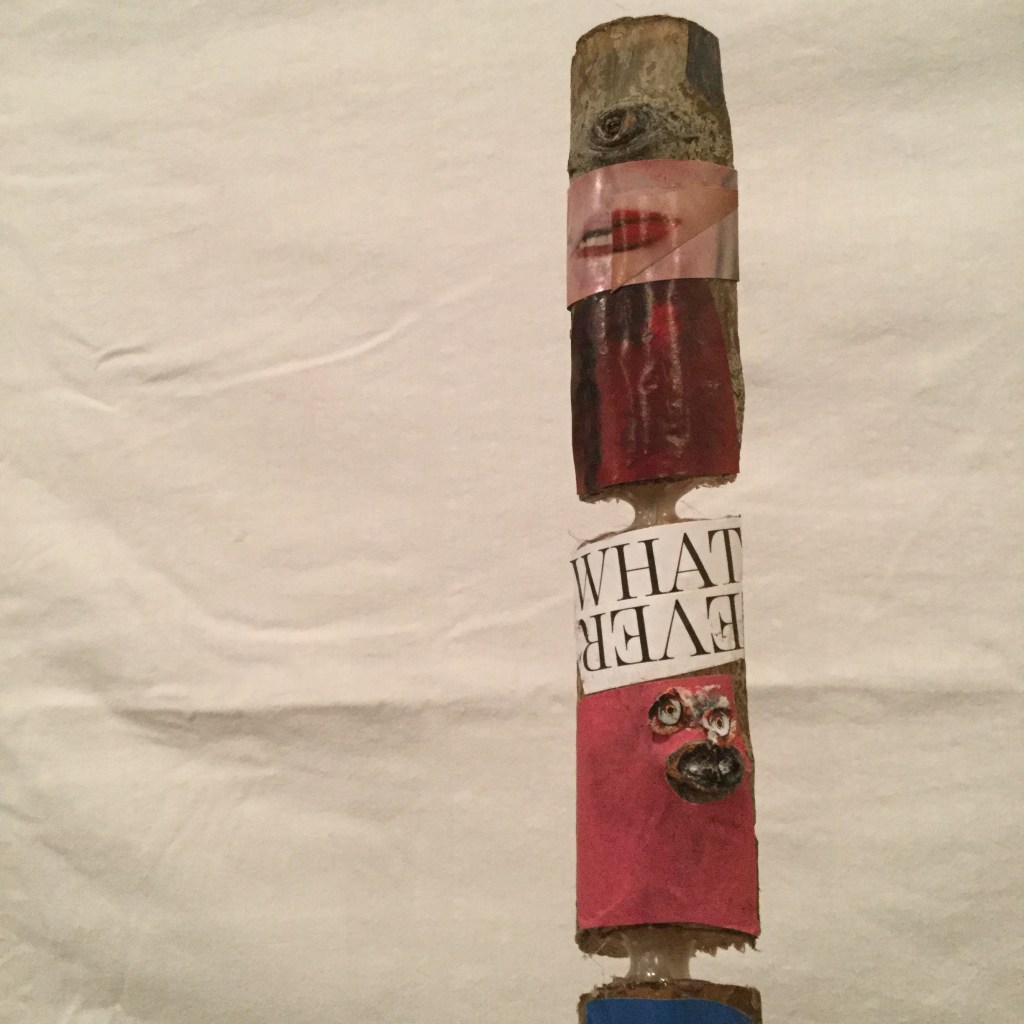
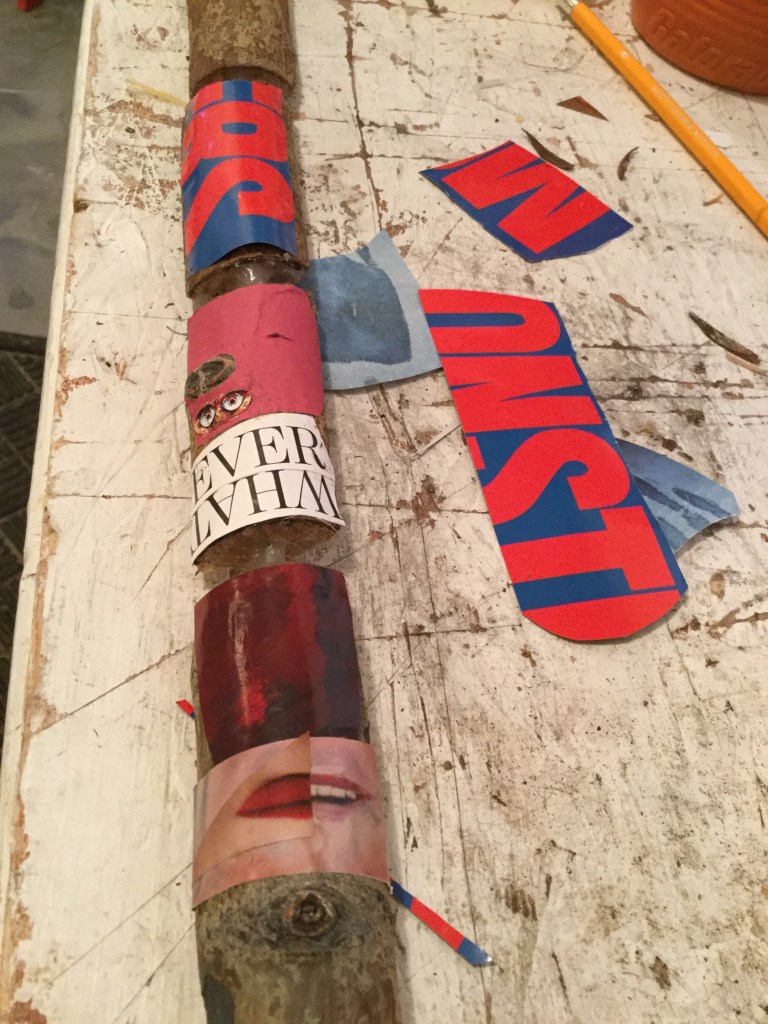
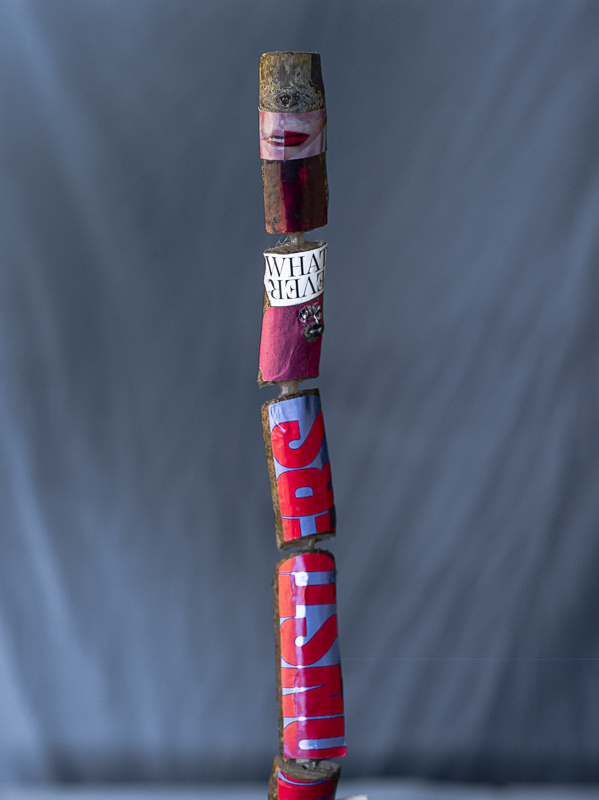
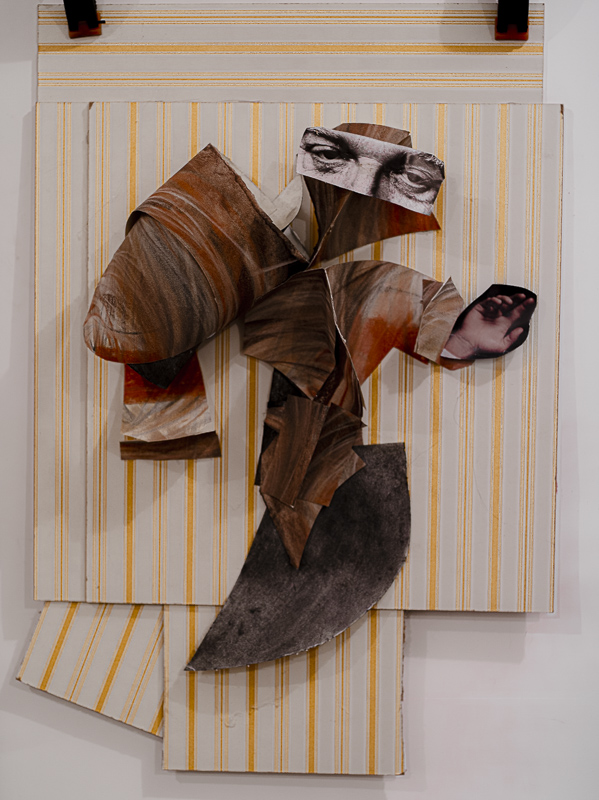
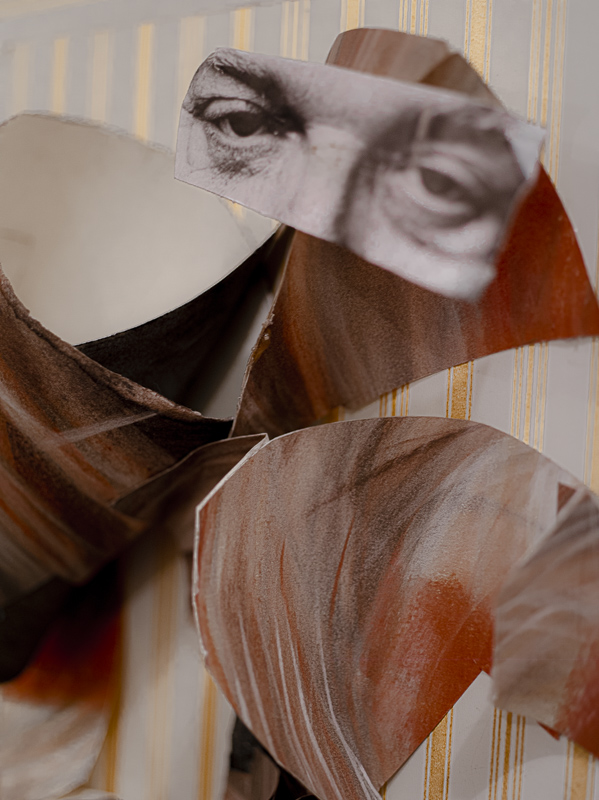
I think I’m as good as everyone else when it is time to see faces in objects. After I “finish” the first sculpture I was not precisely pleased and I had the sensation that I needed to do something else with it. I did not want just to paint to perhaps differentiate the elements that comfort it. I want to do something more. When I consciously noticed that bump at the front of the first piece I immediately though of the work of Hannah Hoch, the amazing german Dada artist from the ’20s of the last century. I always have had a fascination with her photomontage work. So, I decided to go that route to add to my sculpture something meaningful to me.
One last thing about this sculpture is that the images I choose to glue on the surface of it where selected kind of randomly from old magazines. In the end it was clear that the images selected are related to concepts I have been researching regarding intelligence and darkness.
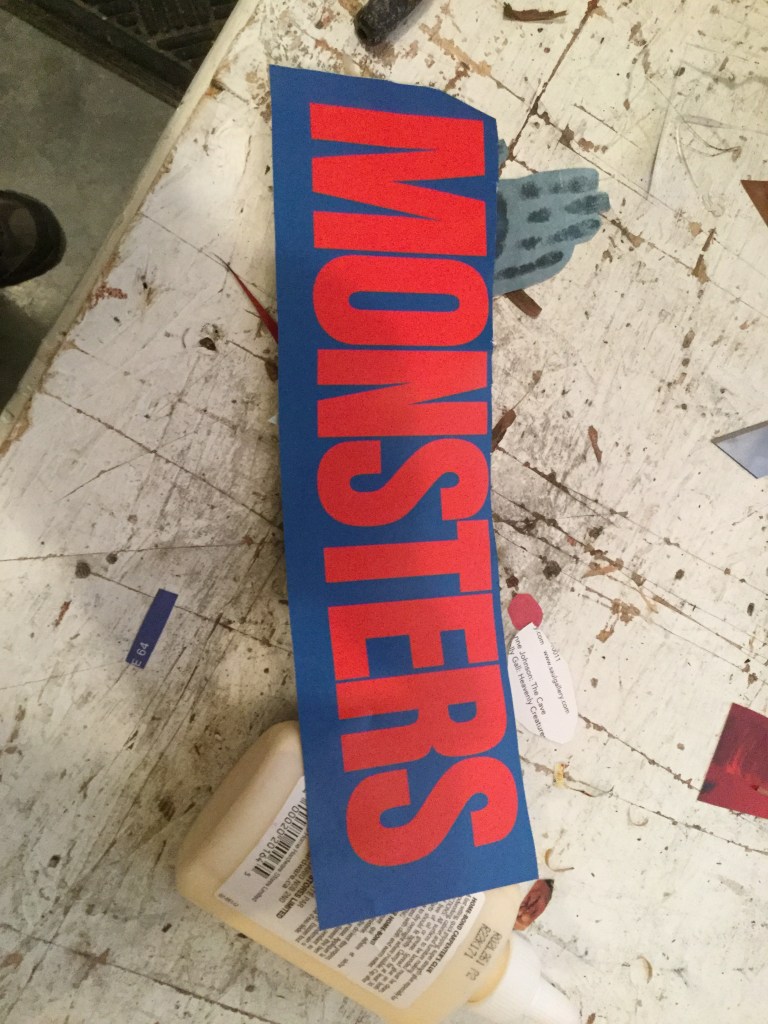
The below gallery shows the last steps for this piece and the incorporation of the word “monsters.”
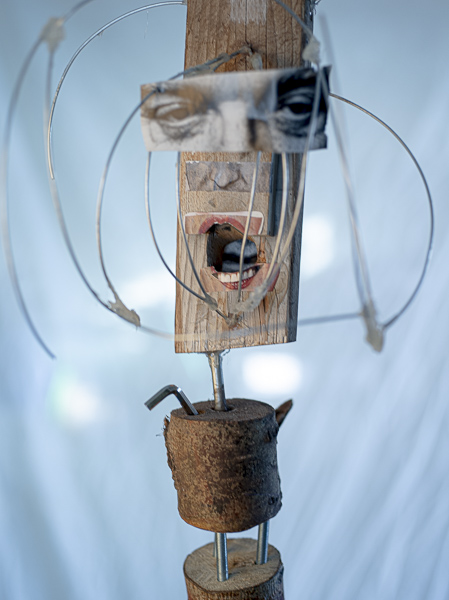
First larger sculpture
What triggered the initial intention in the construction of this sculpture is the same concept as the one in the last piece: Pareidolia.
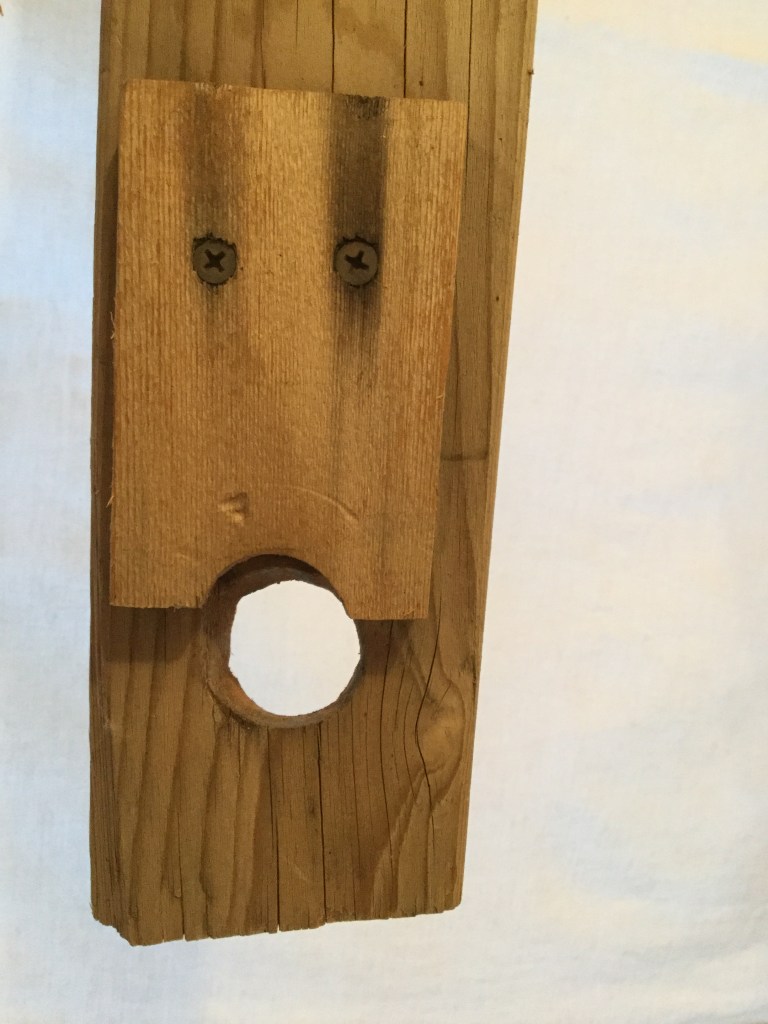
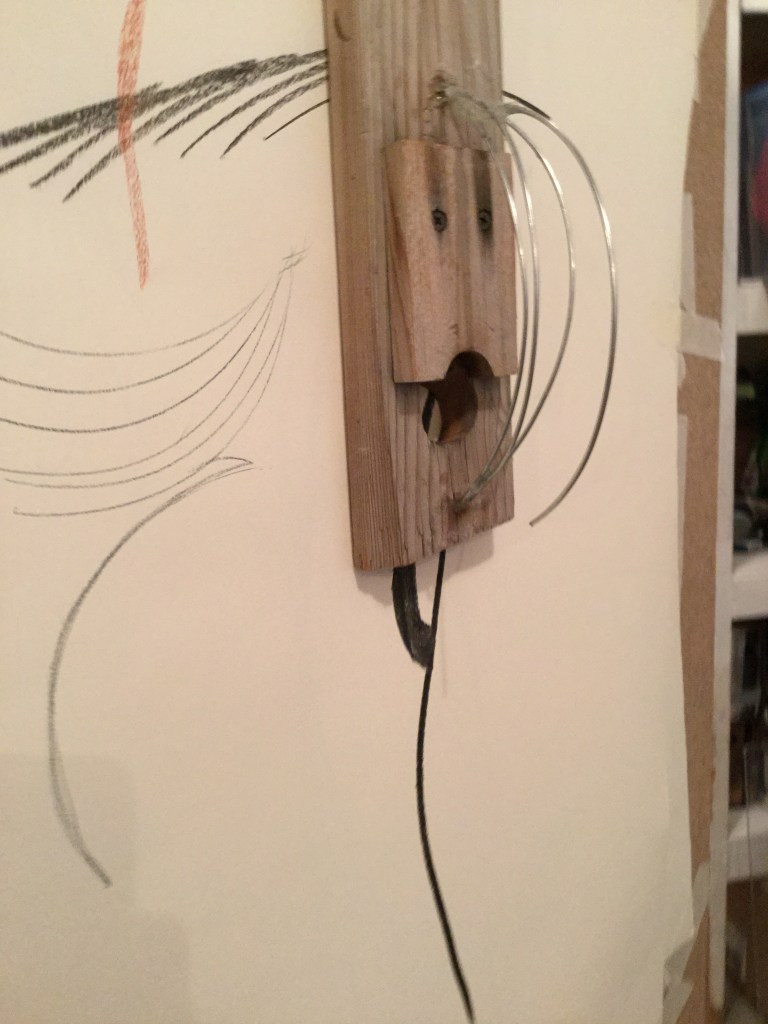
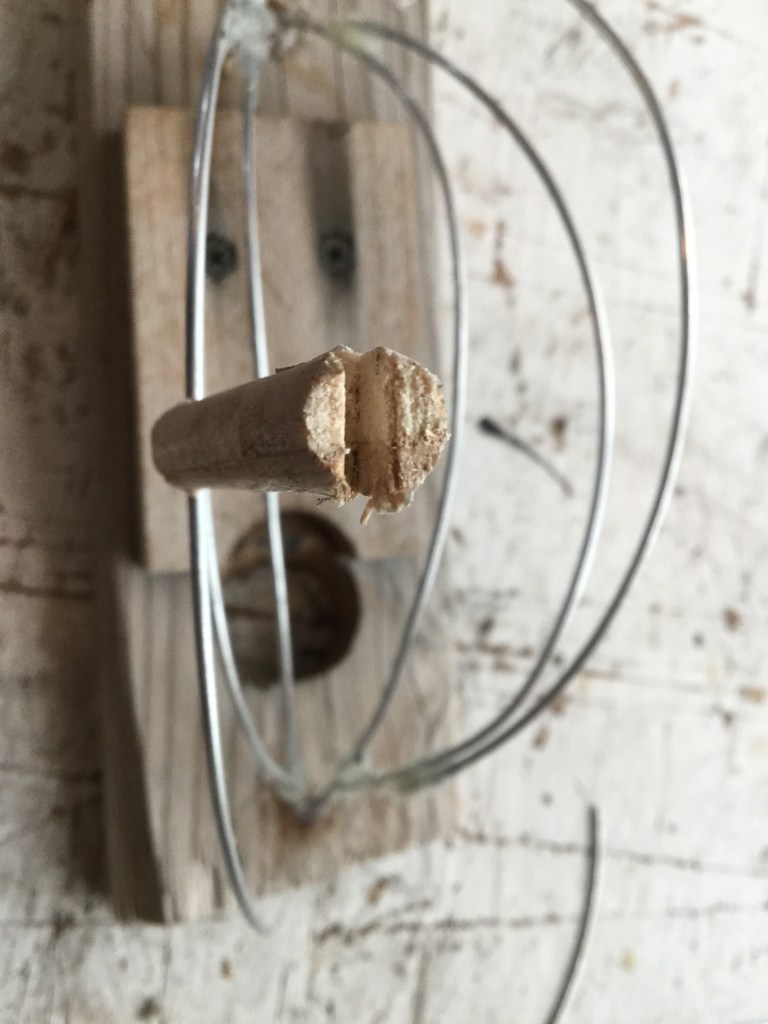
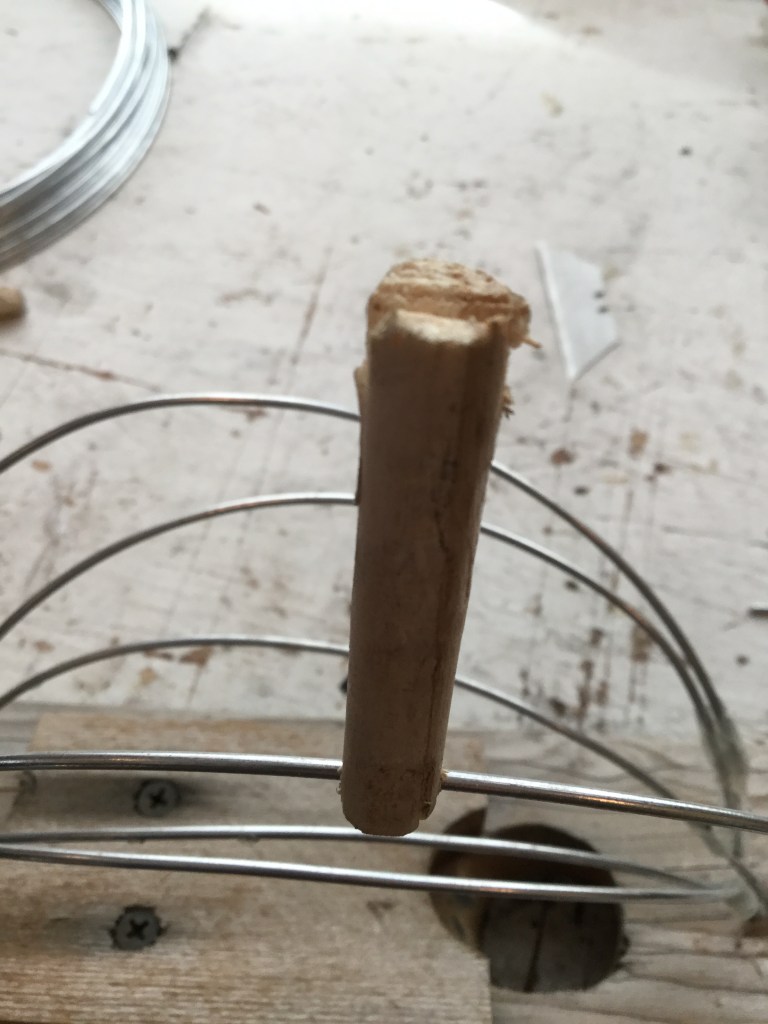
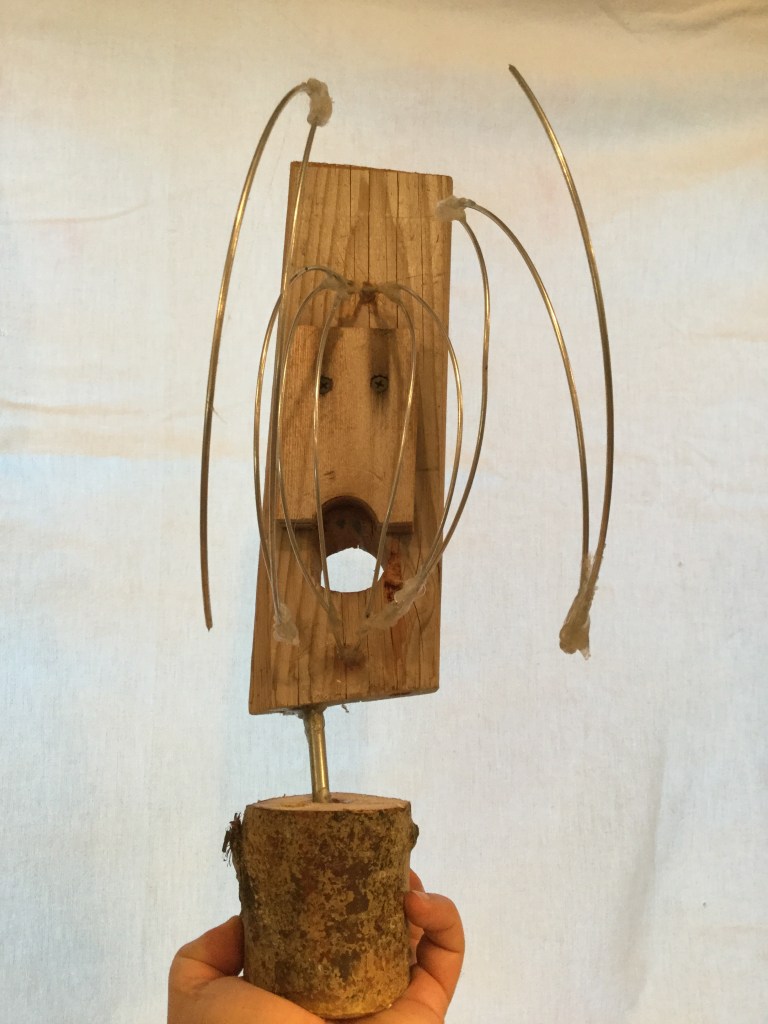
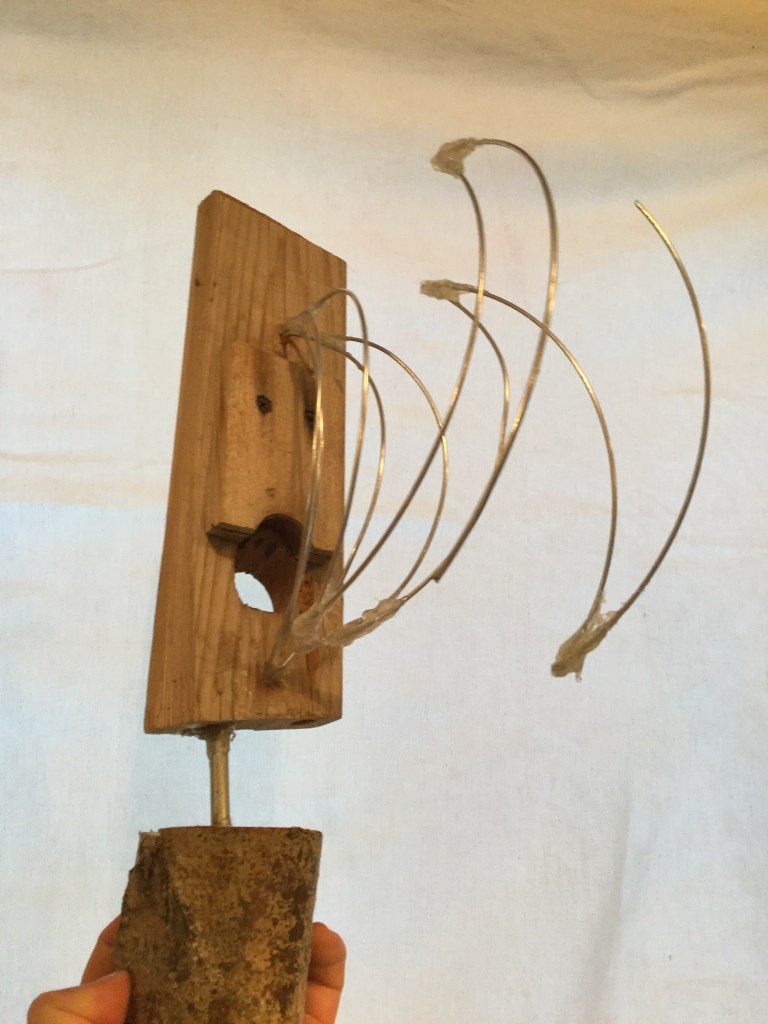
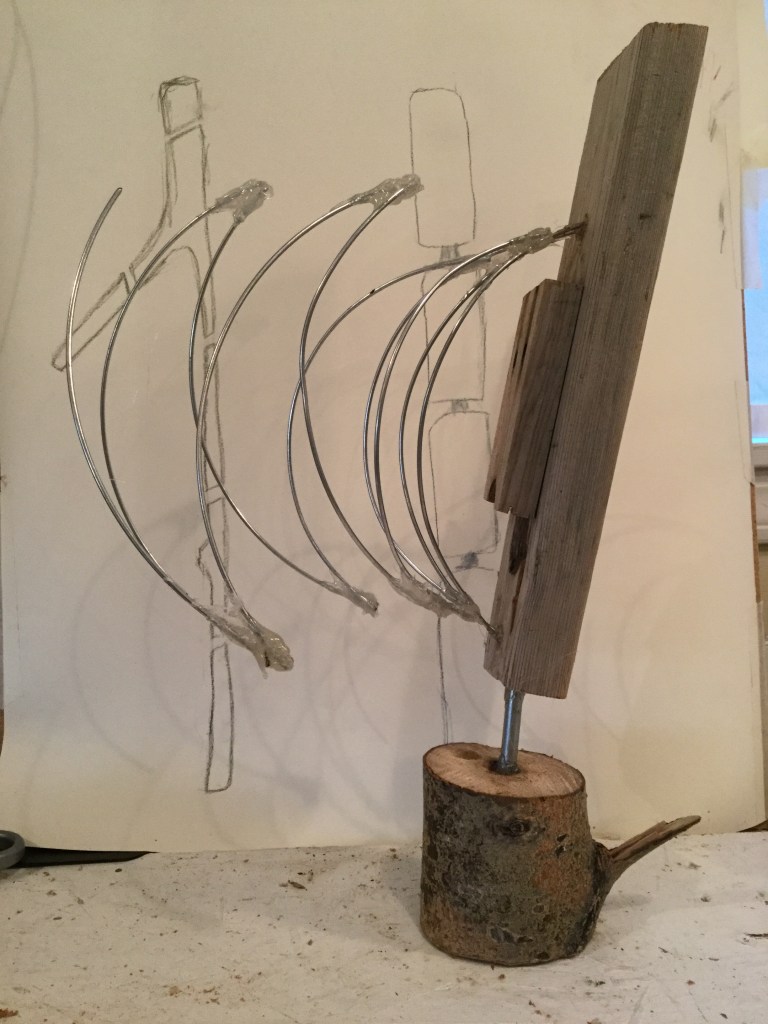
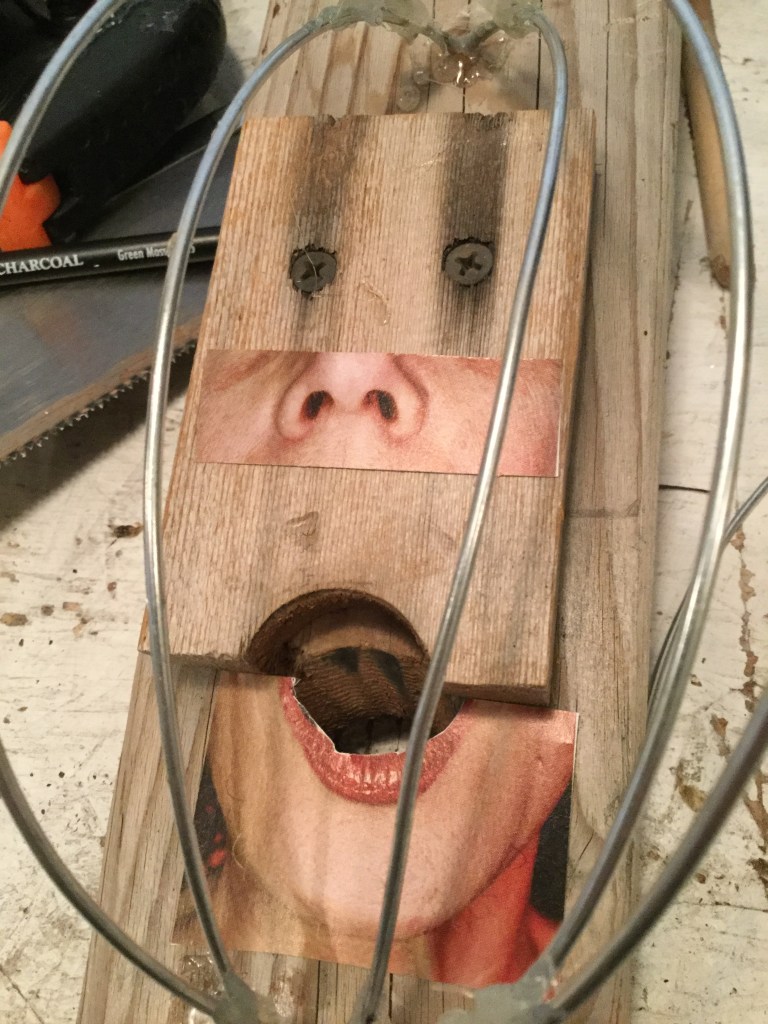
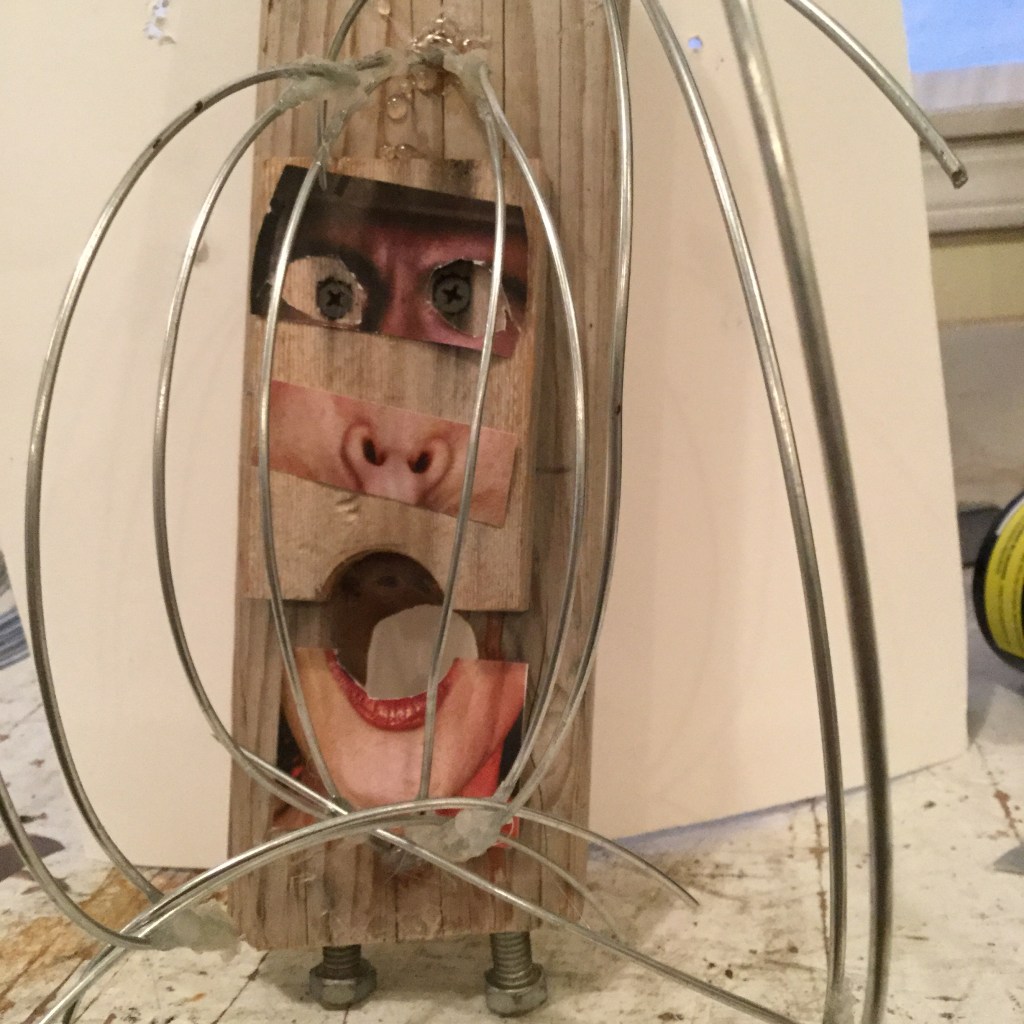
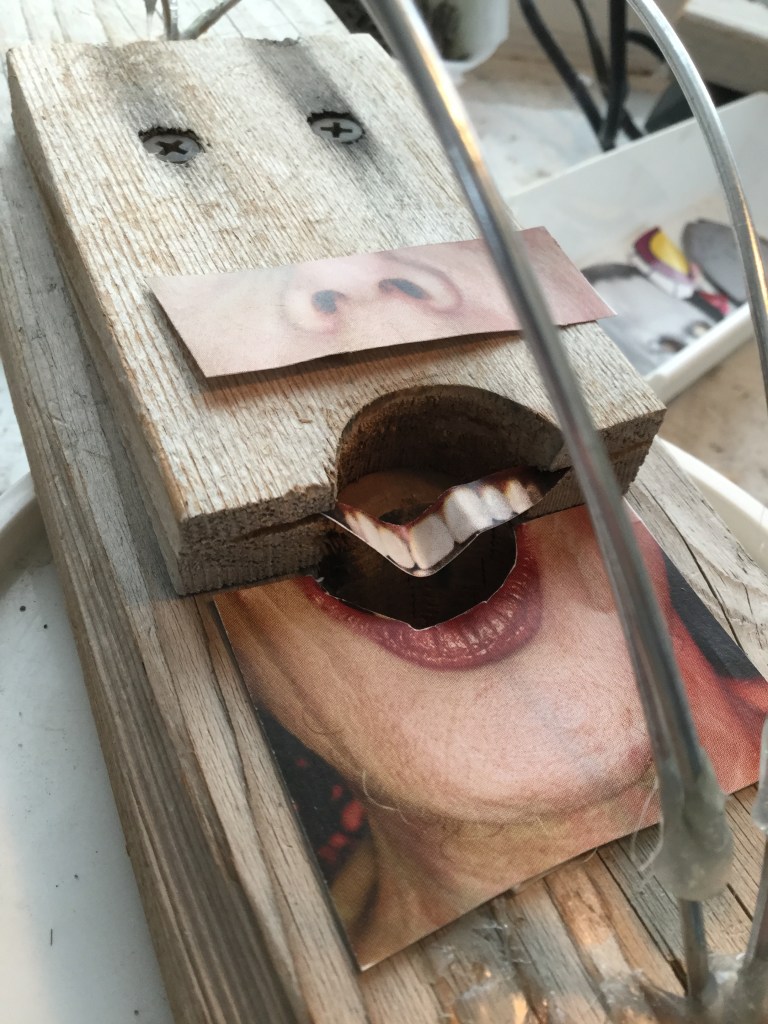
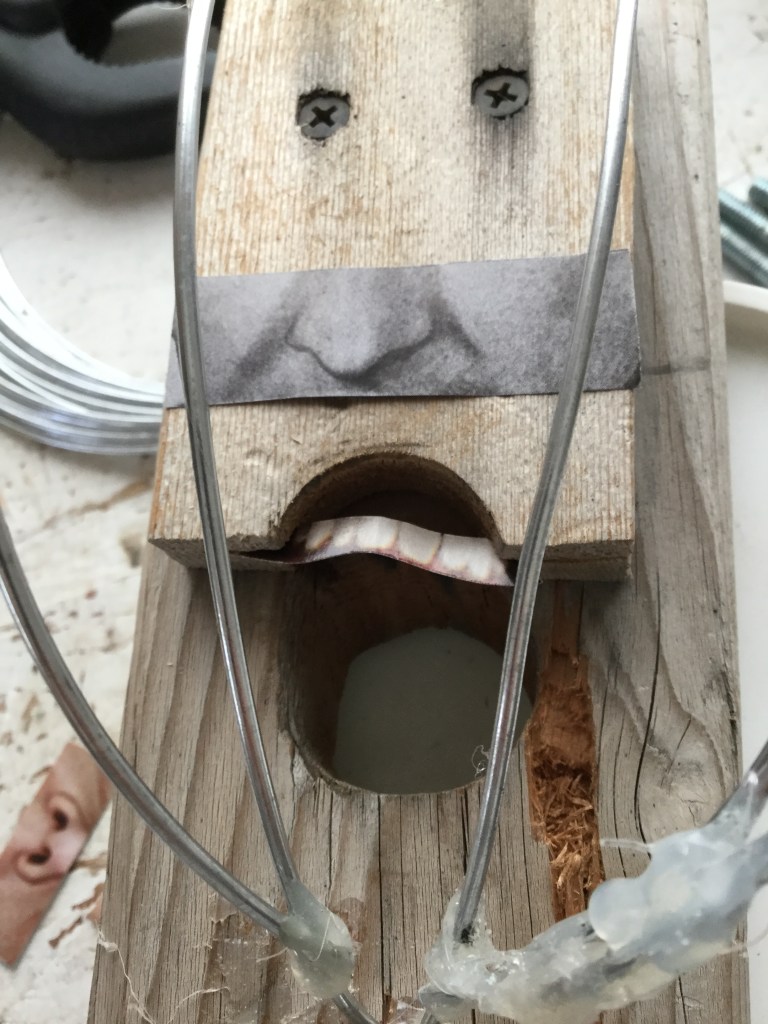
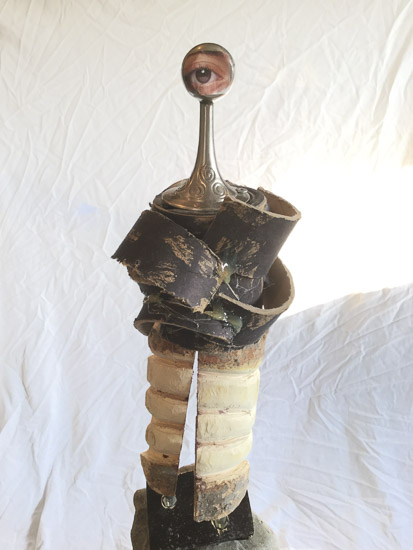
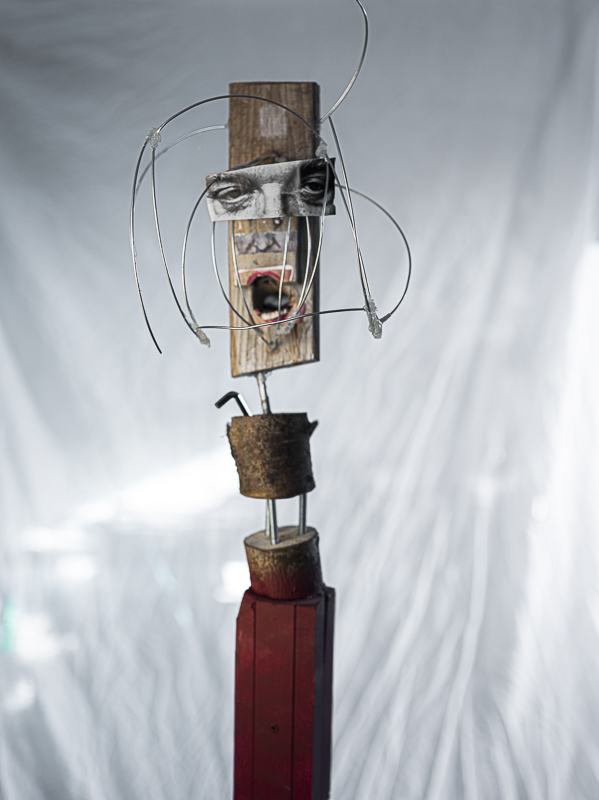
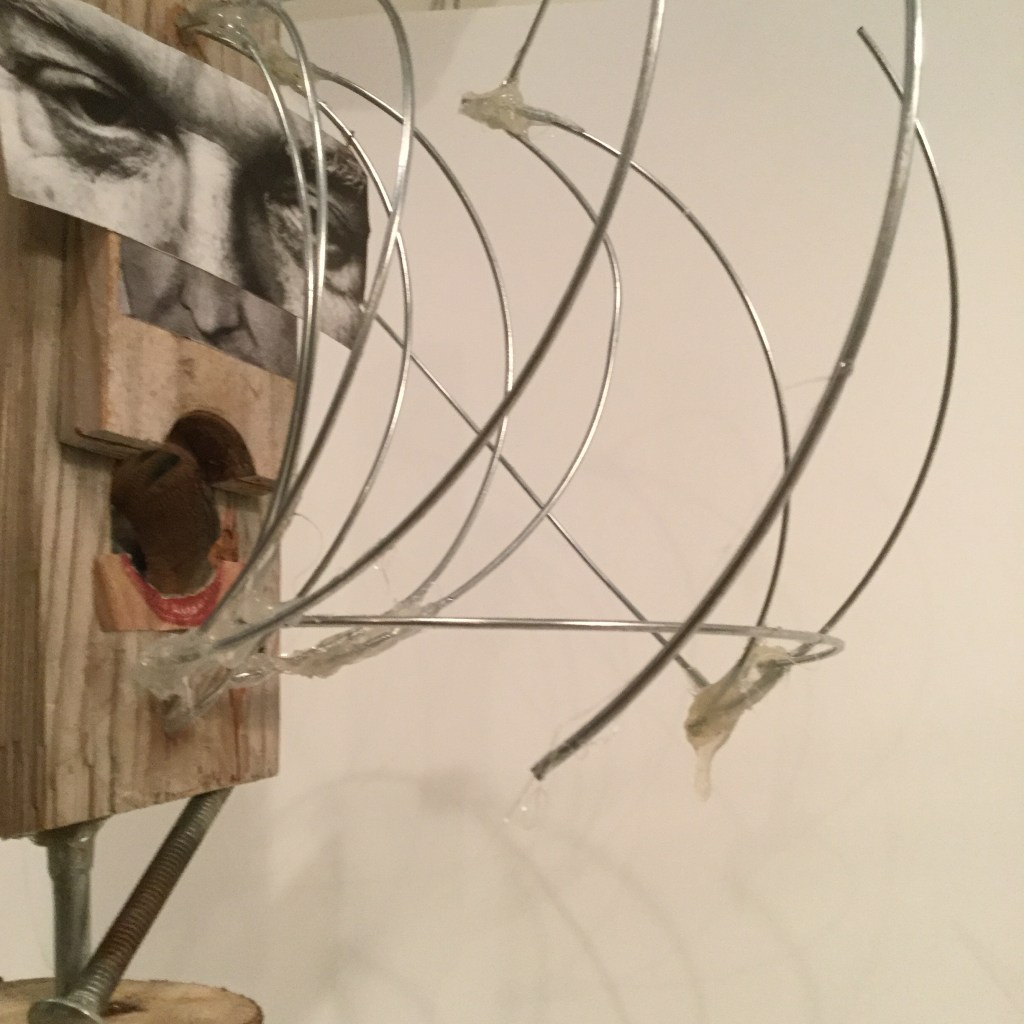
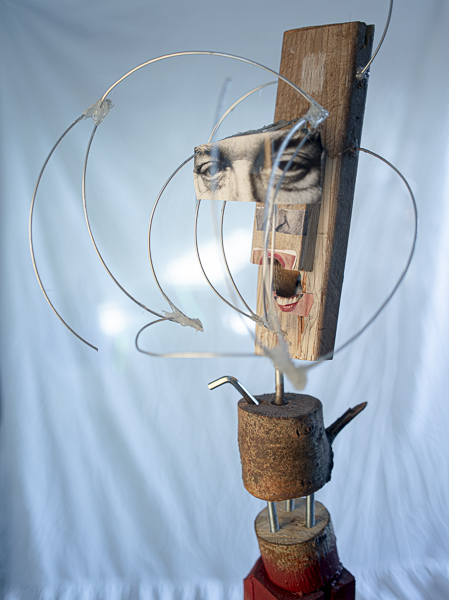
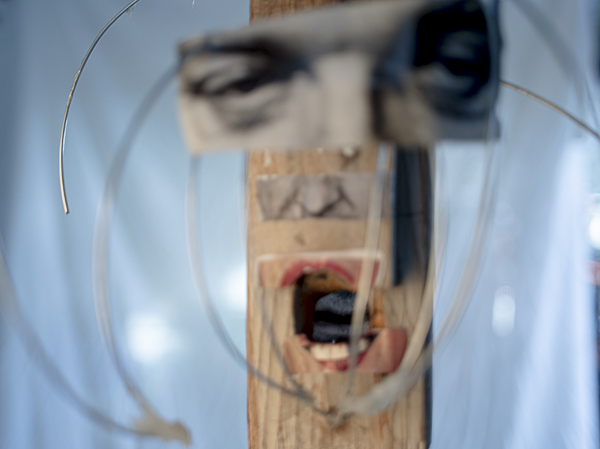
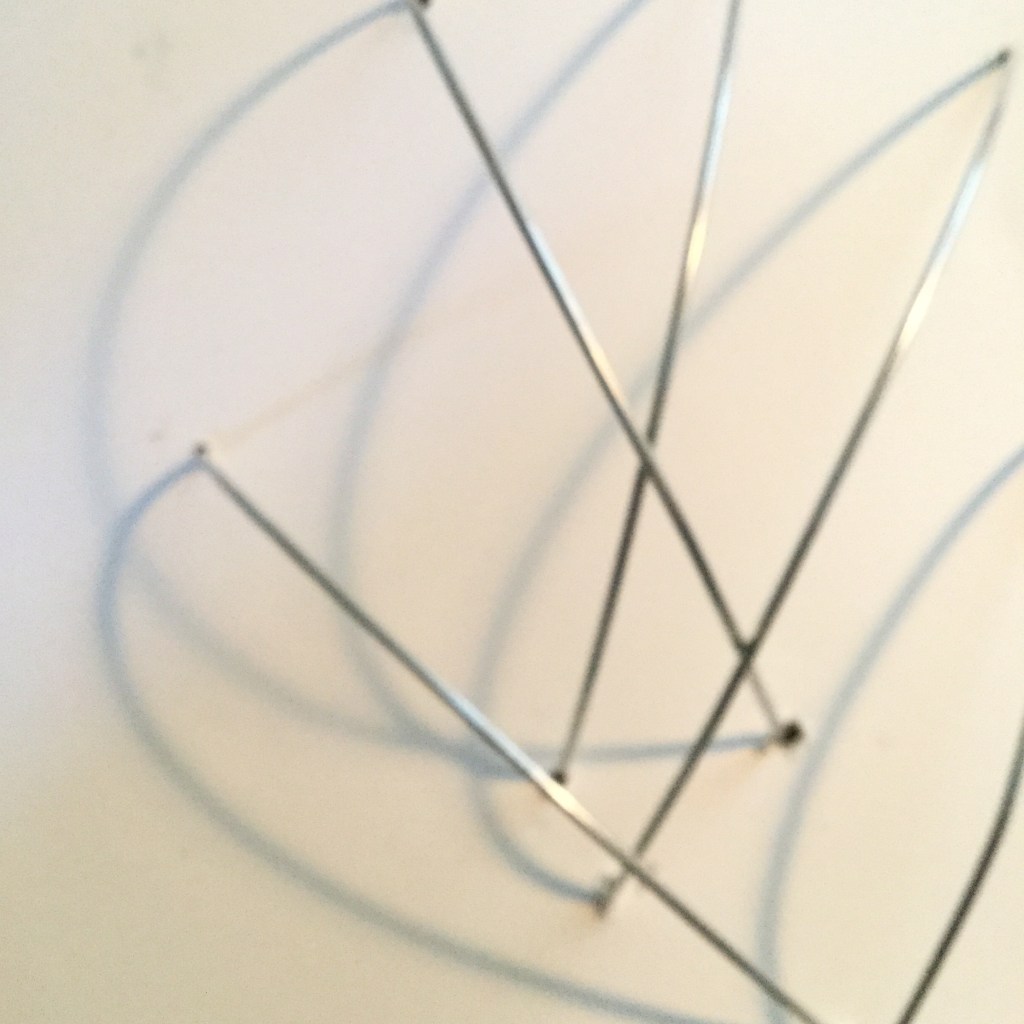
Funny enough as soon as I started to inspect the wood pieces for this next sculpture the firs piece of scrap-wood that I choose has a “face” on it, as it is possible to see in the first image from the left on the below gallery. What intrigued me the most was not the eyes but the mouth. It was like if it was saying something. So, I went back to the drawing board to make a visual representation of a sound.
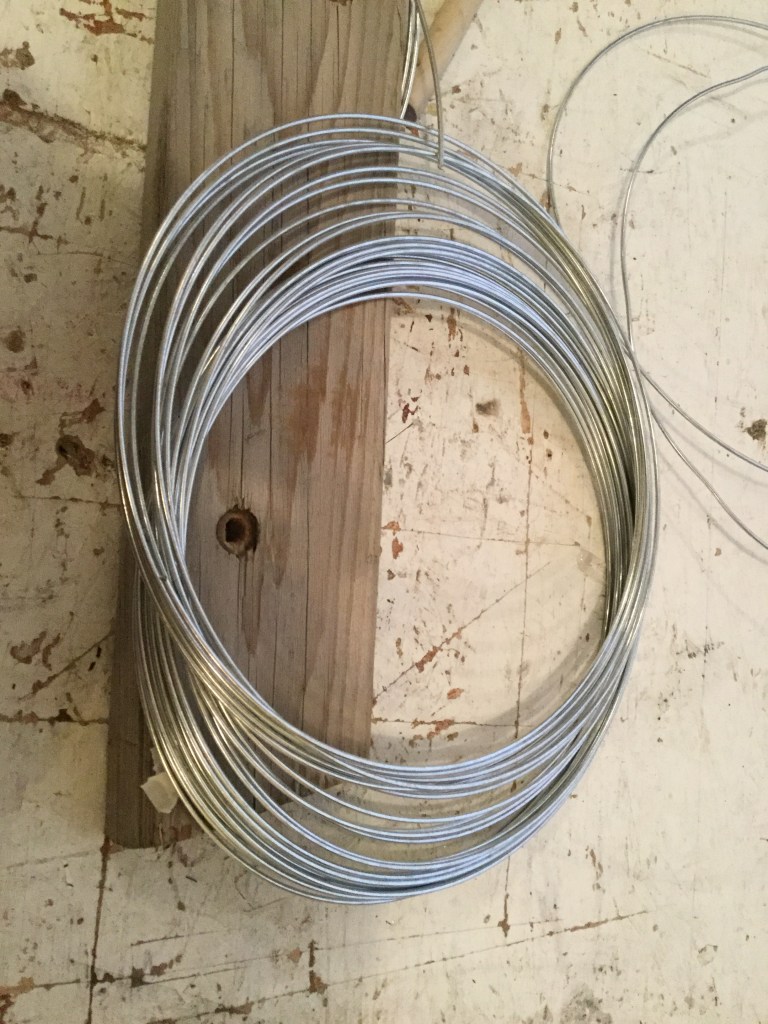
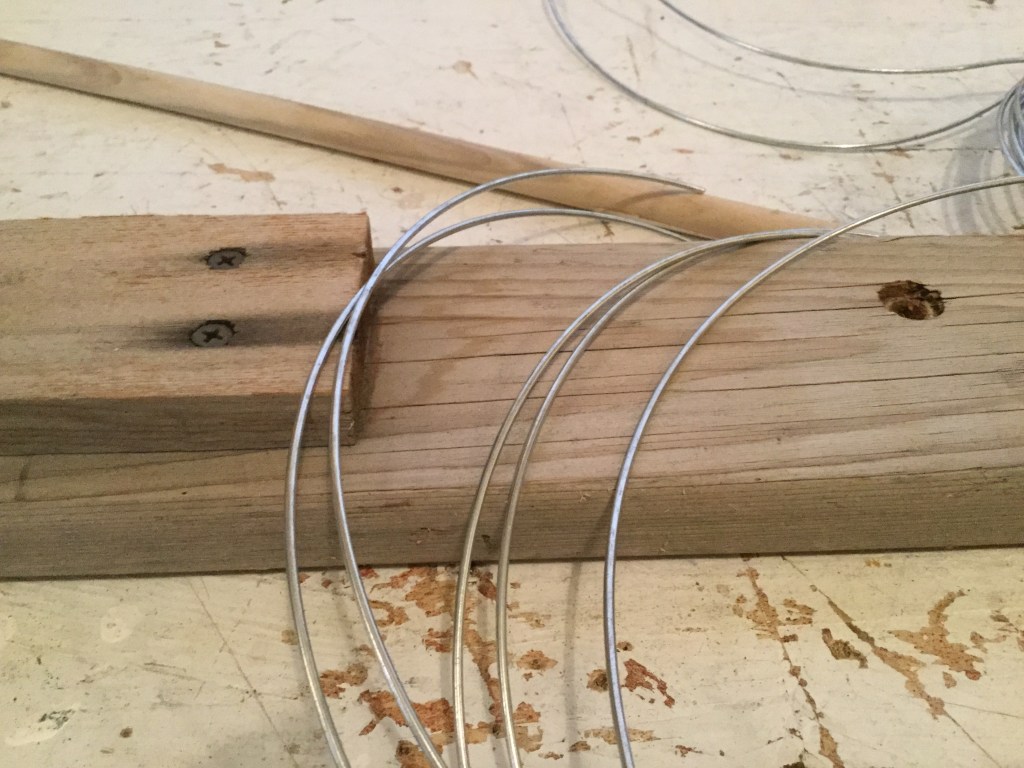
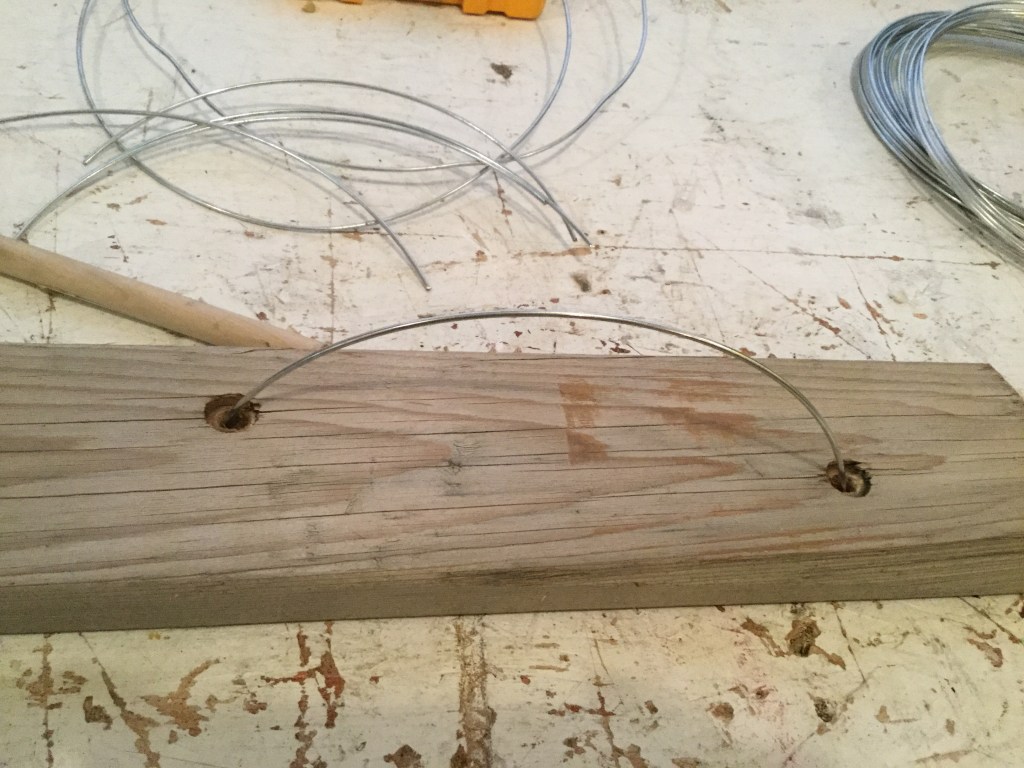
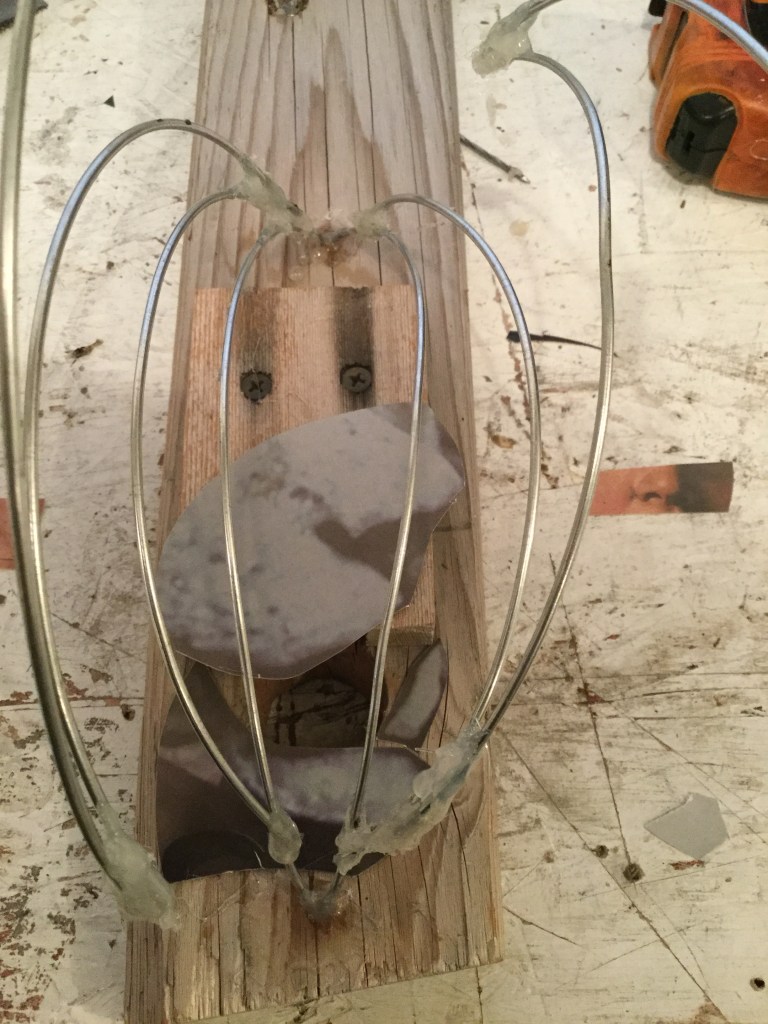
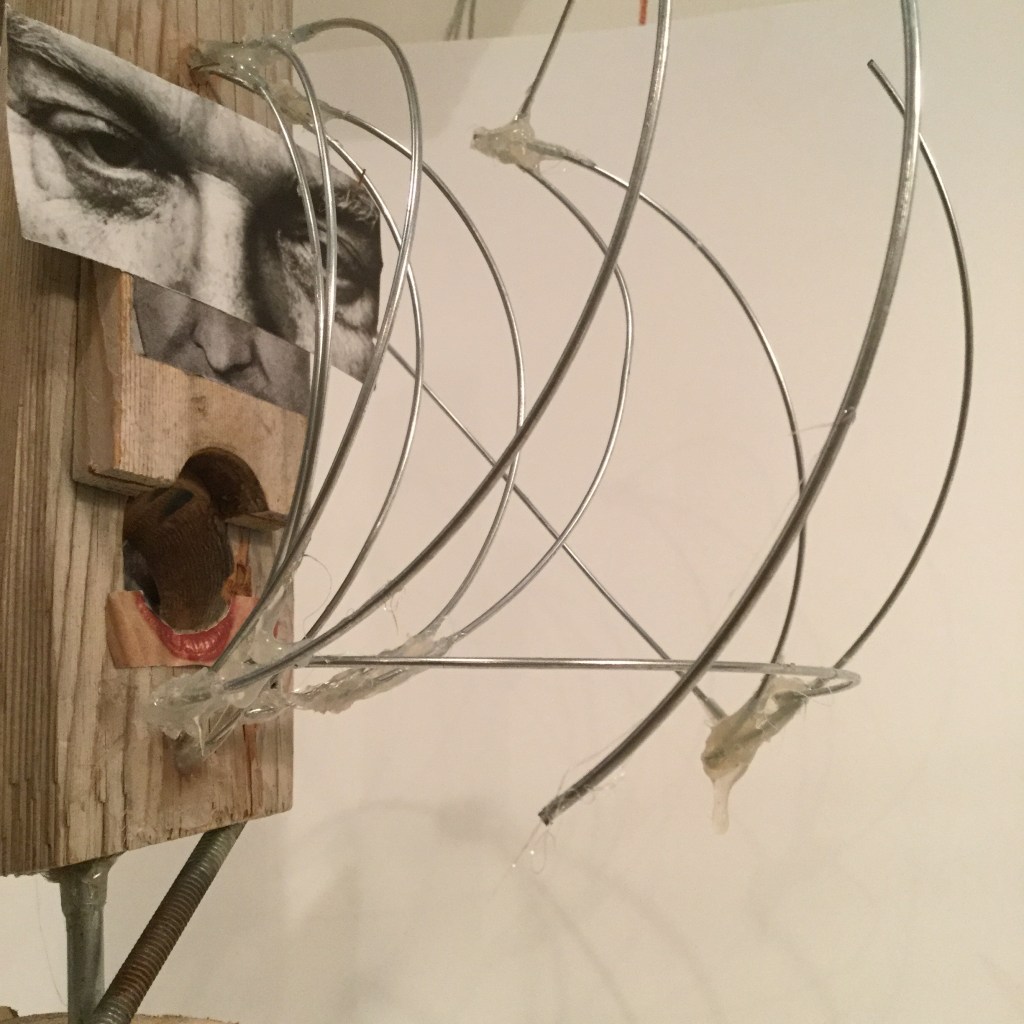
I used wire to construct the sound waves, and I dit it as curves stacked one over another in a vertical position. They intersect and have been glued at the ends. It was a complicated task, so I create a device to hold them together while the glue solidified and they became stable. See the last two photographs from the gallery above.
The gallery below shows the sound waves emerging from the mouth of the sculpture and moving forward into space in front of it.
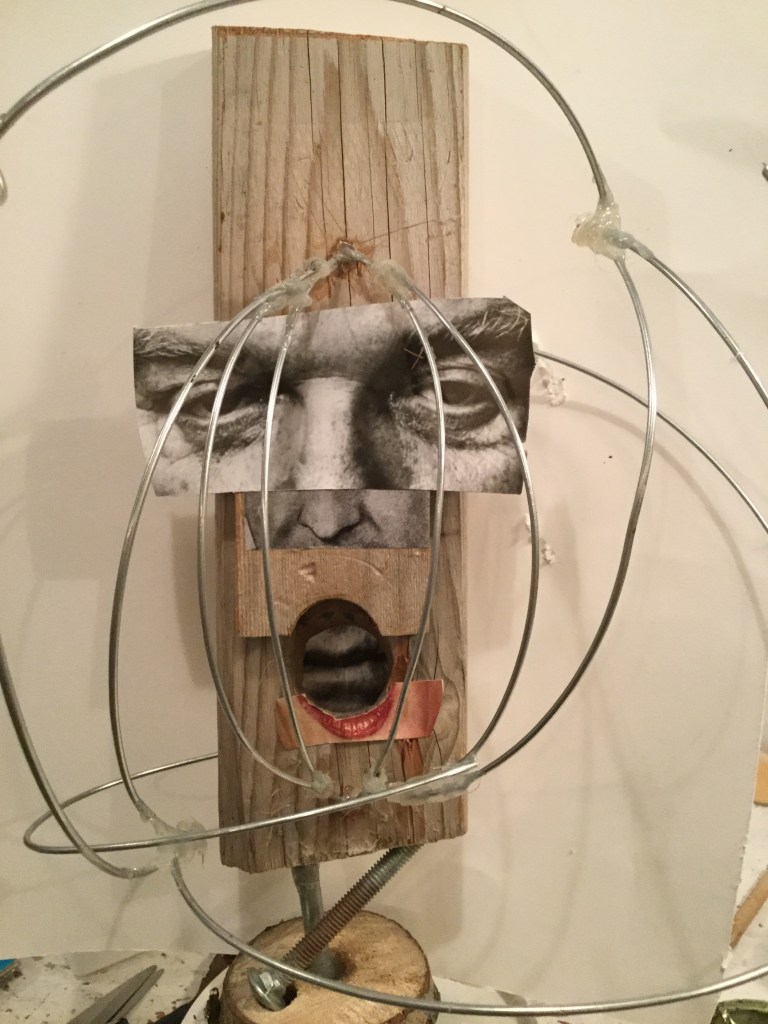
Before I went further into the development of this piece, I took some time to play with the “face” of the sculpture. I cut out some elements from old magazines to give the sculpture a more “human” appearance. I quickly realized that the possibilities could be endless.
Once I decided on the “face” of my sculpture I added more wire pieces at the top and the bottom of the sounds elements to make them look more robust.
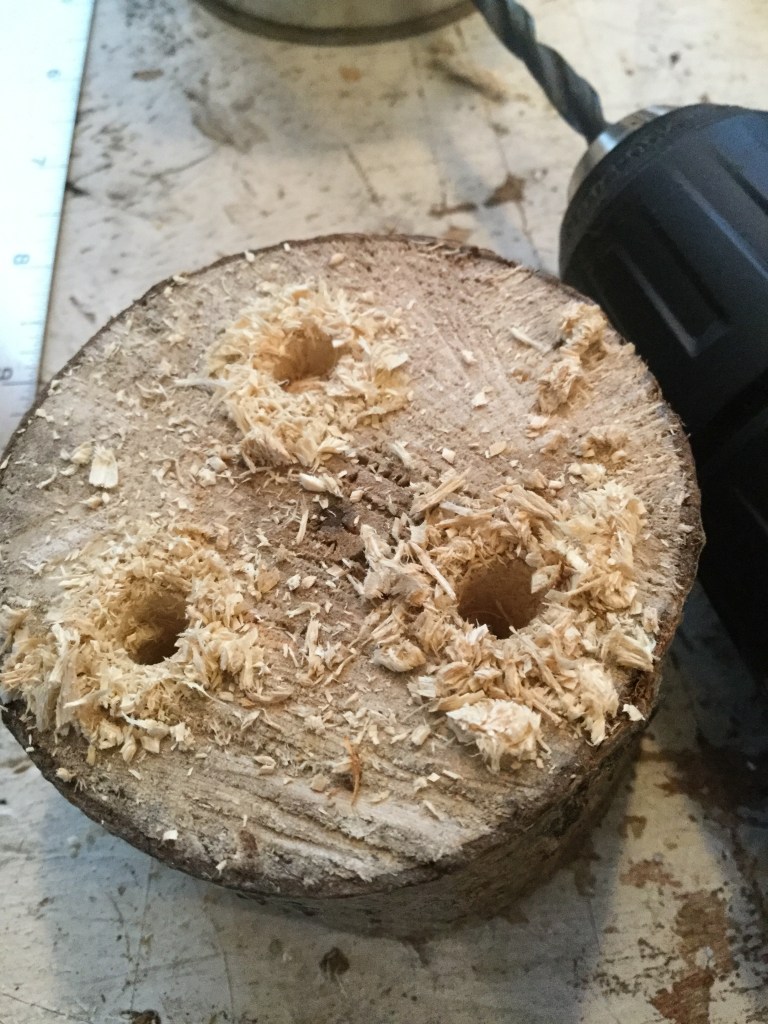
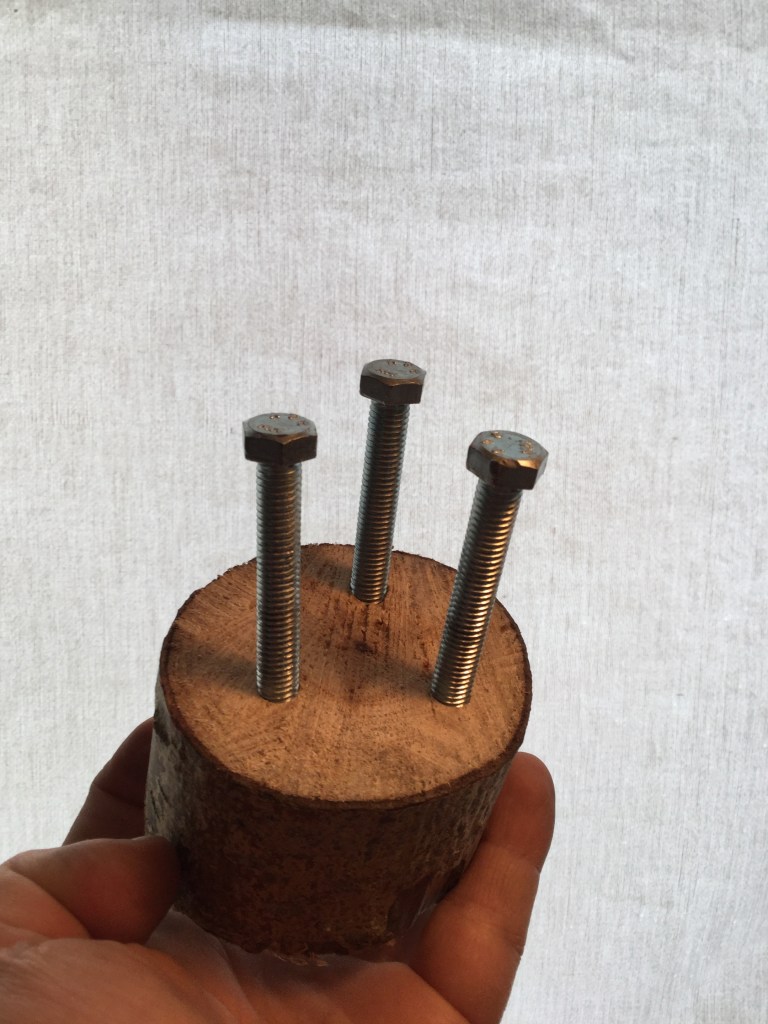
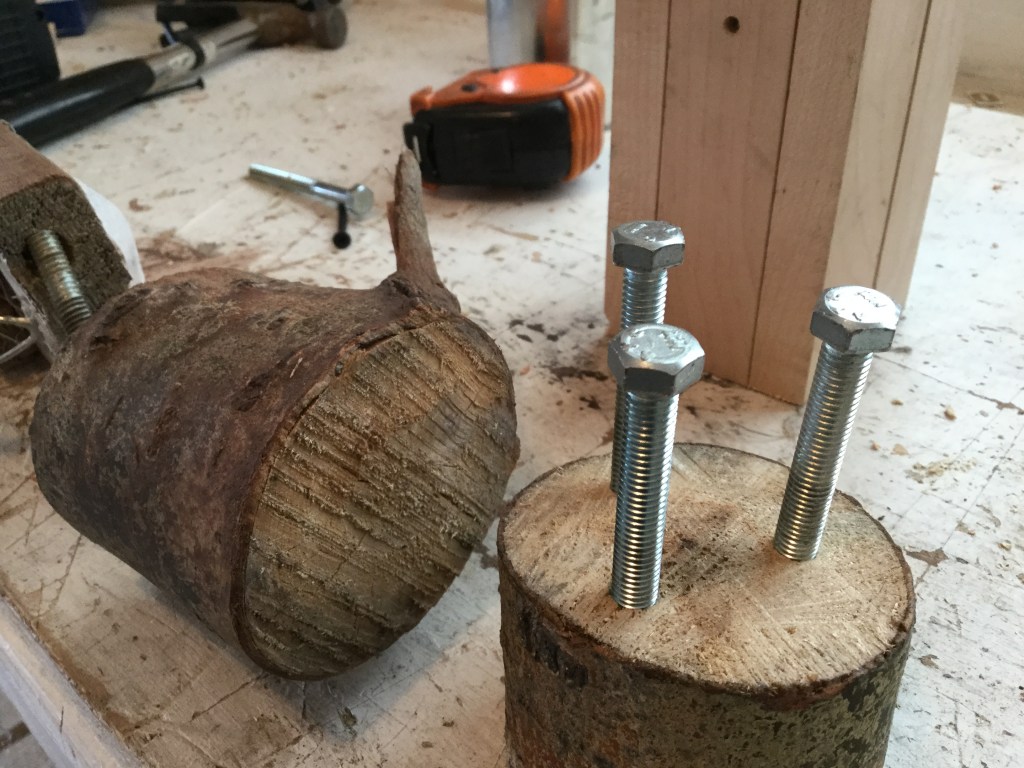
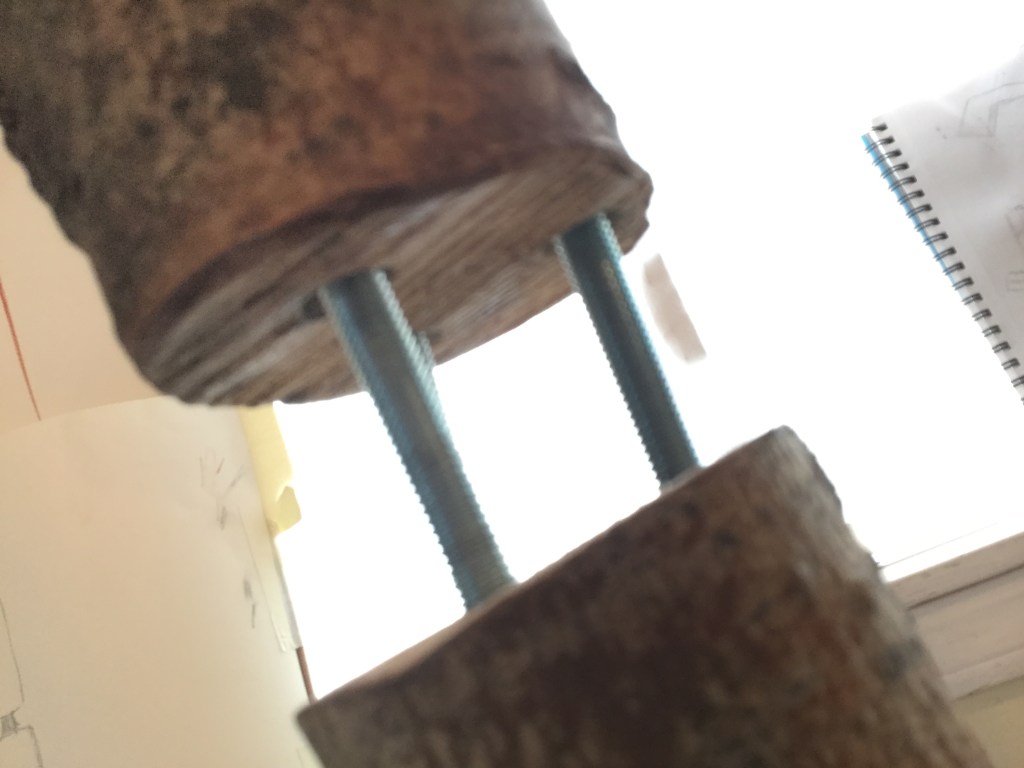
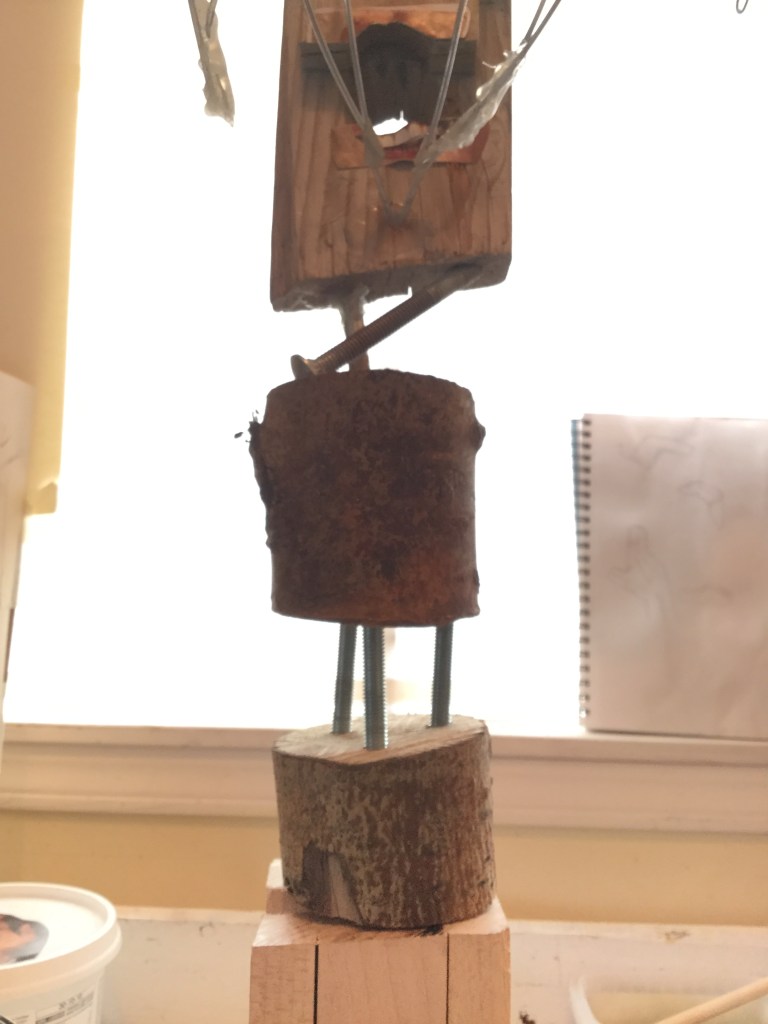
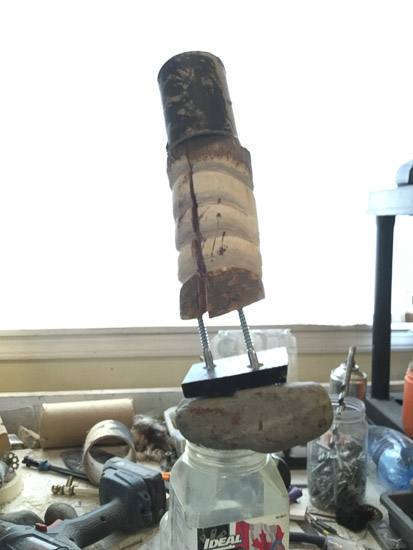
The last part that I needed to tackle when the sounds and the face were done was to make the sculpture taller. At first, I tried with whatever I had in hand to create a base, but it did not work, as you can see in the first image of the gallery below. Later I decide to make things right and attached other elements with proper materials, like the big screws on the below images.
Finally, I decided to create a significant base for my sculpture, gluing some pieces of wood together.
Small second sculpture
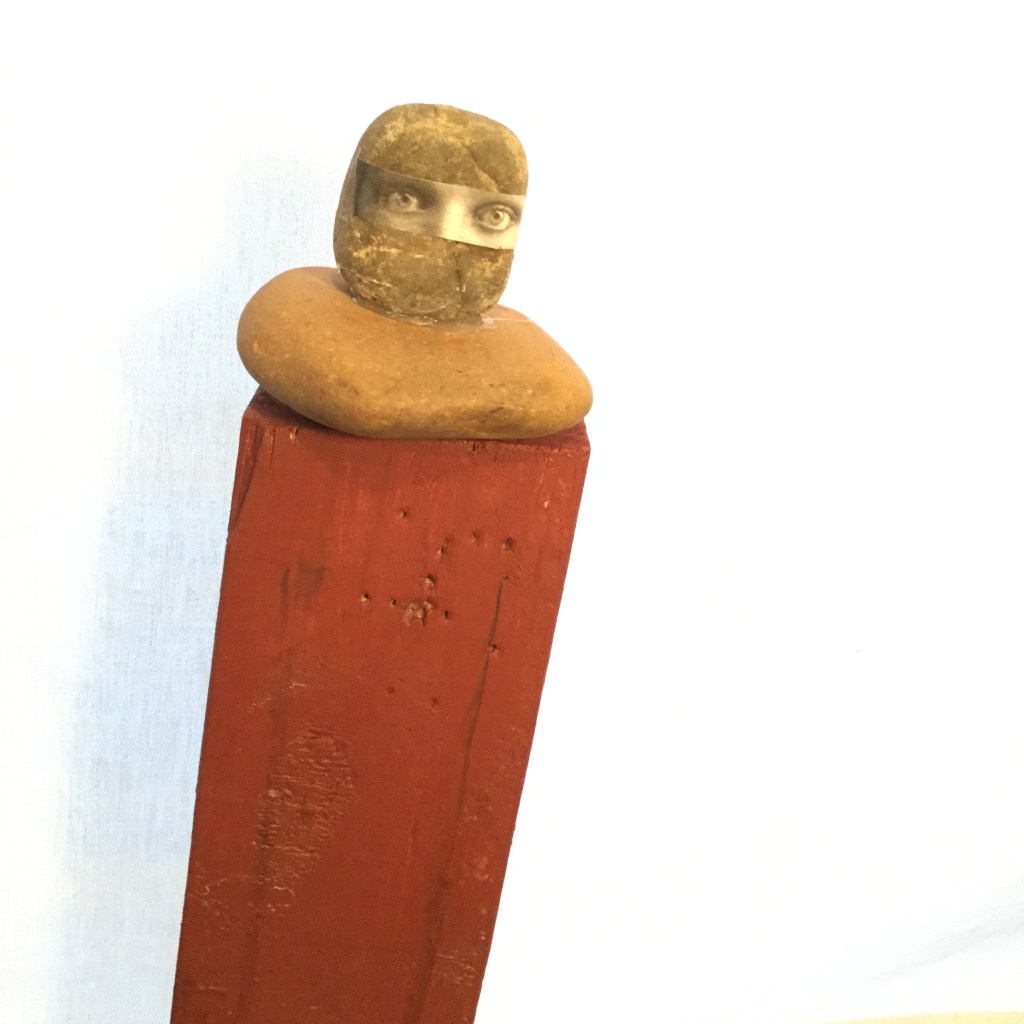
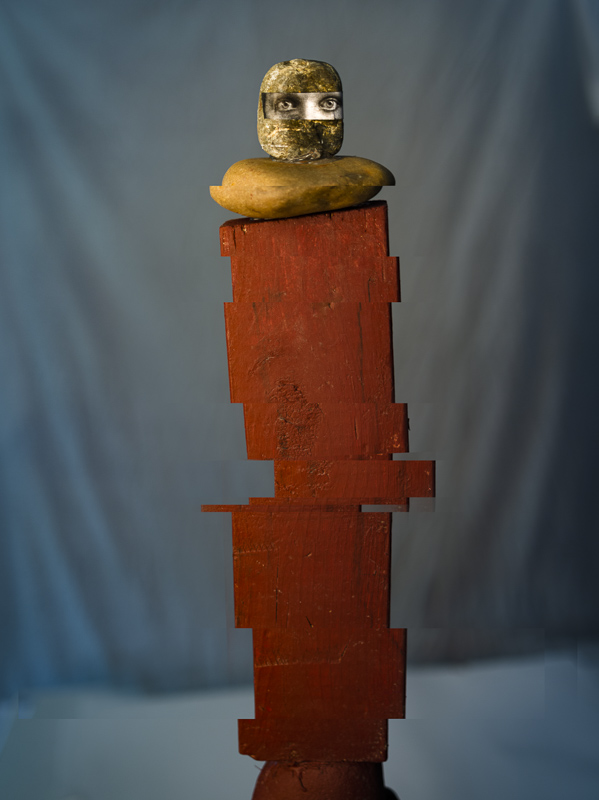
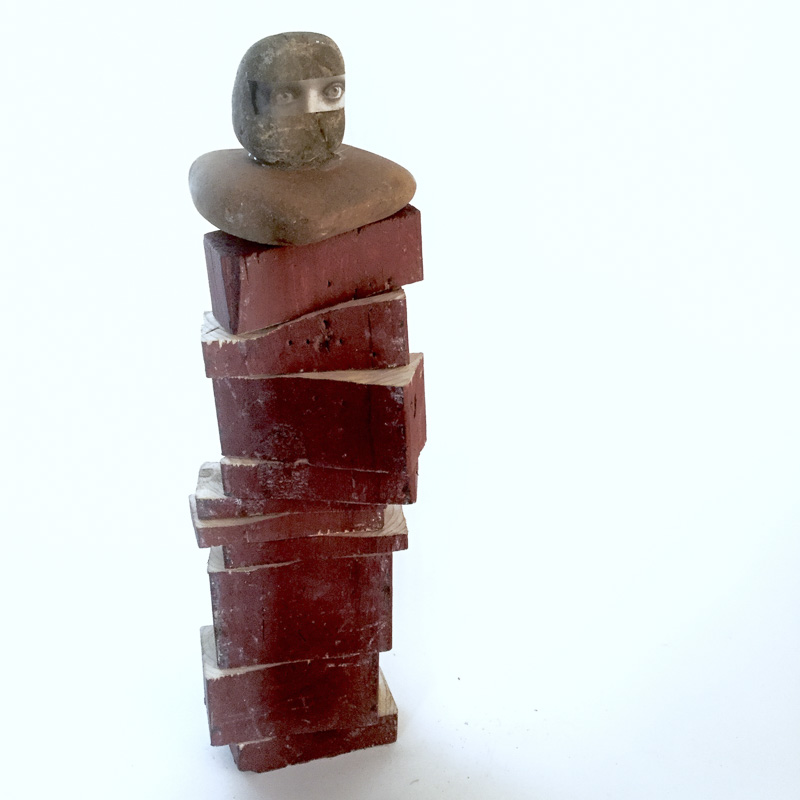
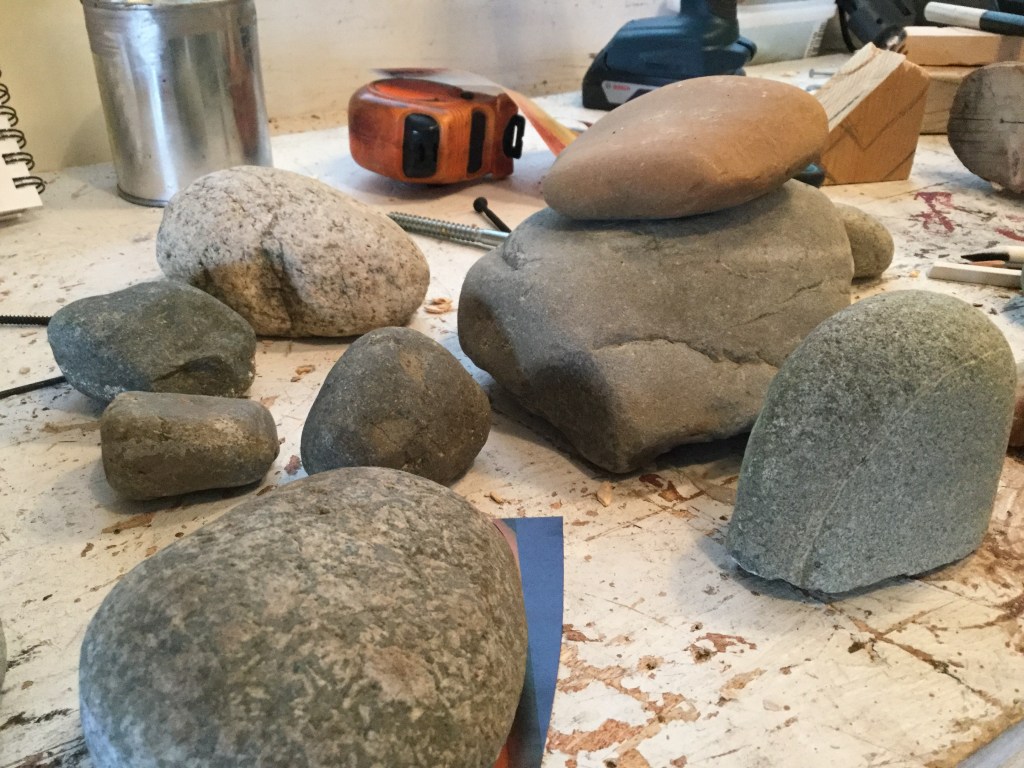
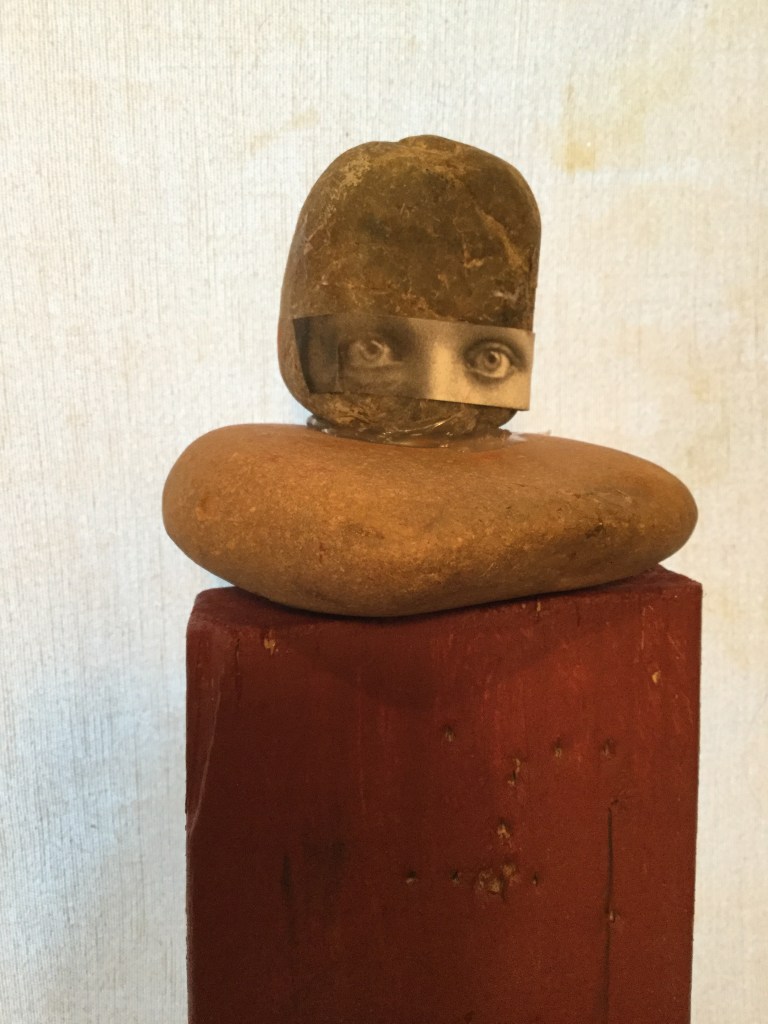
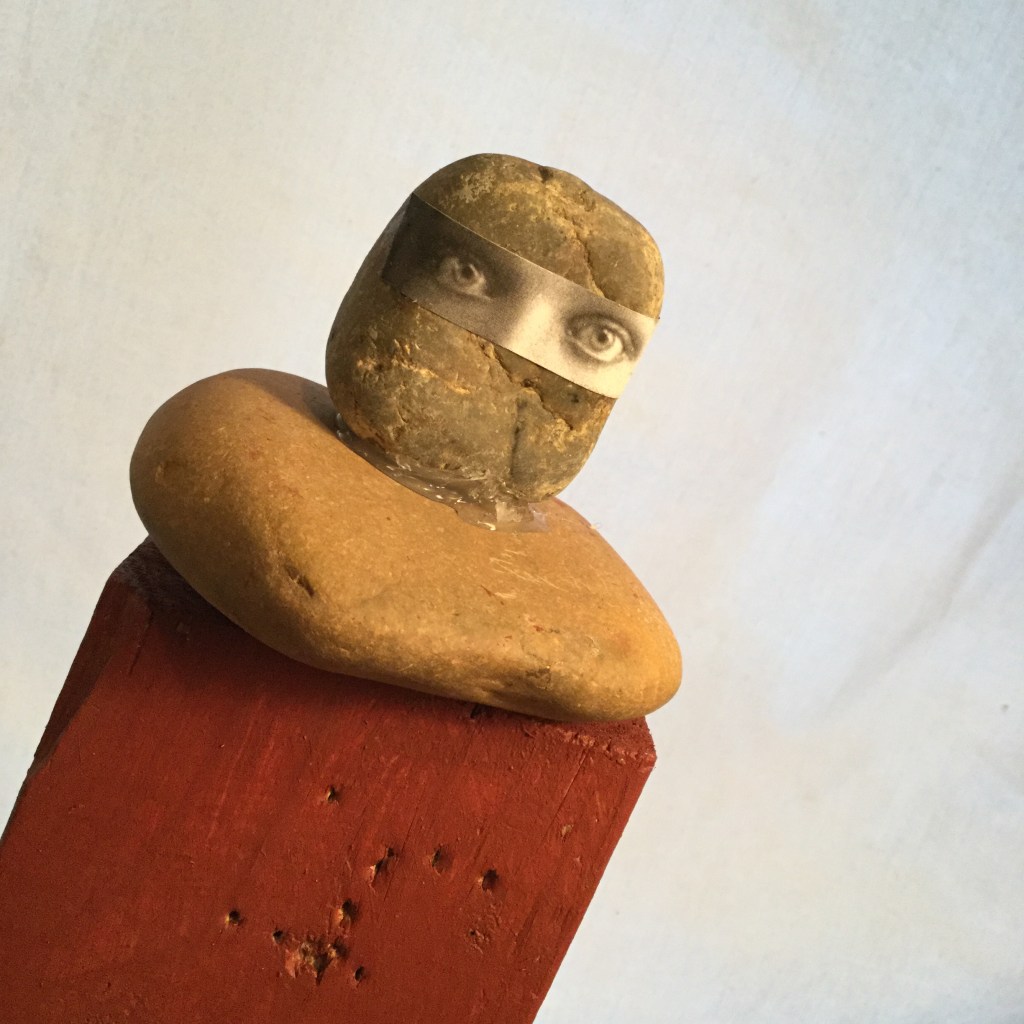
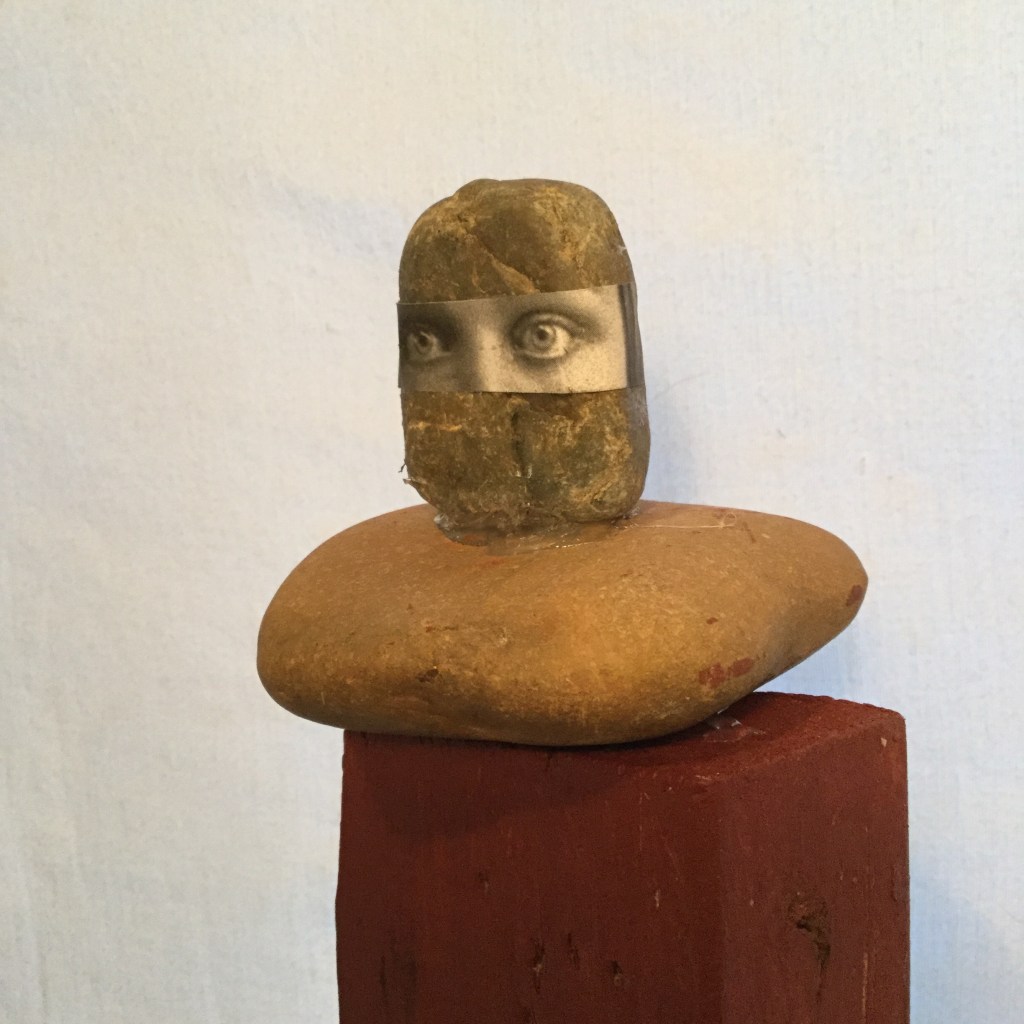
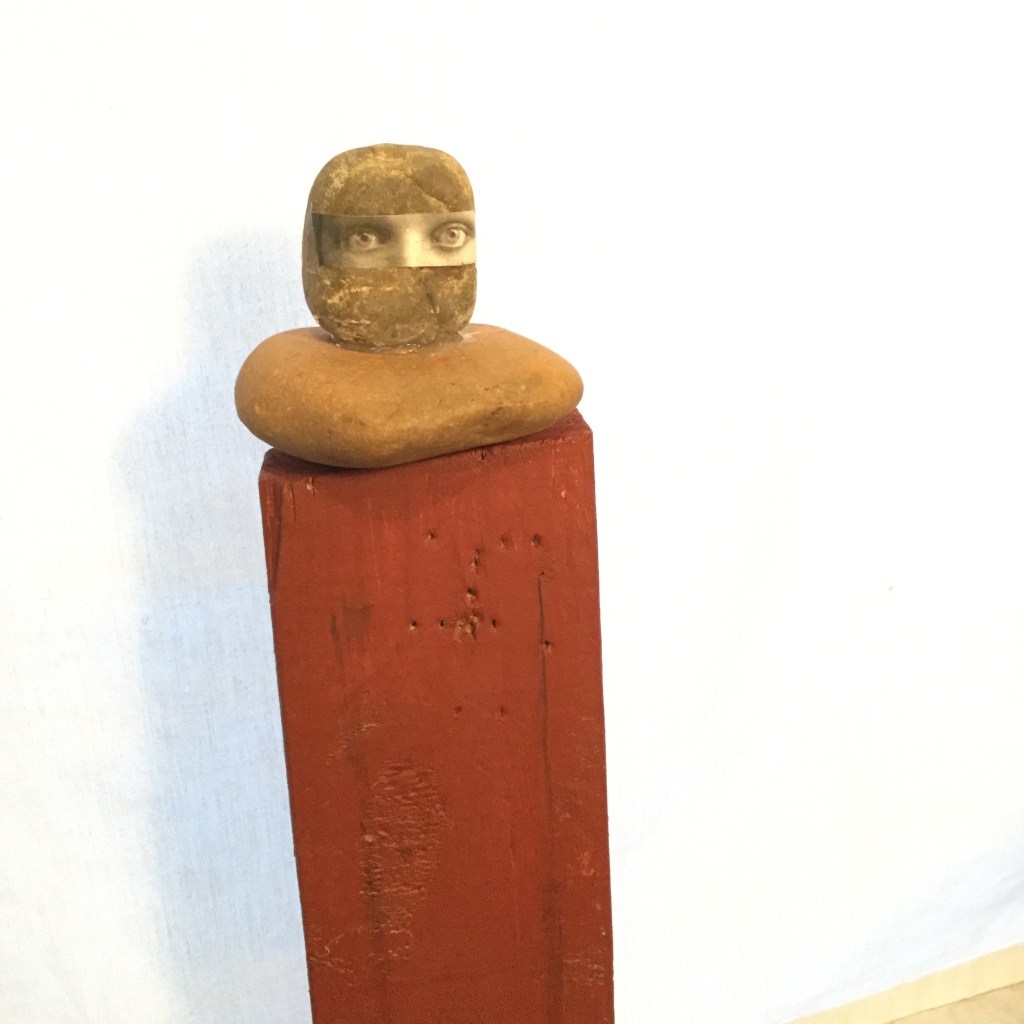
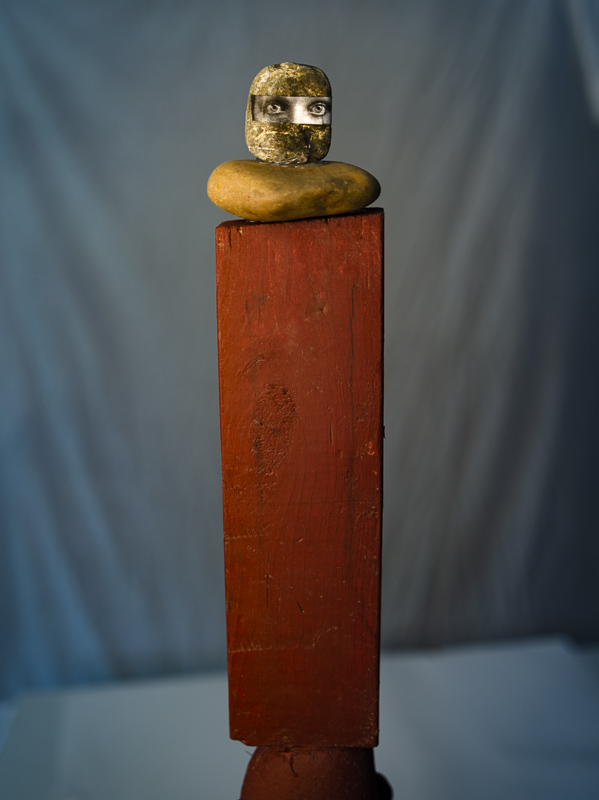
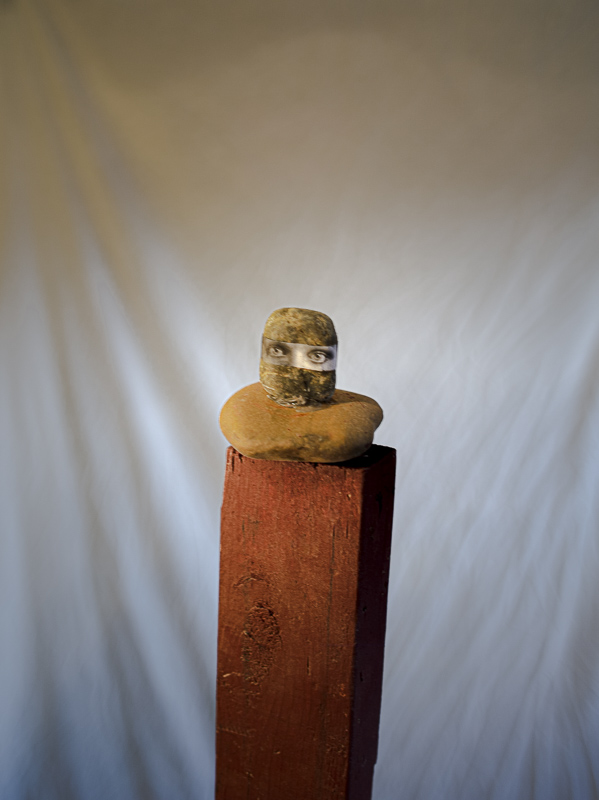
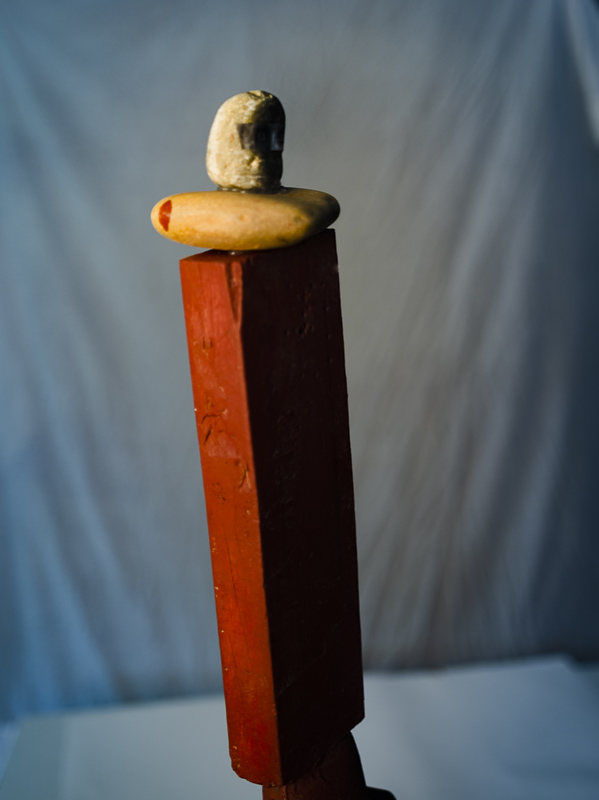
For my second small sculpture, I wanted to do something with rocks. One of the coolest sculptures I have seen here in Canada is an inukshuk: “An inukshuk is a structure made of stones piled on top of each other. Inuksuit or inukshuks (which means more than one inukshuk) were used for navigation in the frozen north where, in the snow, everything could look the same.” (cbc.ca, 2018).
This was one of the fastest and easiest sculptures I did. Although it did not resemble the my first drawings the resulting sculpture is quite cute. It is just a rock at the bottom, a long piece of wood, a flat rock, and finally another stone.
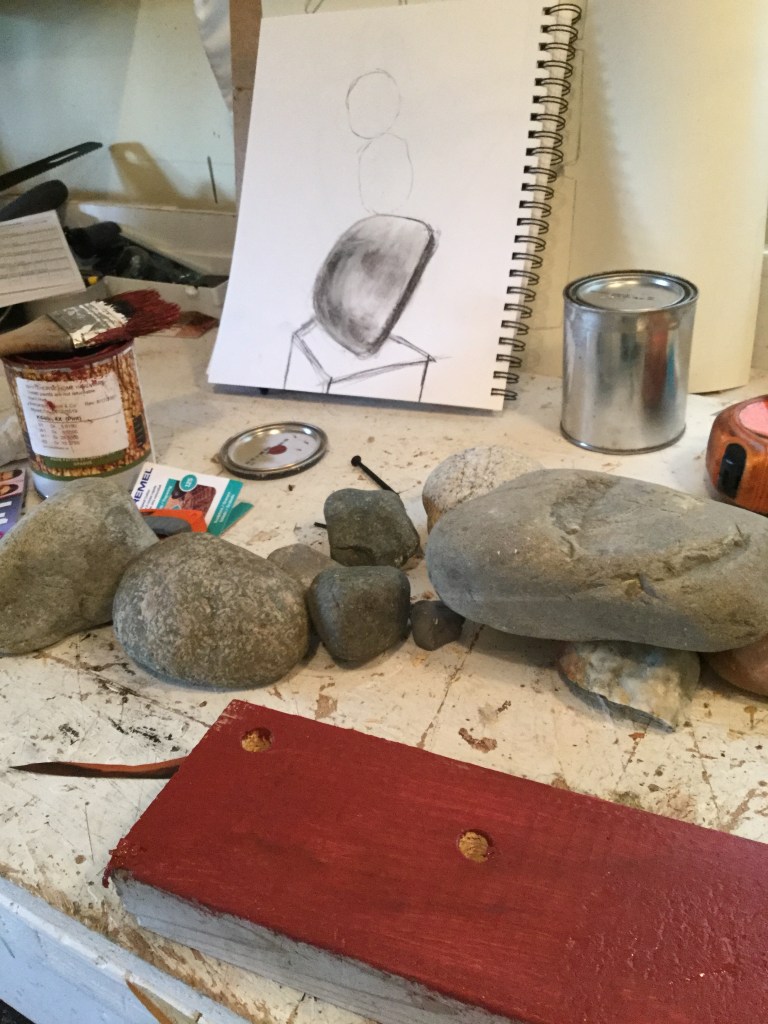
The final touches for this stacked sculpture was an inspiration of the works of Hannah Hoch. This time I used just a couple of eyes that I got from an old magazine and the effect it has on the whole sculpture was fantastic, and I think the head shape rock is as with the eyes: a good match.
Small Third sculpture
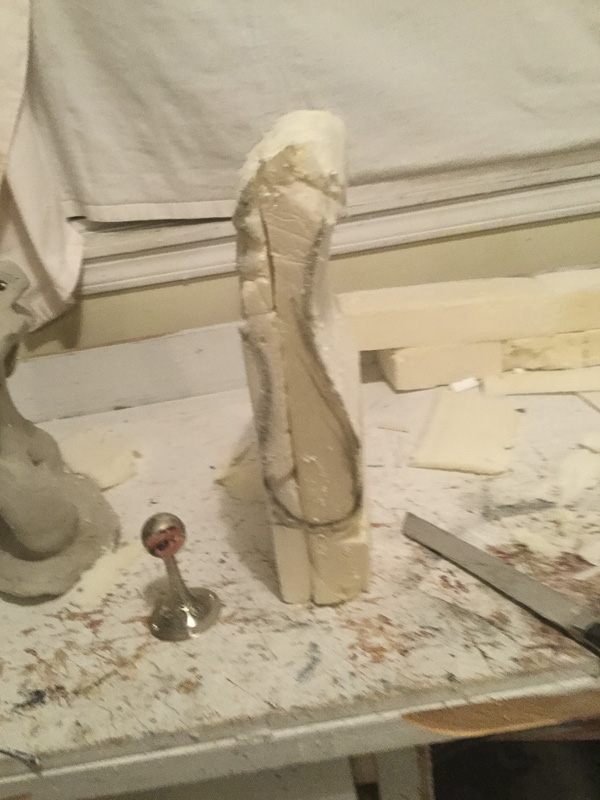
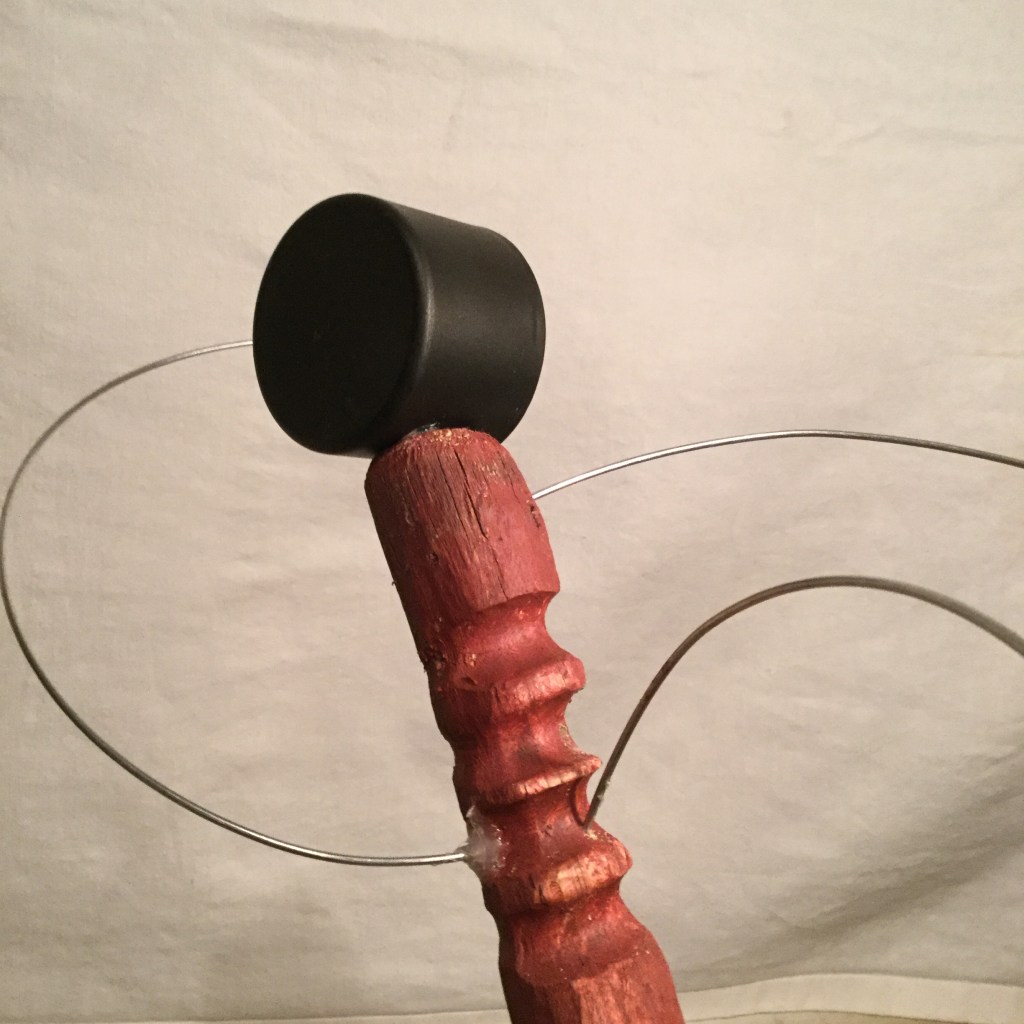
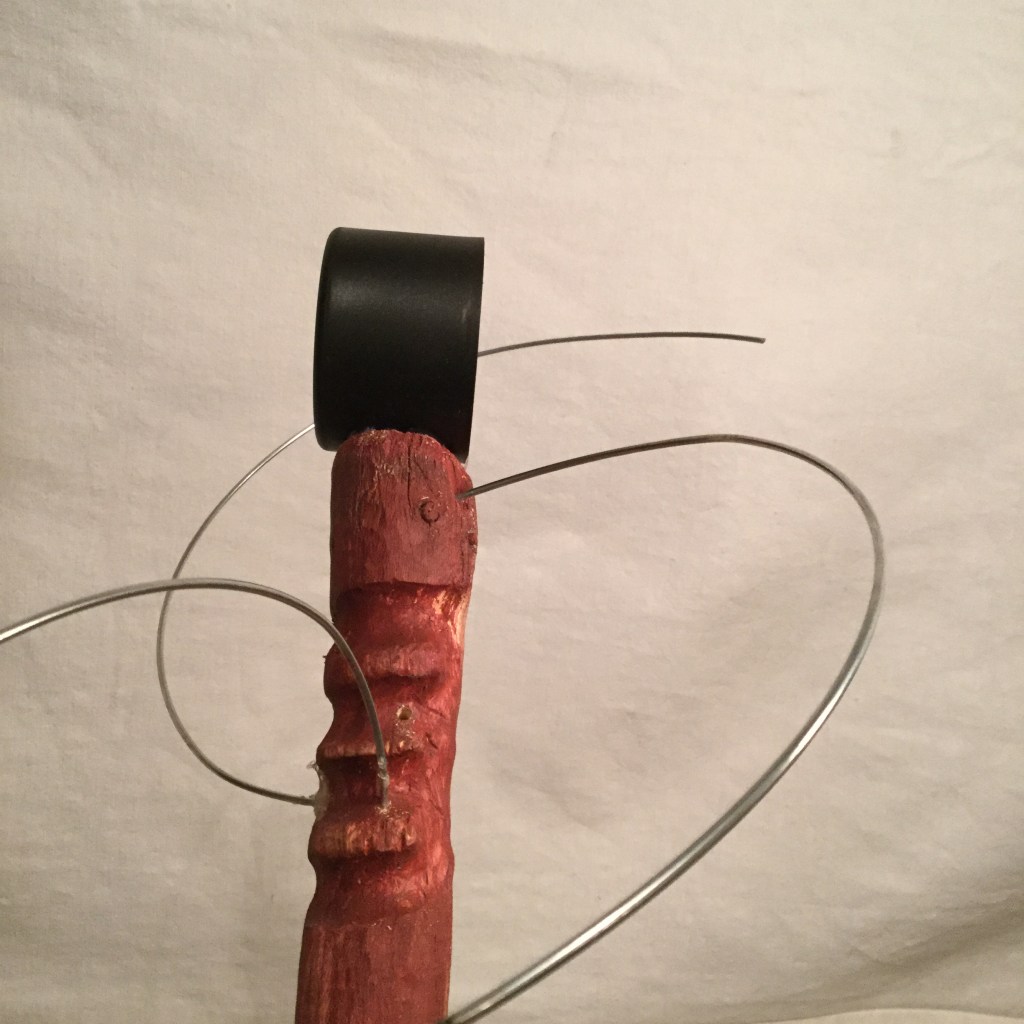
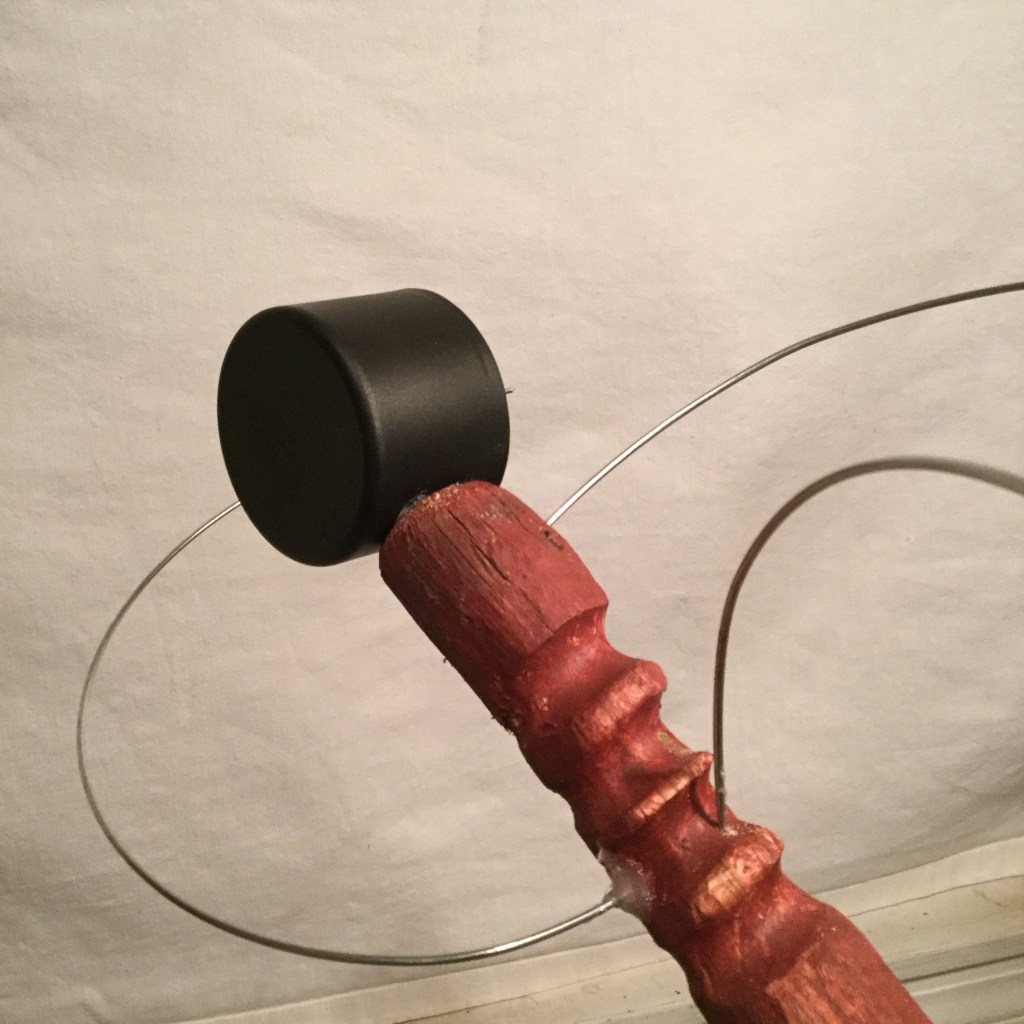
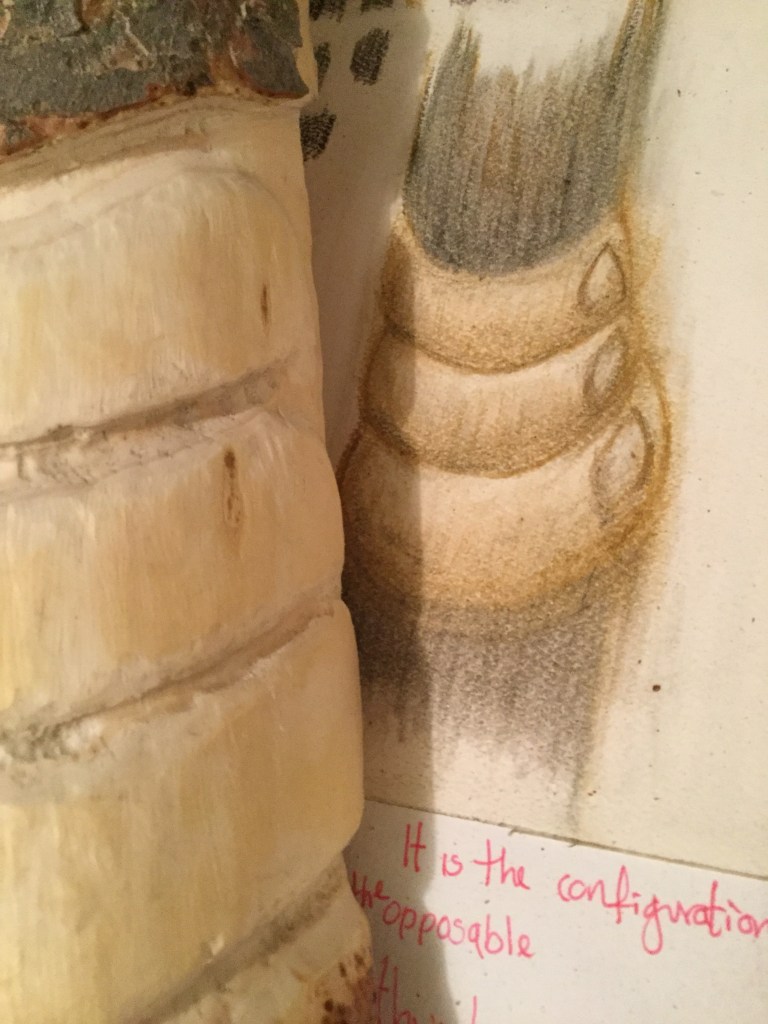
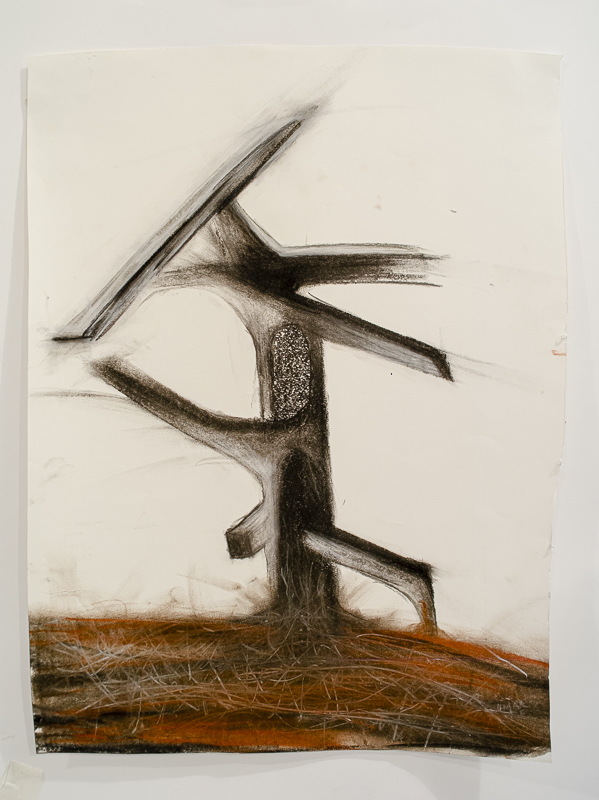
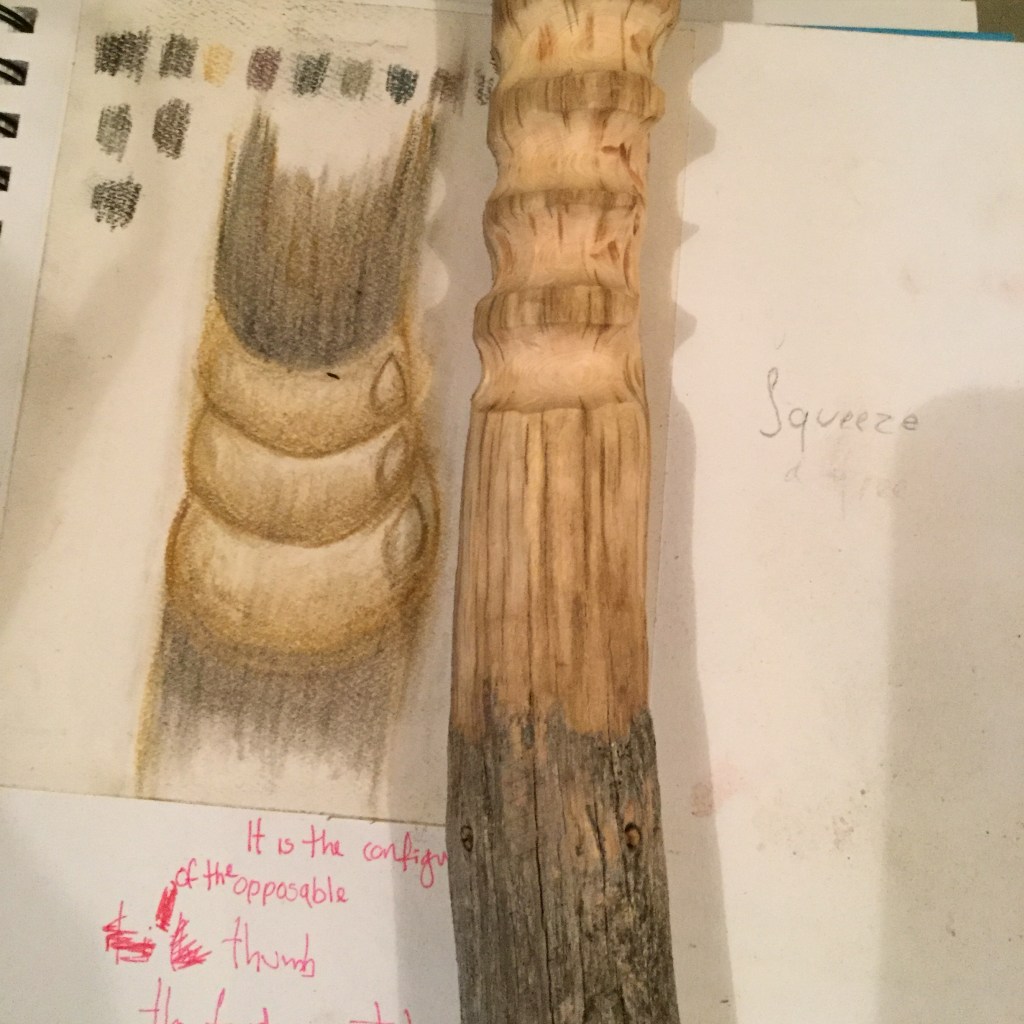
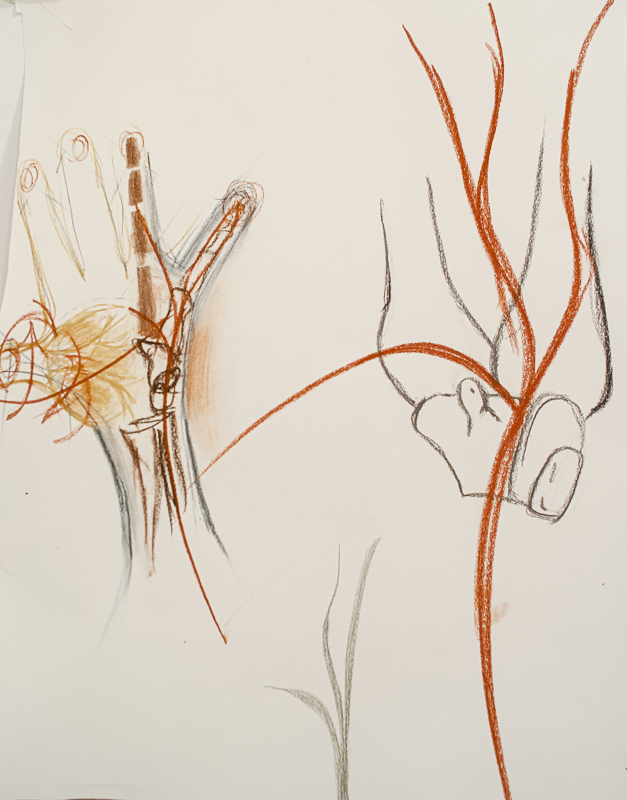
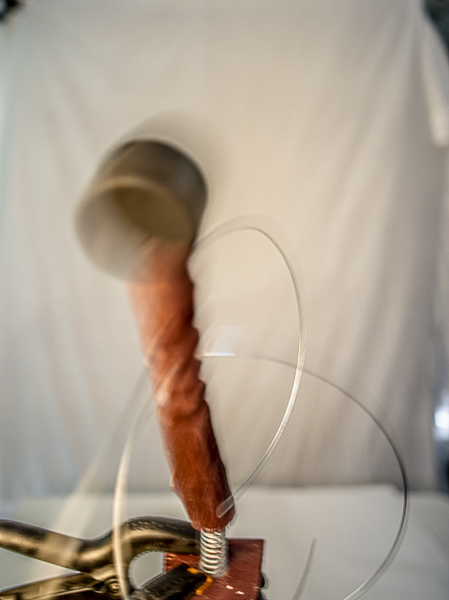
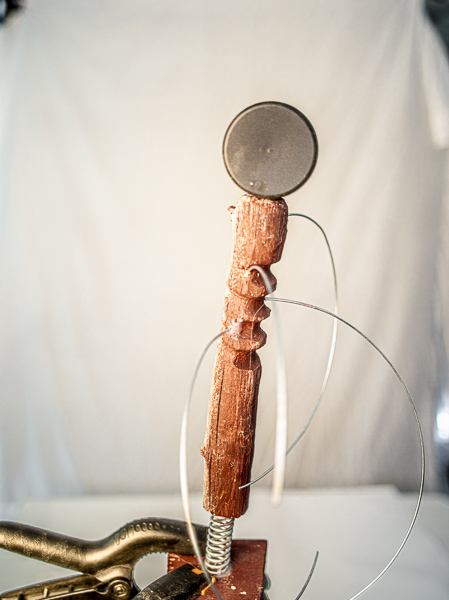
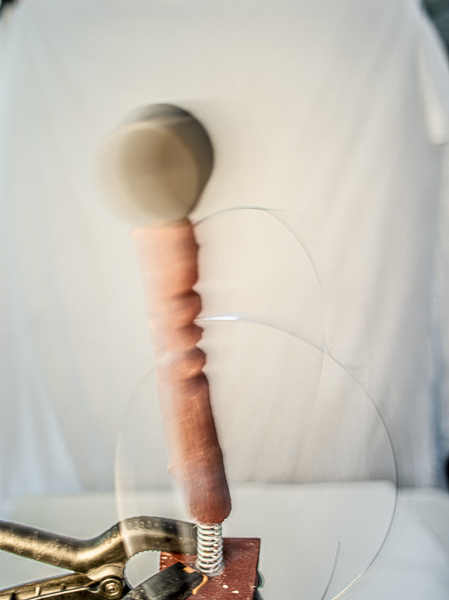
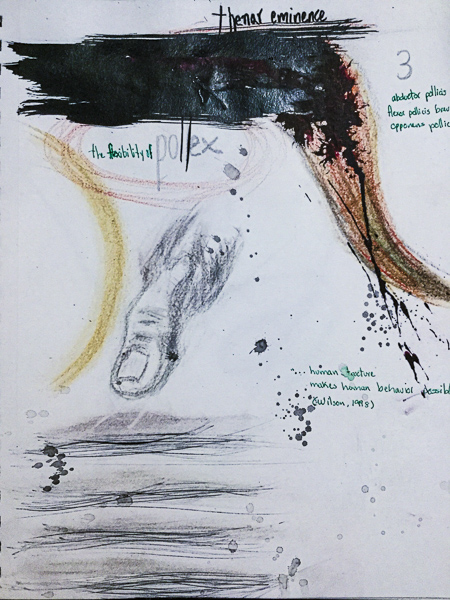
For this sculpture, I returned to my ongoing research of intelligence and darkness, focusing this time on the humans’ hands and fingers.
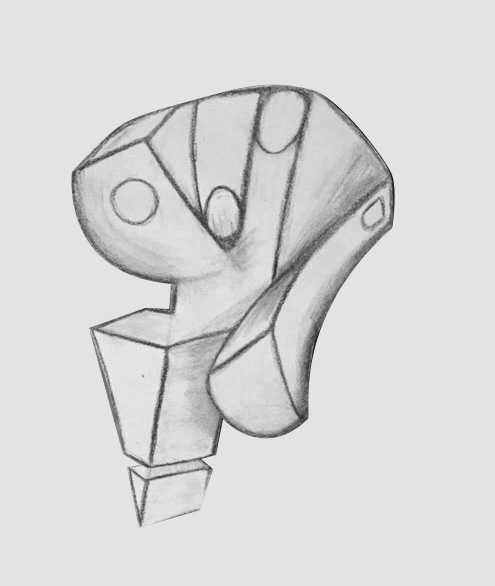
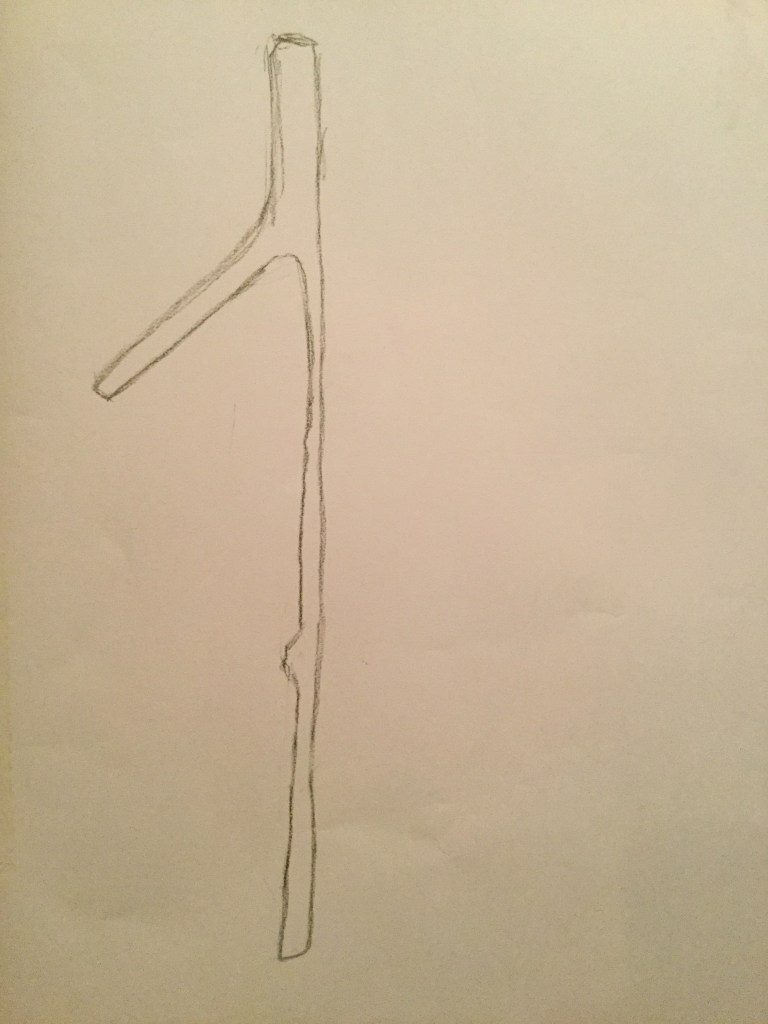
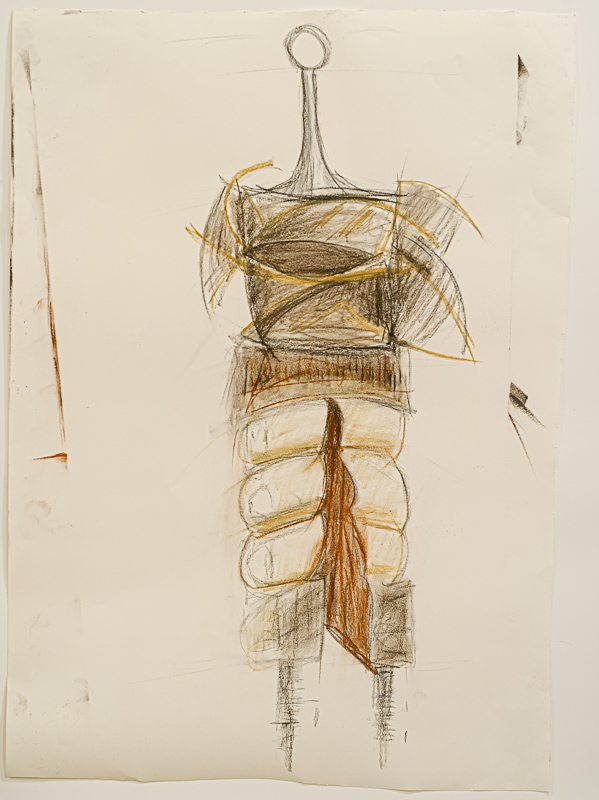
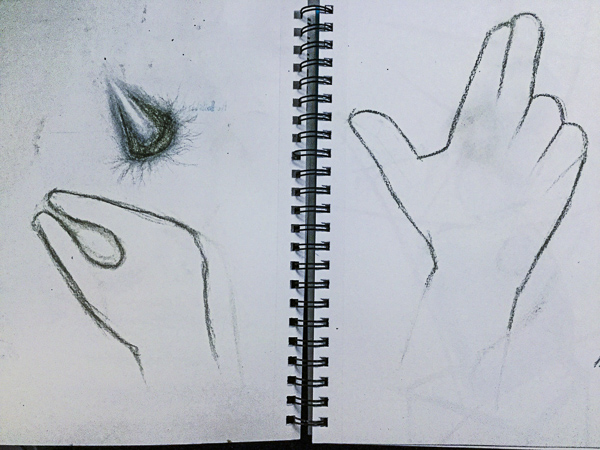
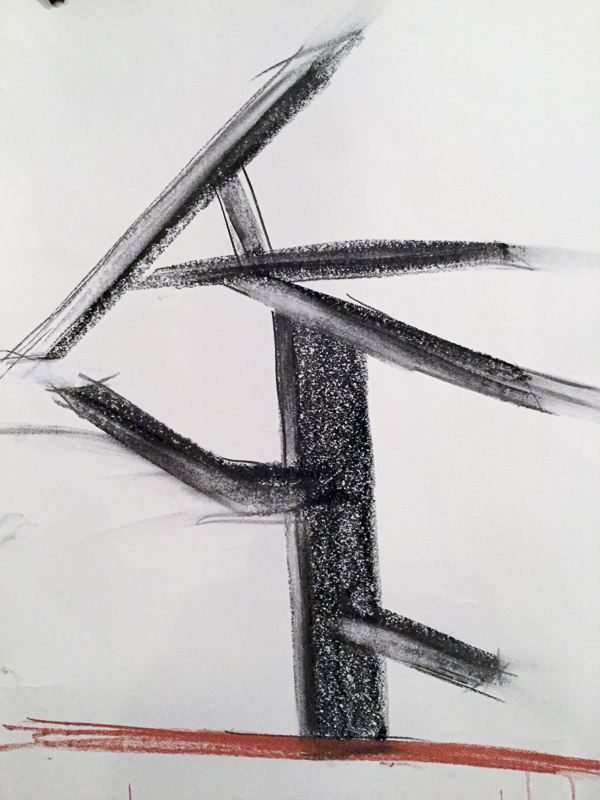
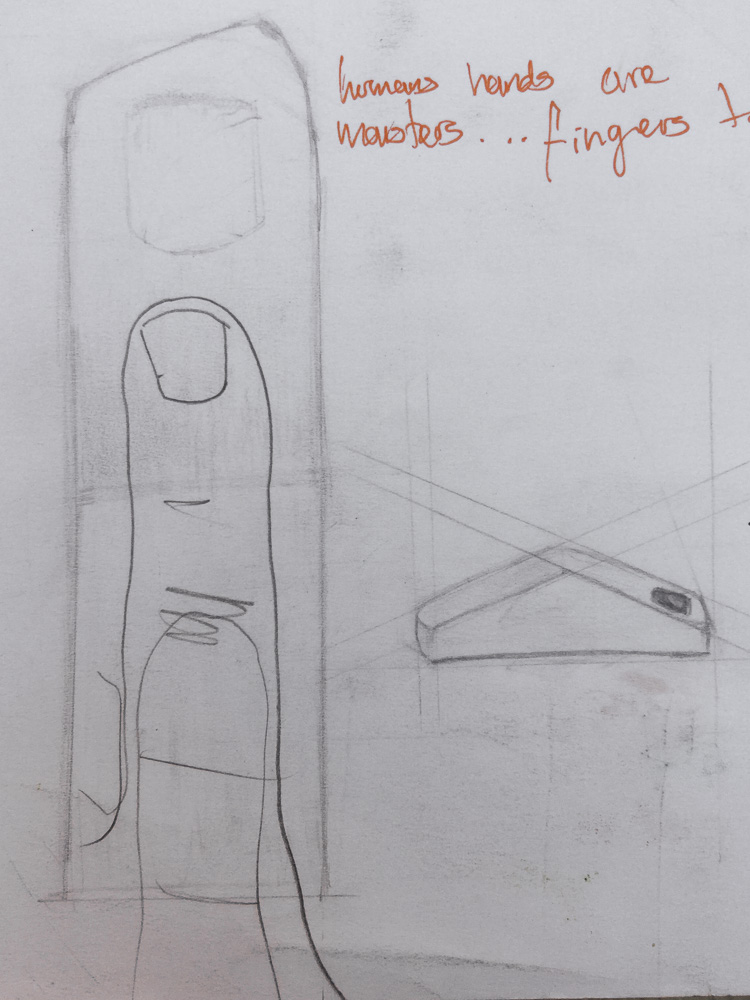
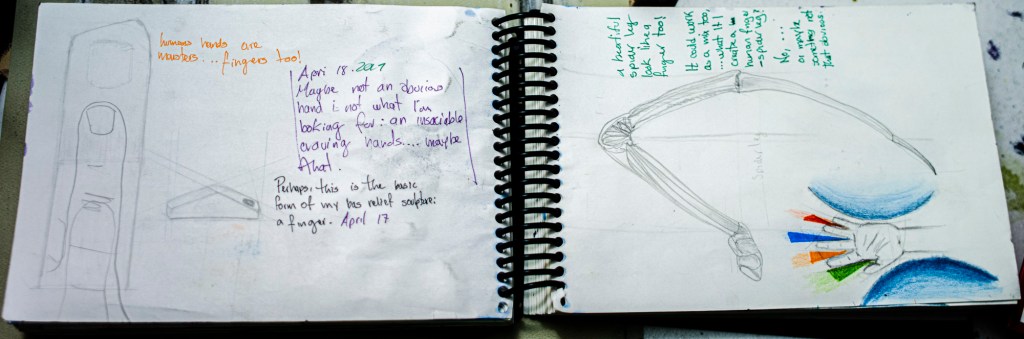
So I made a new drawing (image below) with only three fingers: index, middle and ring finger. The other two, the ones missing in the picture, are the thumb and the pinky and it just happens that this two are the most crucial fingers in terms of evolution.
It is a common knowledge that humans are at the top of the chain because our opposed thumb, however, we are not the only ones with that feature in the animal kingdom. “Most primates (humans, apes, and Old World monkeys) and some other animals have opposable thumbs. Humans can move their thumb farther across their hand than any other primate.” (Damonte, 2014).
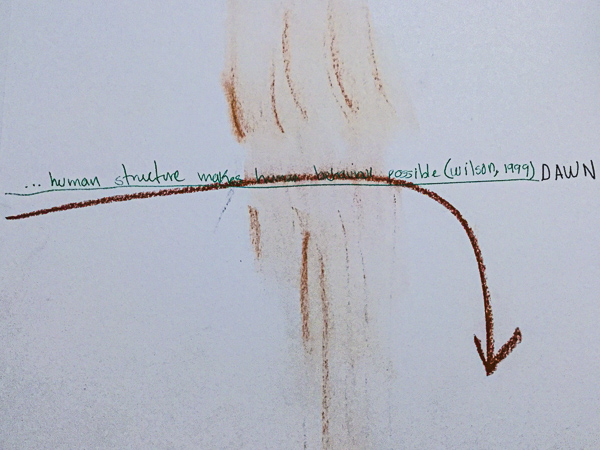
On the other side of the hand lives the fifth finger also knows as the pinky. This little finger provides half of the force of our hand, so the question is: how does it do it? In the words of Frank R. Wilson, the answer goes like this: “is probably no exaggeration to say that the final biomechanical change at the base of the pinkie may have conferred an advantage to the hominid hand comparable to supplying its owner not just with gunpowder but with the biomechanical and computational infrastructure for an entire ballistics technology. Considering everything else that was already present, there was nothing this hand could not do if it could learn how to do it. And apparently with time, and with other opportunities and challenges encountered in new environments, the brain did rise to the challenge, and greatly modify itself in the process,* since there is very little now that this hand, which makes tools that make machines that make computers that make machines and tools (and so on), cannot do.” (Wilson, 1999)
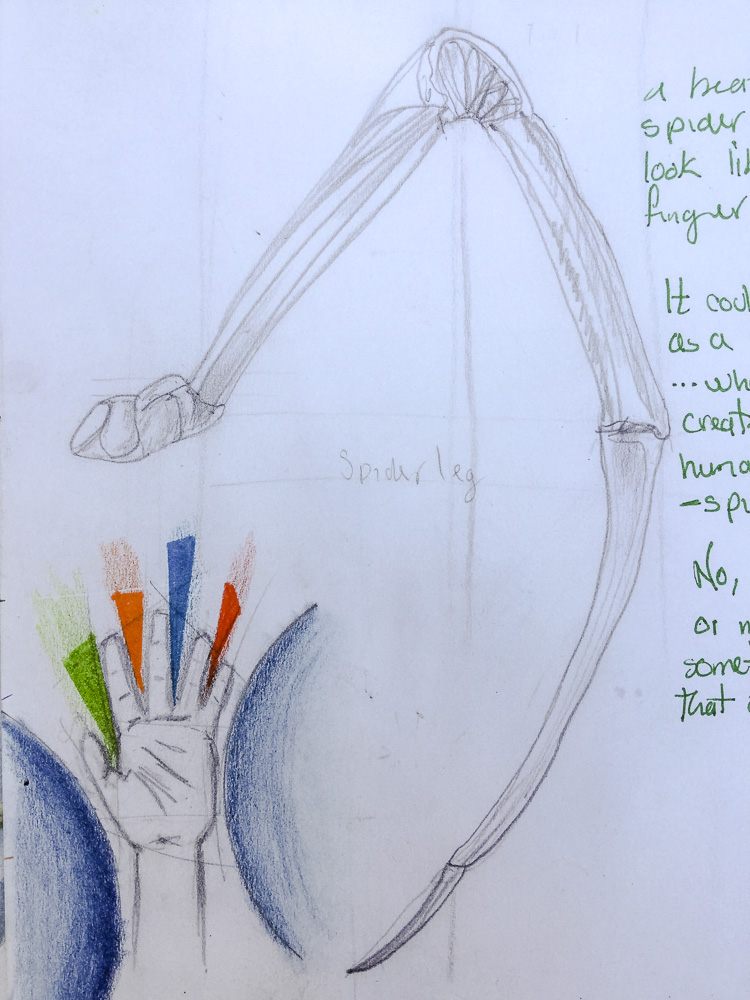
Hamate, Pisiform and Triquetrum are the bones at the base of the pinky, and they are part of the biomechanical changes that Frank R. Wilson talks about it in his book. I did the above drawing to help me visualize this information. On it, you can see the ulnar nerve, the big red swirl lines, resting on the hook of the Hamate bone.
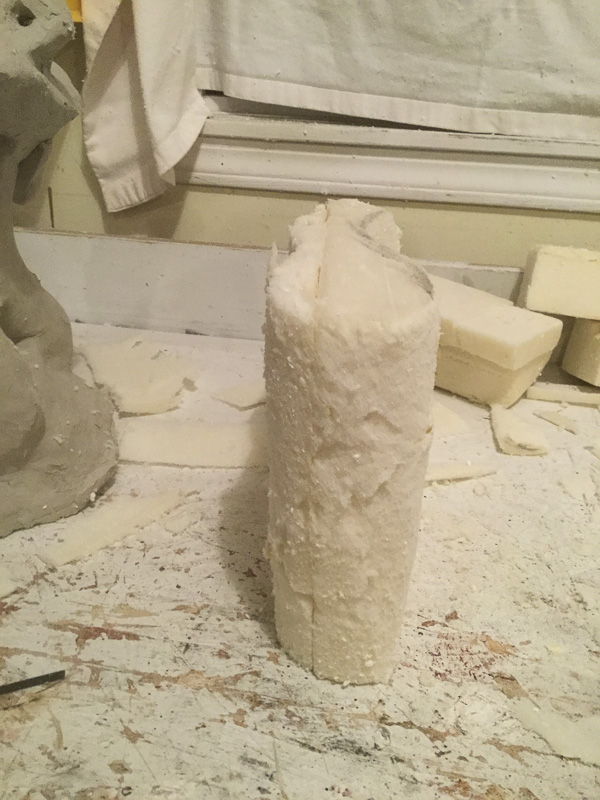
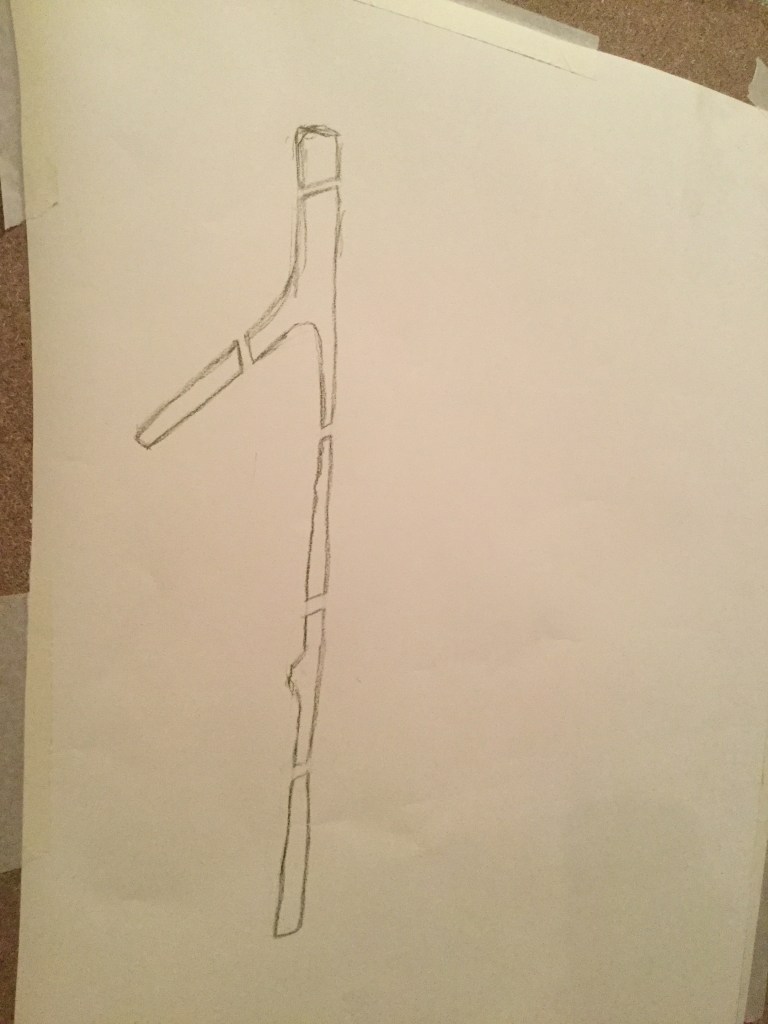
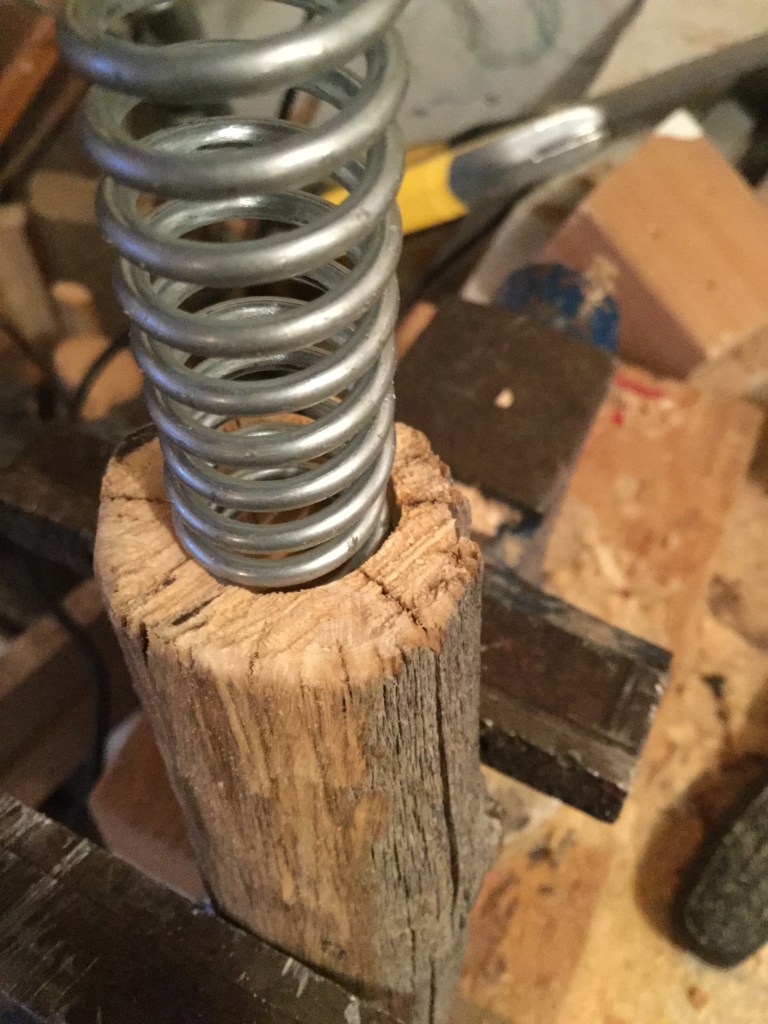
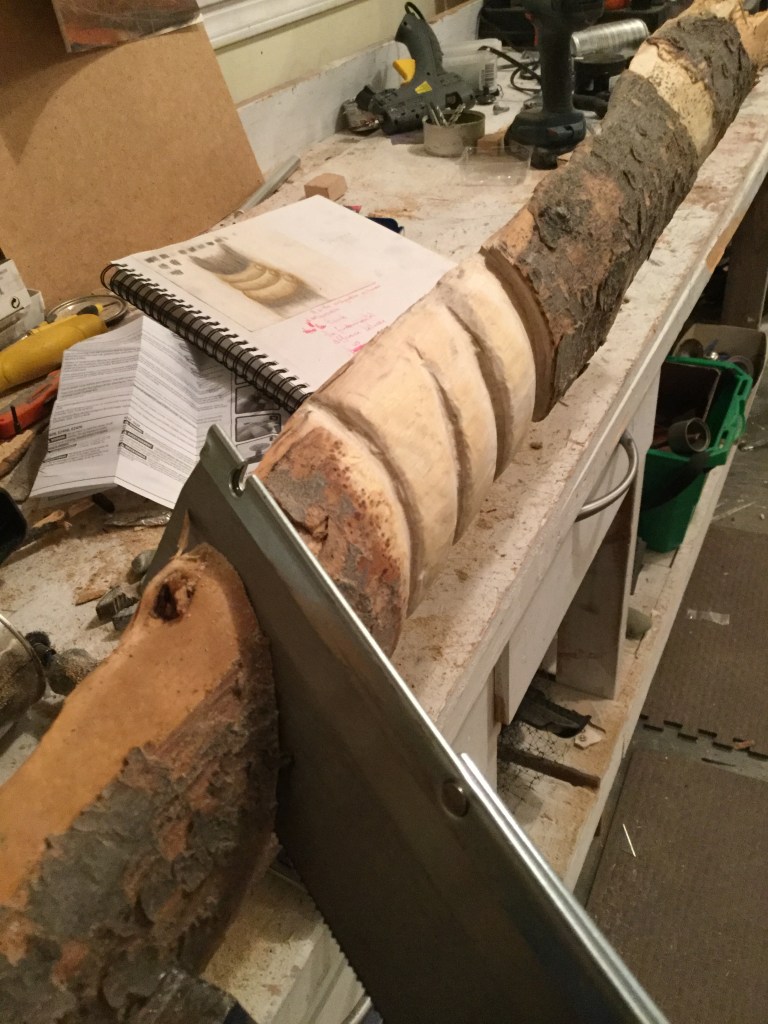
The below gallery shows my construction process from a drawing to a real object. Unfortunately, the result is not exactly what the drawing shows. This is my first time carving, but despite my low results I was still able to use the carved wood piece to make a sculpture.
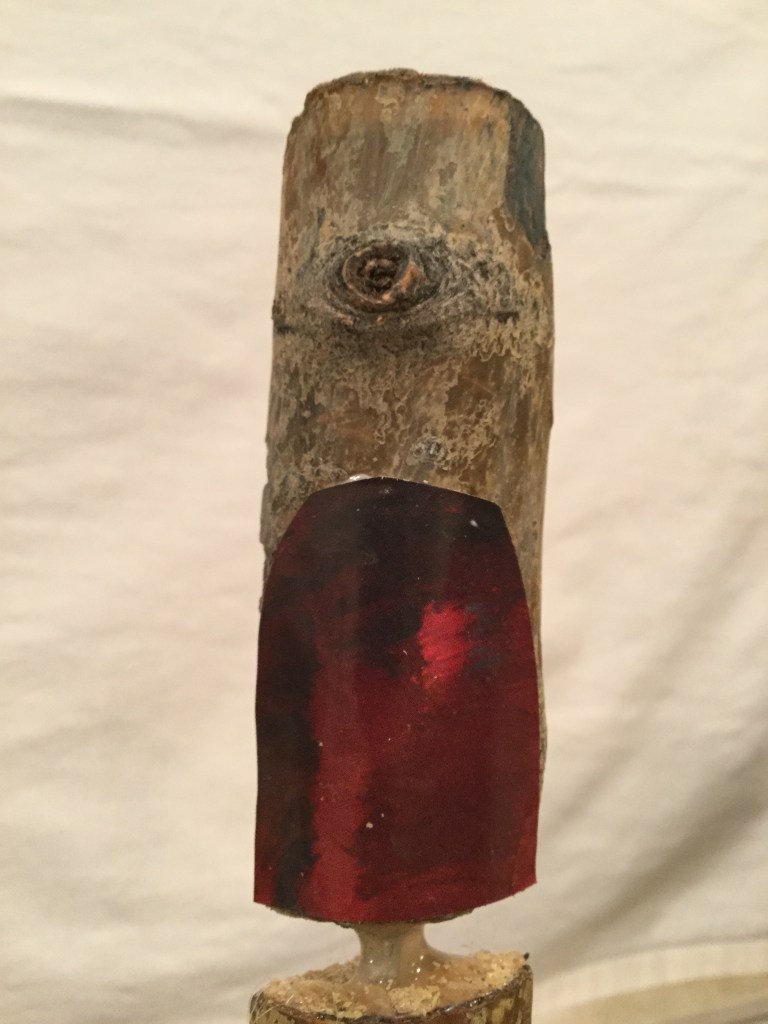
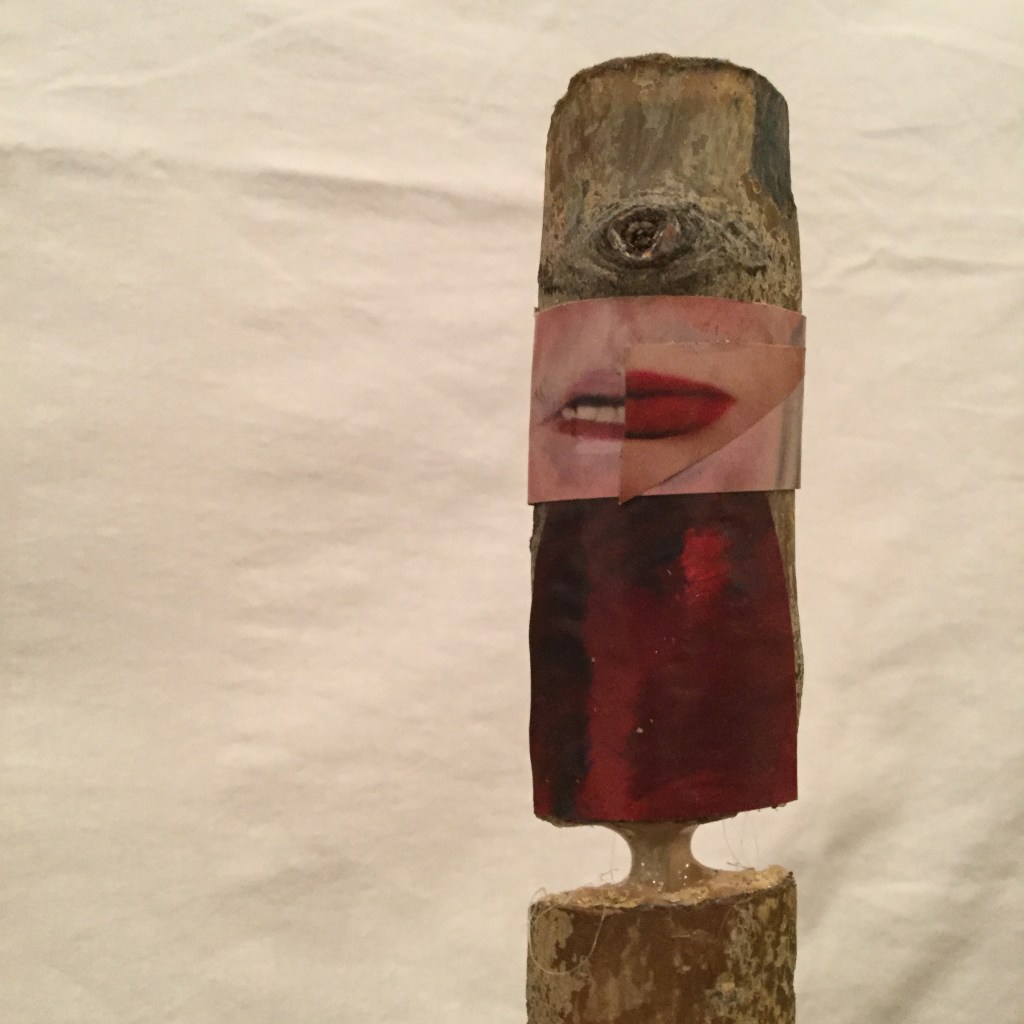
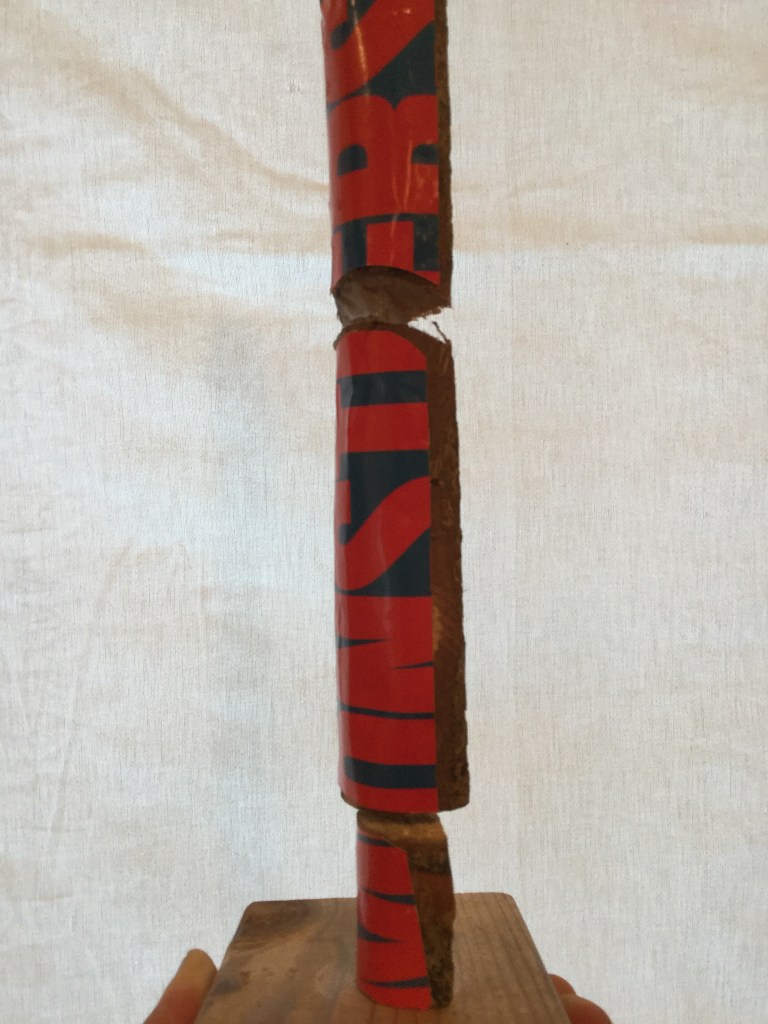
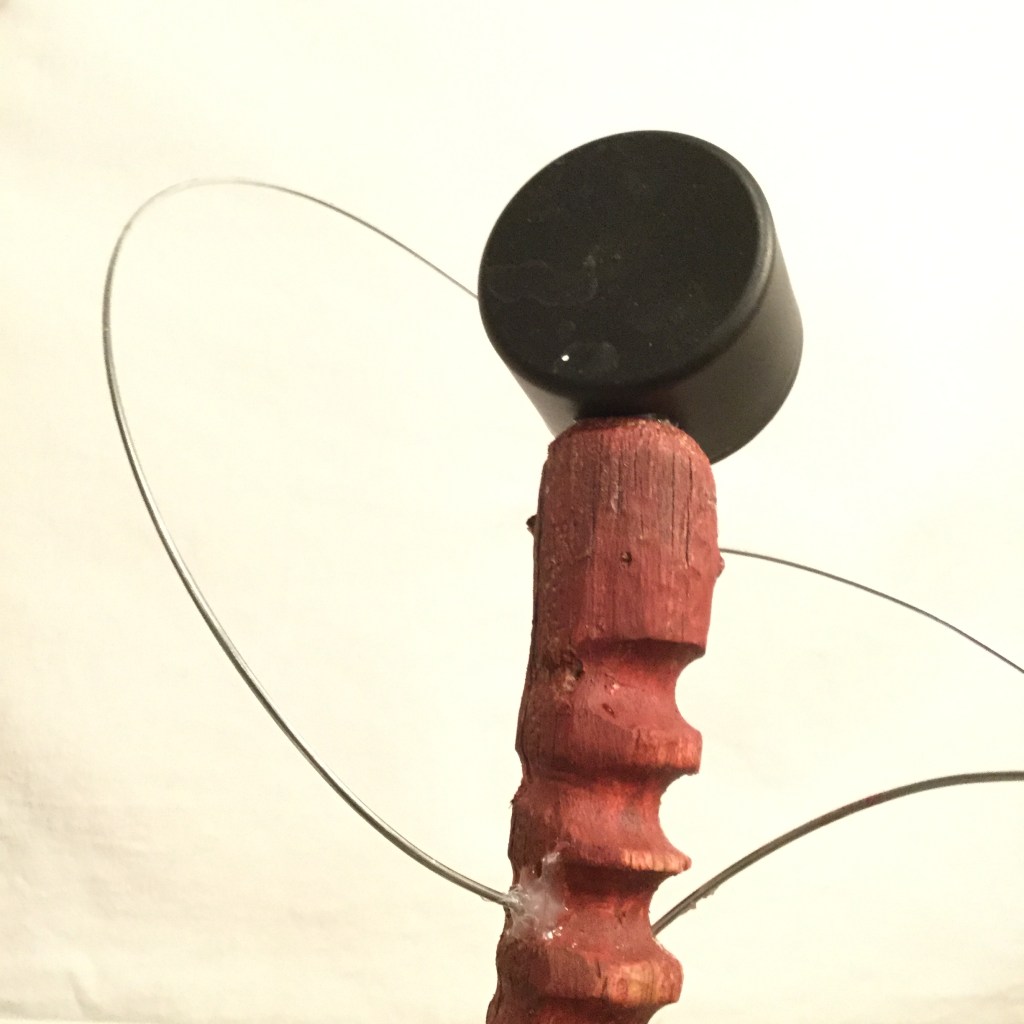
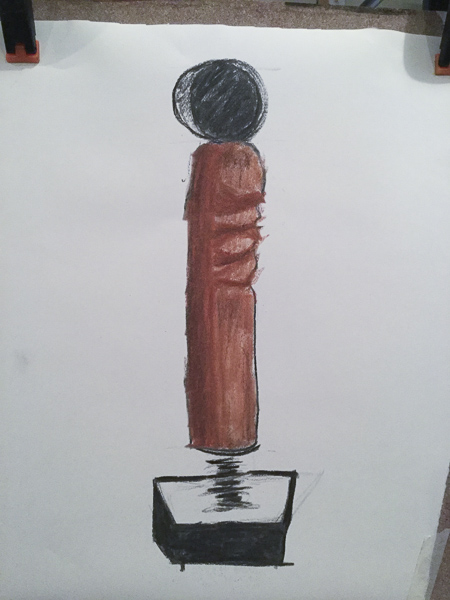
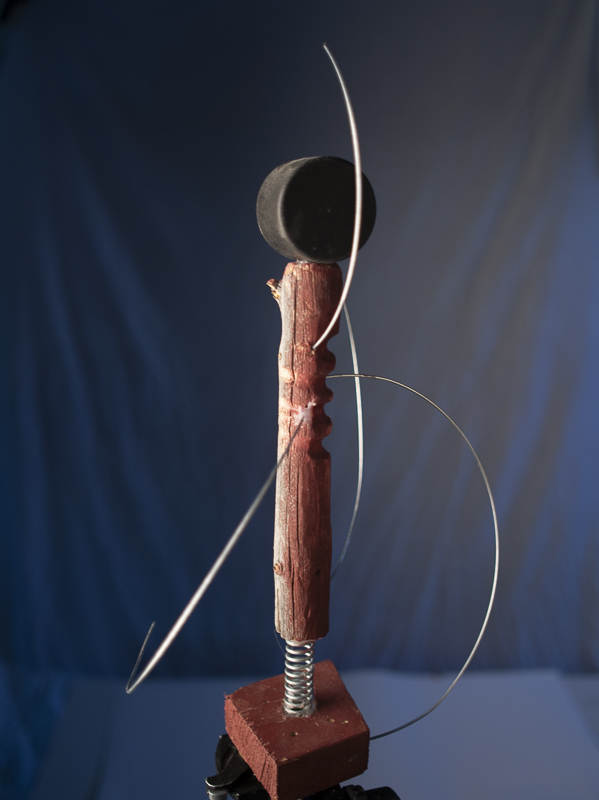
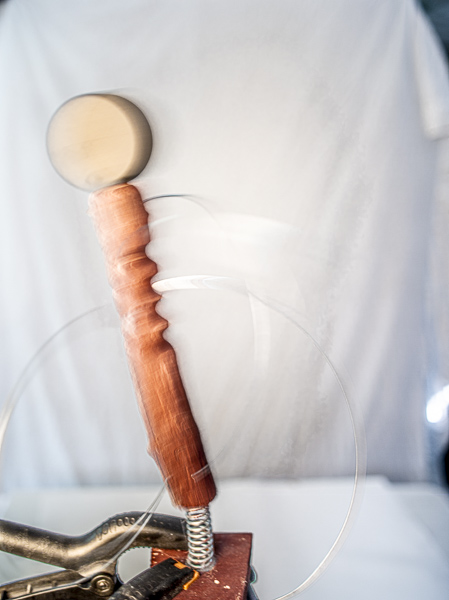
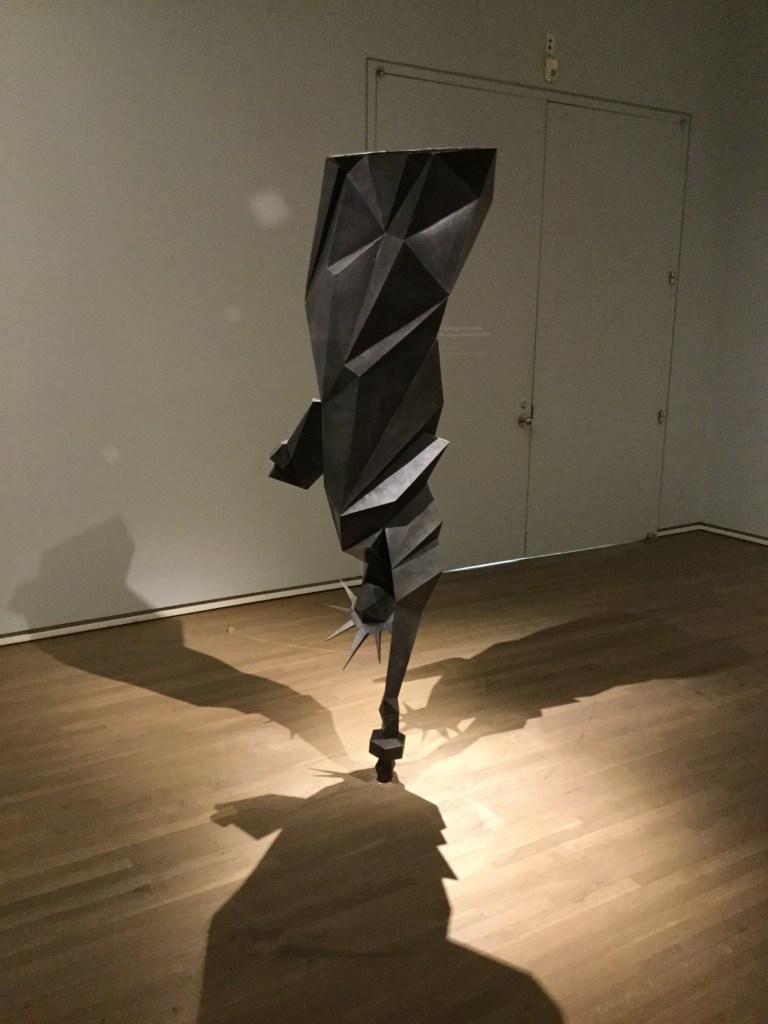
Once the frustration has passed, I decided to do a simple stacked sculpture. I joined the carved piece of wood to spring steel and then I joined the two parts to a base. I painted it red and attached a black aerosol cap on top and some wire pieces to the side.
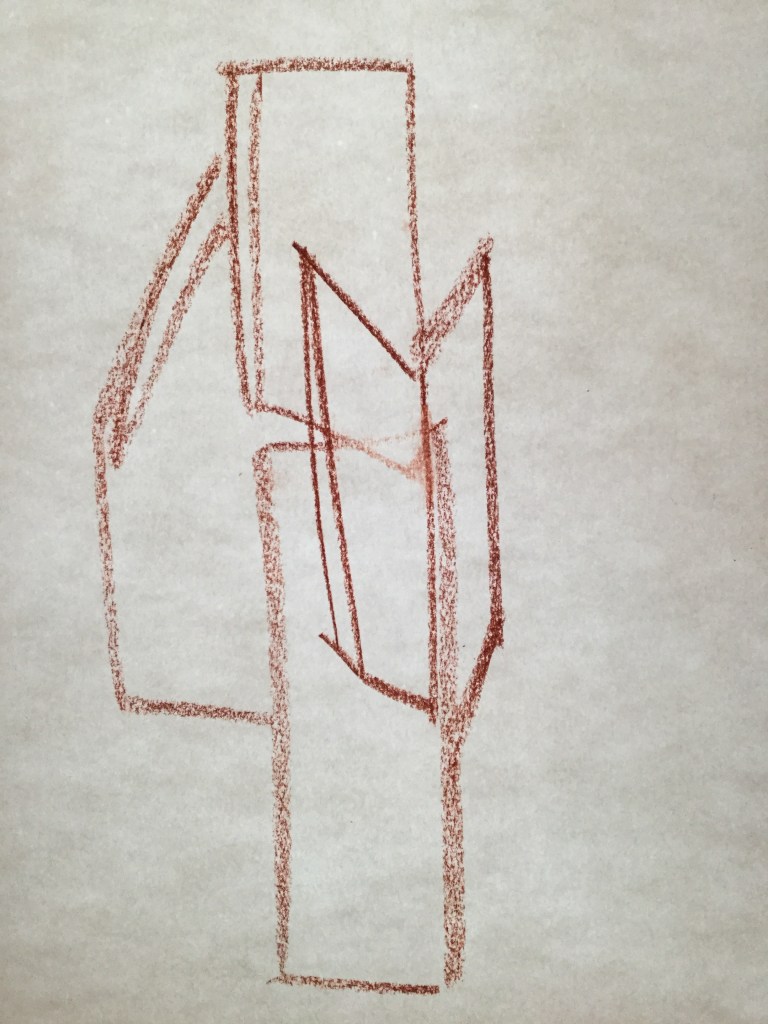
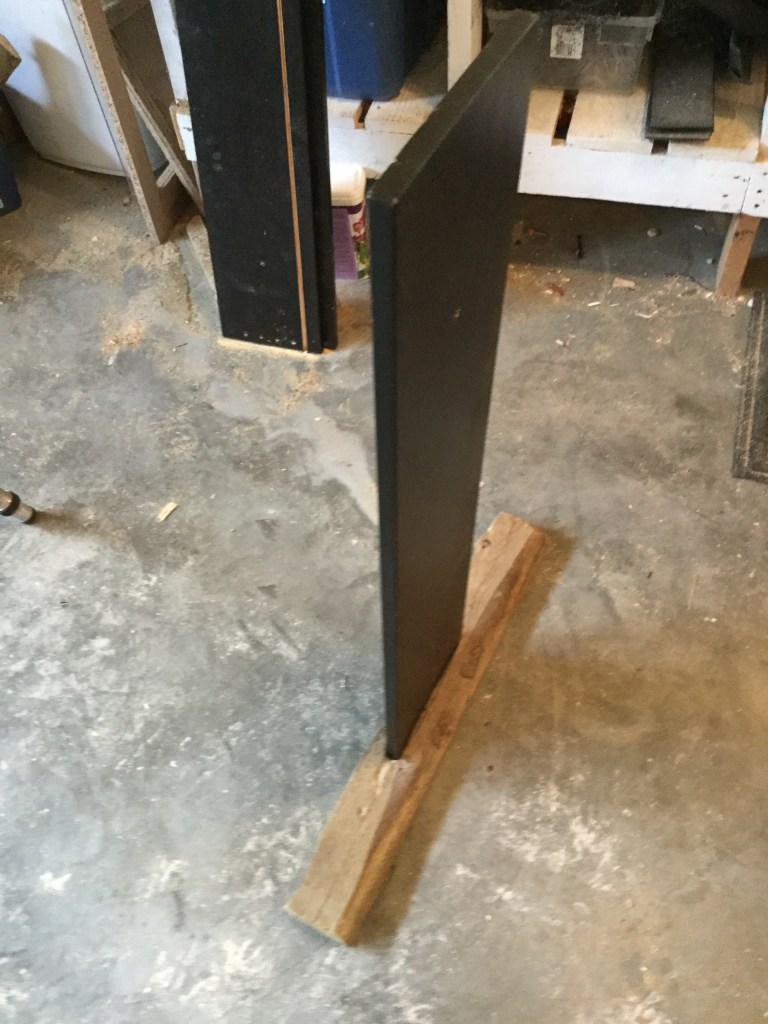
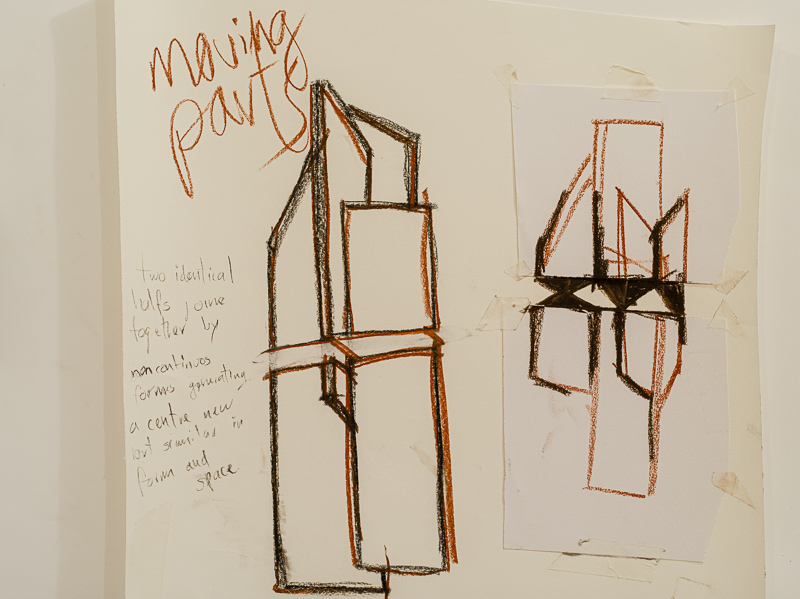
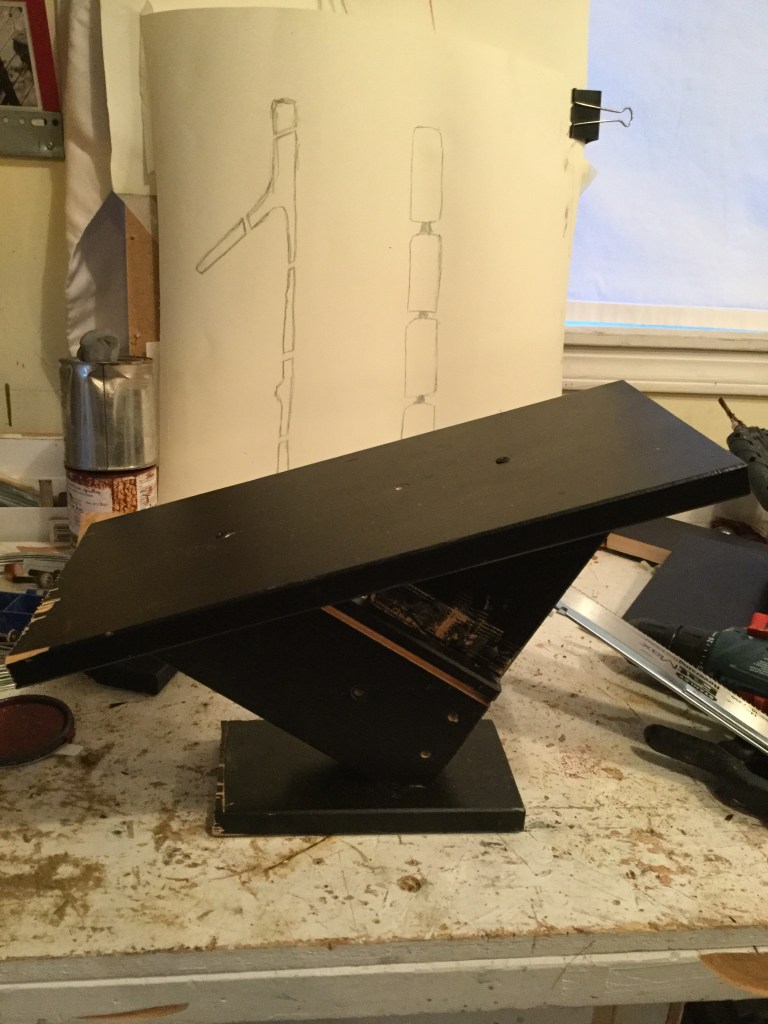
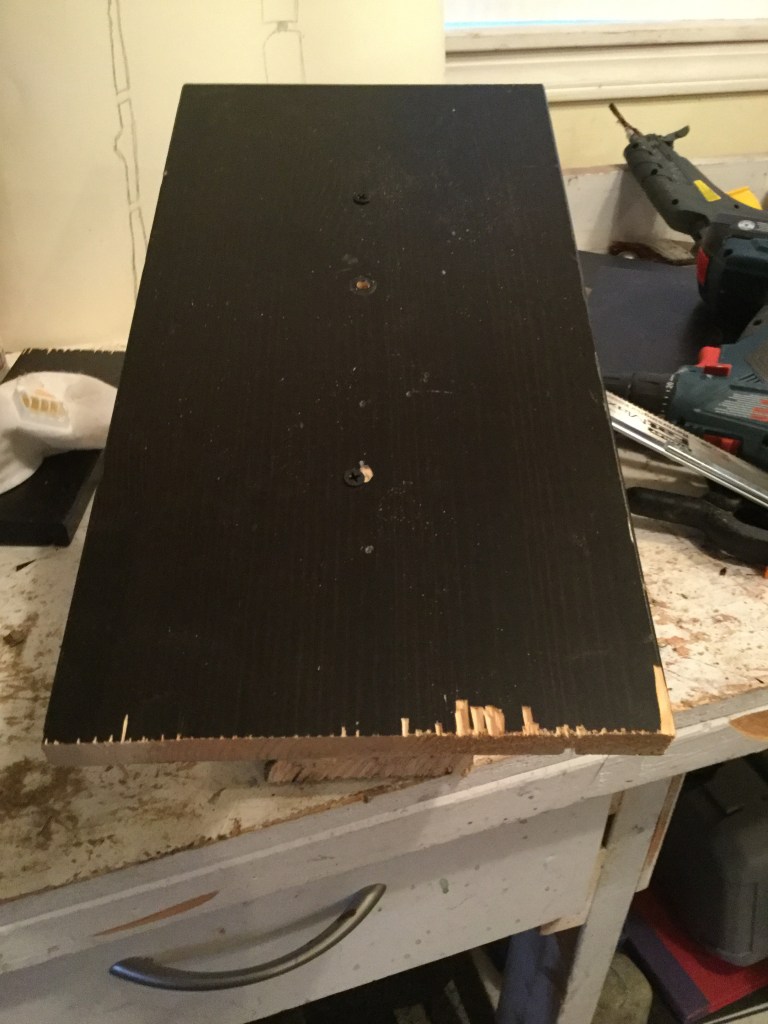
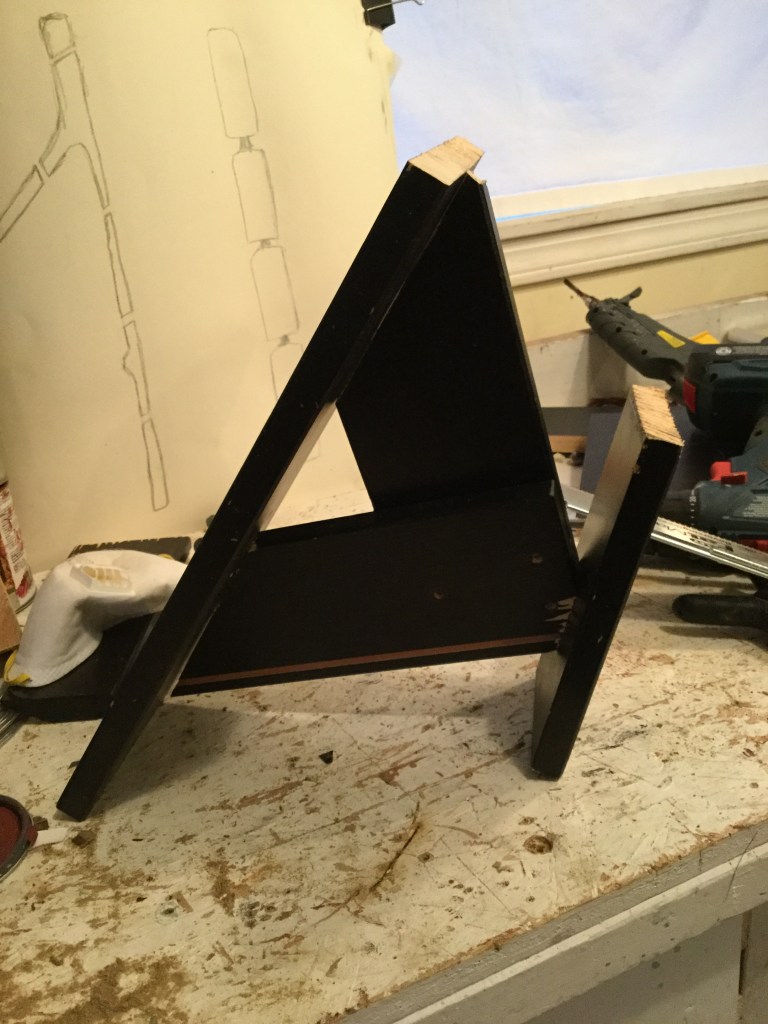
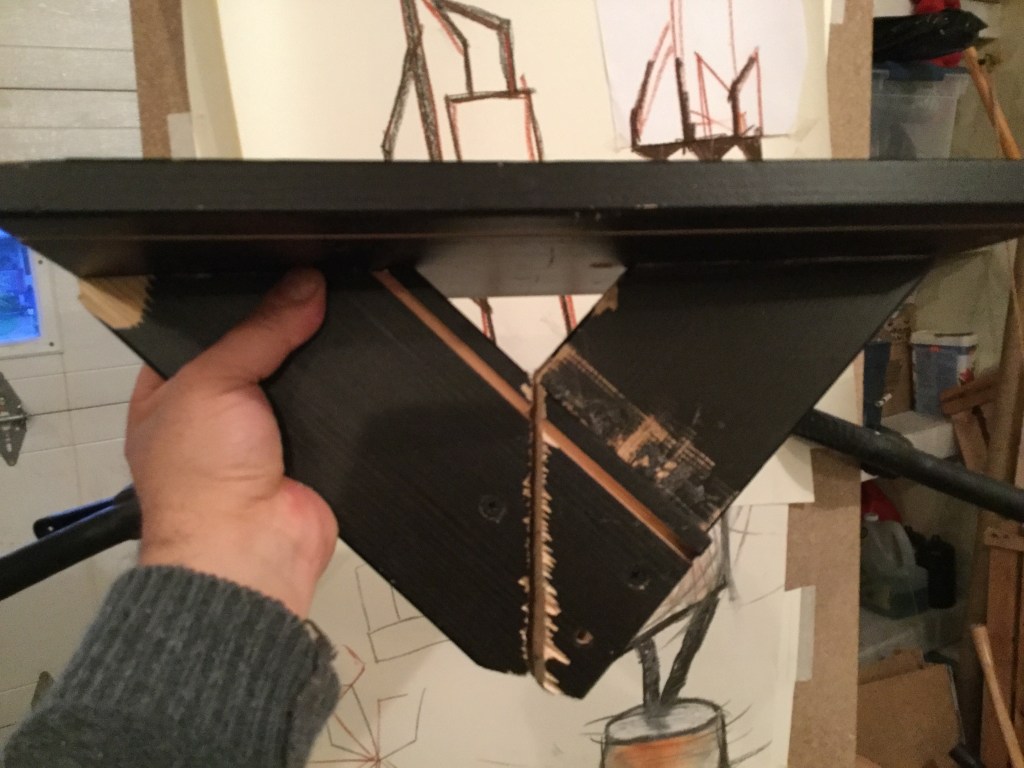
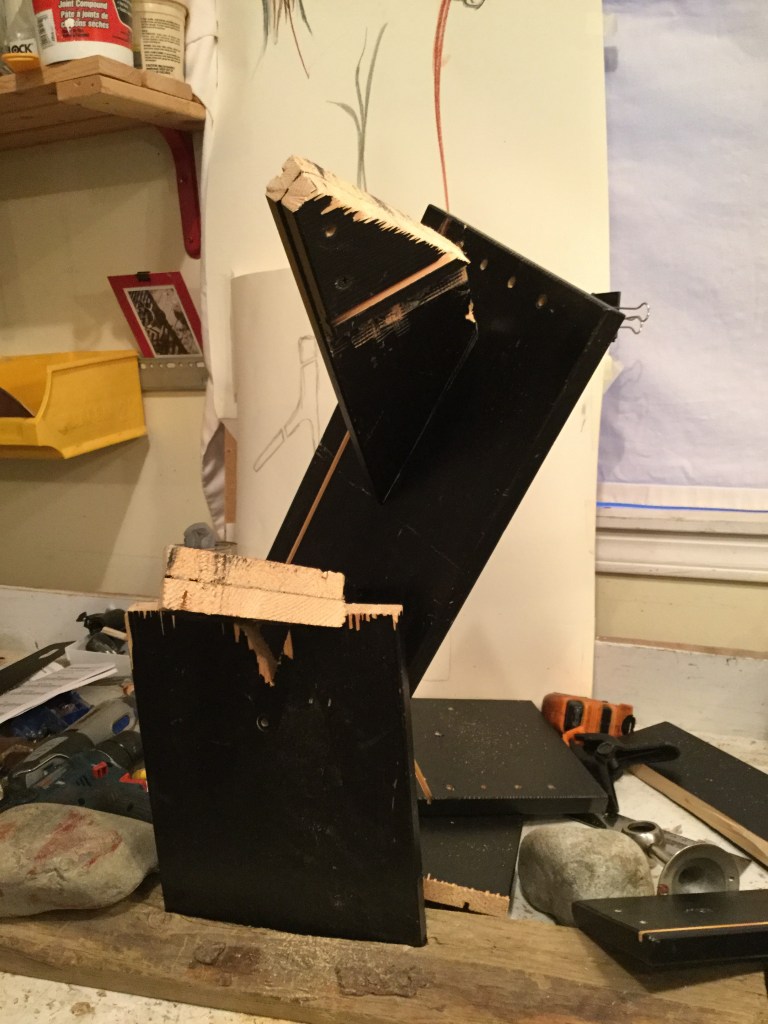
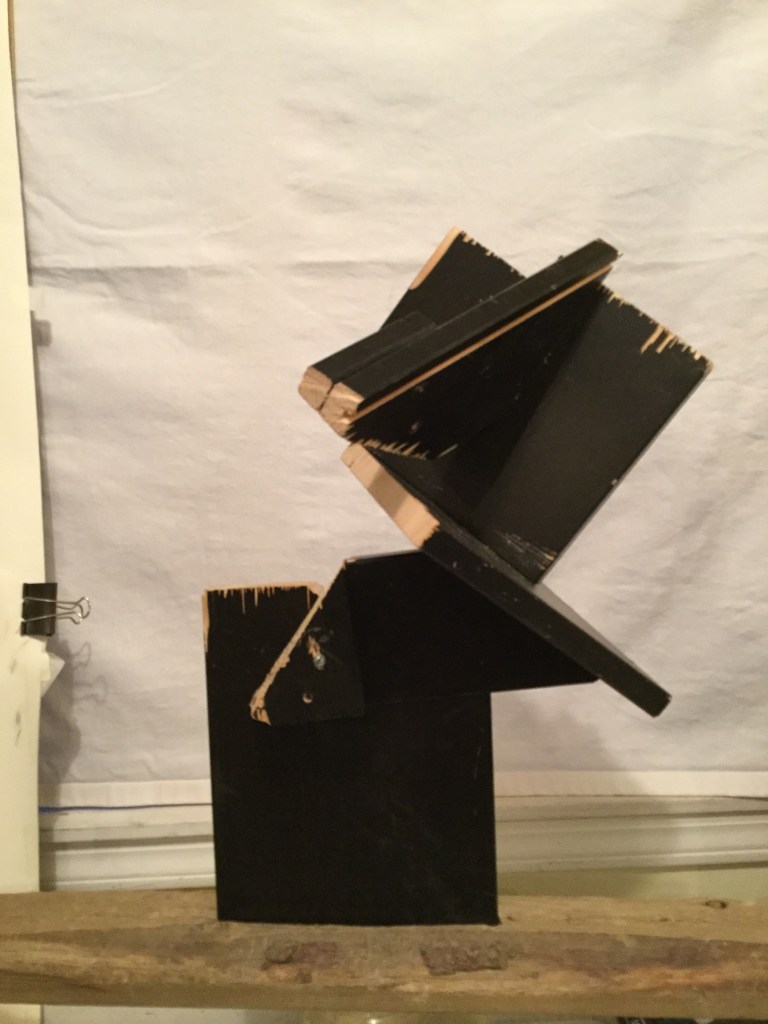
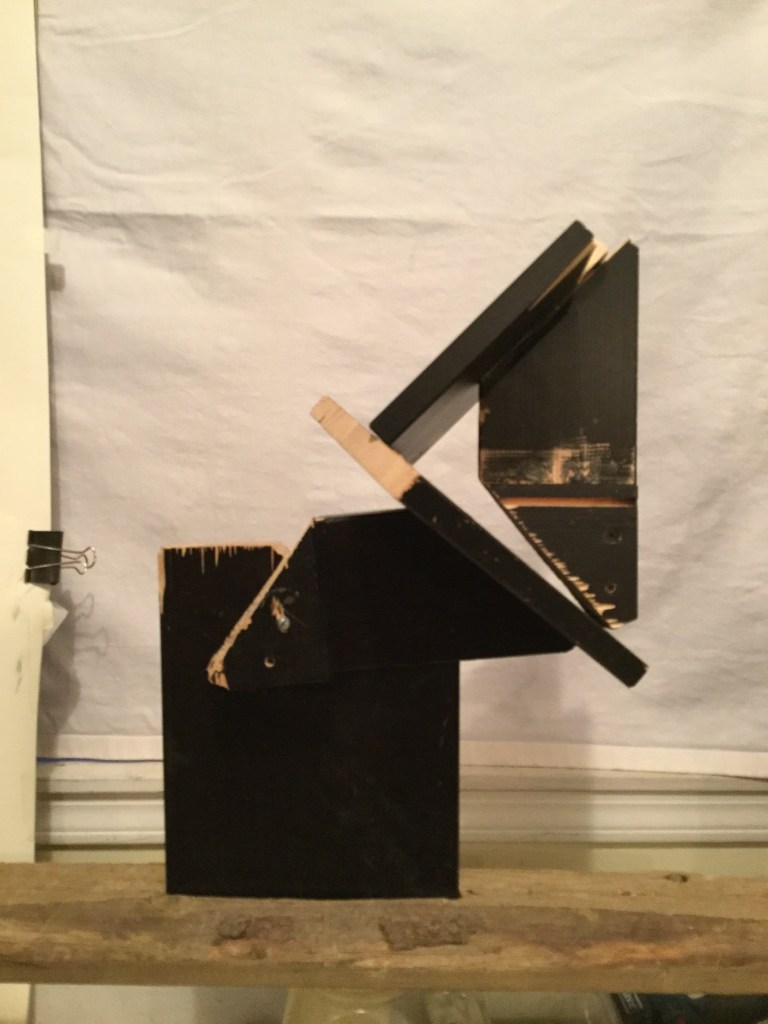
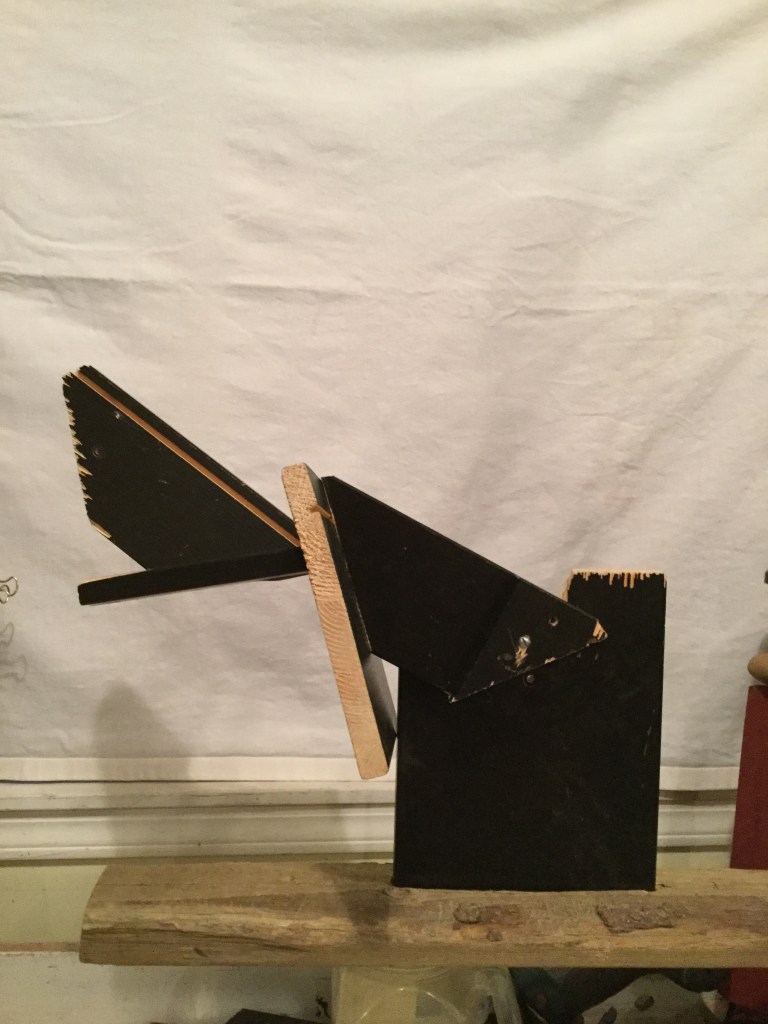
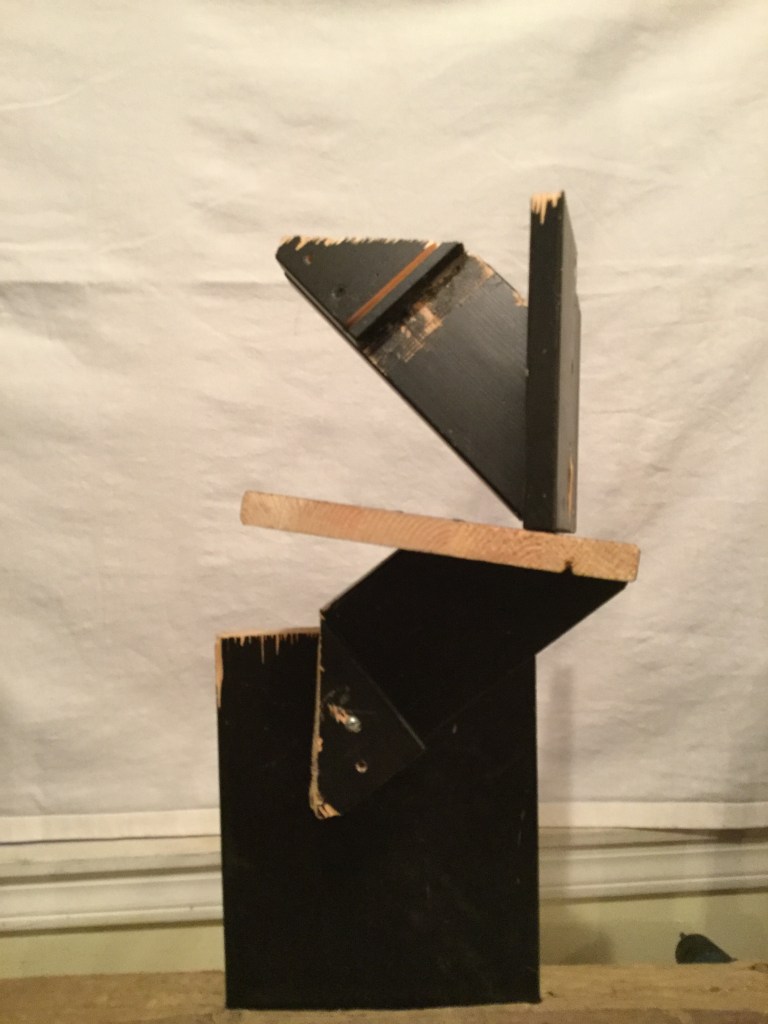
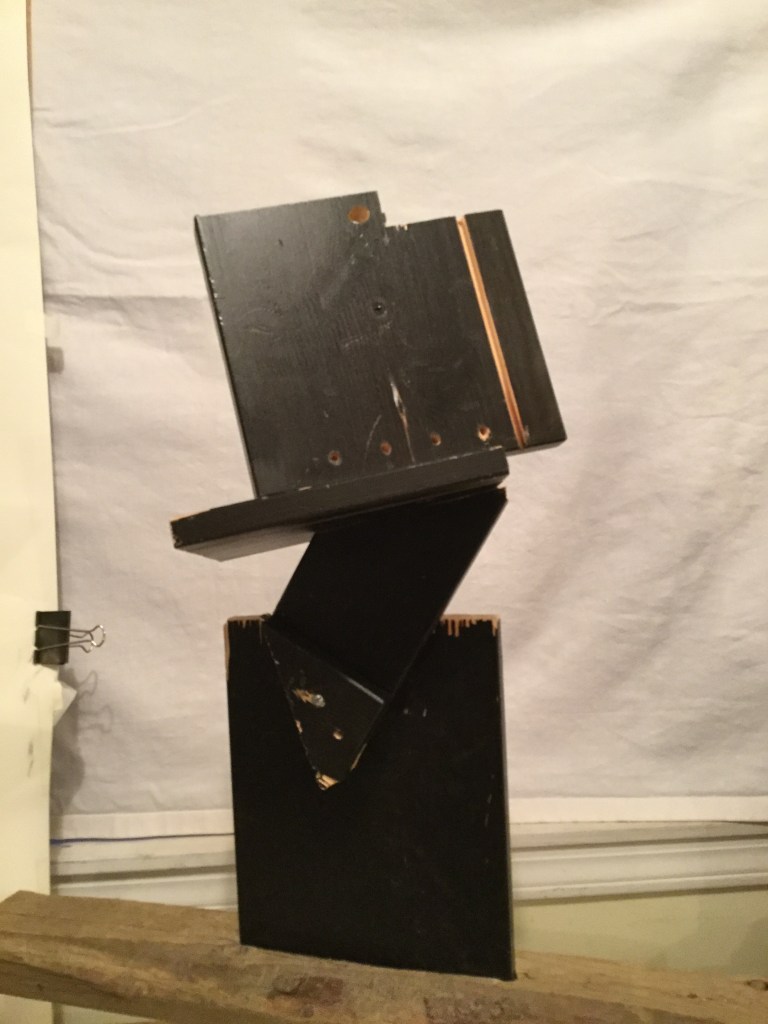
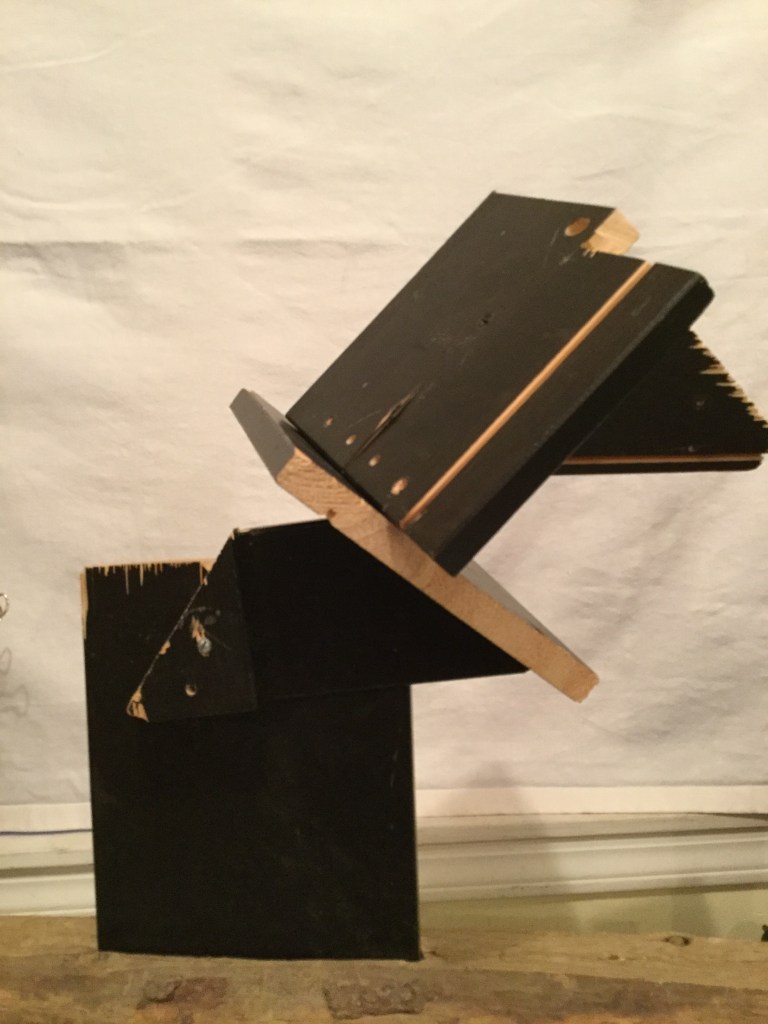
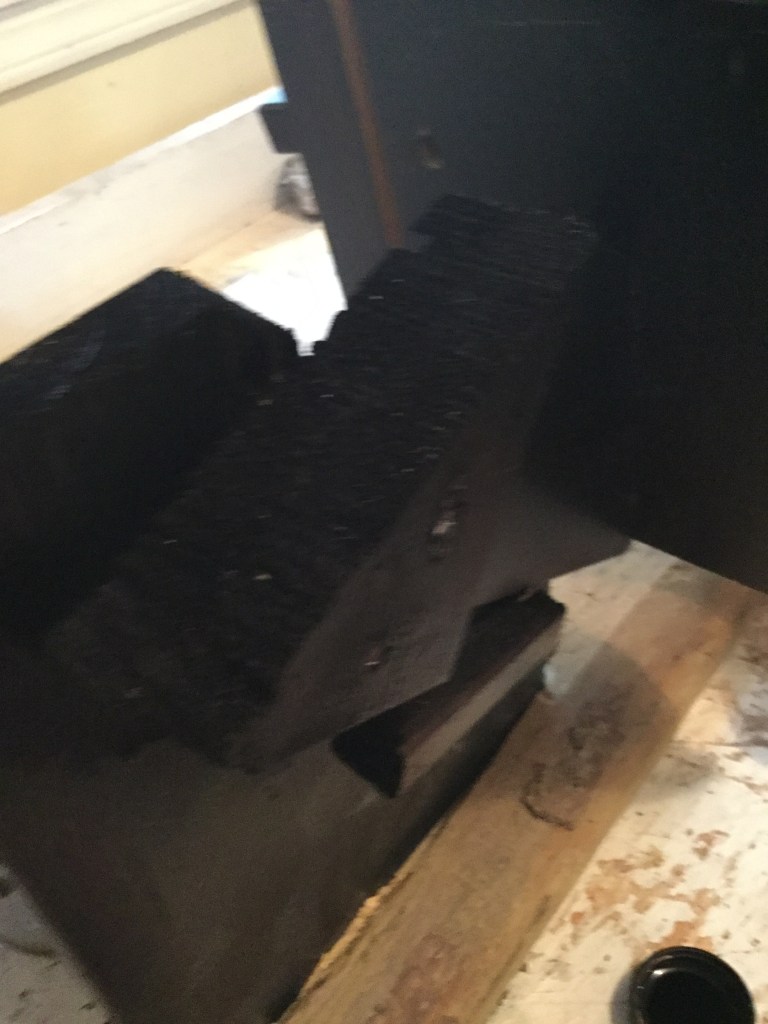
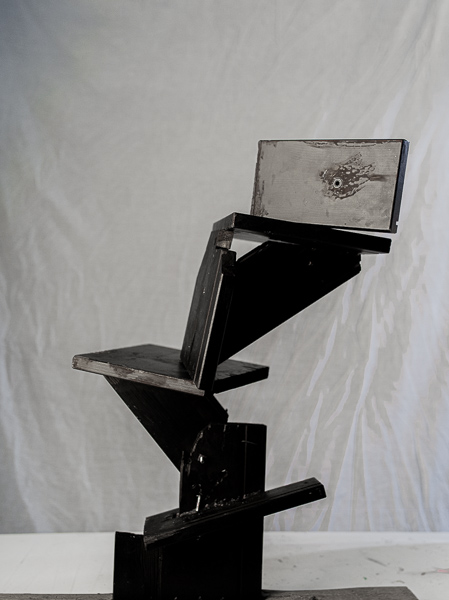
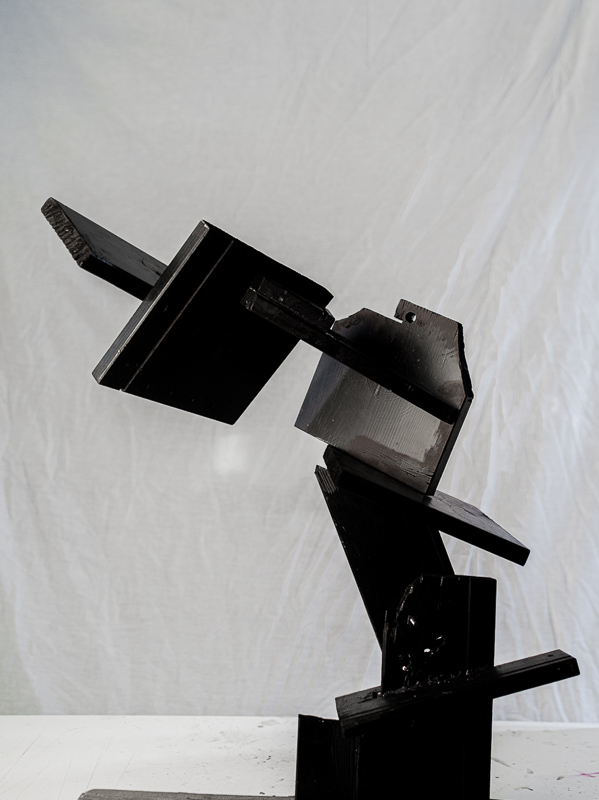
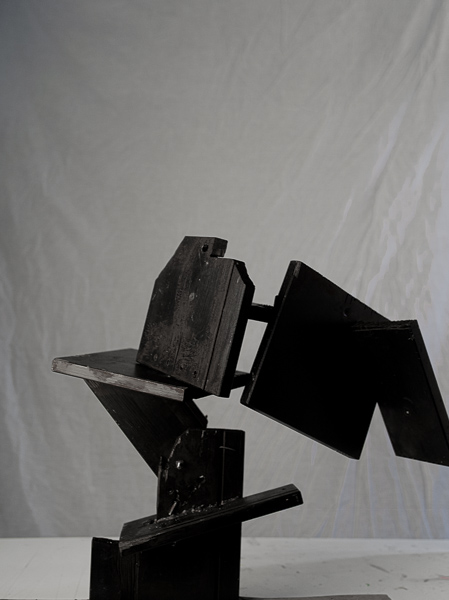
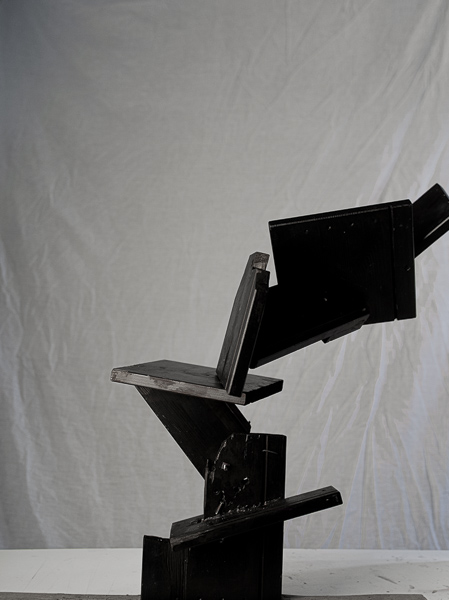
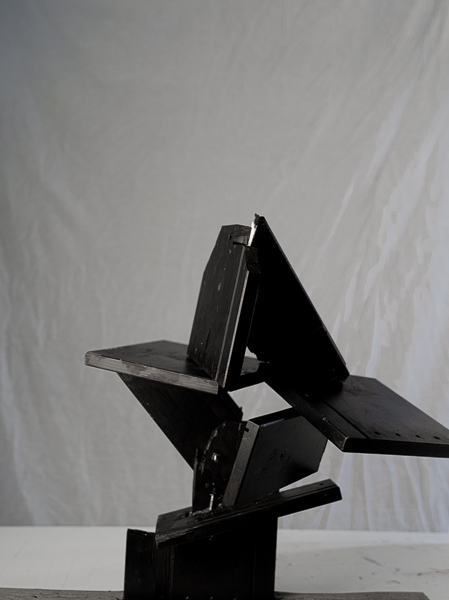
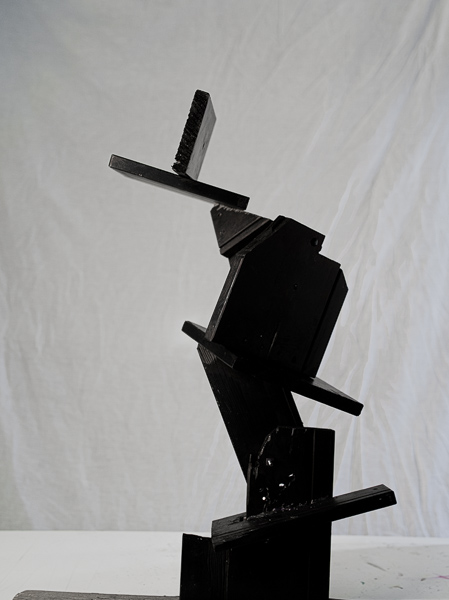
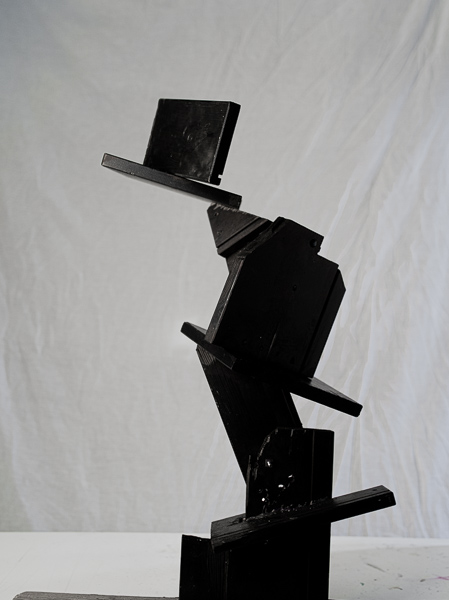
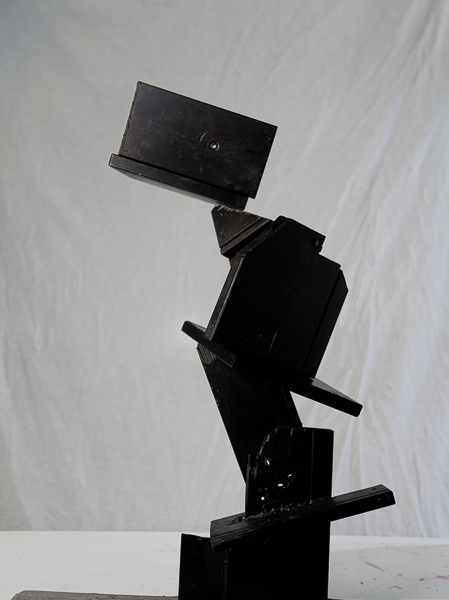
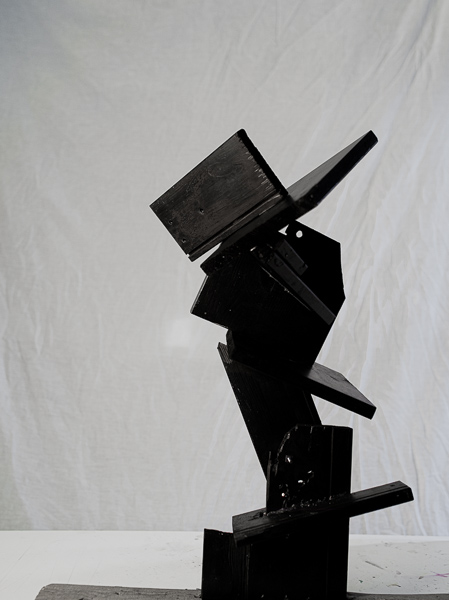
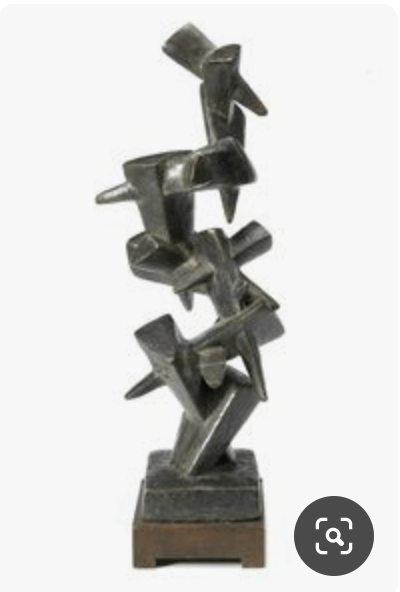
Second larger sculpture (shape shifting)
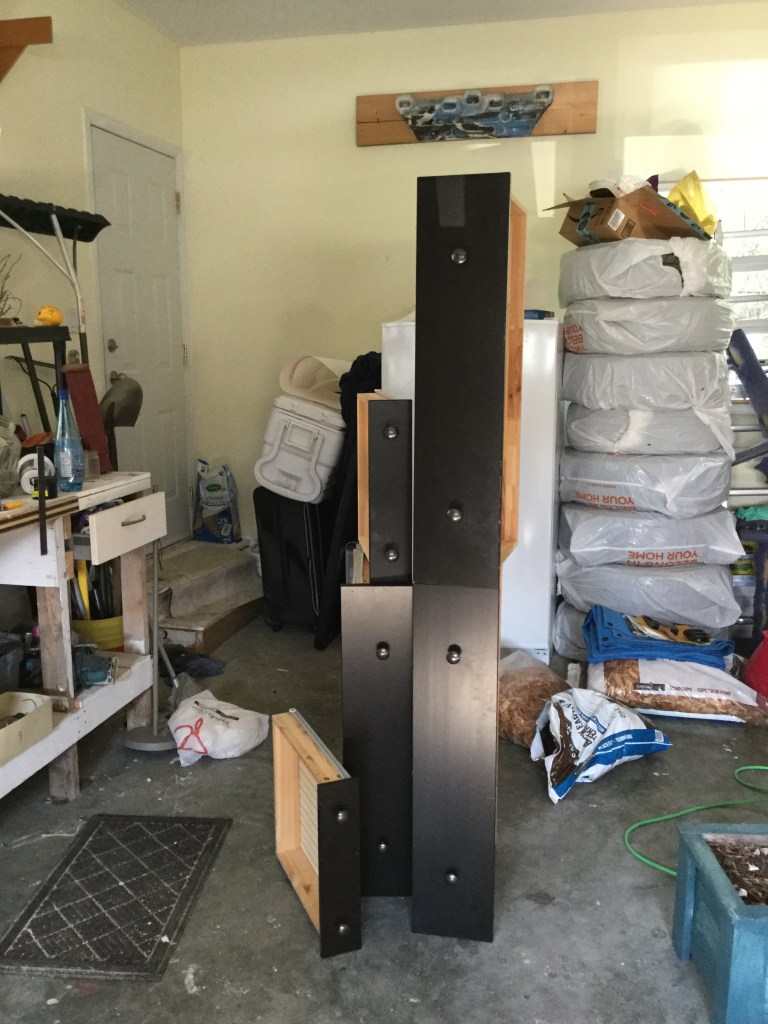
For my second large sculpture, I had the fortune to be able to use an old Ikea drawer that we weren’t using anymore. I was very excited about this new kind of wood: all black and ready for being recycled into a sculpture!
One of the first ideas for this sculpture was to create a tall column with other wood pieces and attached to its side, something like an obelisk: tall, static and ugly. However, after struggling a bit, fixing the first piece of wood to a base, I changed my mind.
Fixing that first piece of wood to a base was complicated: I wanted it to stay in one place, but it moves in different directions all the time, so after this experience, I decided that what I wanted was to create a shape-shifting sculpture: something that moves on all different directions.
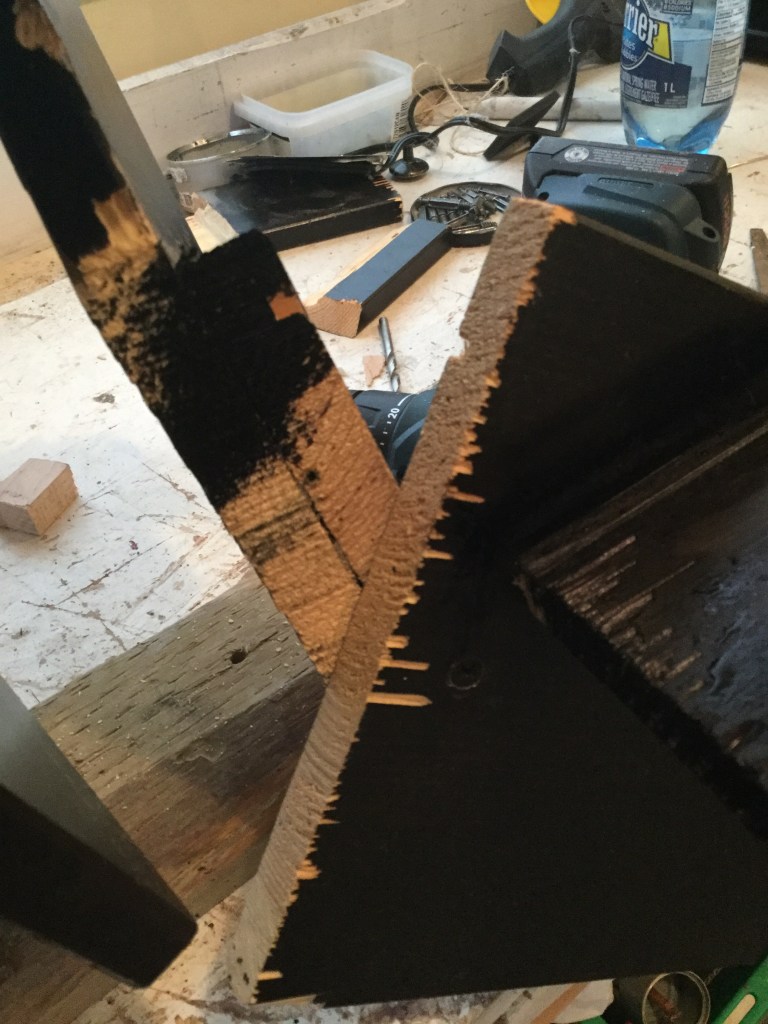
I cut the wood in small pieces and then I joined two pieces at 45 degrees with another piece on top. I built 4 of these structures, all different, and a stacked them together joining them with a long wood screw that was a bit loose to allow me to rotate the pieces in almost all directions.
To finalize the sculpture I painted all the areas where I have sawn the wood black.
I have to say that I’m quite happy with the final result: the sculpture moves on all different directions adapting a different “pose” each time a piece of it is moved. However, the gravitational centre of the sculpture moves each time some part of the sculpture it is moved making it quite unstable at some “poses.”
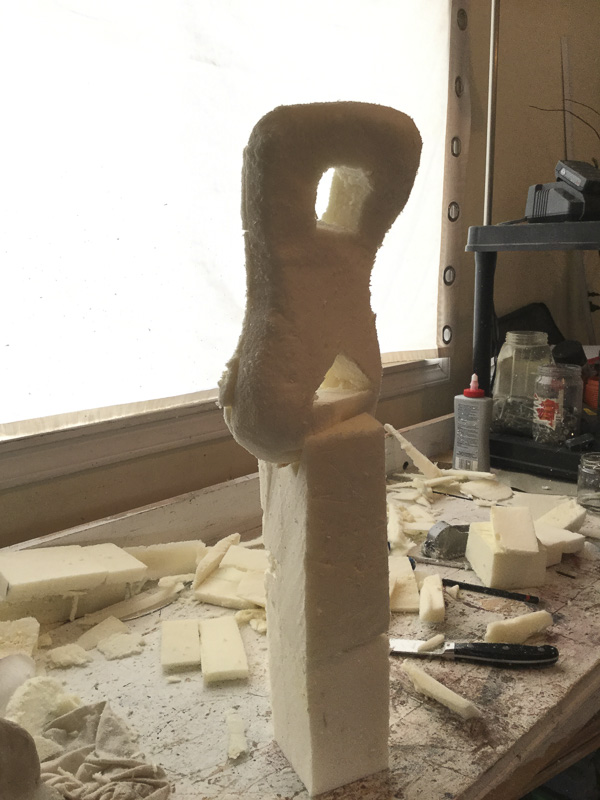
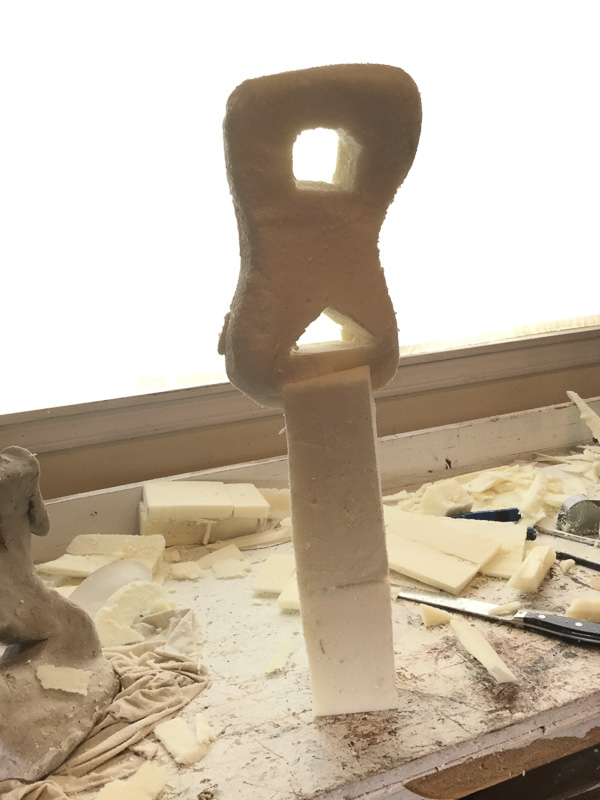
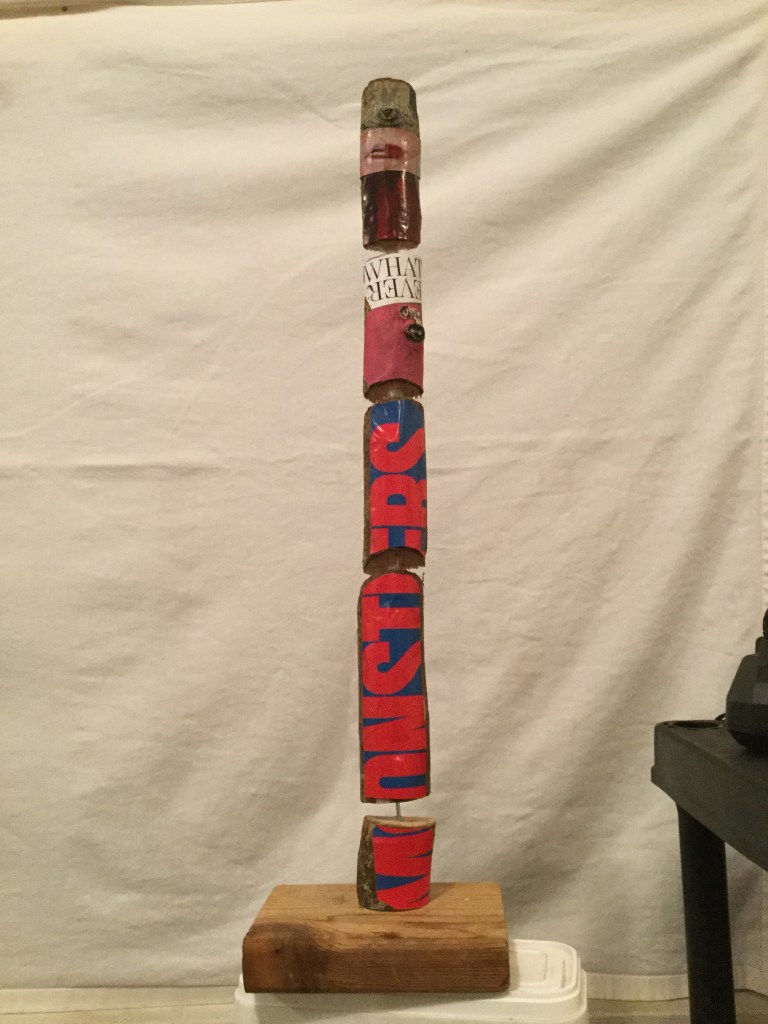
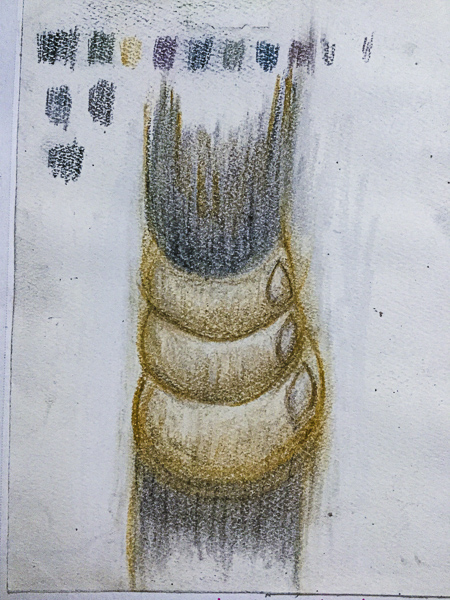
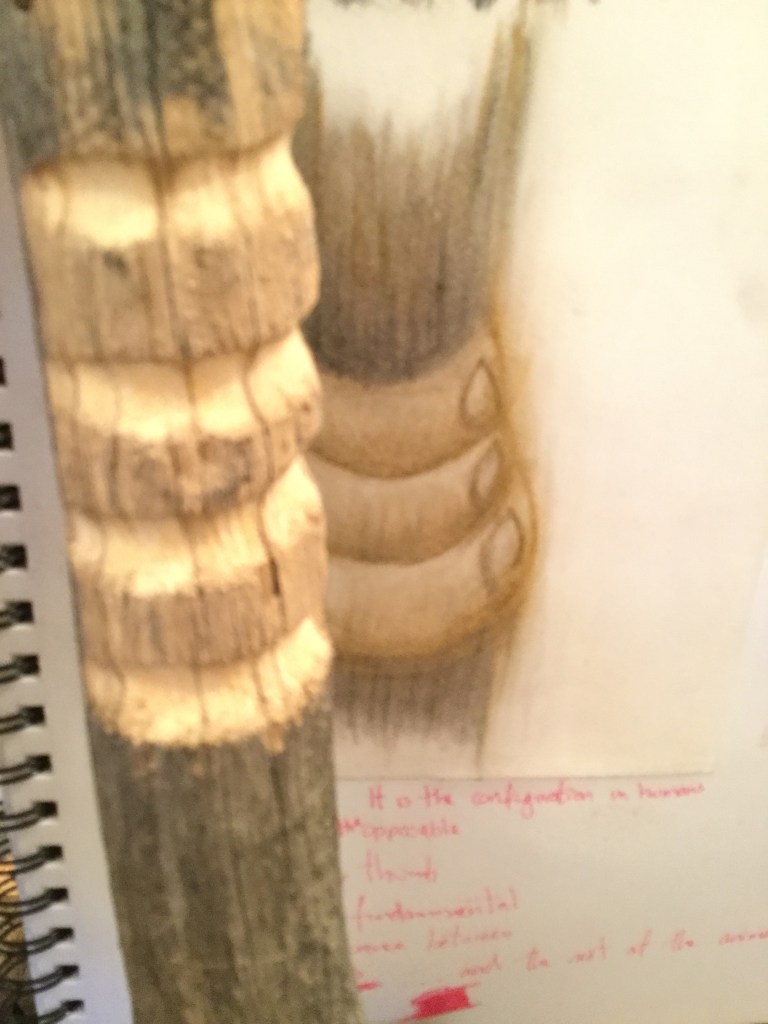
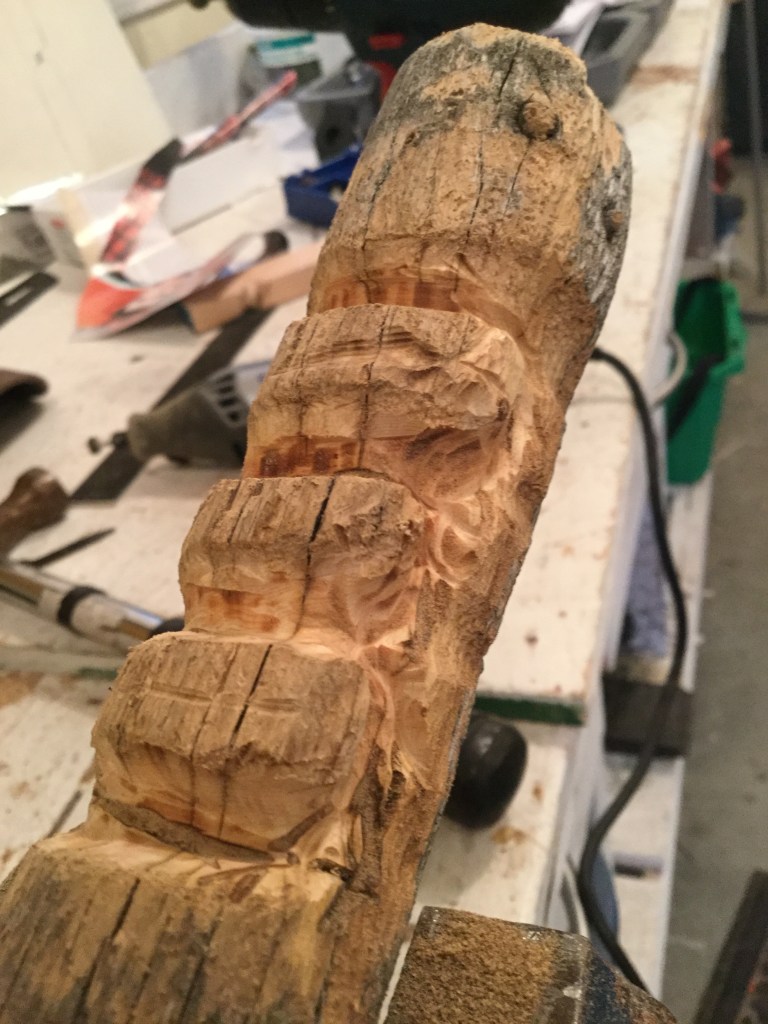
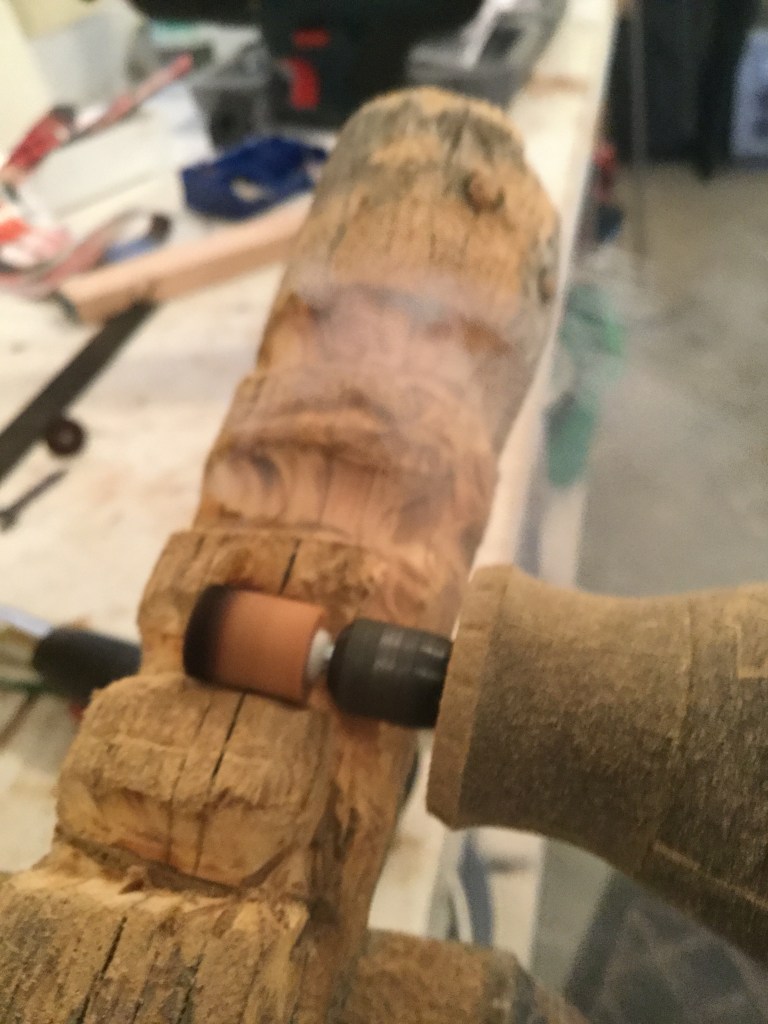
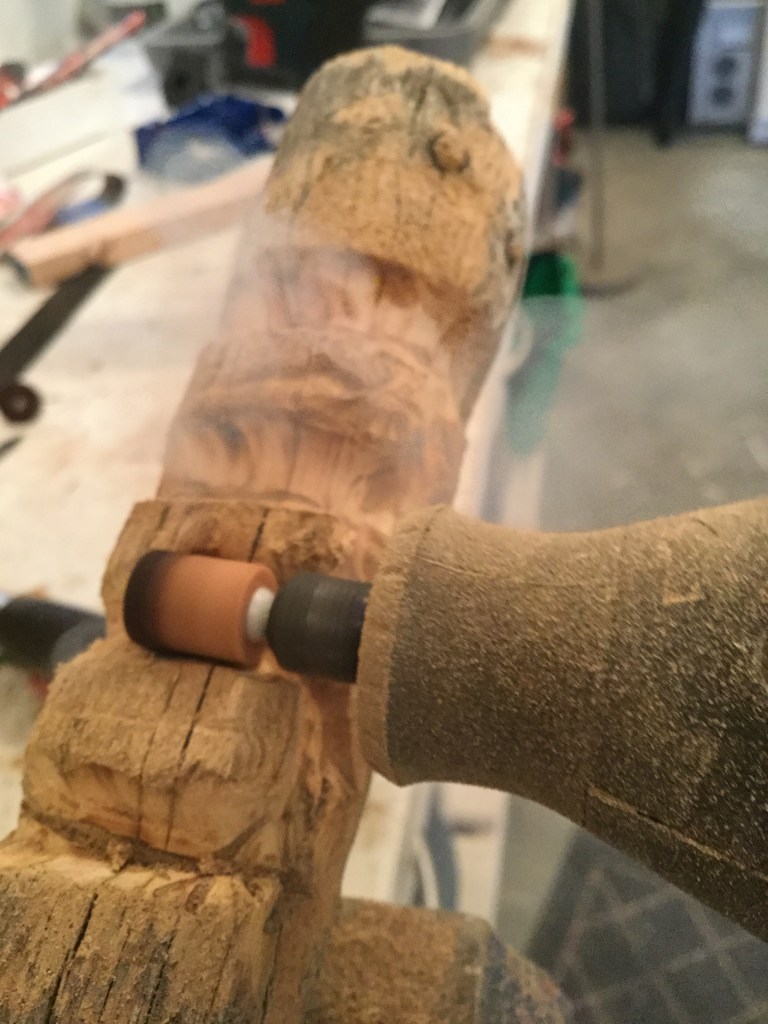
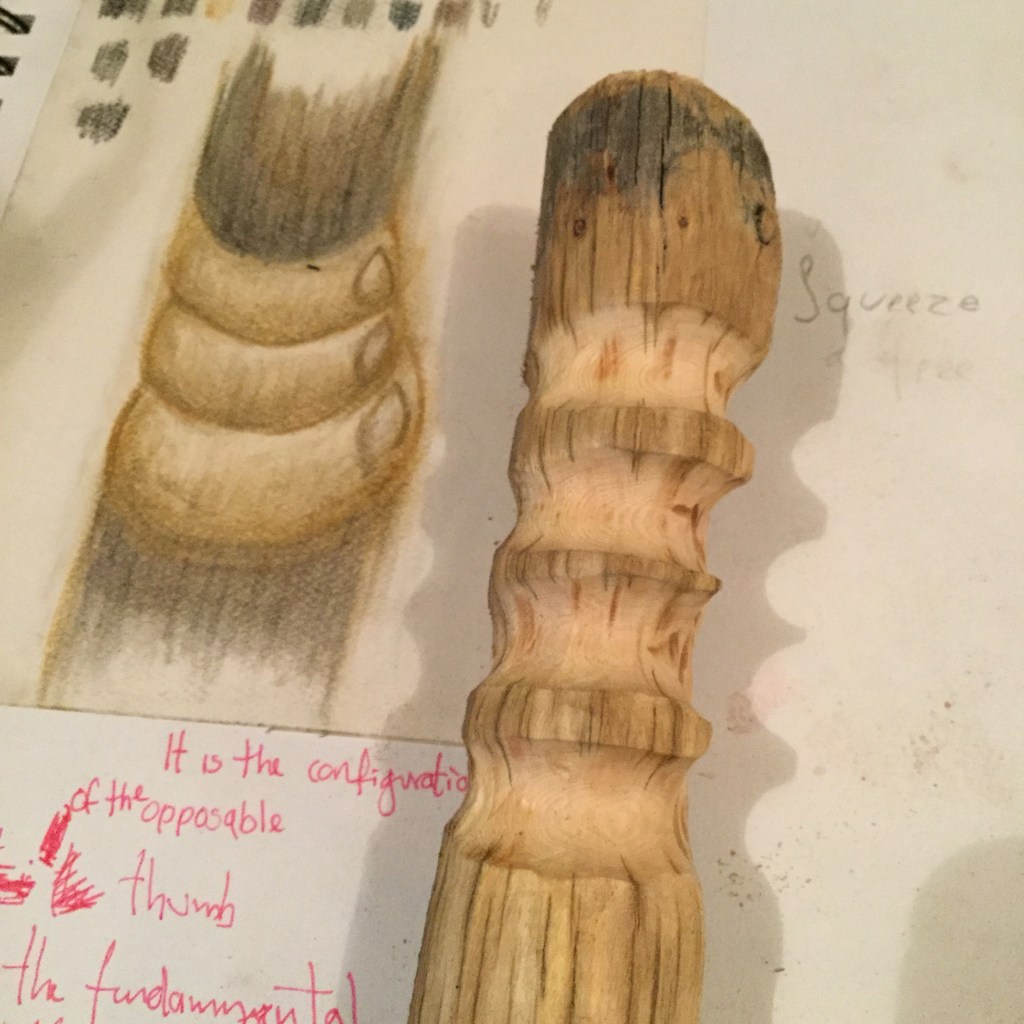
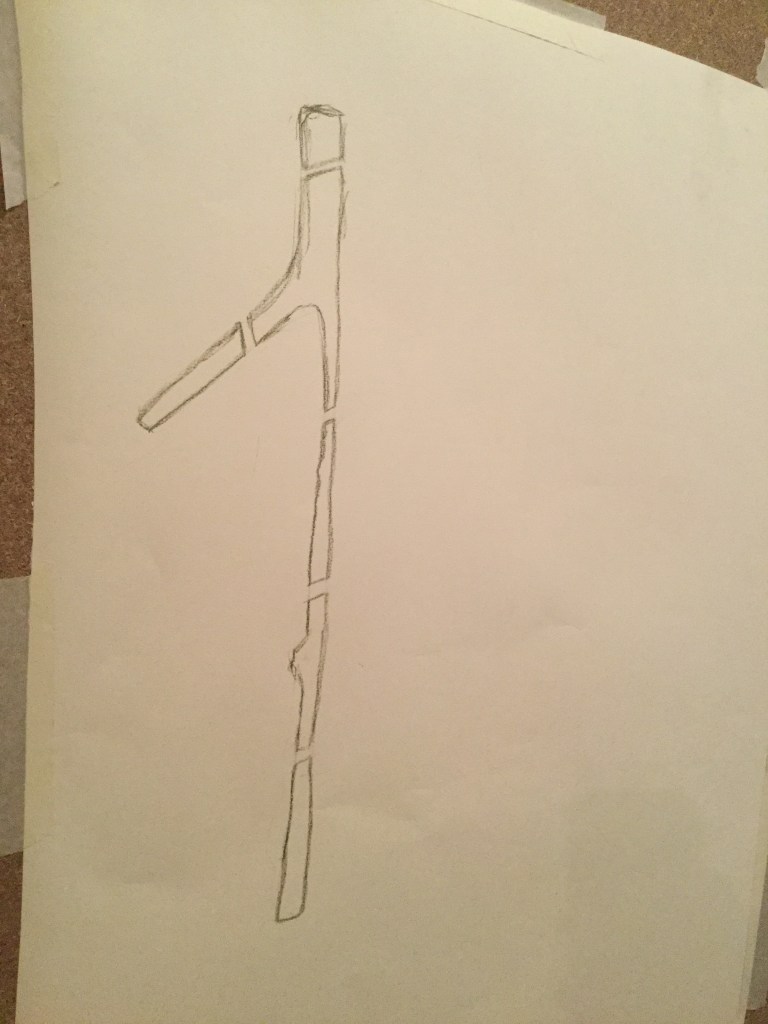
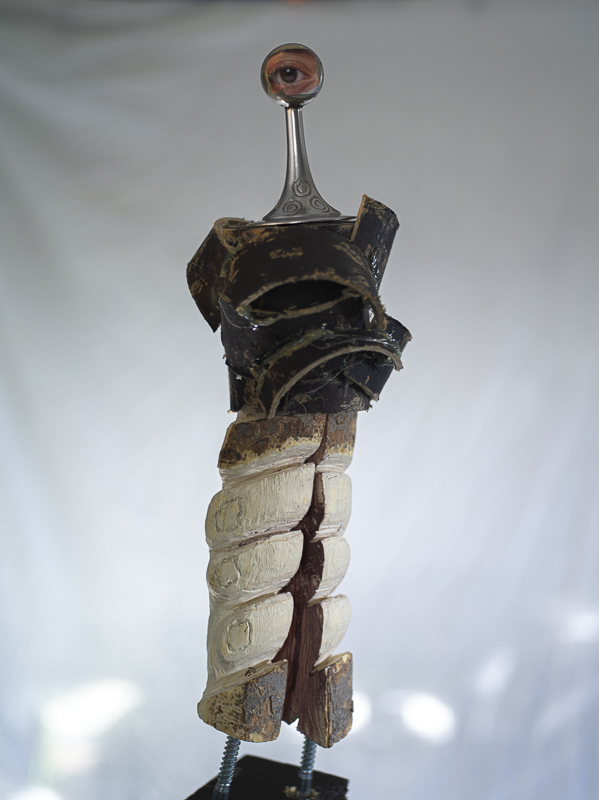
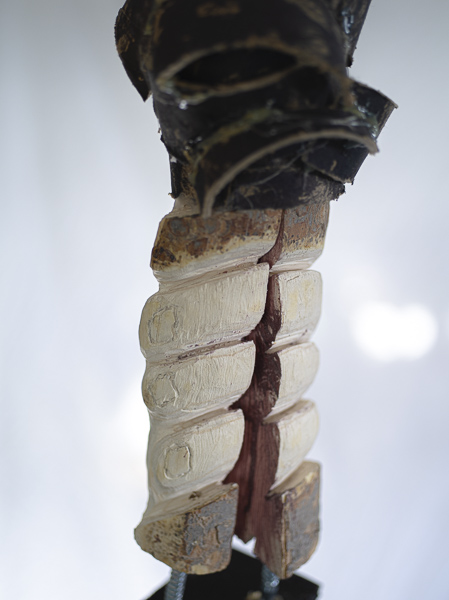
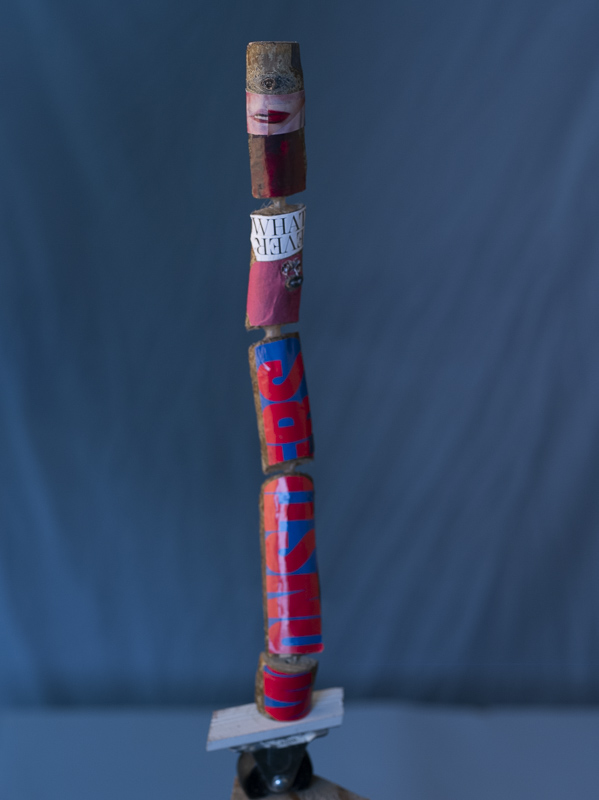
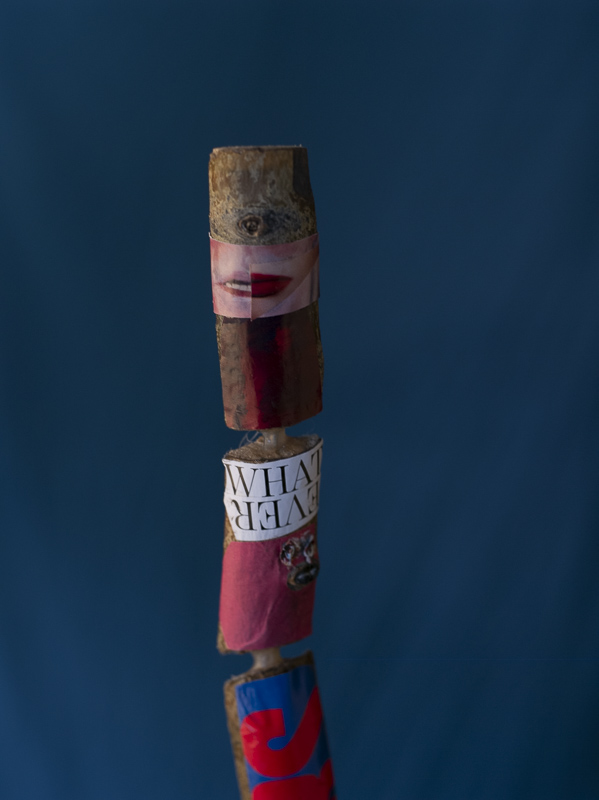
Small four sculpture – Materialization of a hand III Pinky
After my first and failed attempt to replicate this drawing into and sculptural form, I did not give up, and I came back for a second round!
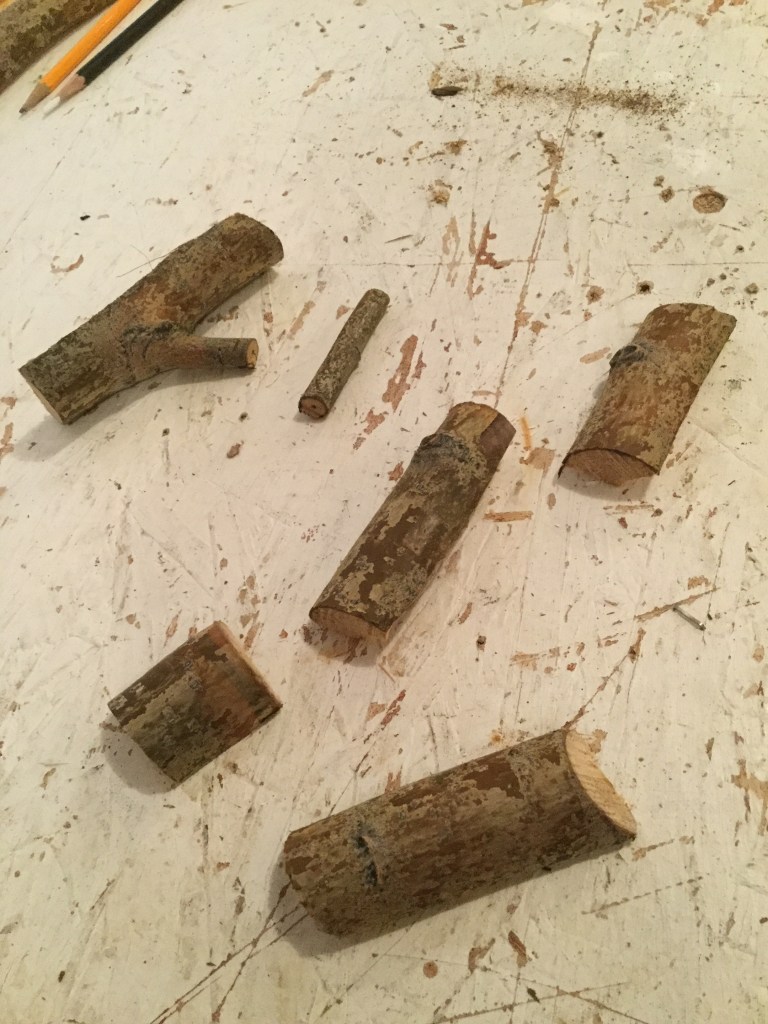
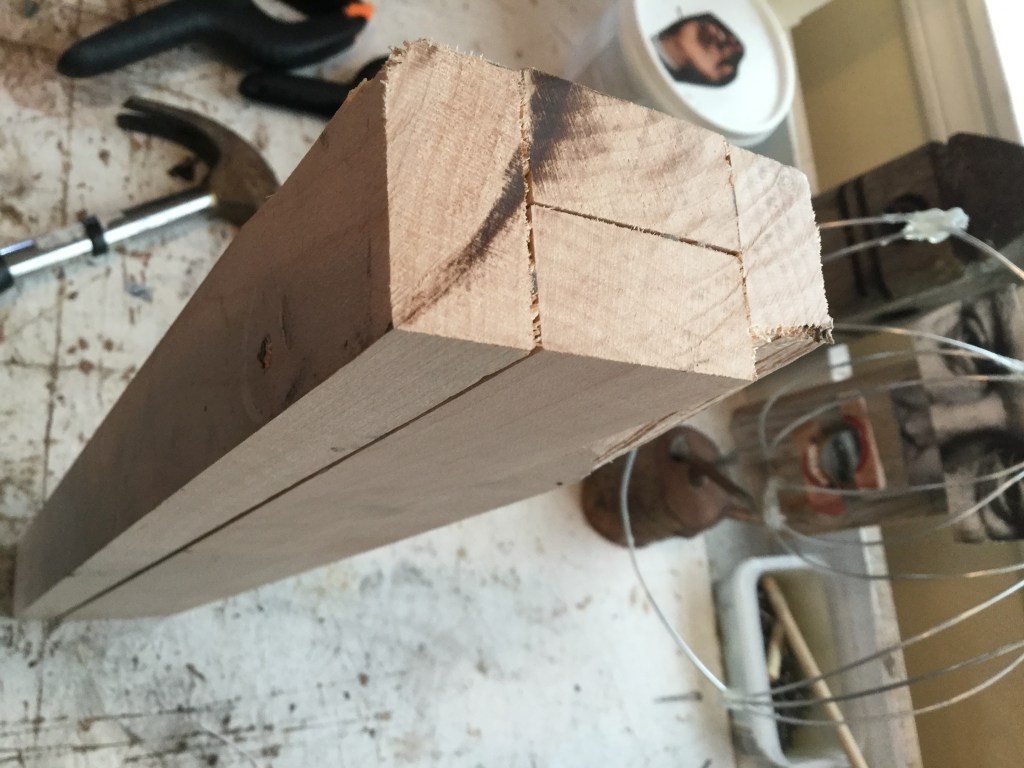
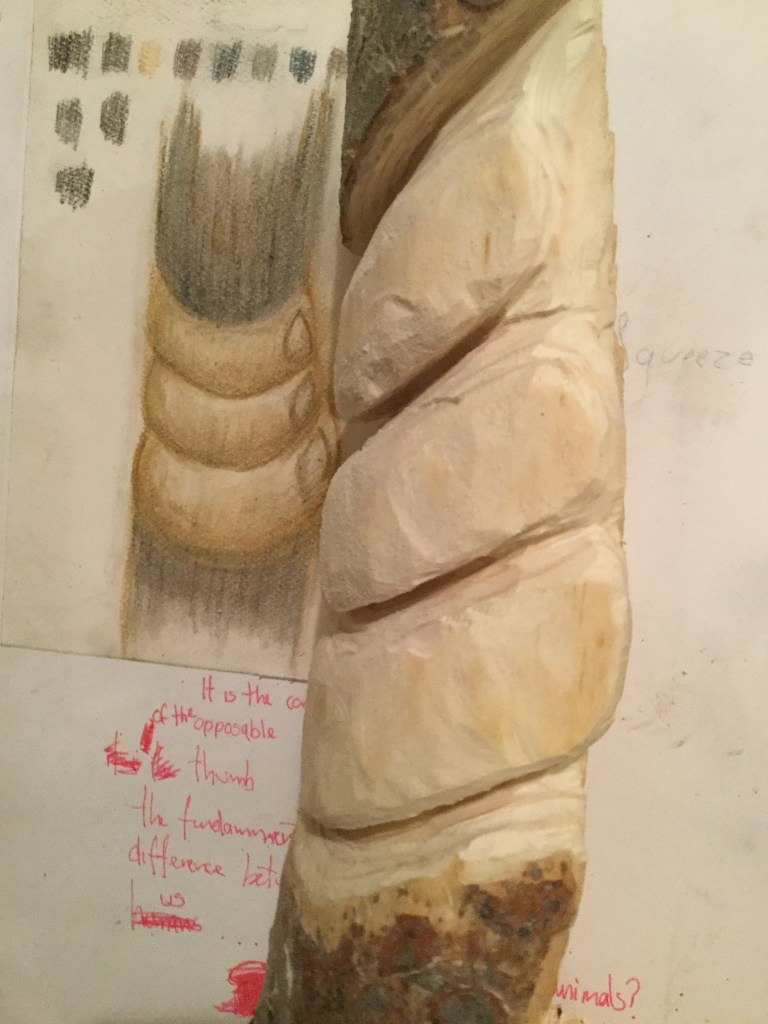
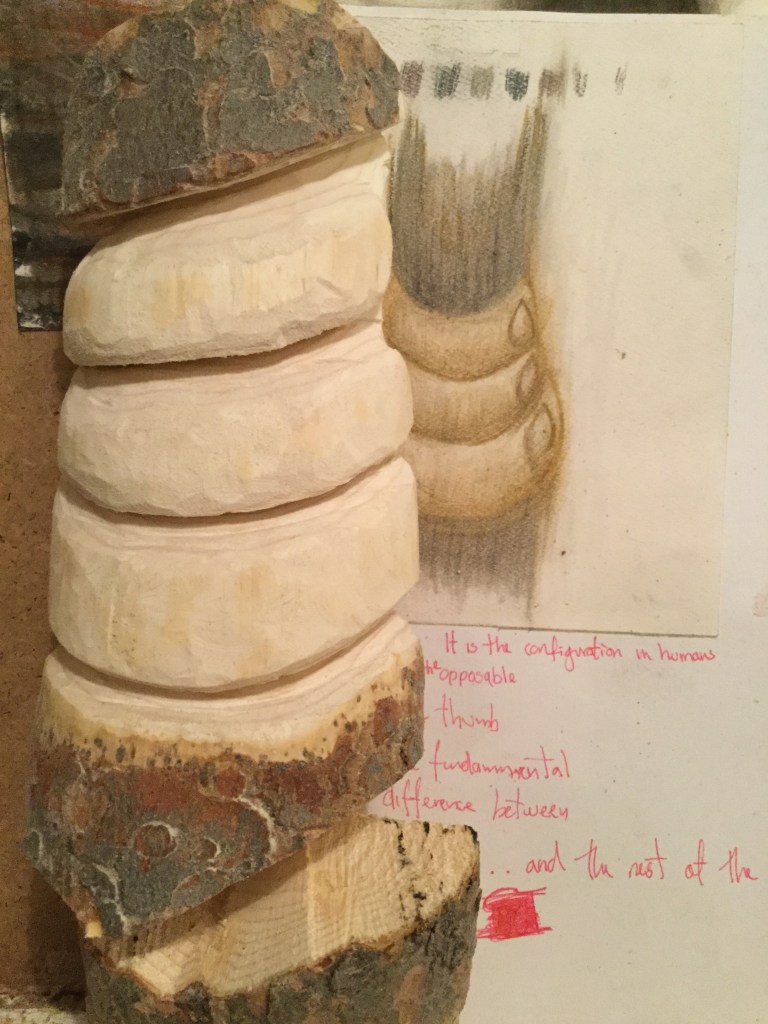
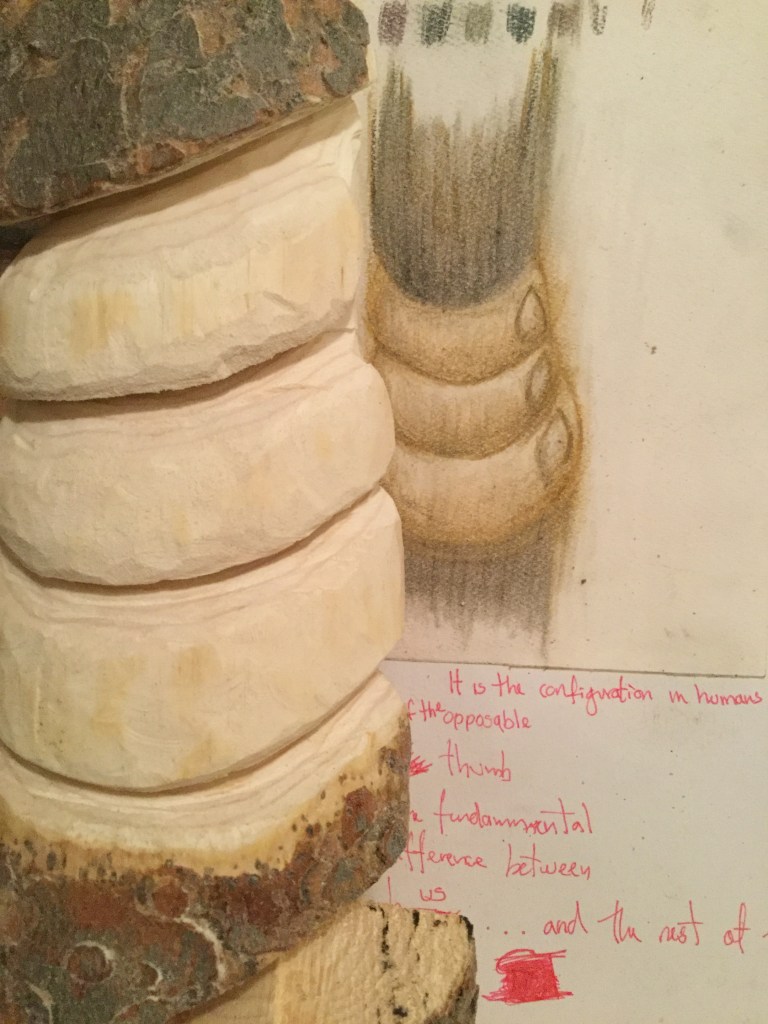
This time I learned from my previous mistakes: first I knew that a more significant piece of wood was need. I also knew what the tools I was working with were capable or not of doing. As you can see in the below image my second attempt started this time with the right foot, I was trilled.
In the next step, I deeper the space between the fingers to make them look a little bit more rotund. Even though the nails are very badly done they look ok, I think they give the fingers that missing element that makes me recognize them as hand digits.
(Please refer to the section “Small Third sculpture” in this document for more research notes.)
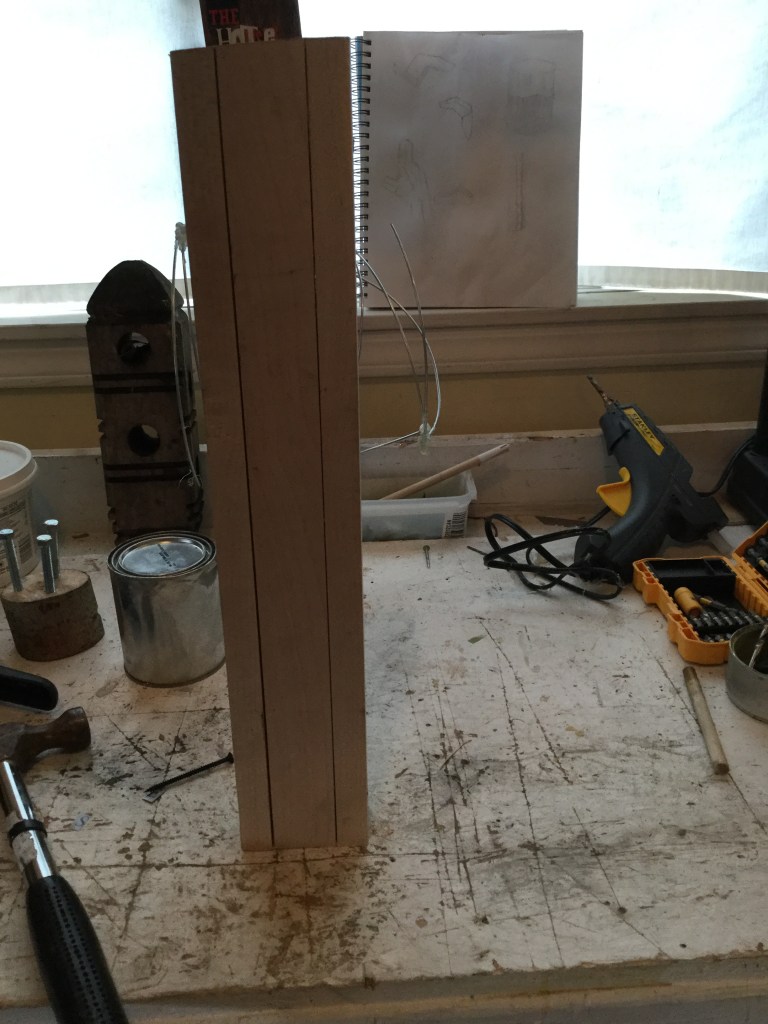
Next, I cut them in half to make legs. To make this decision, I mimic with my hand the movement of a spider running at full speed in a straight line. The index, middle and ring finger do most of the job; the little finger helps but thumb not much.
Even if these three fingers are not as important in evolution term as the thumb and the pinky the action to transform the fingers functionality into a locomotive one was correct. Everything was it is the right place.
For the last part of the sculpture, I added the two other fingers somehow to the sculpture. The thumb is the section just after the legs finish and the little finger comes right after. And of course a little Dada influence at the end with the eye.
Title: Materialization of a hand II Author: Omar Reyna Date: 2019 Place of production: Yukon, Canada Materials: Cotton paper, Sketching Crayons and charcoal Technique: Drawing Dimensions: 90cm by 1.5 m.
The drawing process was quite exciting. Going from the drawing board to the working table and then back to the drawing board, and so on, allowed me to experience a workflow of constant action. Even though thinking was part of this workflow, I worked way more with my body (especially my hands) without mentally processing and thinking my next moves. It was like putting theory into practice instantly. It is not that I haven’t worked this way before; however, this time, the length of time between planning-thinking-sketching and the actual production was virtually non-existence. I am going to use this way of work more in the future.
The below galleries show the order in which I made the drawings. First, I sketched and used these images as a construction reference. After the sculpture was made I drew it. Some of these drawings are just a depiction of it but others are base on the sculpture and represent a step further in the development of the piece.
Large sculpture 1 (Sound)
Large sculpture 2. (Shape shifting)
Small sculpture 1
Small sculpture 2
Small sculpture 3
Small sculpture 4 (Unique)
From sculpture to drawing and back to sculpture
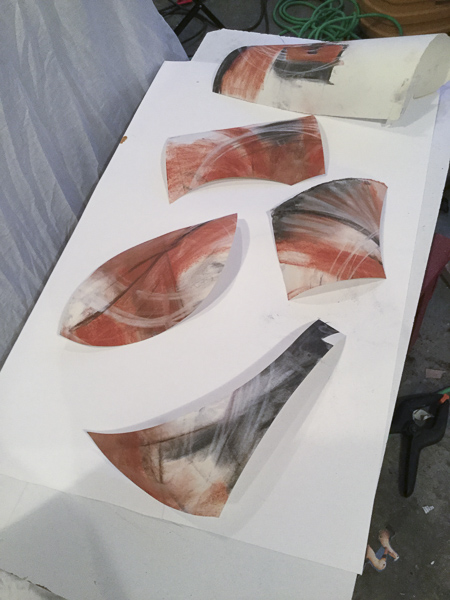
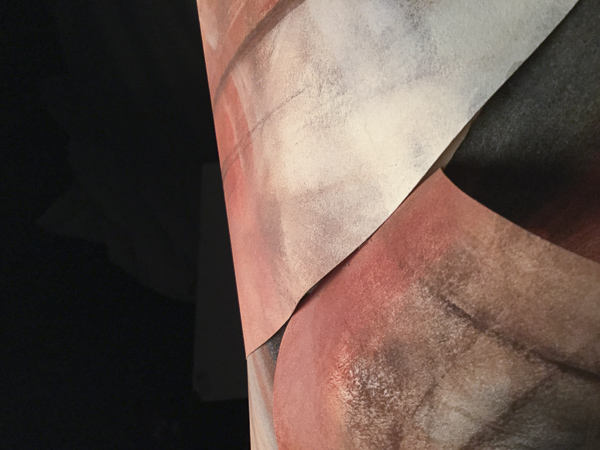
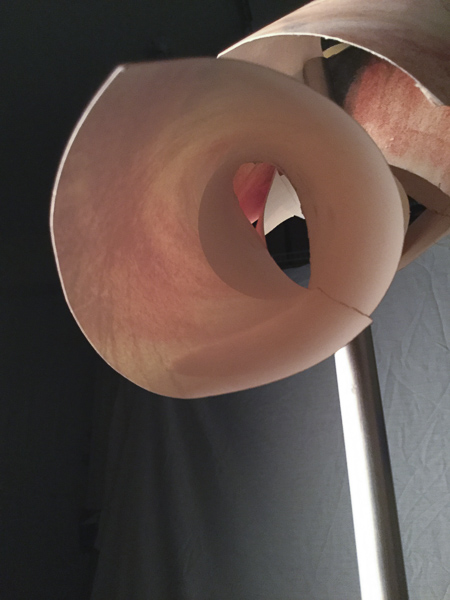
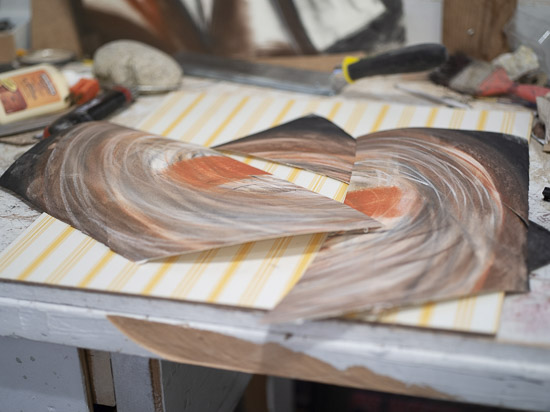
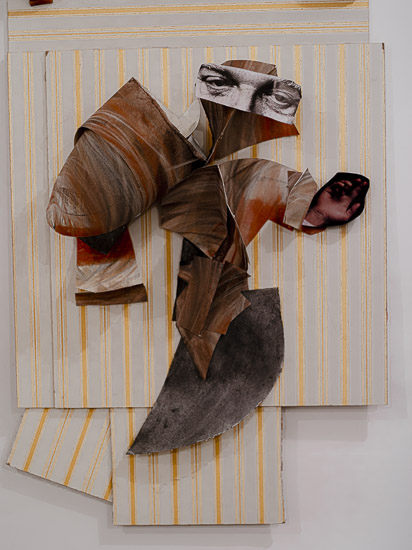
One of the most fantastic things that happened during the drawing process was to create a sculpture from a drawing. I cut a drawing into pieces, and then I reshaped it into a sculptural form. I have to say that I ‘m happy with the results. I did not imagine that this was such a fantastic thing to do.
Exercise 1
This below gallery shows in just three photos the process of going from a sculpture to a drawing and then to a new and different kind of sculpture.
The below gallery shows the construction process of this sculpture.
Exercise 2
The below gallery shows in just three photos the process of going from a sculpture to a drawing and then to a new and different kind of sculpture.
Two sculptures made from drawings to a sculptural form.
9 9
Moments of creations: Relevant sketches drawings & sculptures
9 9
Self-assessment
How did I use a range of techniques to create a skilful and effectivesculpture?
The whole process was led by an exchange of experiences learned during drawing and construction. It was a constant going back and forth with some periods of rest or doing nothing which I think is also a technique.
There were other techniques involved in this process that are worth mentioning: observation, thinking, imagination, planning and research. All of these skills were applied during drawing and construction.
How did I use construction techniques involving a variety of media and tools?
This time I felt more in control of the construction process and my use of media and tools is more refined than in the last section of the course. With practice came confidence but still there is a lot to learn.
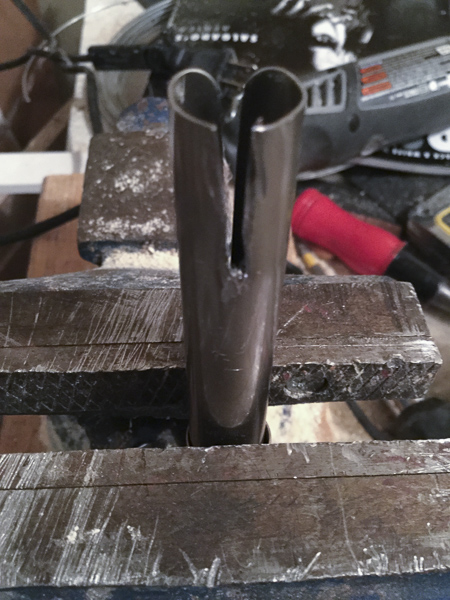
My arsenal of different tools for this module grew significantly. I invested in a rapid rotating machine (Dremmel) which is fantastic. It lets you create a lot of things that come into your head without worrying too much if you will be able to do it or not, it is quite versatile.
How I developed basic skills in drawing and used those drawing to develop my ideas
As I mentioned before the drawing process was a big part of this module and it was that way not only because it is what the syllabus dictated but because I think I did a decently good job on this area
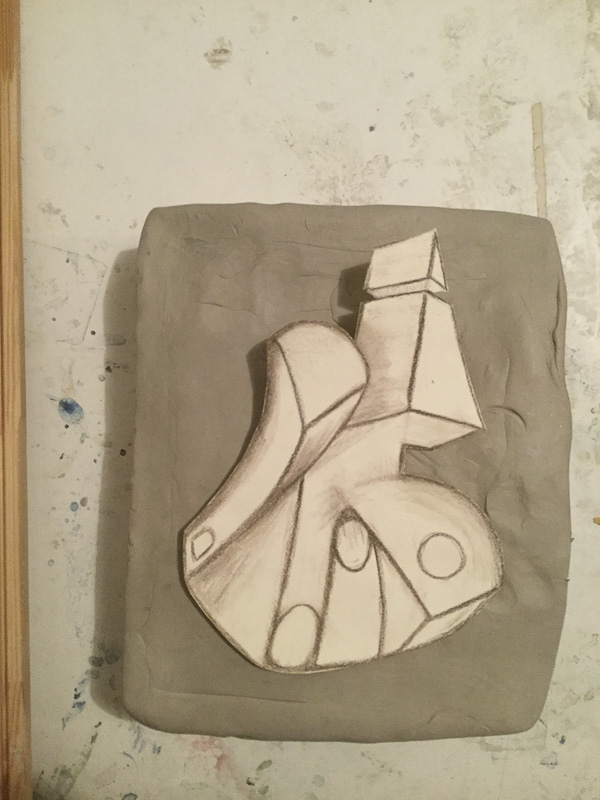
I’m especially pleased with a couple of drawings, see the two below images, I did after the sculptures were done. I think about these drawings as future sculptures to make. They were base on the physical sculptures, but they are entirely different.
Also, I think I achieve something exciting with the drawing that I later converted into a sculptural form. The relationship between a flat drawing folded into a 3d shape is wild.
How did I demonstrated the use of research techniques in the study of the history of sculpture and its relevance to my own work
I like to think that the work I did for this module are totemic in a way and even though I played with the influence of Hannah Hock’s works my pieces are constructed not as photomontages but as stacked sculptures.
I made a quick comparison with the work I did with the work of the artists I researched. I did not copy any of this masters intentionally but the likeness are there. The below gallery shows some kind of similar forms, lines, directions, etc among the works.
Figure 1. Constantine Brancusi, “King of kings” (1938)
The text in light grey are my tutors comments (Kimberly Foster) and the black text are my answers.
I would encourage you to play more and make more as even small moments of making can make considerable contributions that enable your ideas to manifest.
Generally speaking, I think that this time I was more playful, creation-wise. It is true that “even small moments of making can make considerable contributions” so much that all the images I choose for the section “Relevant sketches drawings & sculptures” are from those small moments of creation that are game changers.
Therefore, there is an interesting simplification that happens in the outcome of the relief, by the choice of how you edited and cropped through the photograph. Does this make the outcome photographic – as the rest of the sculpture exists beyond the image presented?
I have been thinking a little bit about this and the answer is yes. The result I produce is completely mediated by the tools I use, and the camera for me is a tool that it is not able to capture the reality as many believe. What it produces is the photographic image that has a life of its own.
There is as you suggest a very different consideration between the image and the physical form. What do you present, when is the work seen as resolved?
I would present both the photo and the sculpture.
you might play with some more of the ideas that emerge through the drawings and seek other ways of exploring materials. Sometimes you can’t answer everything in one way or in one piece of work, and it is in the multiples or series of experiments that the work emerges
I couldn’t agree more. The following images will be my next experiments; the becoming into sculpture I would say, and then into drawing again.
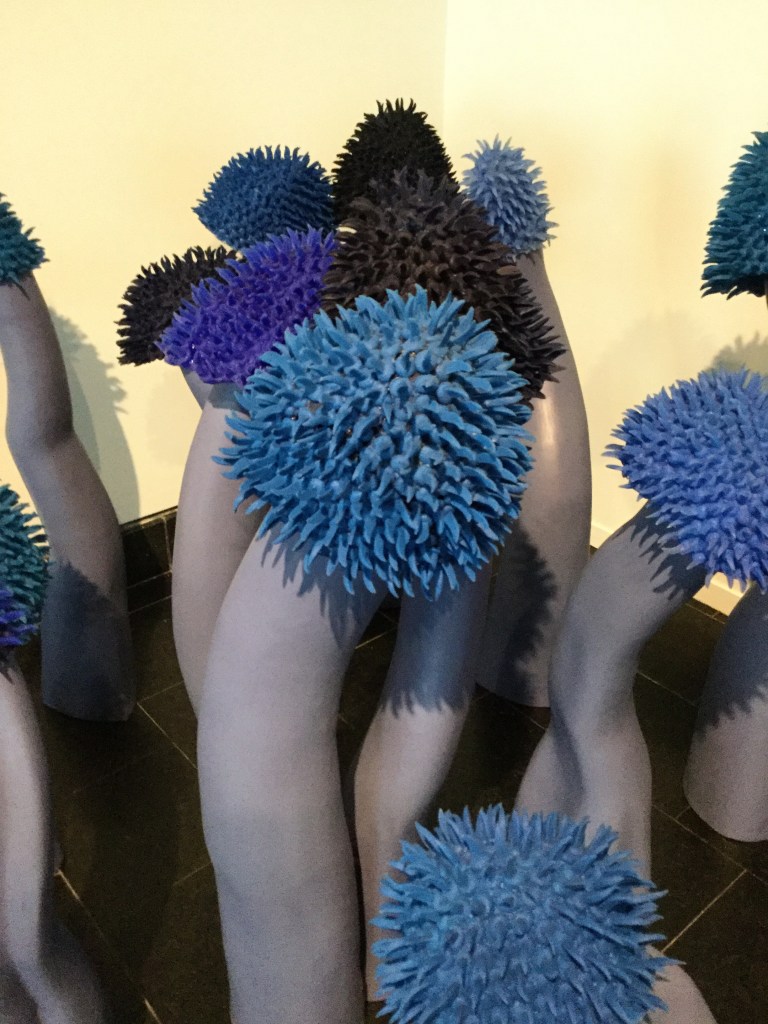
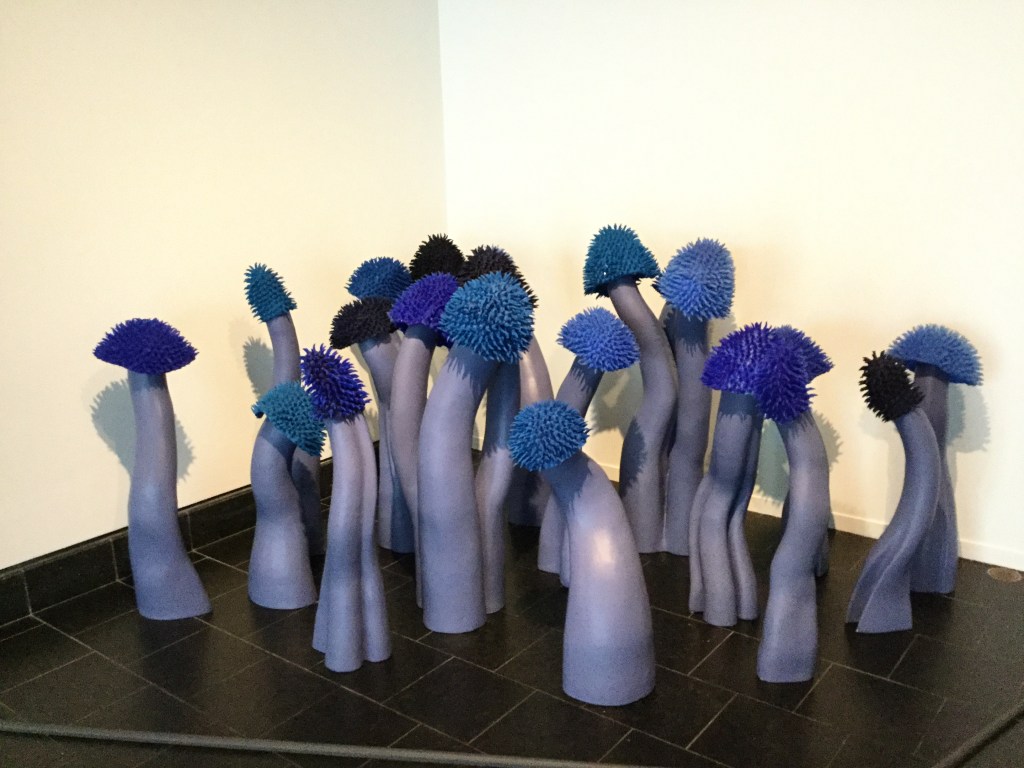
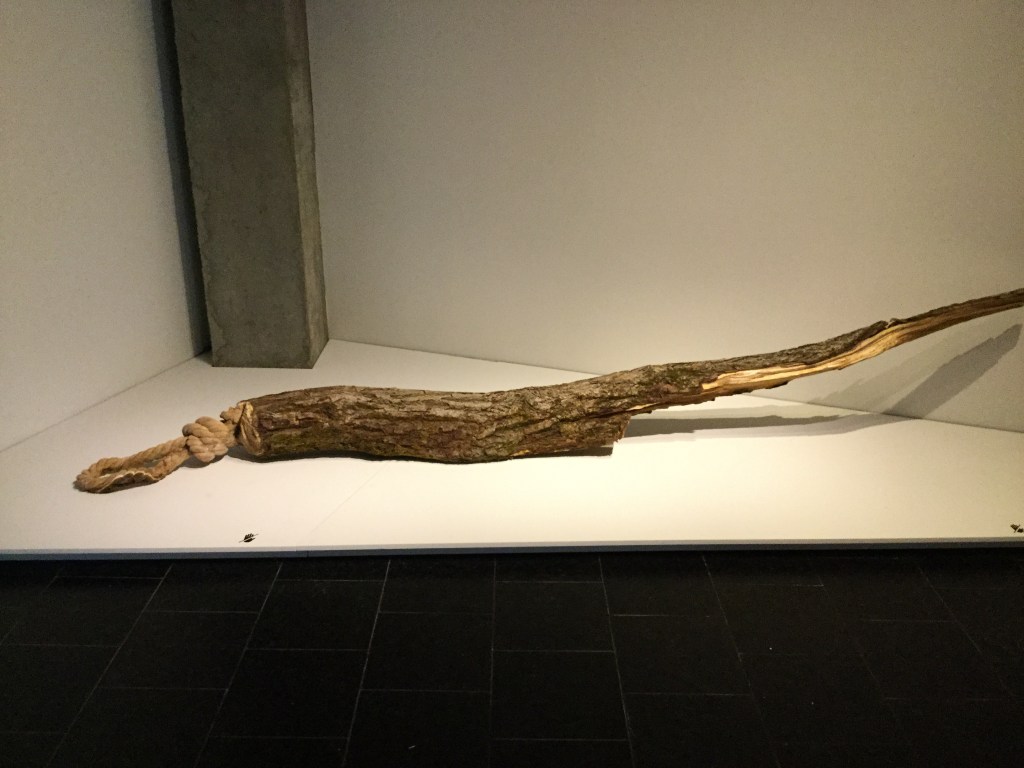
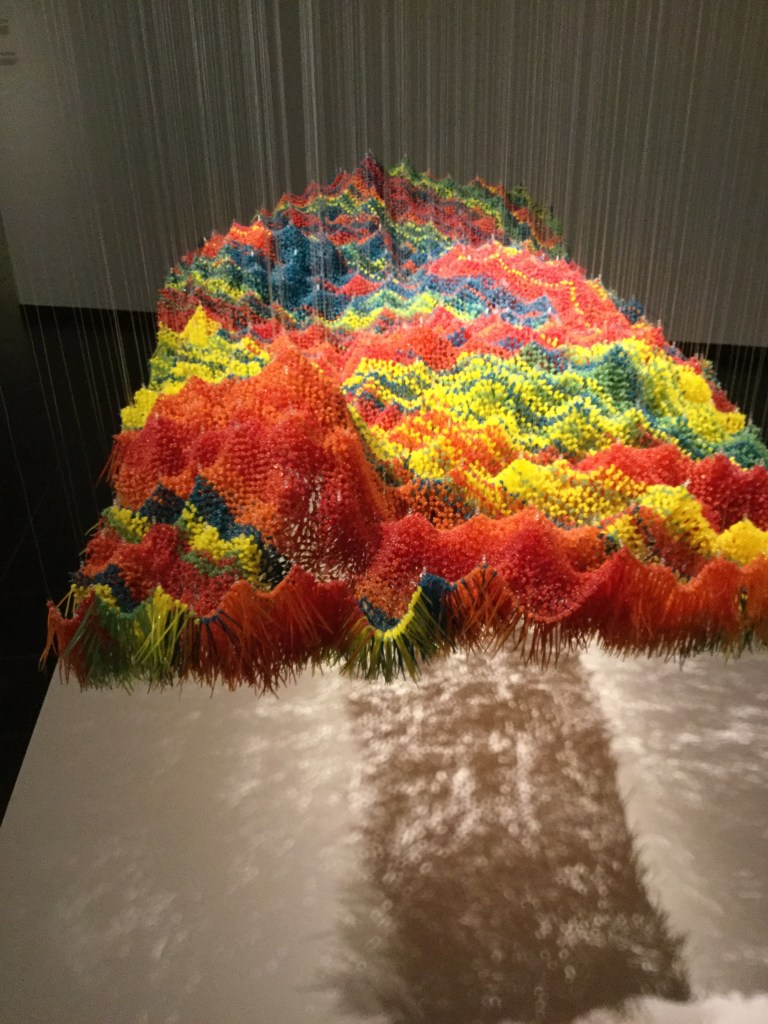
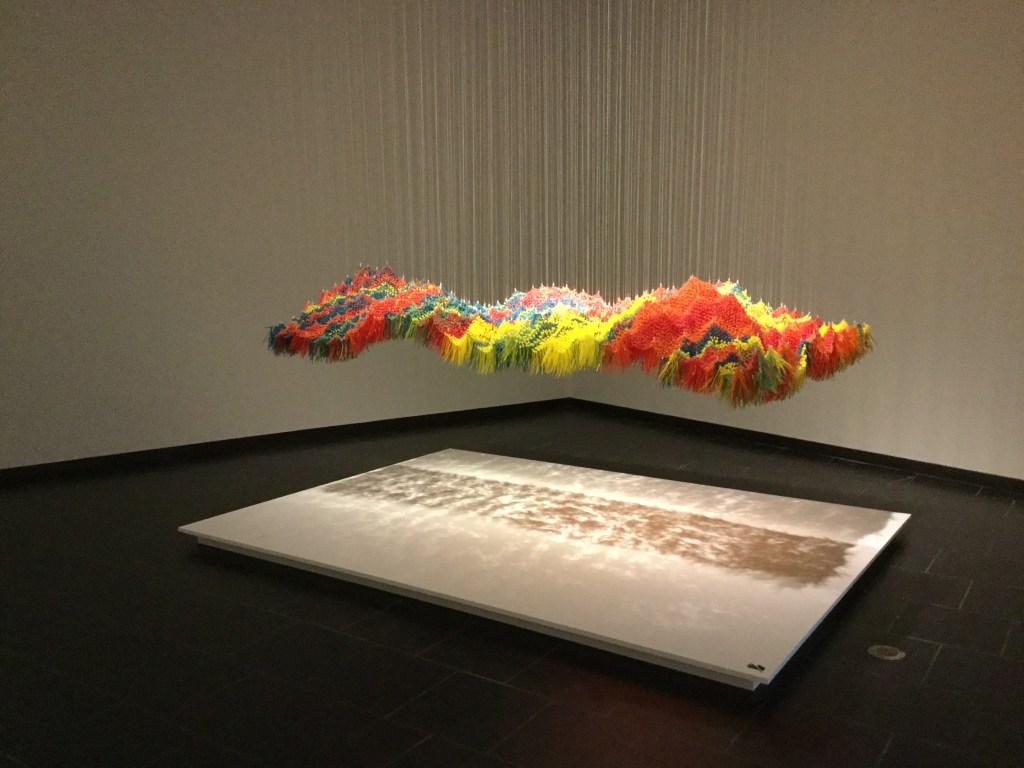
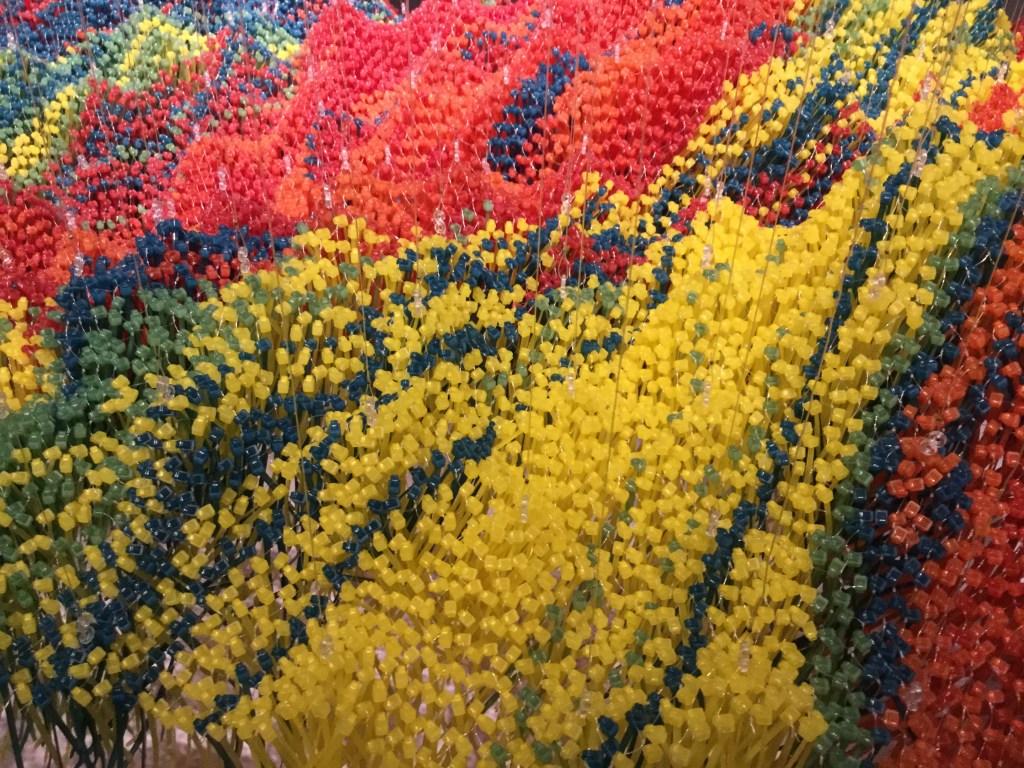
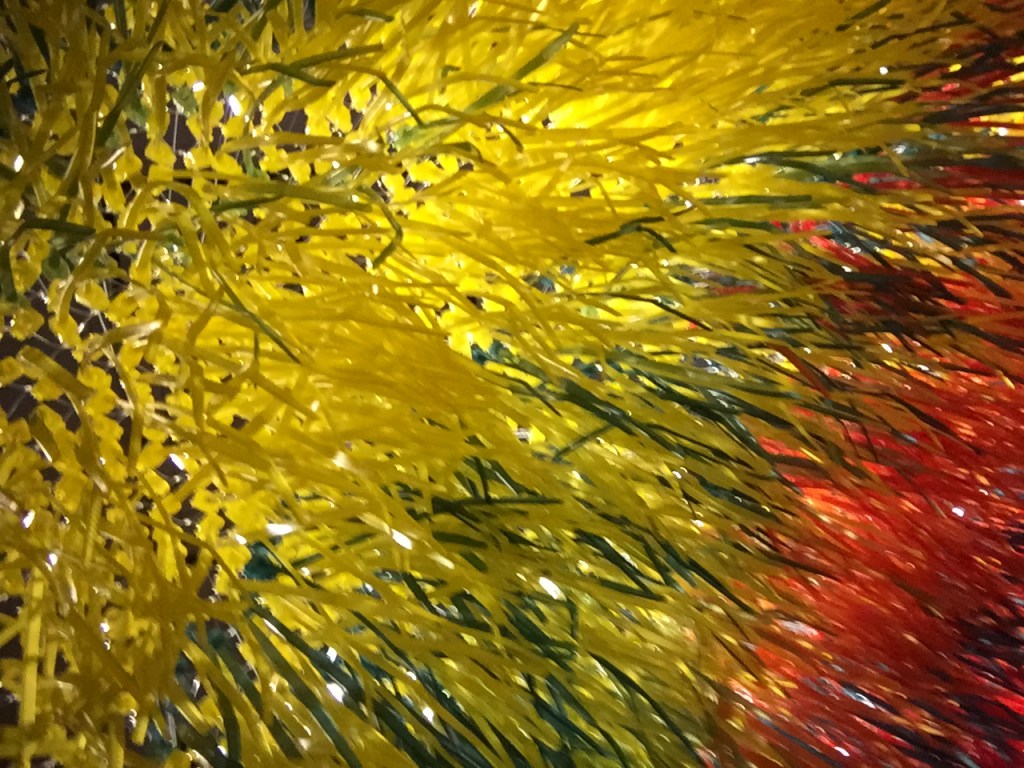
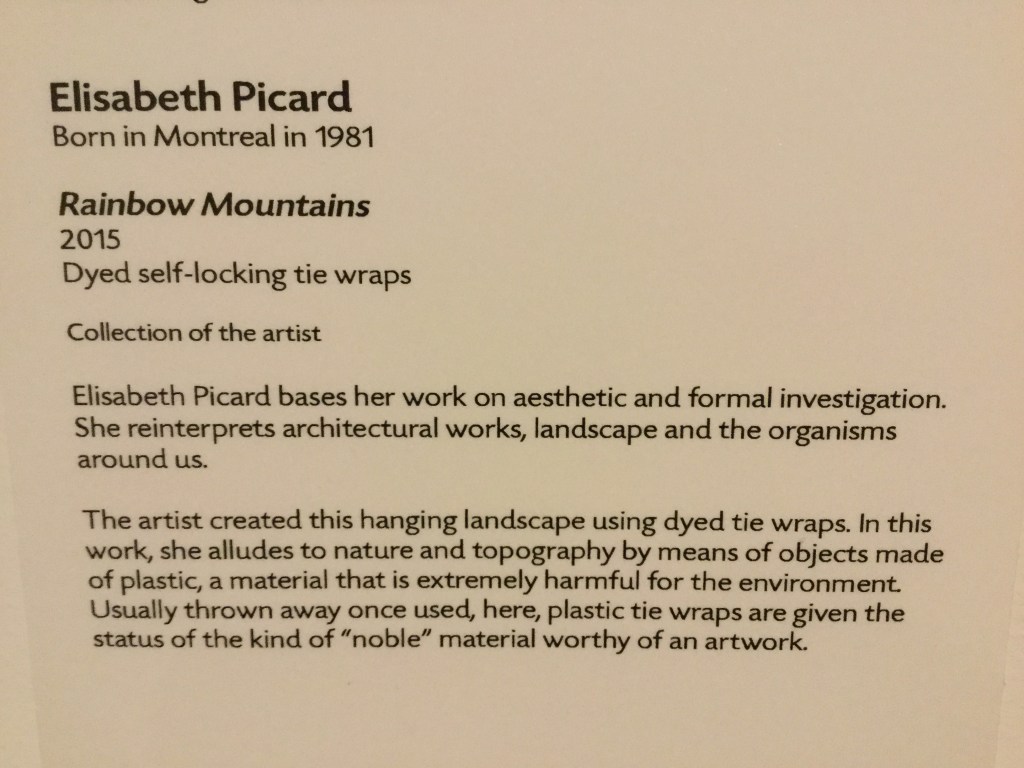
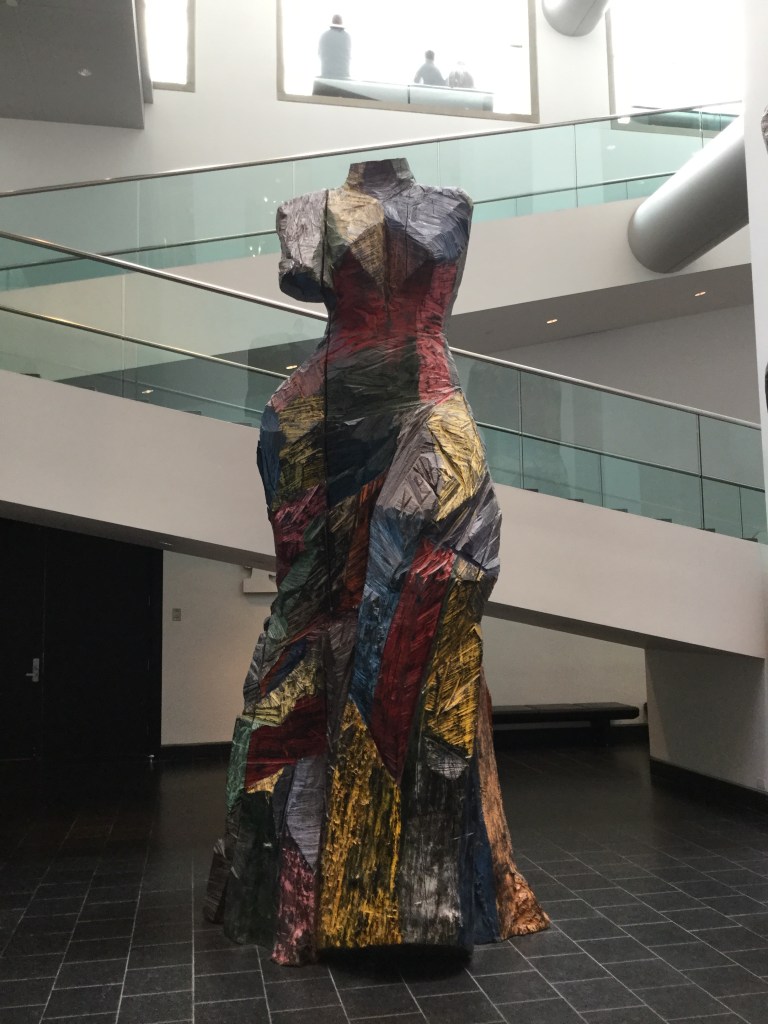
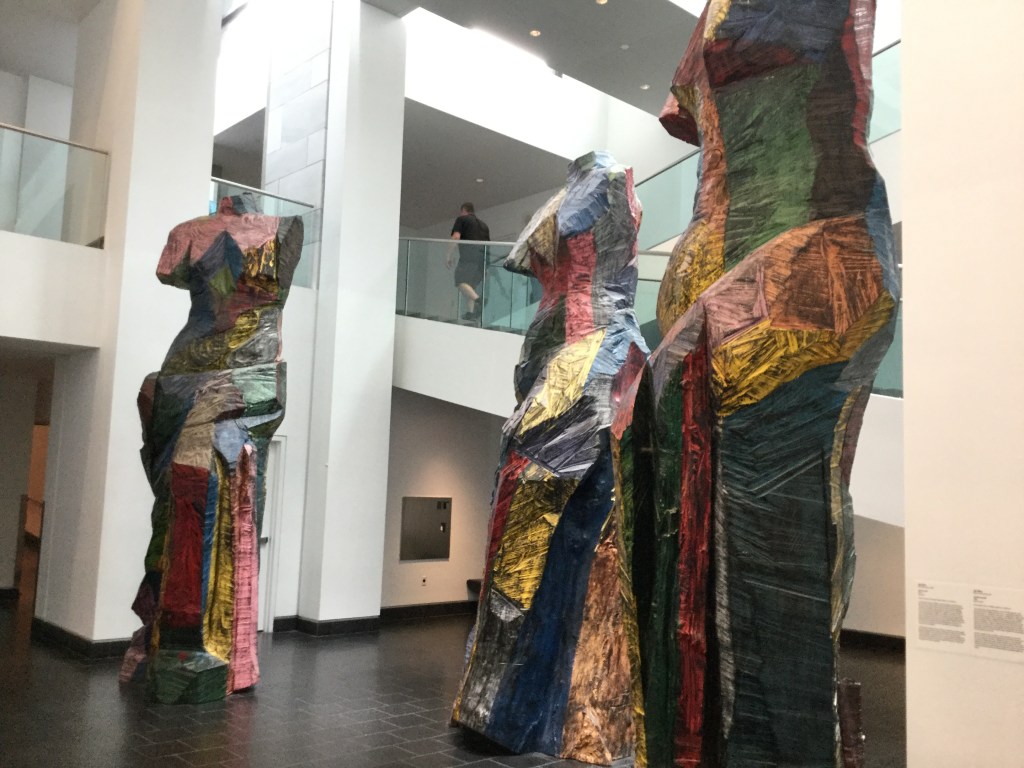
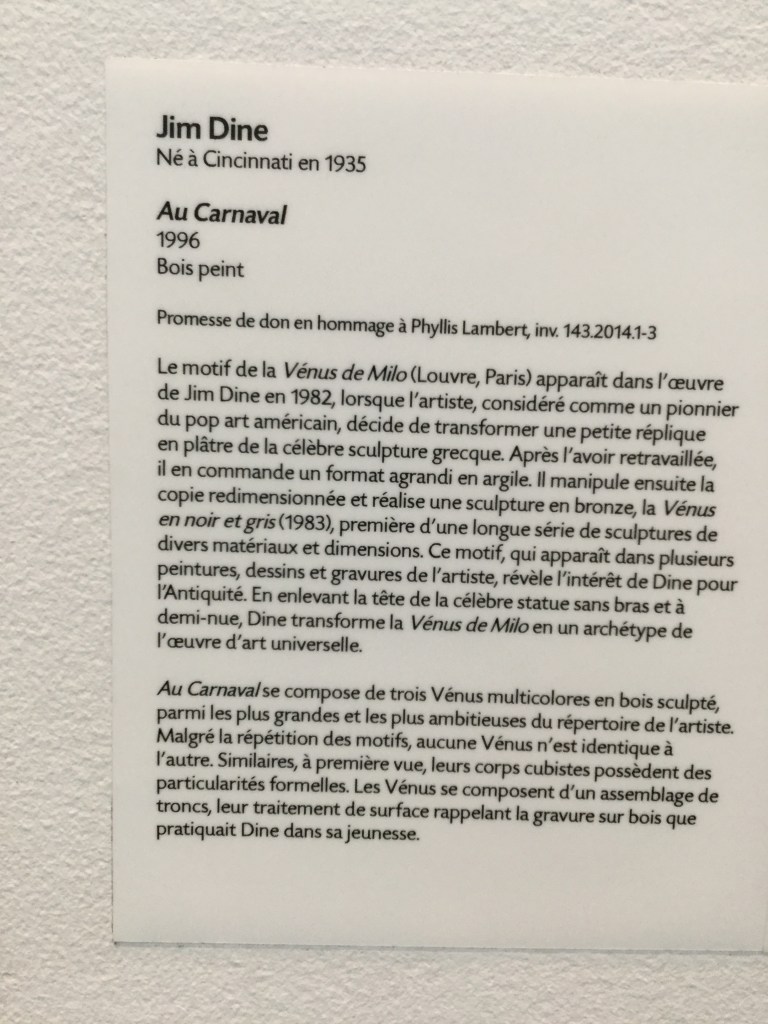
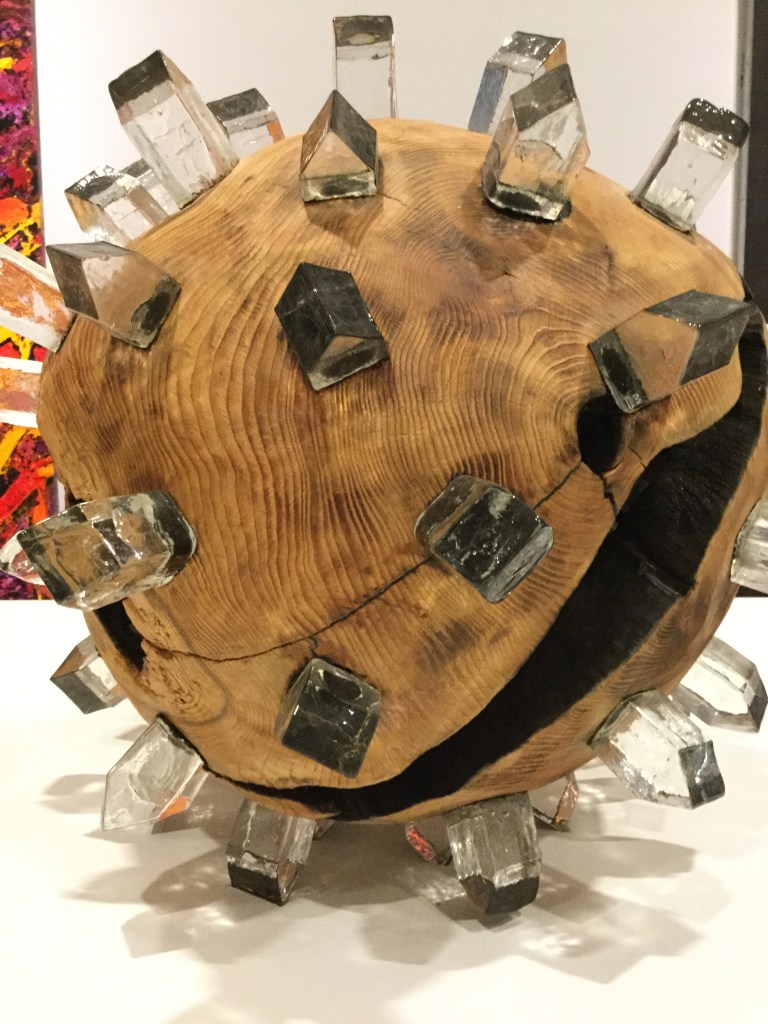
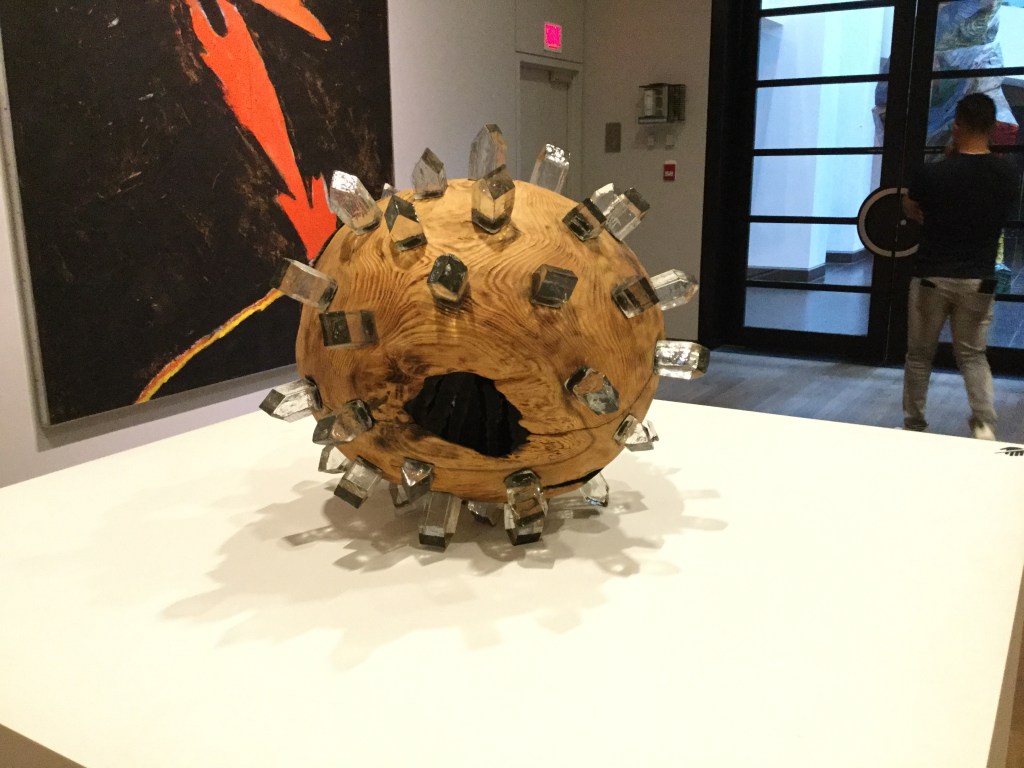
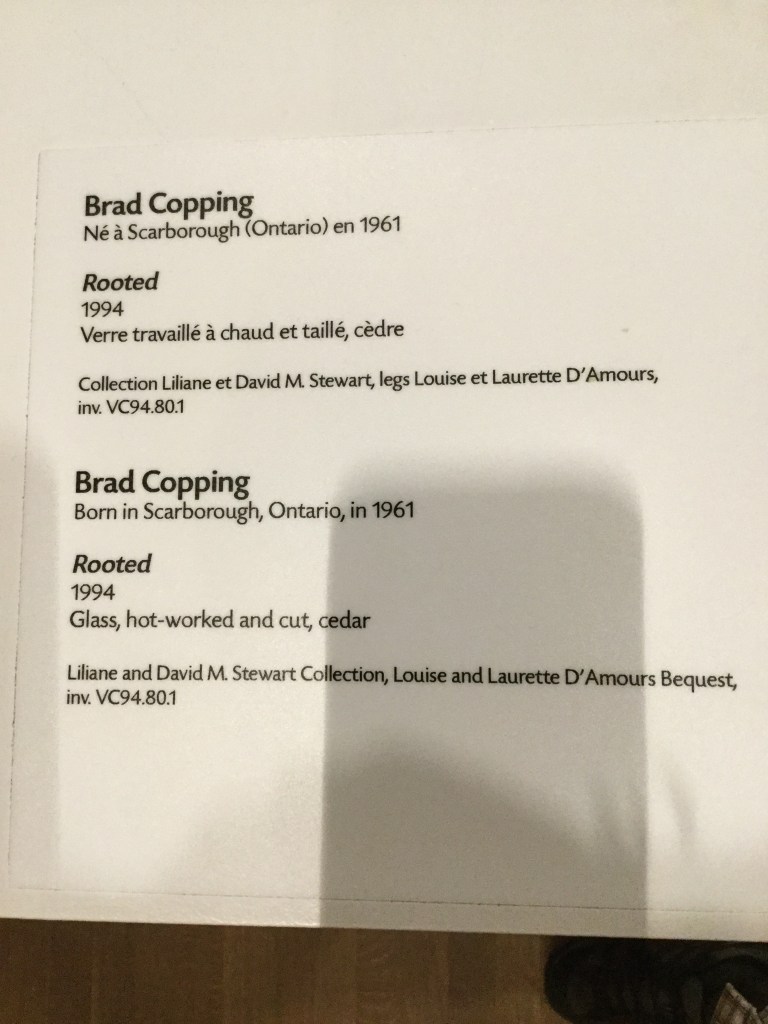
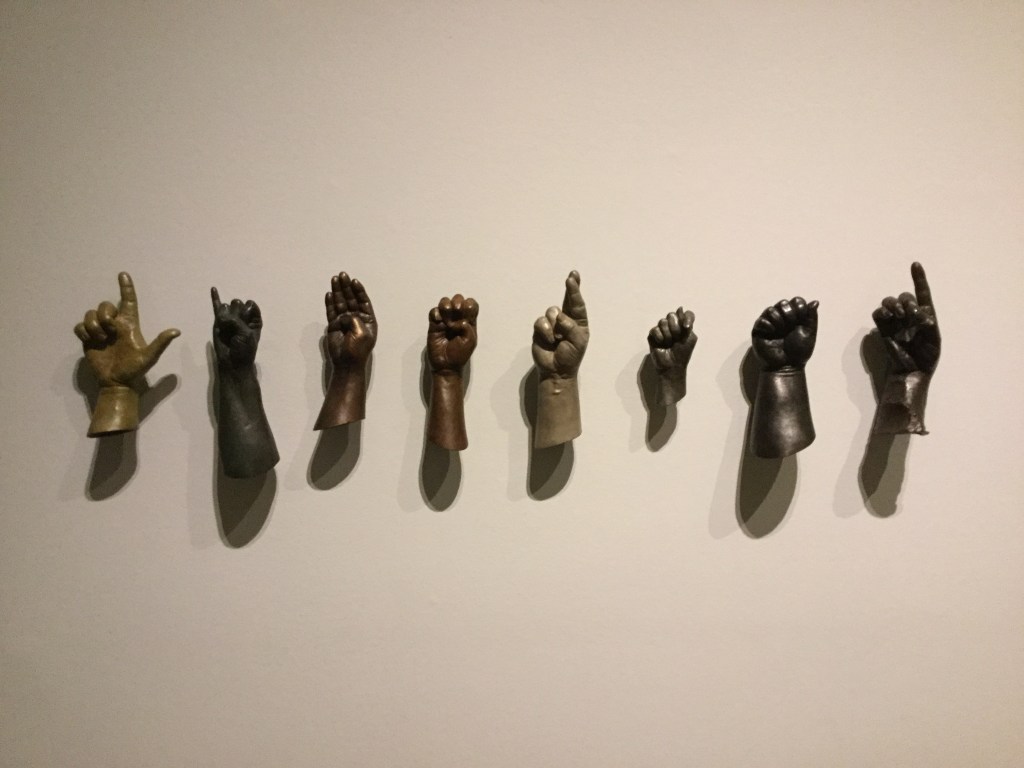
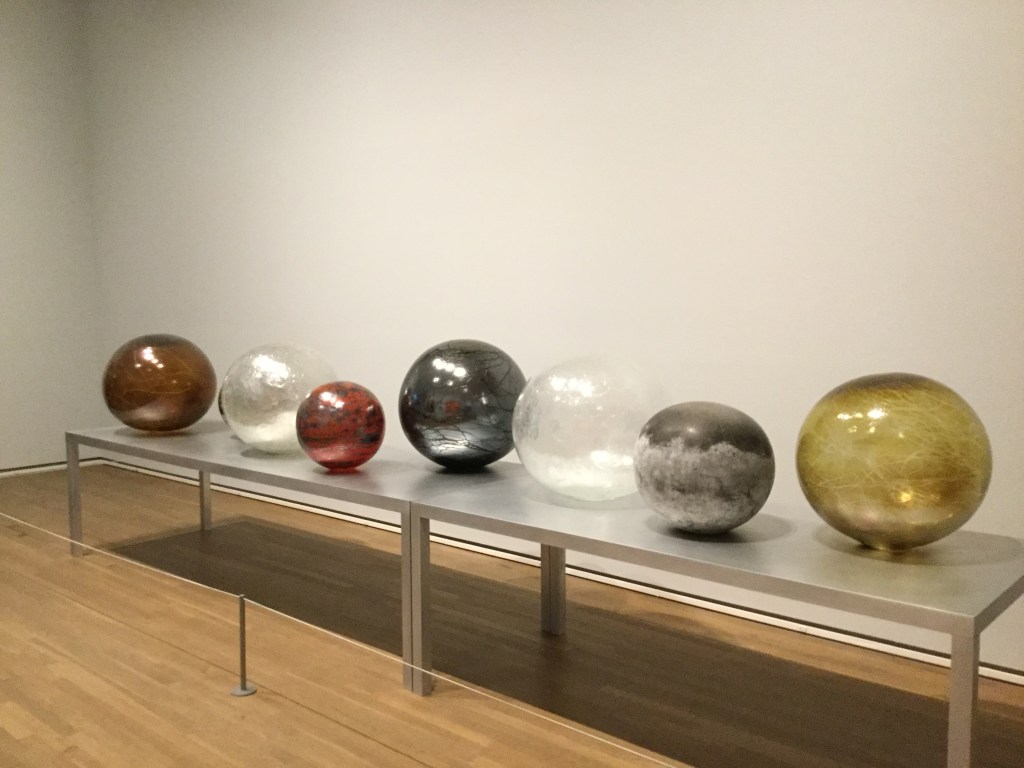
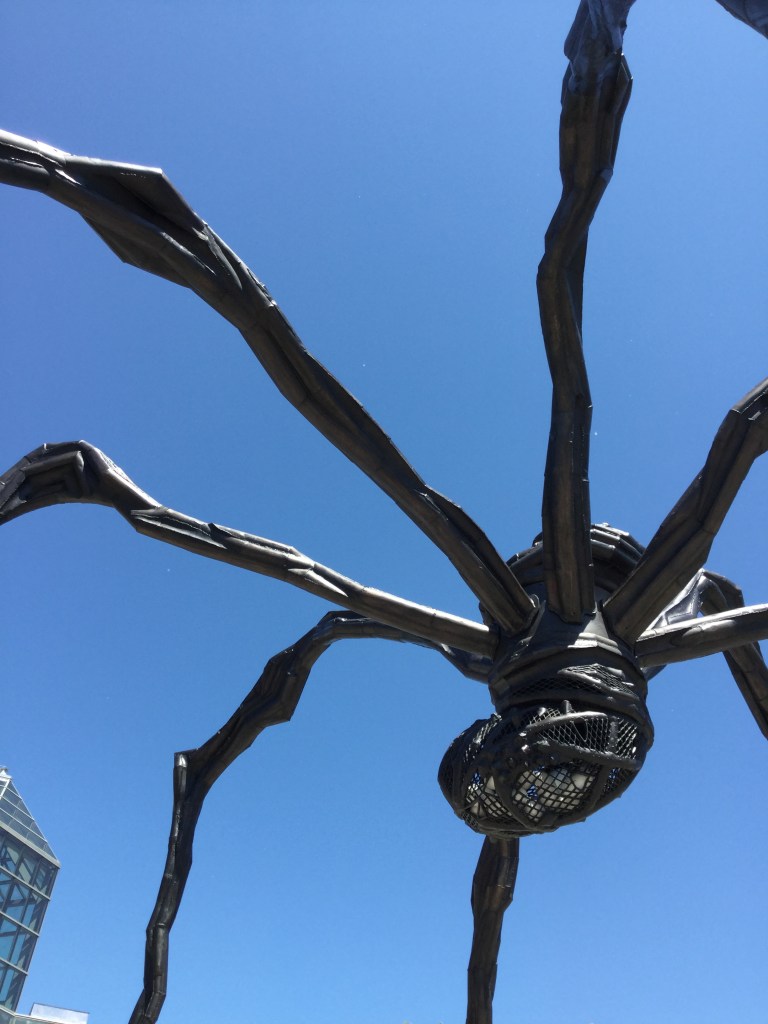
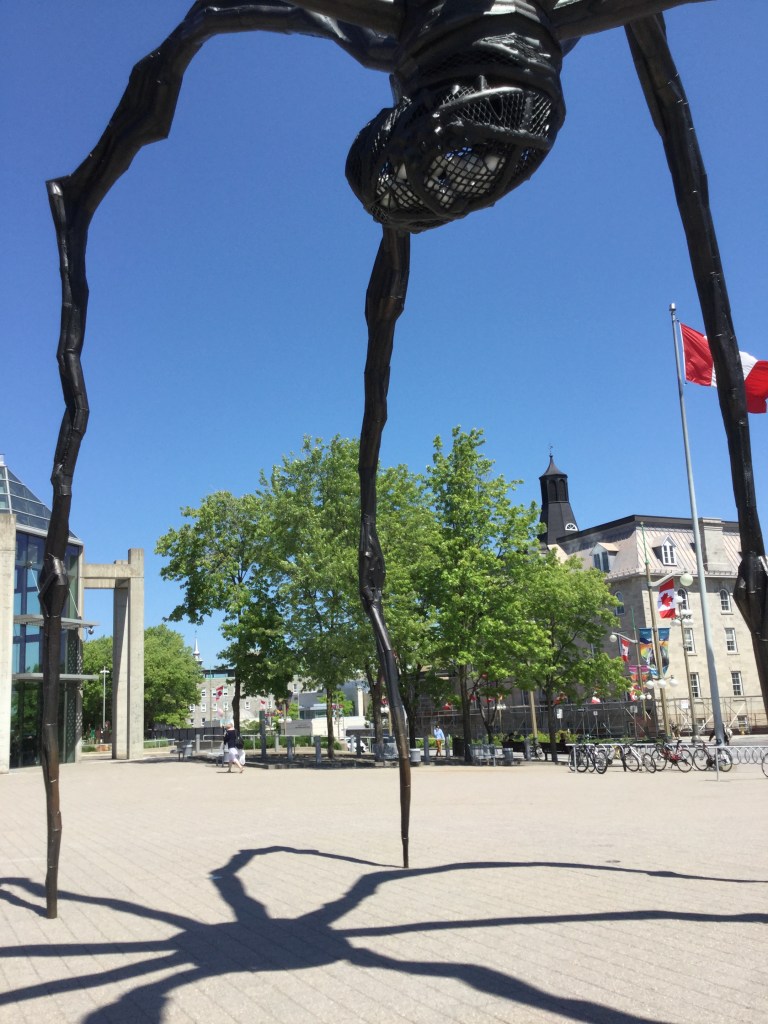
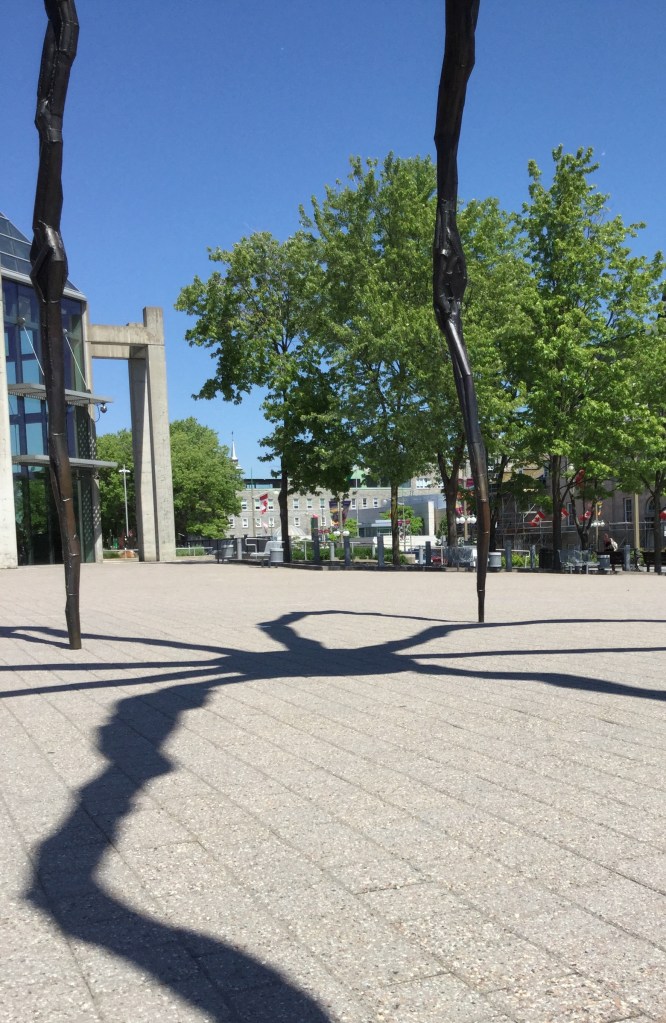
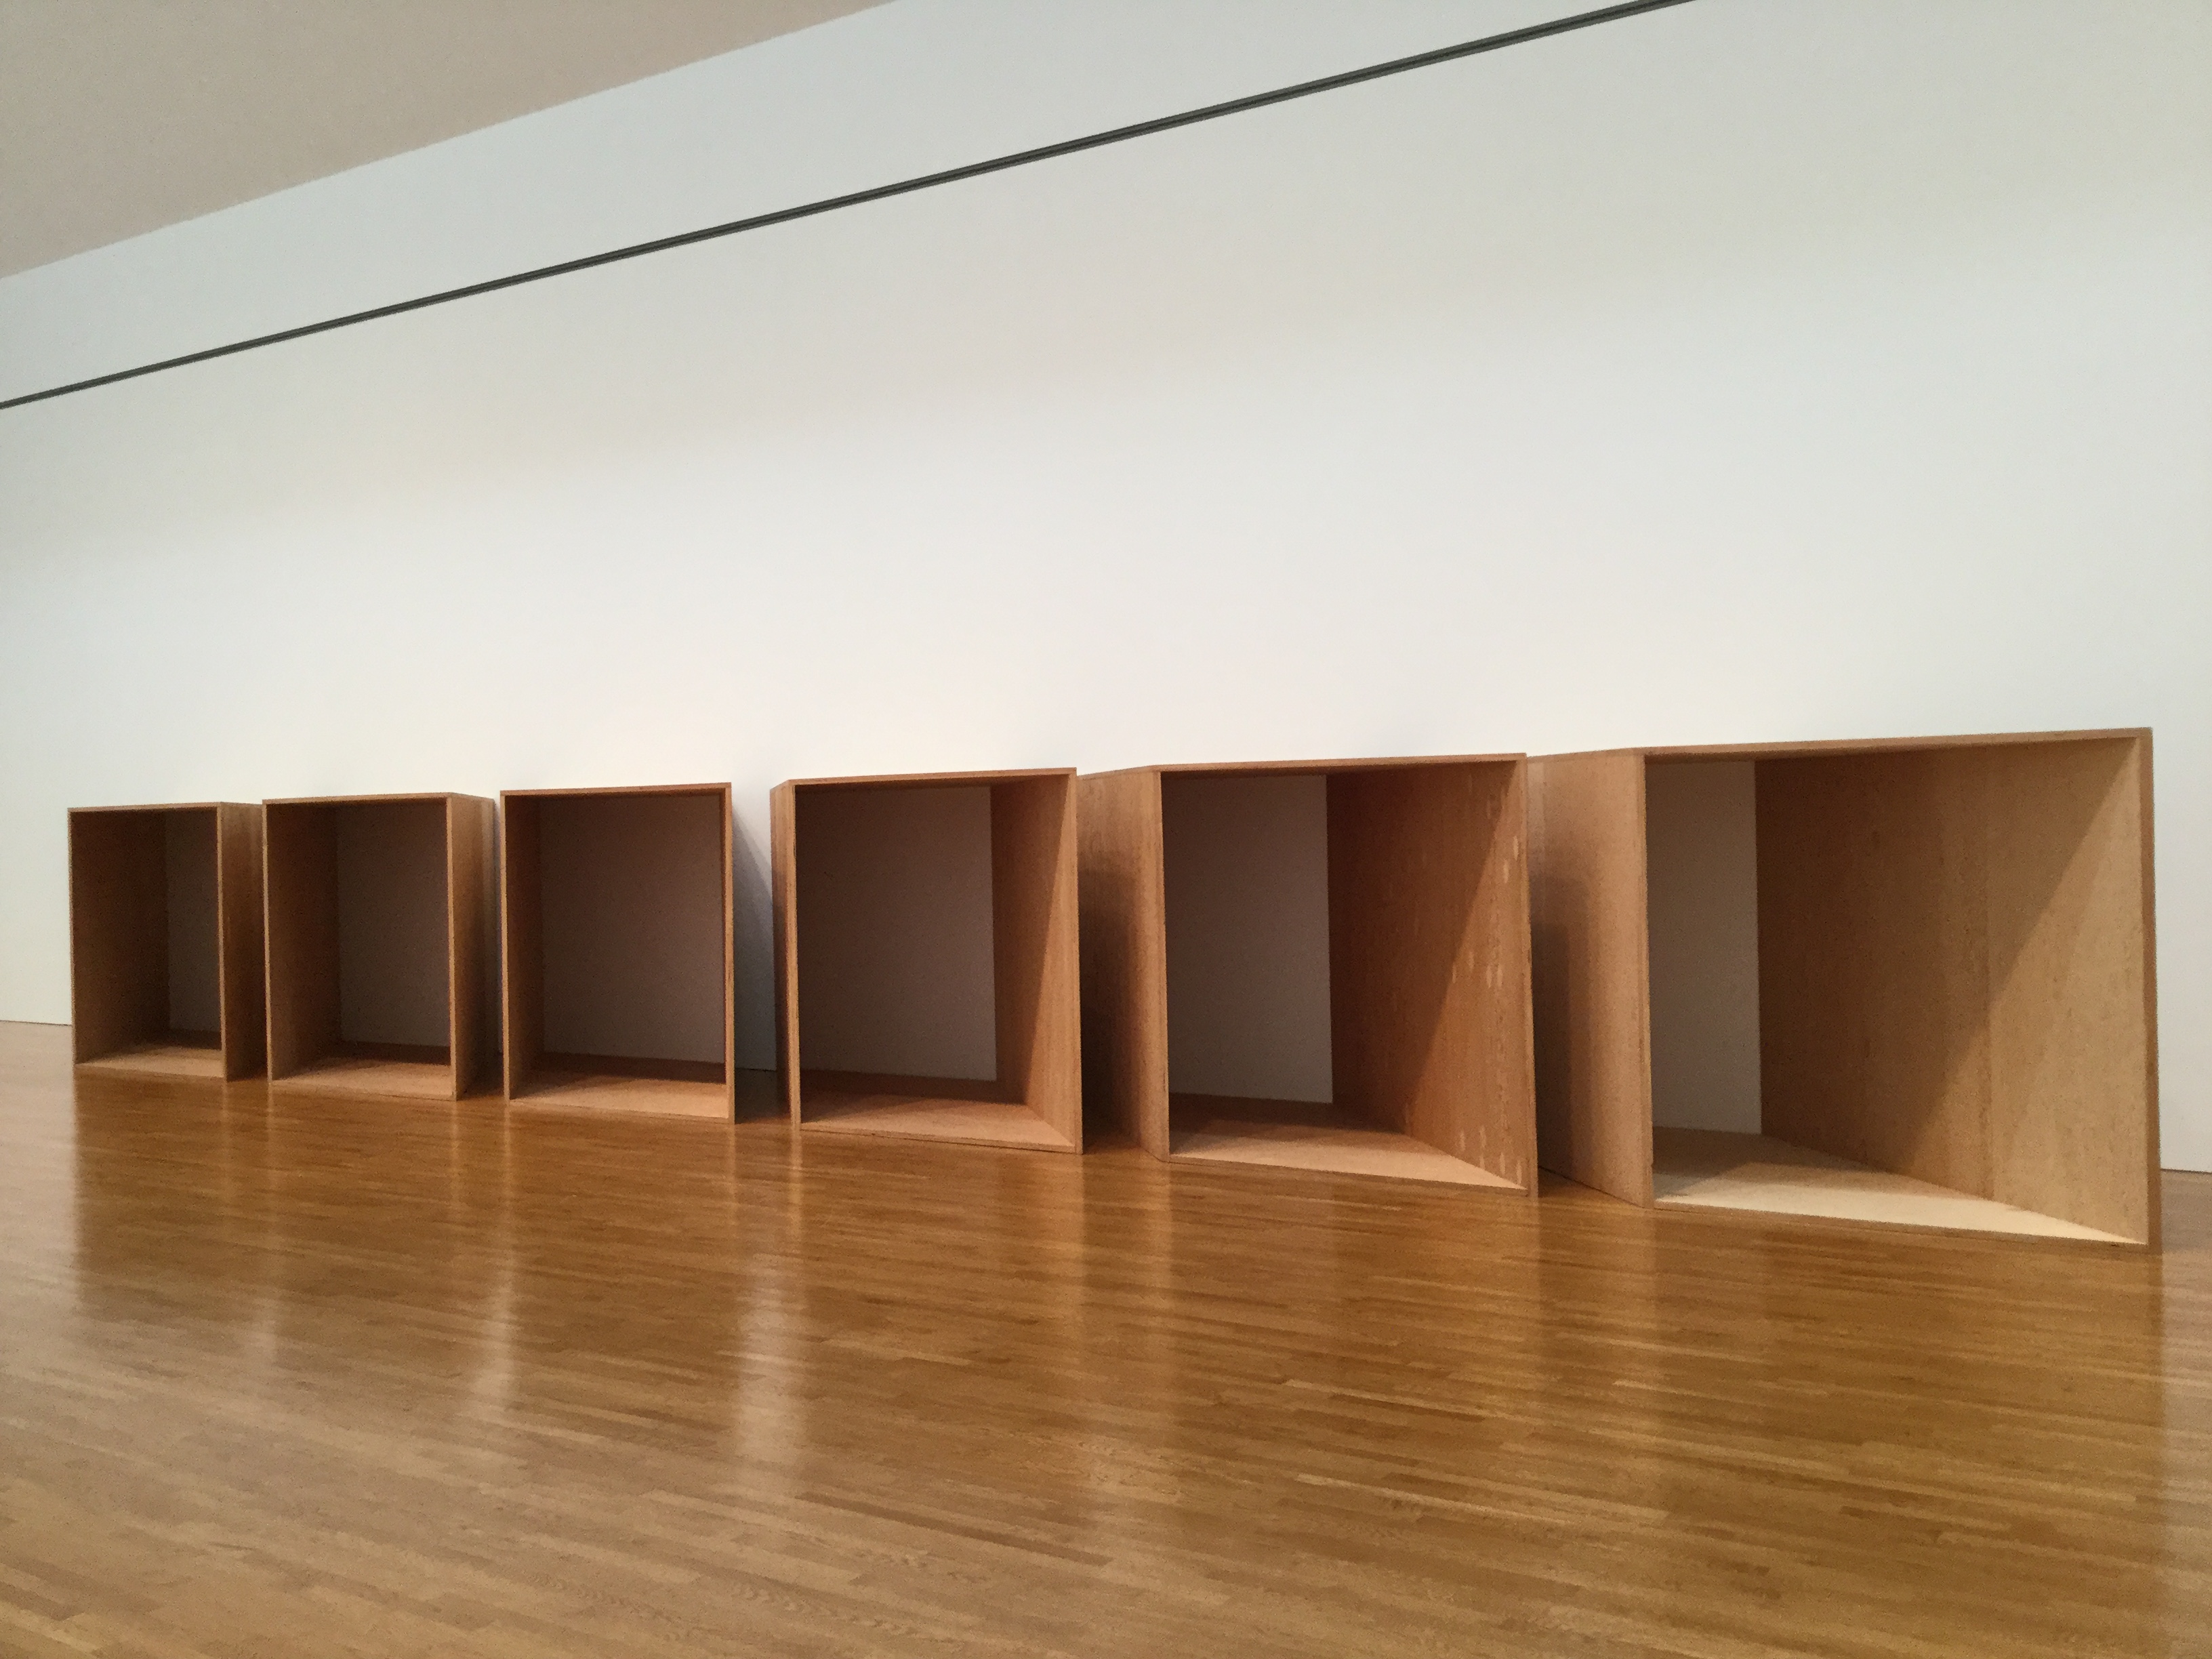
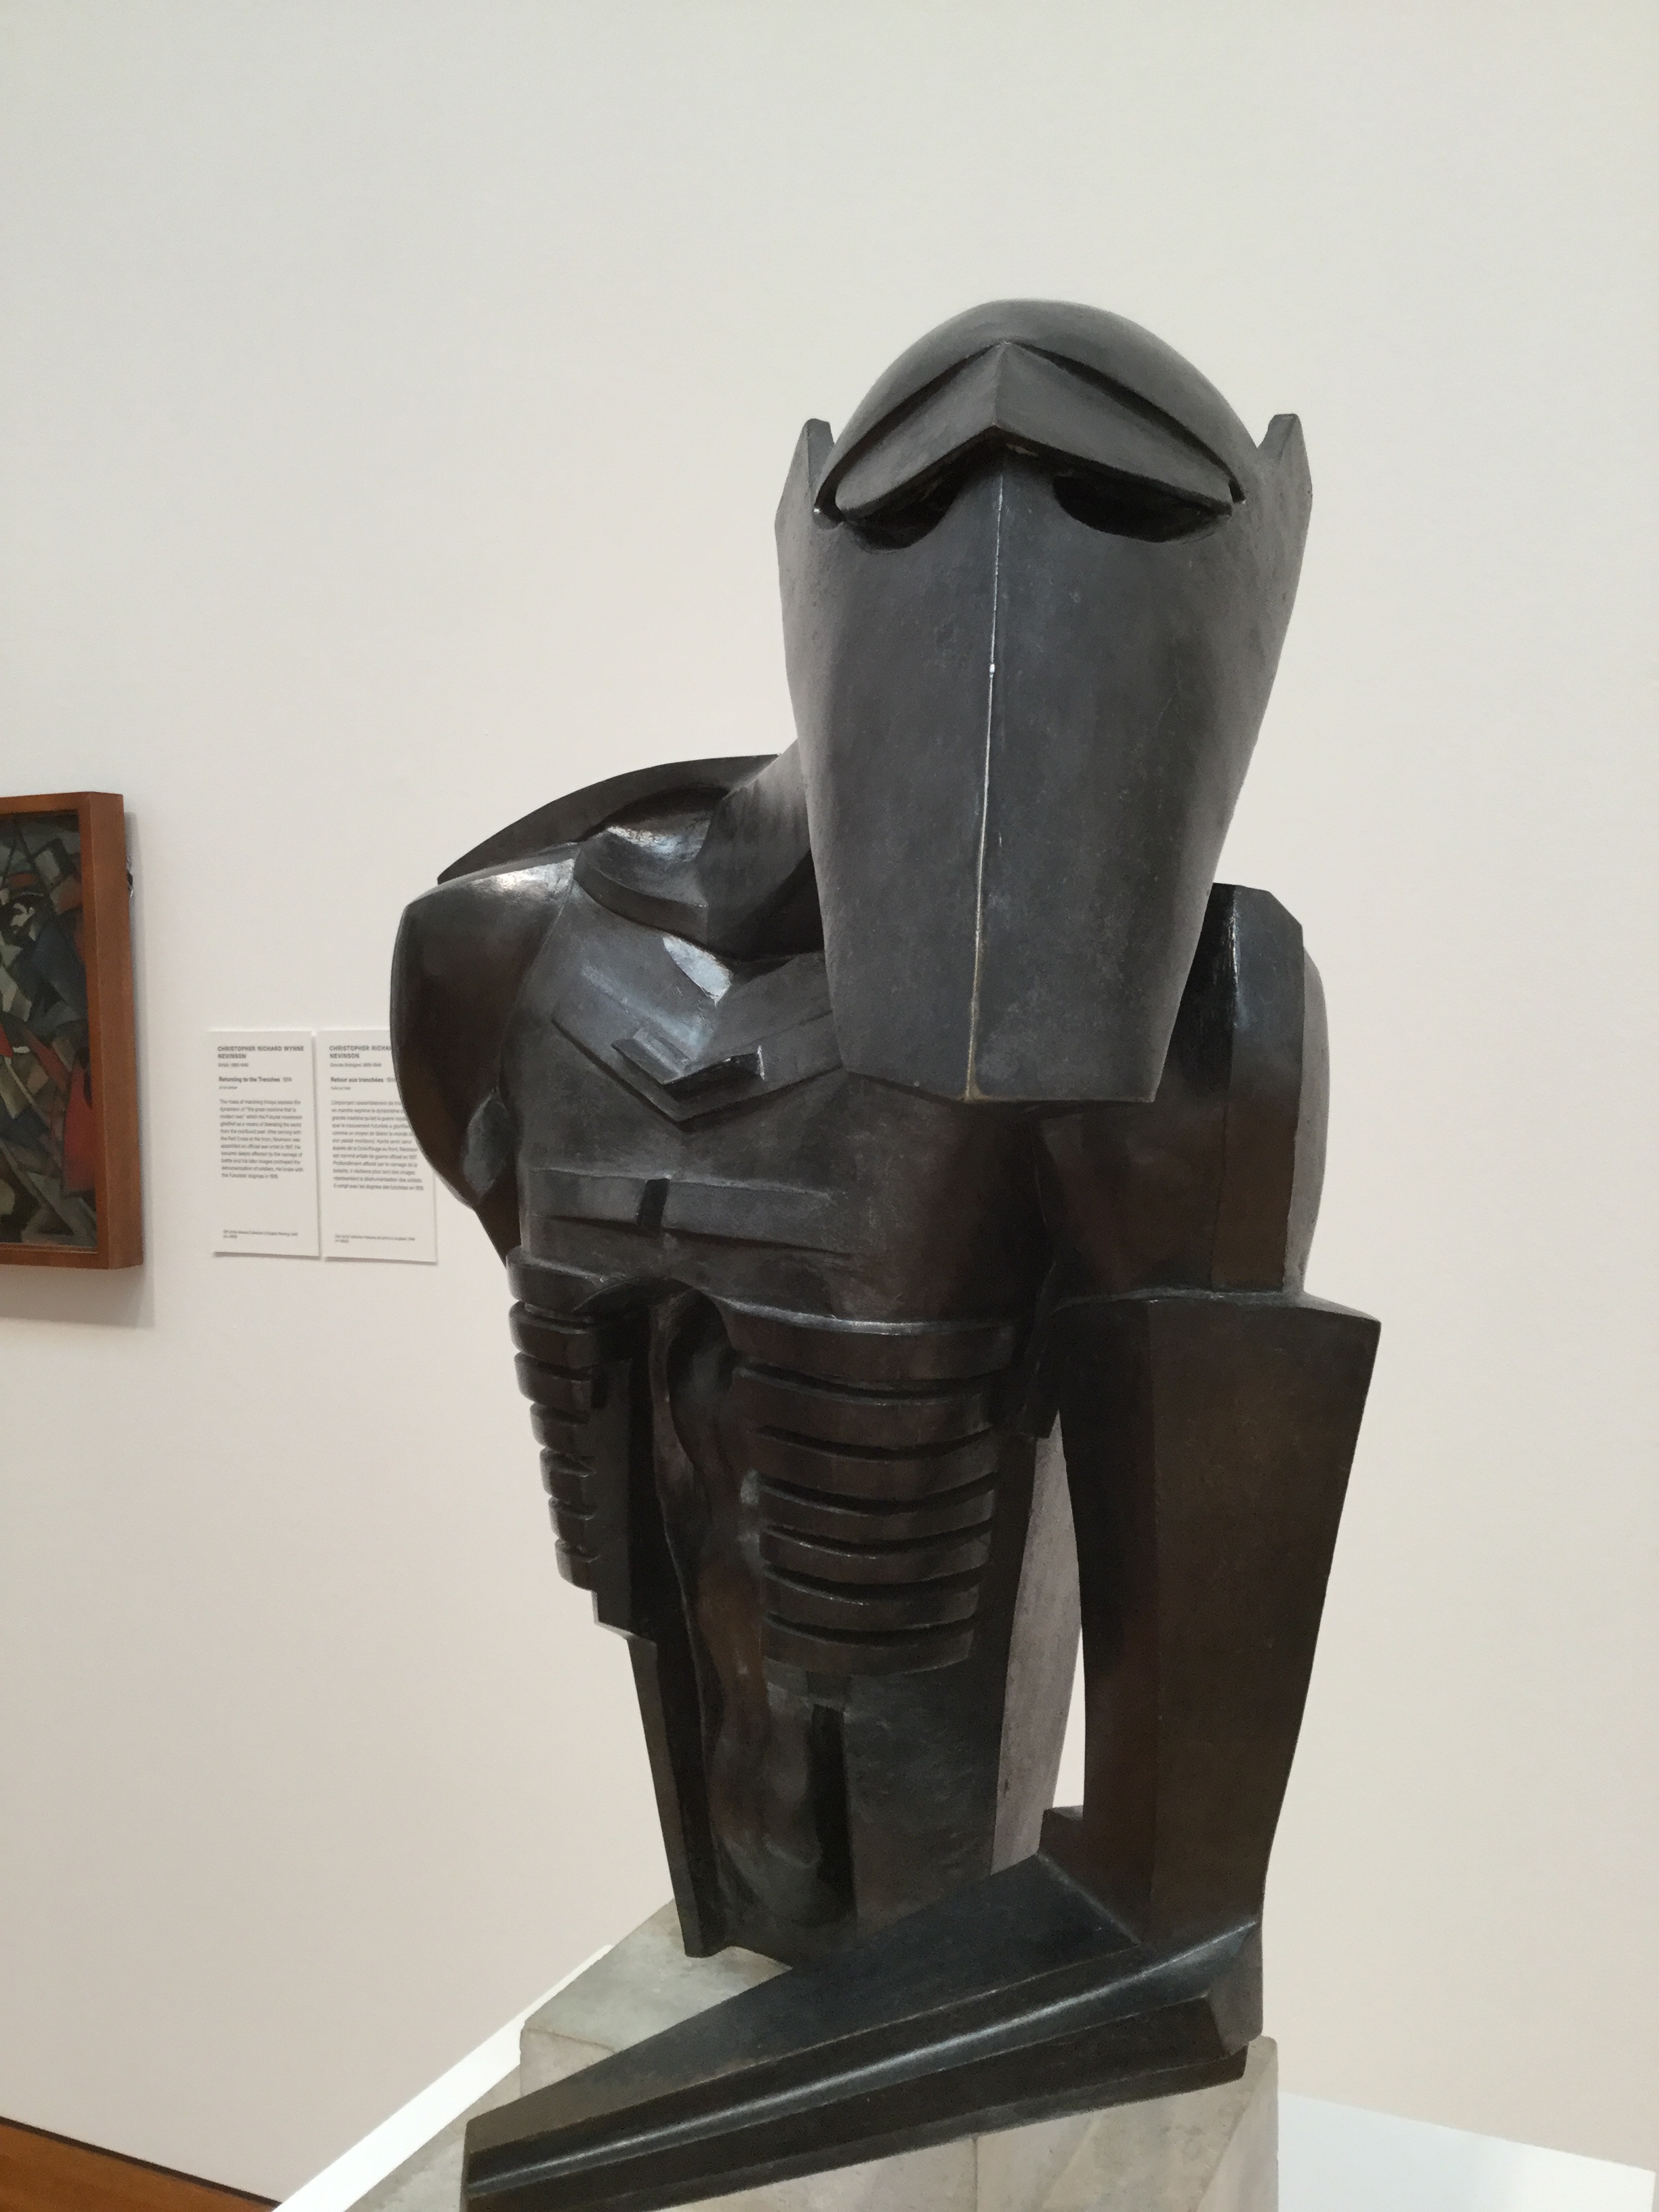
I was lucky to go to Ottawa, Montreal and Quèbec City this summer. The museums offer was incredibly and of course the statues I saw, not only in the museums but also on the streets were fantastic. I was fascinated how I was able to see sculptures with different eyes now that I’m doing some (minor) sculptures of my own. I paid attention to the materials, sizes, forms and the concepts behind the sculptures but I was intrigued, most of the time, by the base or by how the sculpture stood by itself.
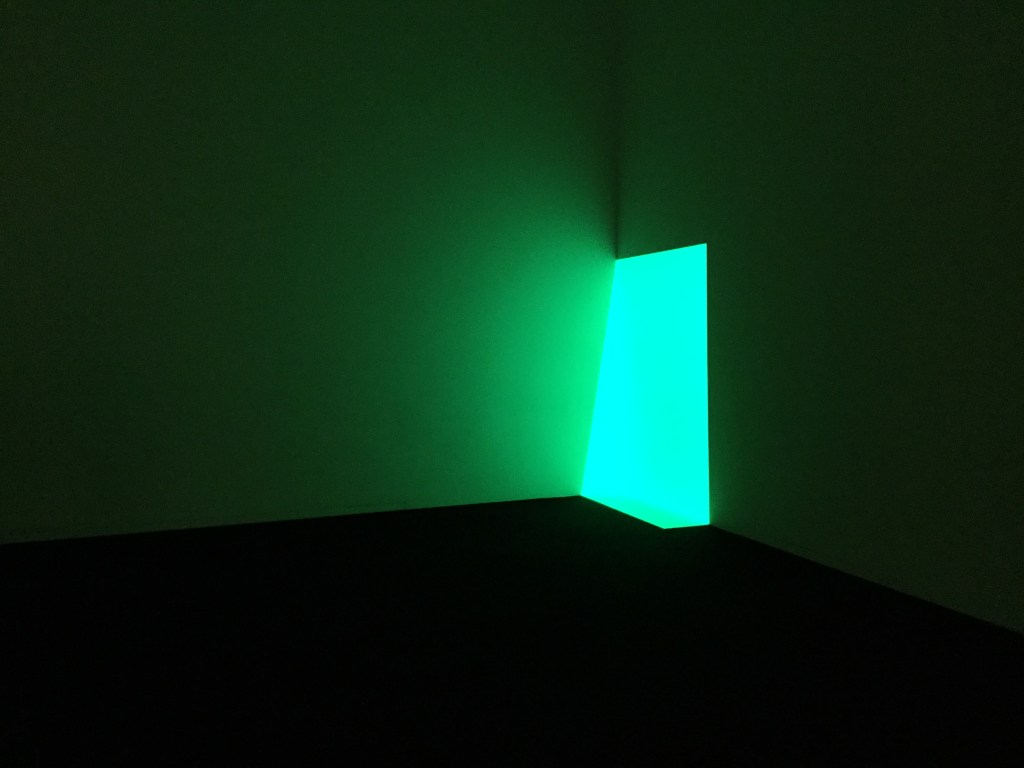
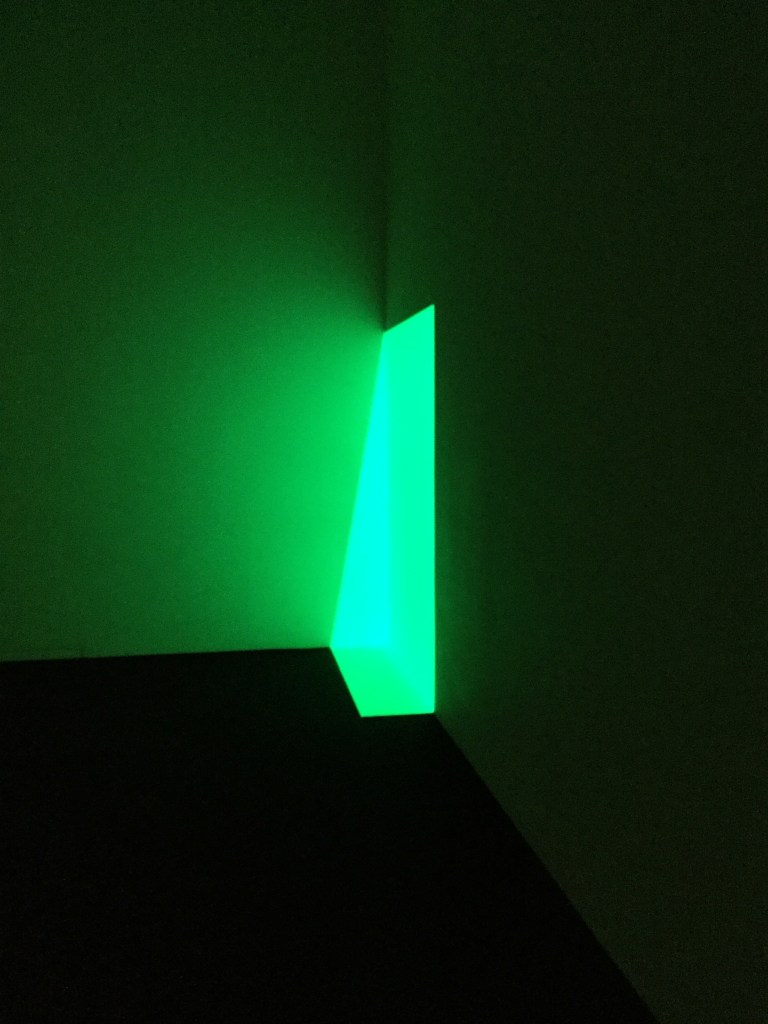
The following galleries are of the sculptures that I found most interesting. There were two artists that impressed me the most: James Turrell and Rebecca Belmore. One of the sculptures that impressed me the most was by James Turrell, and it was made with light!
MAC Montreal
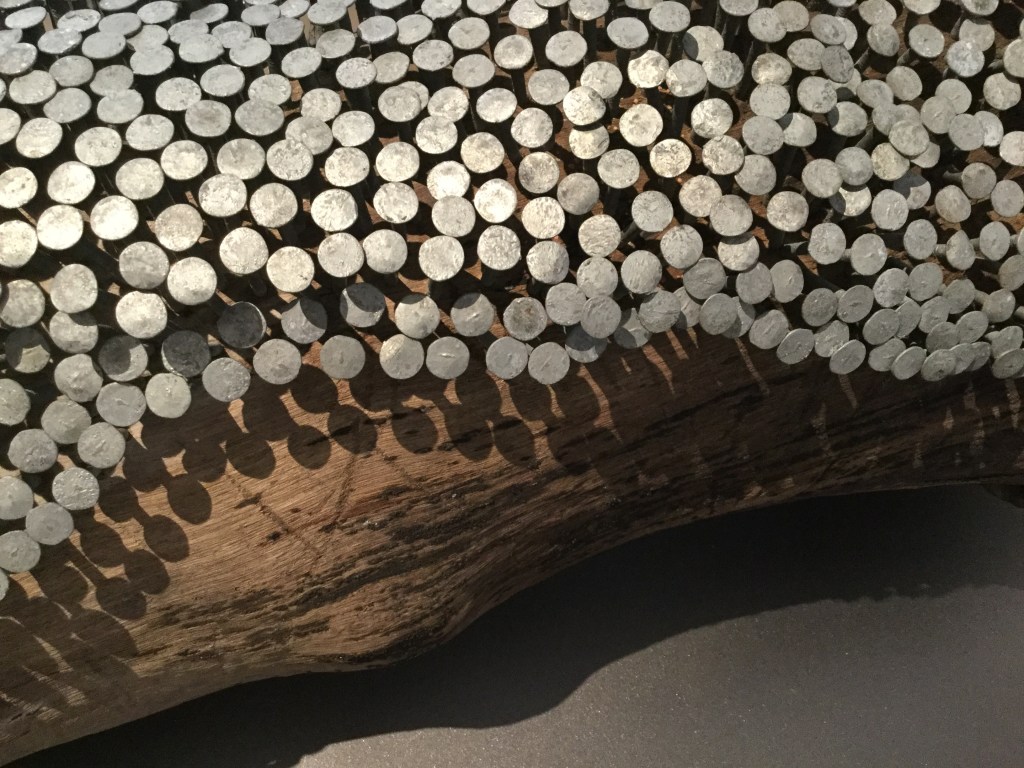
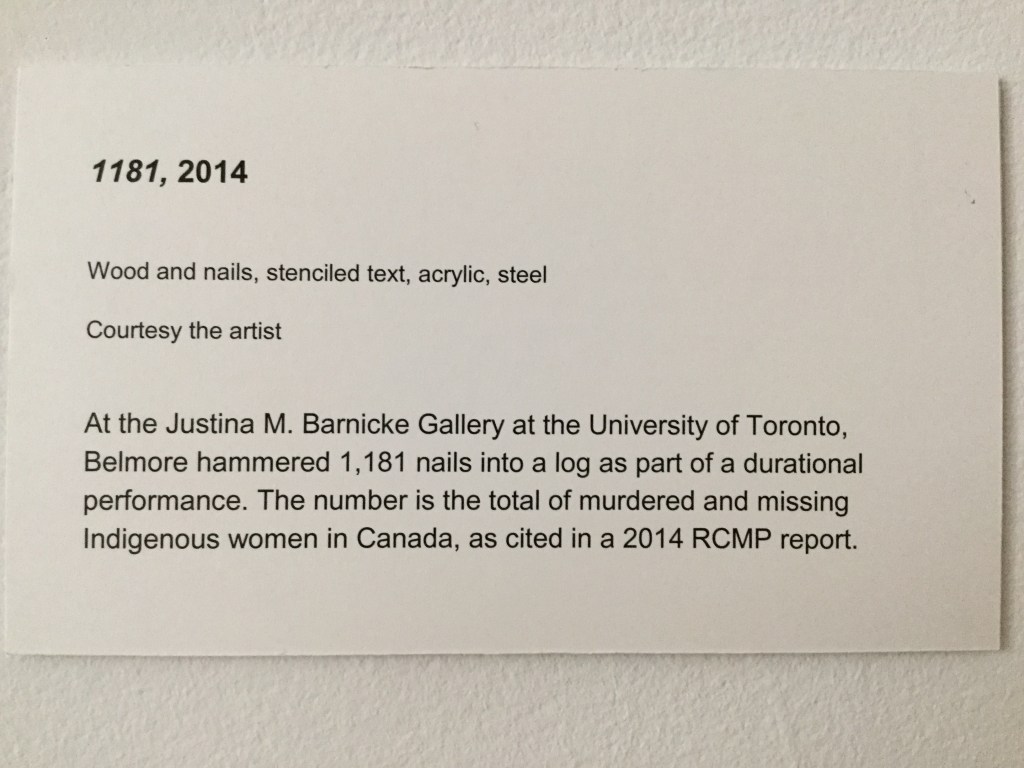
Rebecca Belmore
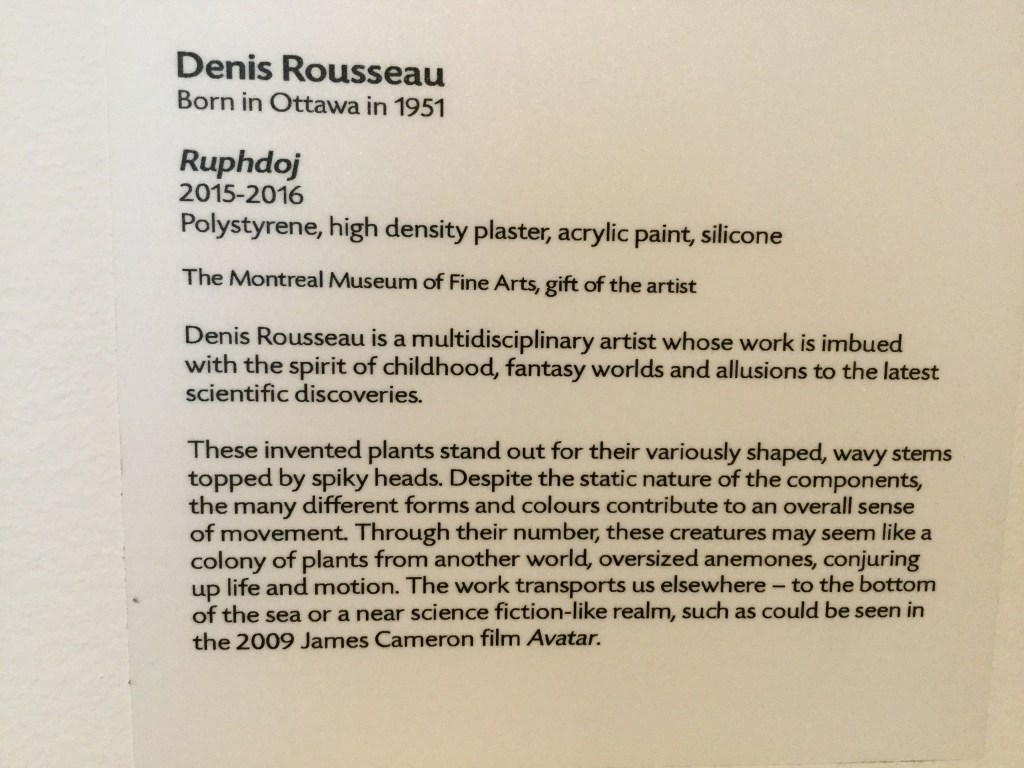
Montreal Museum of Fine Arts
James Turrell
This is by far the sculpture that impressed me the most. I am really not so sure if this is considered a sculpture but it has all the illusion of tridimensionality. I took these photos with an ipod and the result is not as impressive as the real thing.
This is a list of what I am reading for the course. This list will continue to growth as I advance through the course.
There is a phrase in our syllabus book, Sculpture 1, Starting out in 3D, that goes: Sculpture had become like drawing in Space (Sacker, Burton, Unsworth 2016:20). I just got fascinated with this sentence, so I searched for more about this, and I found it in this book. There is a chapter named This New Art: To Draw in Space. I just read it once, so wait for my comments in the future.
I found this book insightful, it is full of excellent essays. Sculpture in the Expanded Field, a seminal text of R. Krauss, is also included.
Kraus E., Rosalind (Revised ed. edition, July 9 1986) The Originality of the Avant-Garde and Other Modernist Myths. Massachusett: The MIT Press.
Hamill, Sarah (First edition, 2015) David Smith in Two Dimensions: Photography and the Matter of Sculpture. California: University of California Press
.
Moszynska, Anna (2013) Sculpture Now. London: Thames & Hudson Ltd.
.
Tippett, Maria (Kindle edition, 2017) Sculpture in Canada: A History Canada: Douglas & McIntyre
.
Gough, Maria (2015) The Artist as Producer: Russian Constructivism in Revolution California: University of California Press
.
Matthew Affron,, Yve-Alain Bois,, Masha Chlenova, Hal Foster, Leah Dickerman (2013) Inventing Abstraction, 1910-1925 New York: The Museum of Modern Art, New York
.
Text
.
Mills, J. (2005) Encyclopaedia of Sculpture Techniques. London: Batsford
.
De Bolla, Peter Toward the Materiality of Aesthetic Experience. Diacritics, Vol. 32, No. 1, Rethinking Beauty (Spring, 2002), pp. 19-21+23-32+34-37 at: https://www.jstor.org/stable/1566359 (Accessed: 18-04-2019 22:22)
Detail of the construction process of “Materialization of a hand”
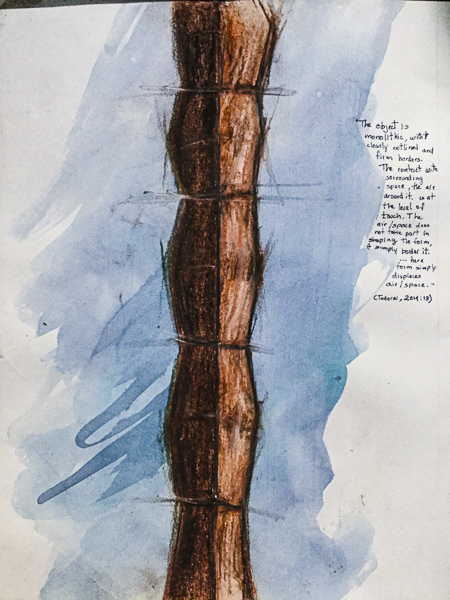
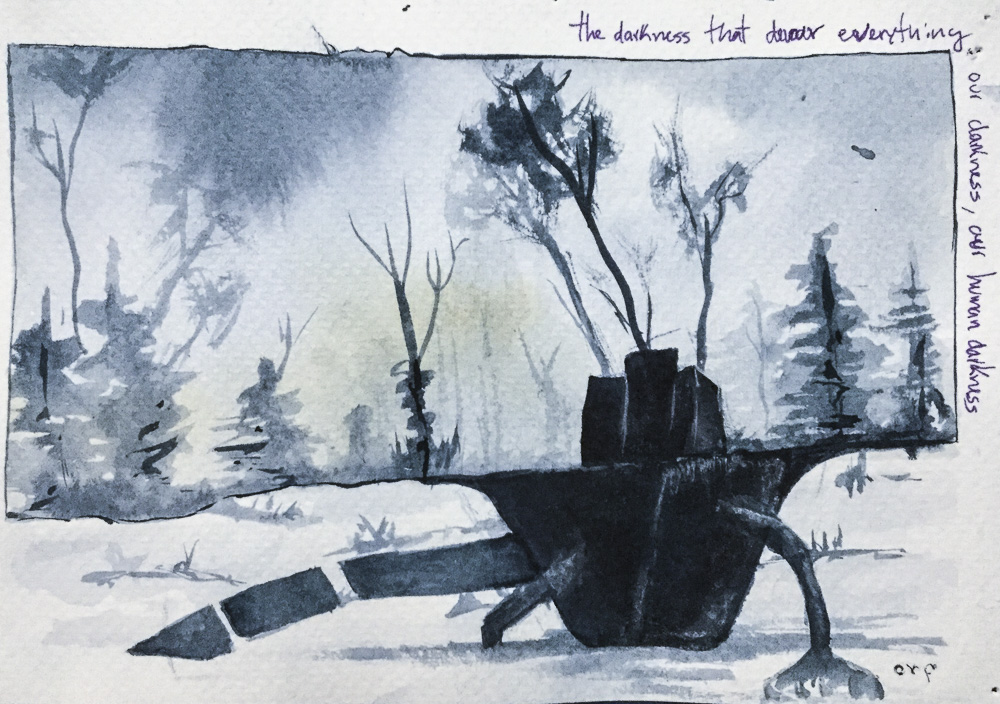
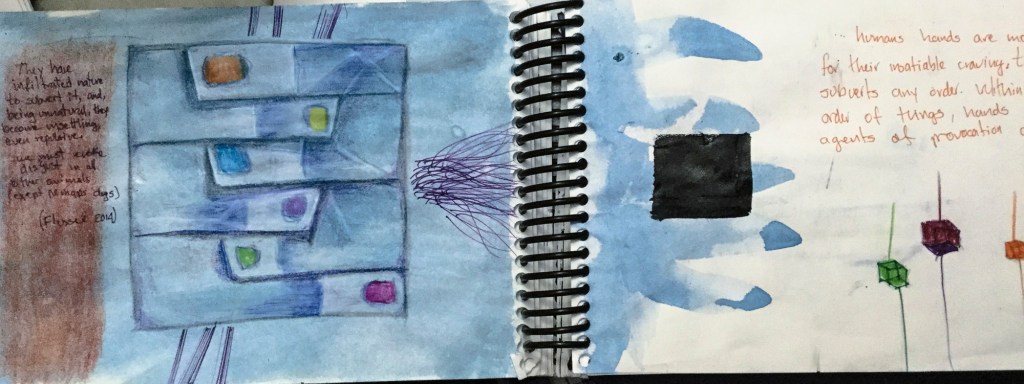
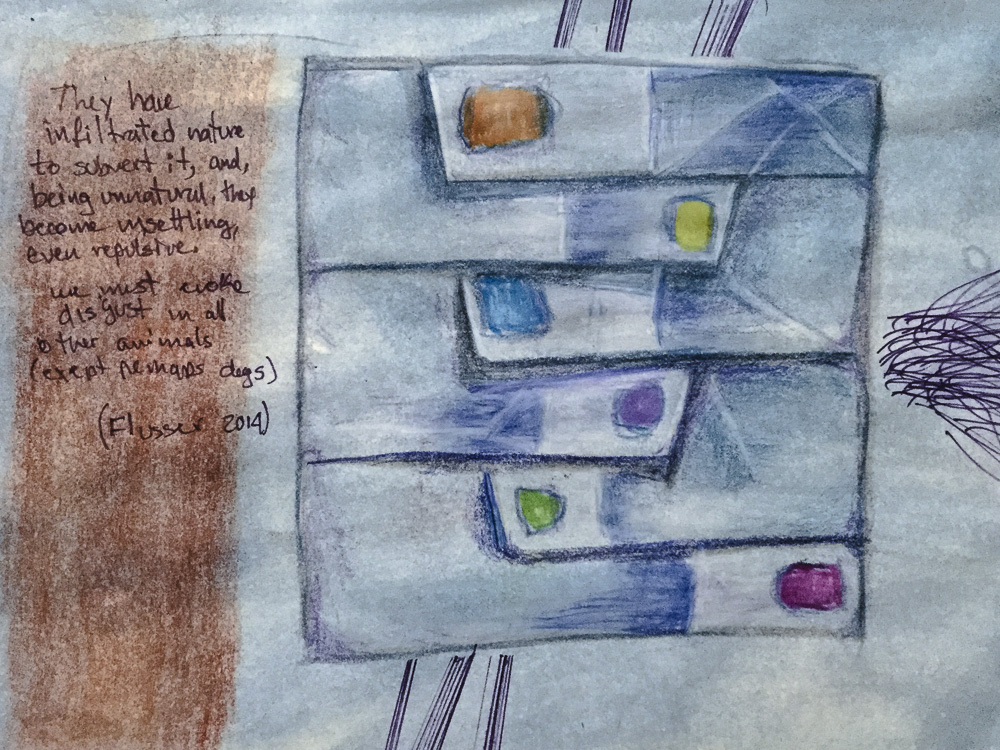
The source of inspiration for Project One came from the thinking I have been doing in the last year that has to do with darkness and human intelligence. Darkness as something that can do harm and intelligence as something highly cognitive complex, but without compassion and flexibility in our motivational structure (Metzinger, s.d, as cited in Ananthaswamy, 2015). One of the first encounters that I had with these two ideas was when reading the book Gestures of Vilém Flusser, chapter The gesture of making : …hands are monsters, for their insatiable craving, their curiosity, subverts any order. Within the order of things, hands are in fact agents of provocation and subversion. They have infiltrated nature to subvert it, and, being unnatural, they become unsettling, even repulsive. And very obviously, hands are one of the ways we humans are in the world. (Flusser, 2014)
An un-feasible idea
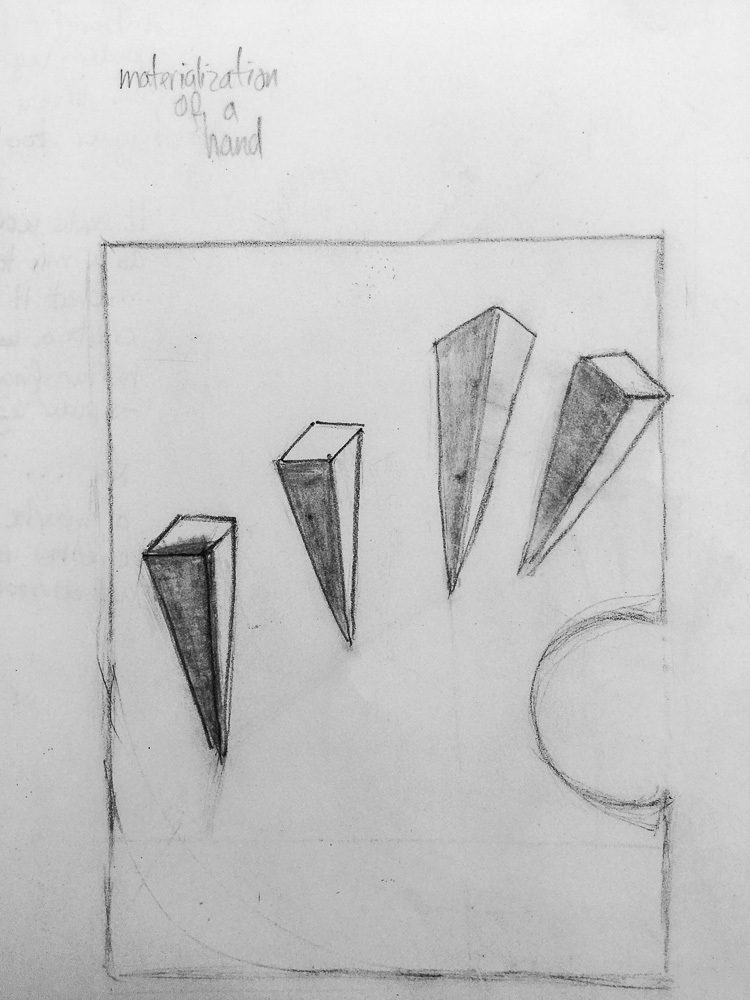
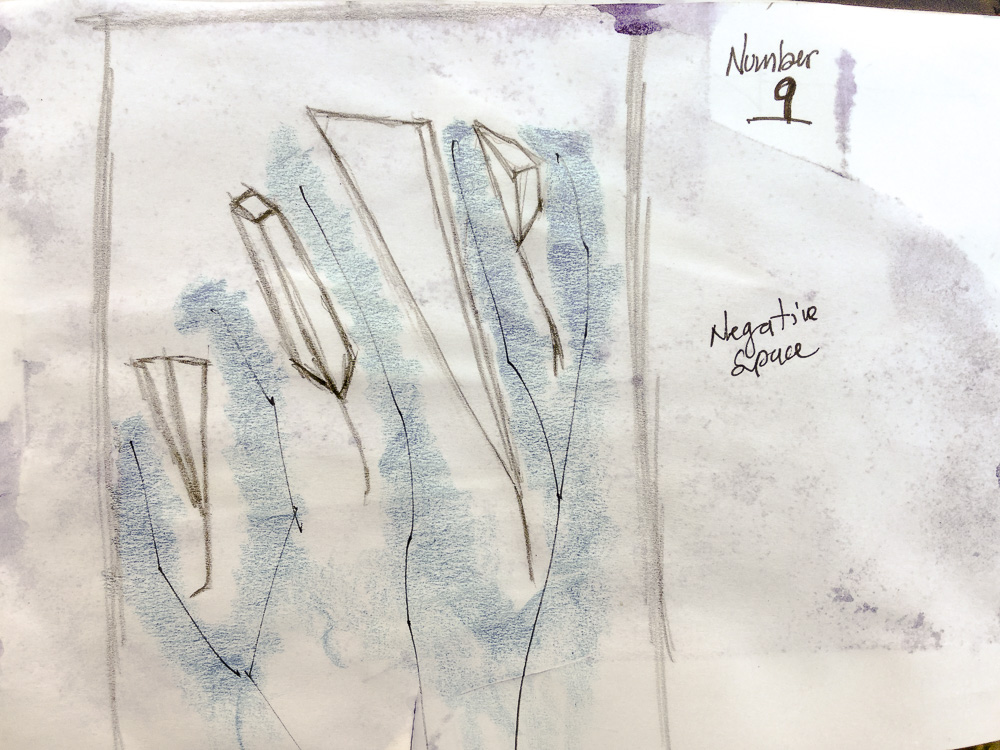
The figurative character of the above drawing depicting an intertwined hand was an earlier idea for the shallow relief sculpture. This idea was discarded for its complexity and my limited knowledge of construction. The instructions for Project One was to do something entirely different, with simple geometrical forms and non-figurative.
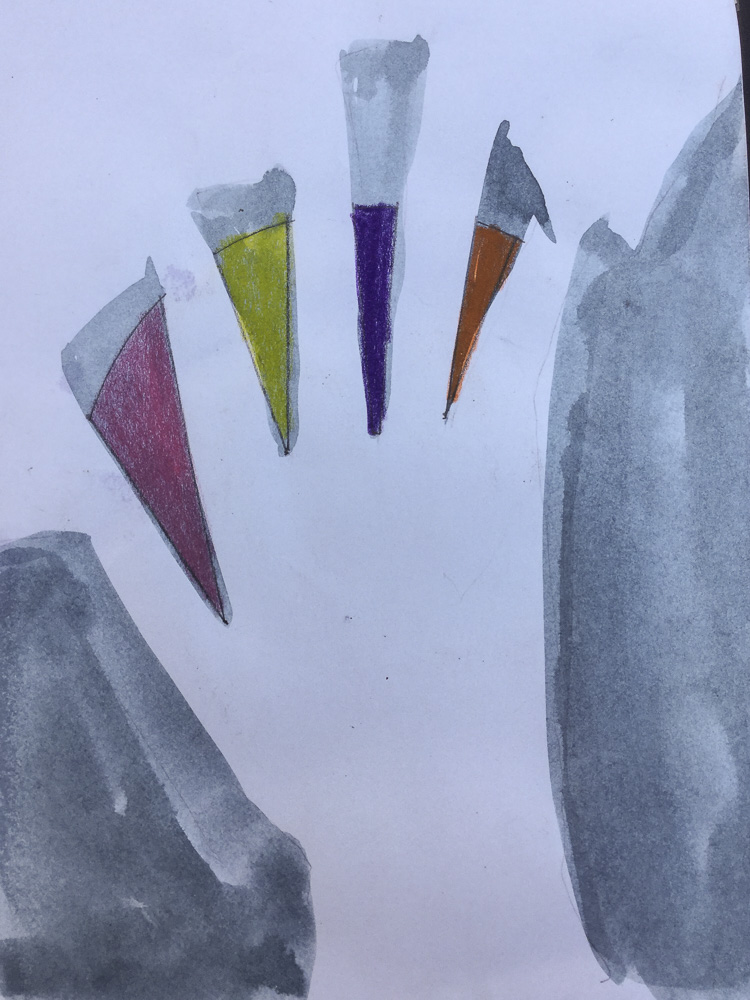
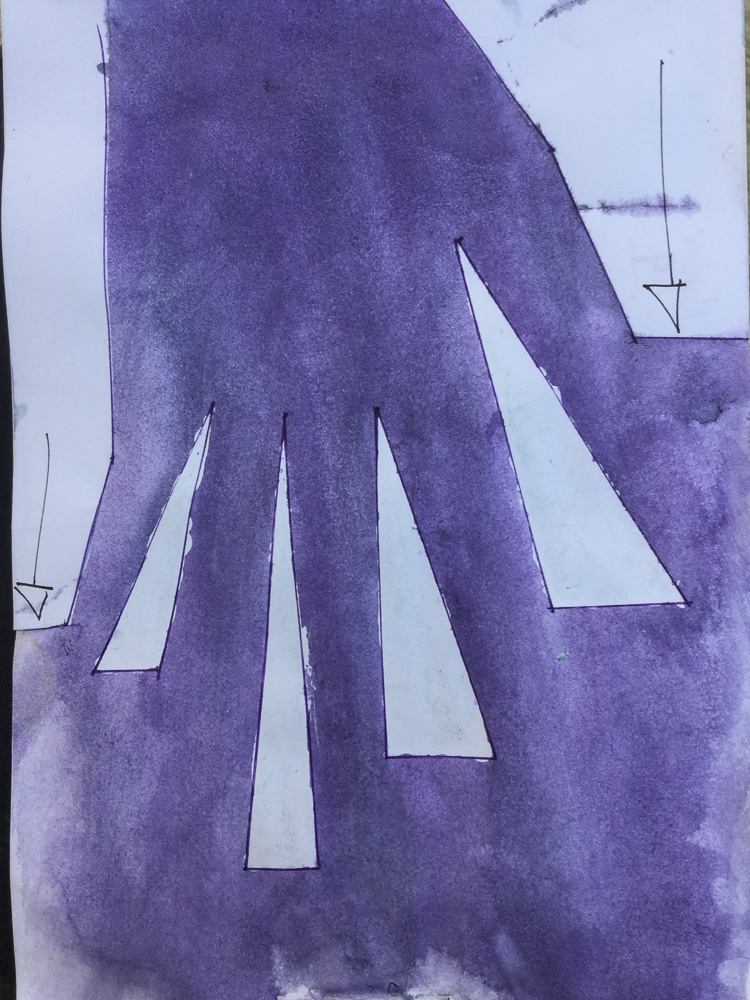
Further exploration of the idea of a hand as the main element of my sculpture led me to the above image, in which I drew triangular shapes in the middle of the fingers and decided I wanted to evoke the sense of a hand from the negative space between the fingers – Naum Gabor is an inspiration here. I believe that in this way I kept the sculpture geometrical and abstract enough to meet the course requirements.
Exploration of an idea
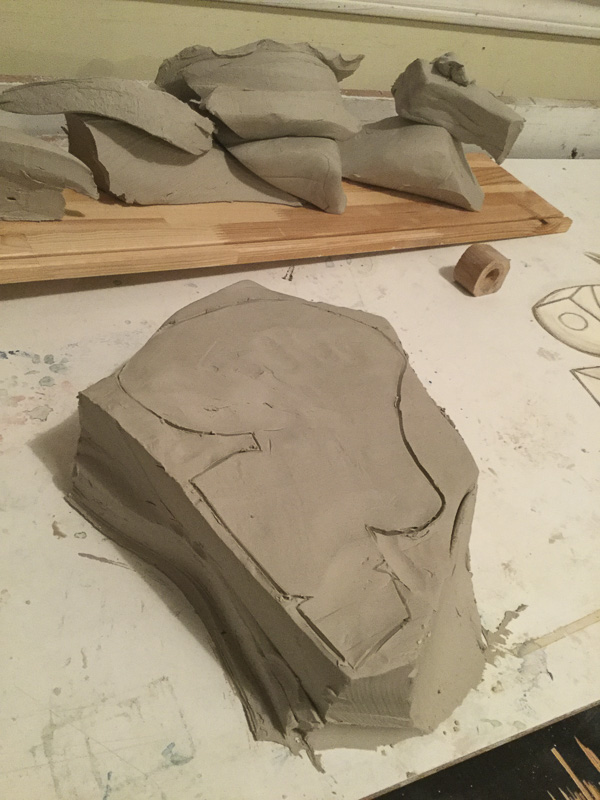
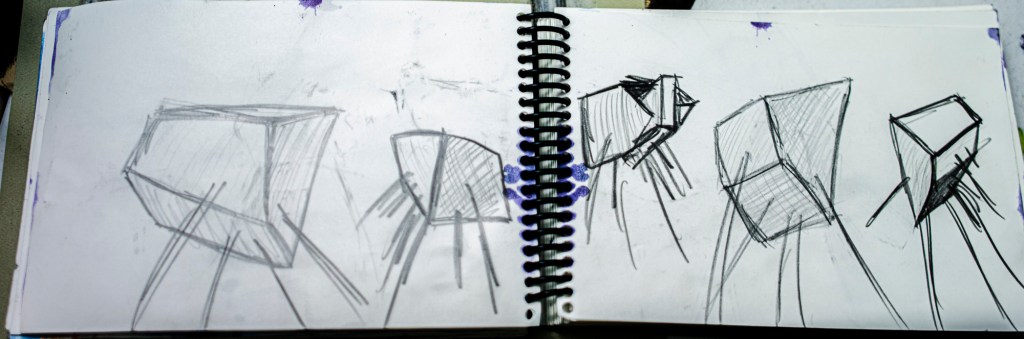
The below image gallery shows the process from the early sketches to the latest one before its constriction.
Construction begins
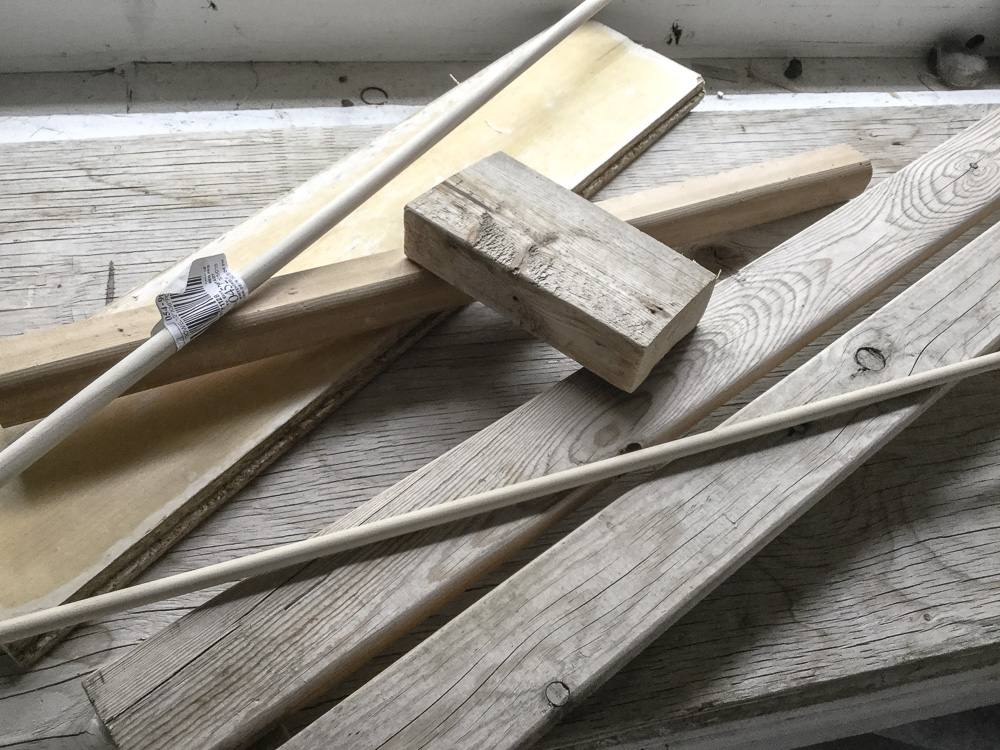
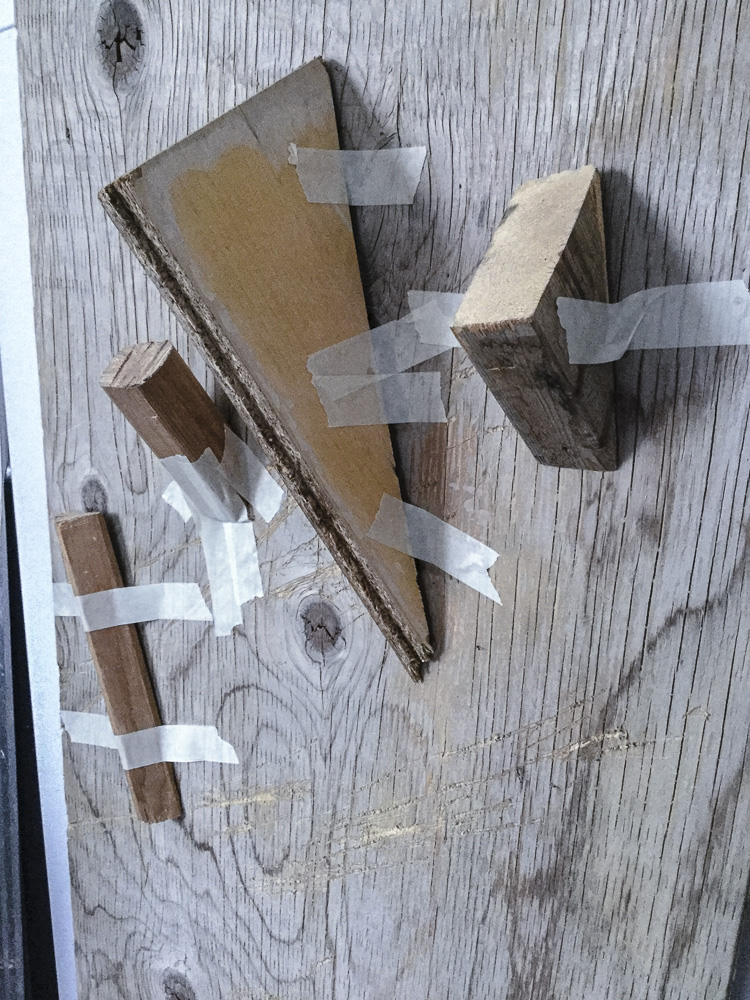
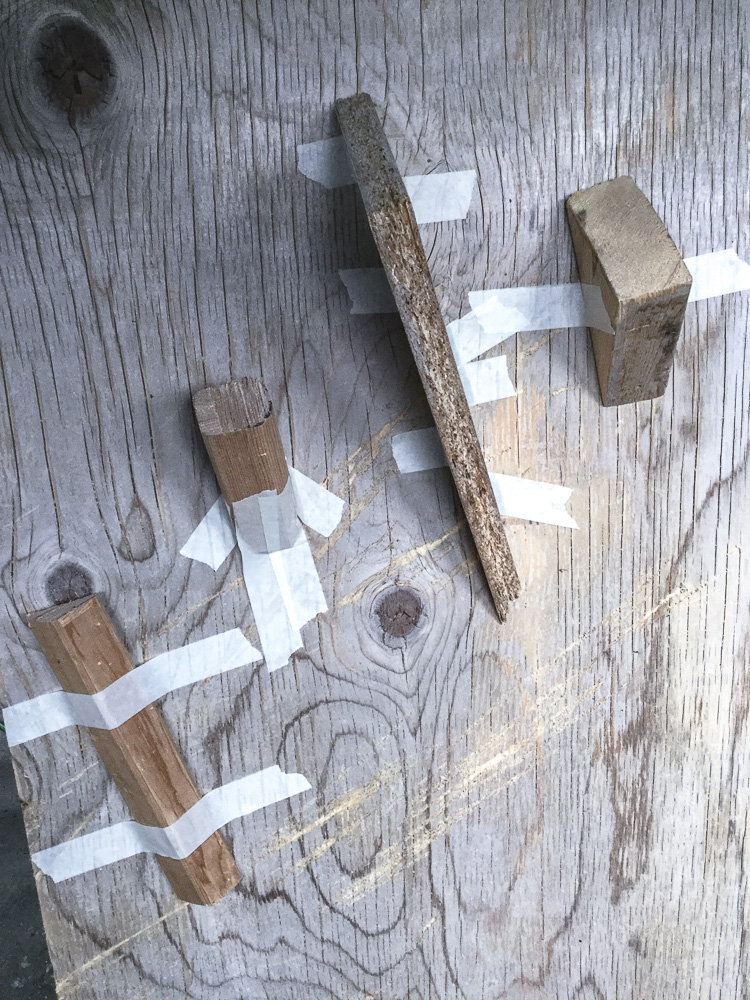
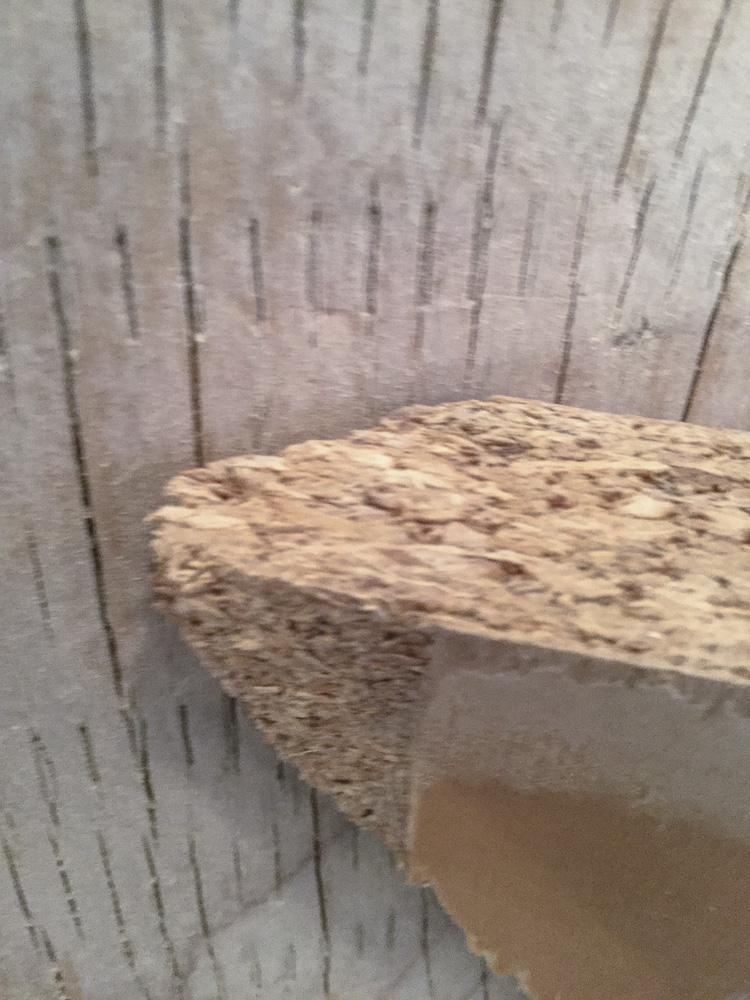
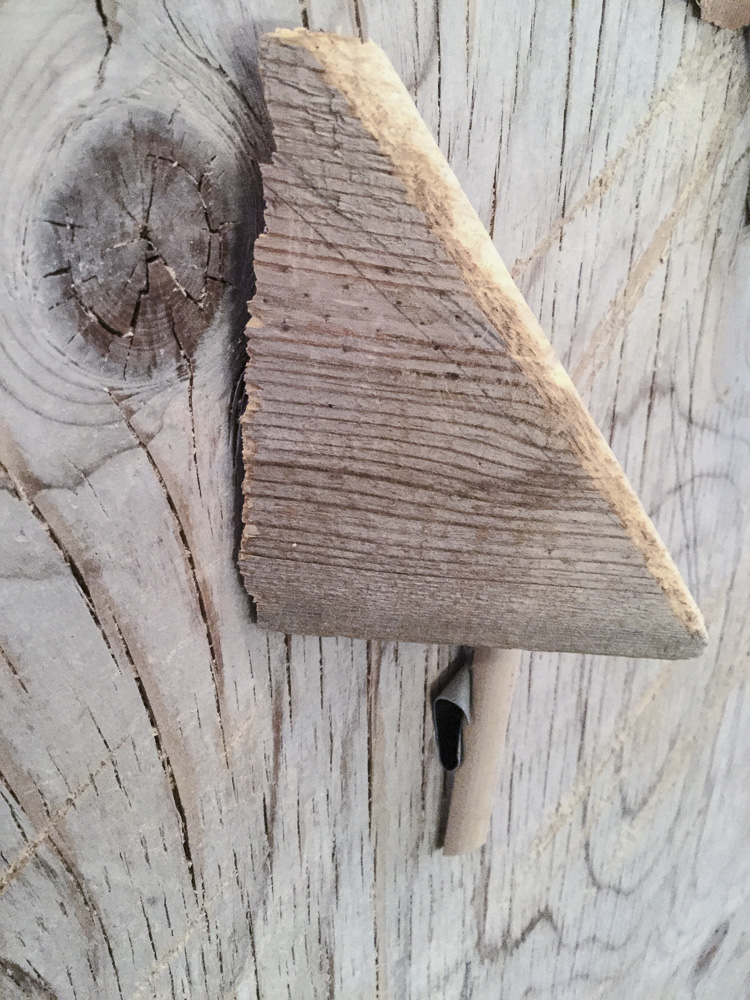
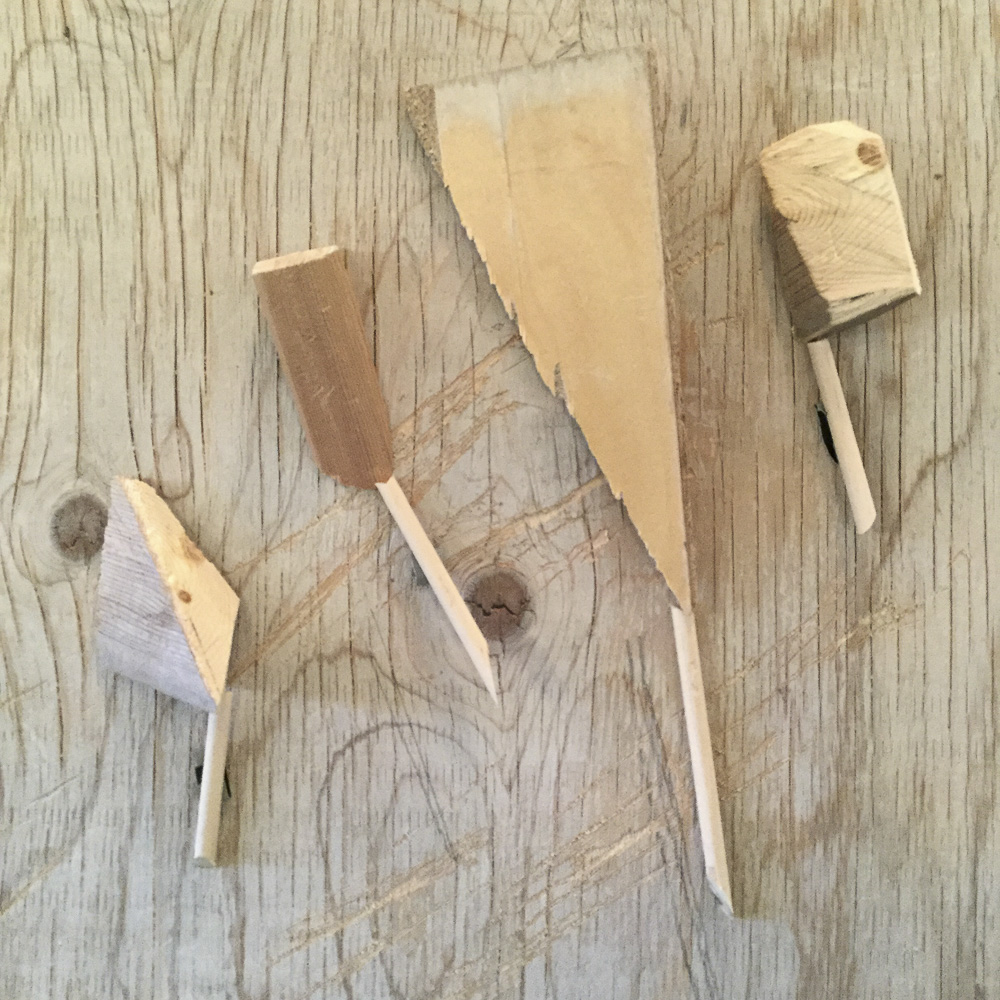
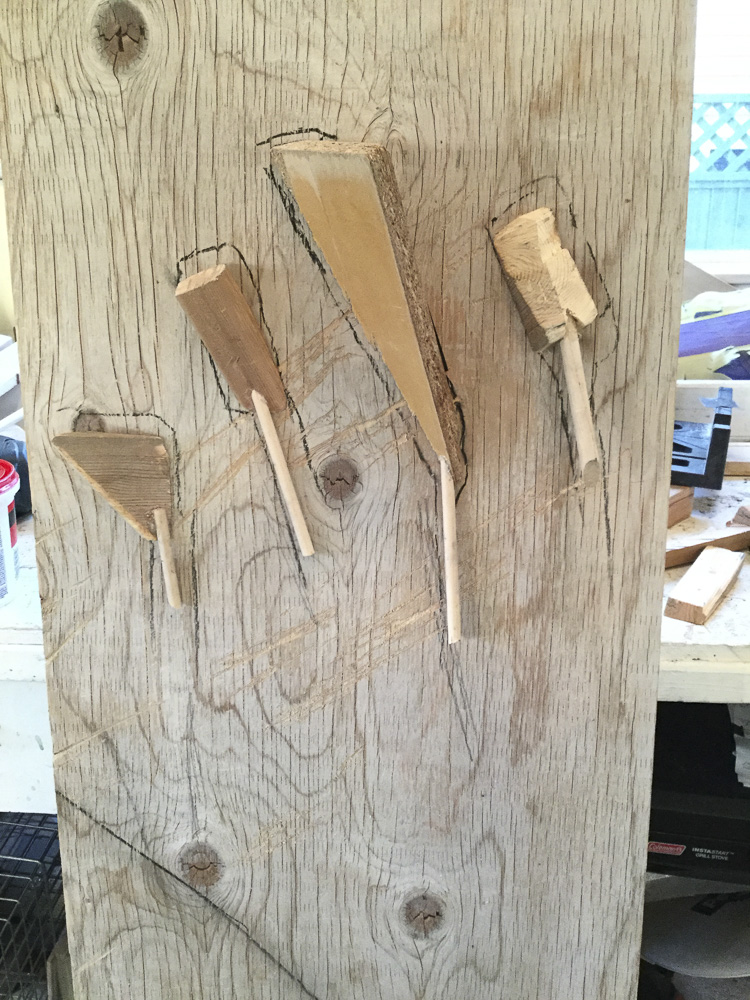
The first step in the construction process was to collect all the materials I needed for my sculpture and it just happened that almost everything that I required was in my garage: pieces of wood of different shapes and sizes and even a wood baseboard for the base of my sculpture. It is impressive the number of things one can keep throughout the years besides the recycling bins of different kinds of rubbish, so the offer was interesting.
I created the below drawing after gathering all the materials. It has a very close resemblance to the final sculpture and this is because, with all the wood pieces in front of me I was able to know how the construction was going to look like.
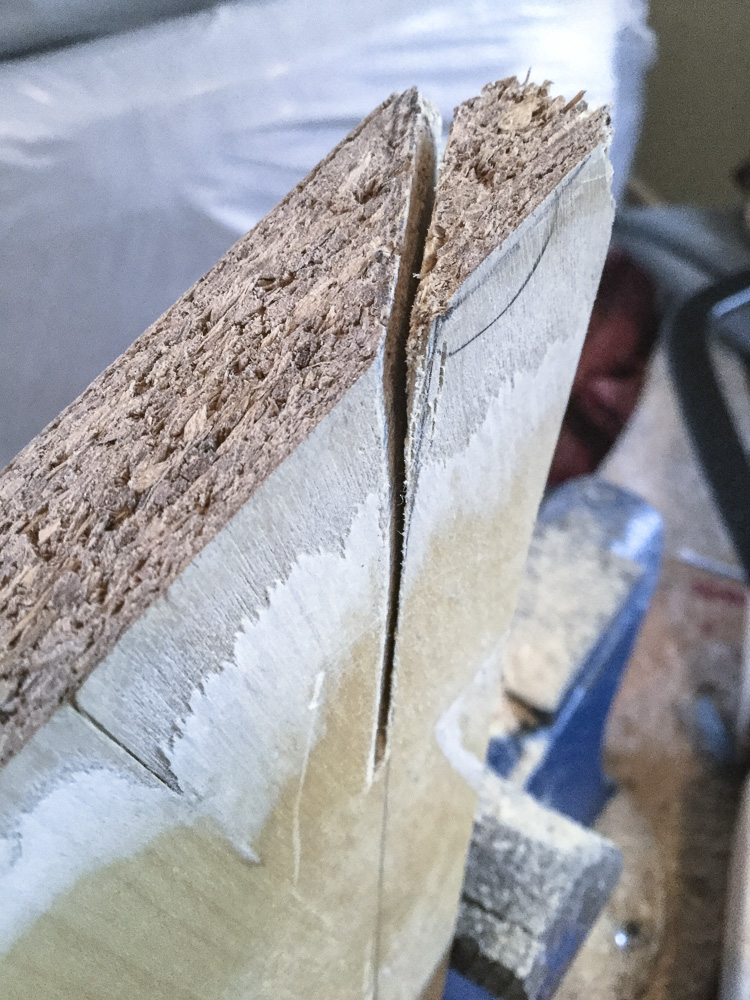
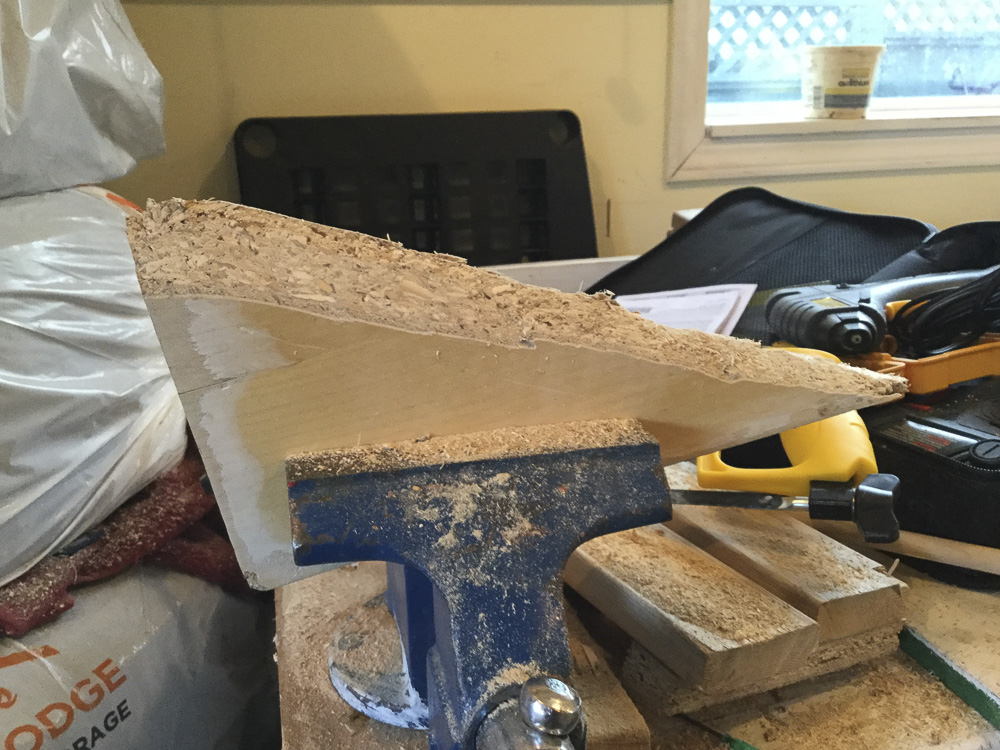
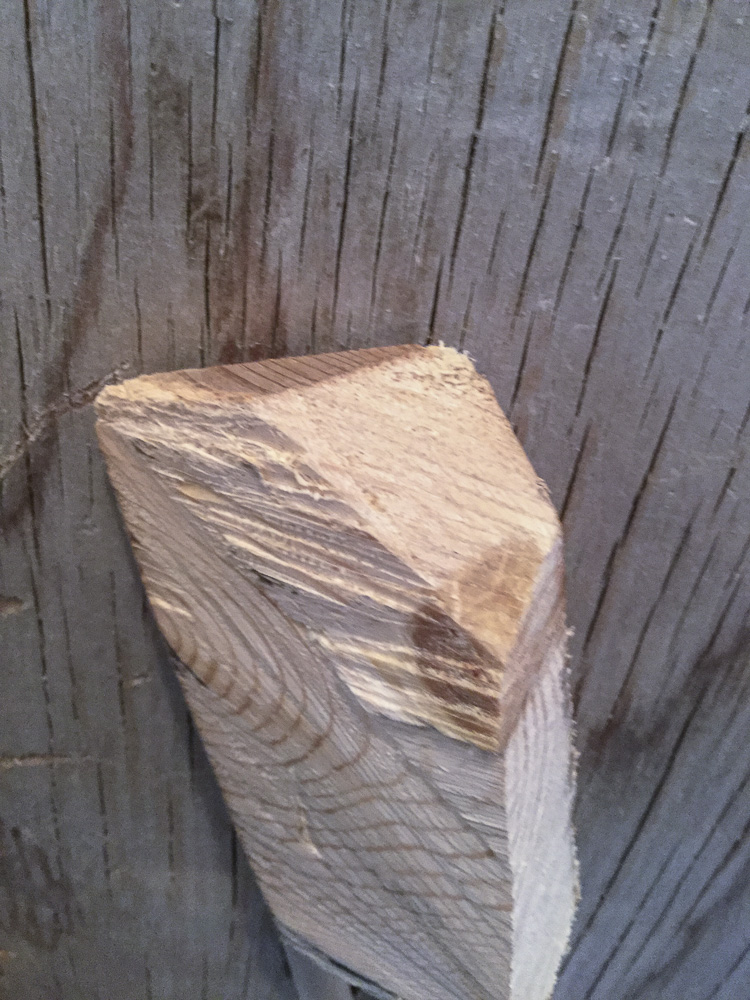
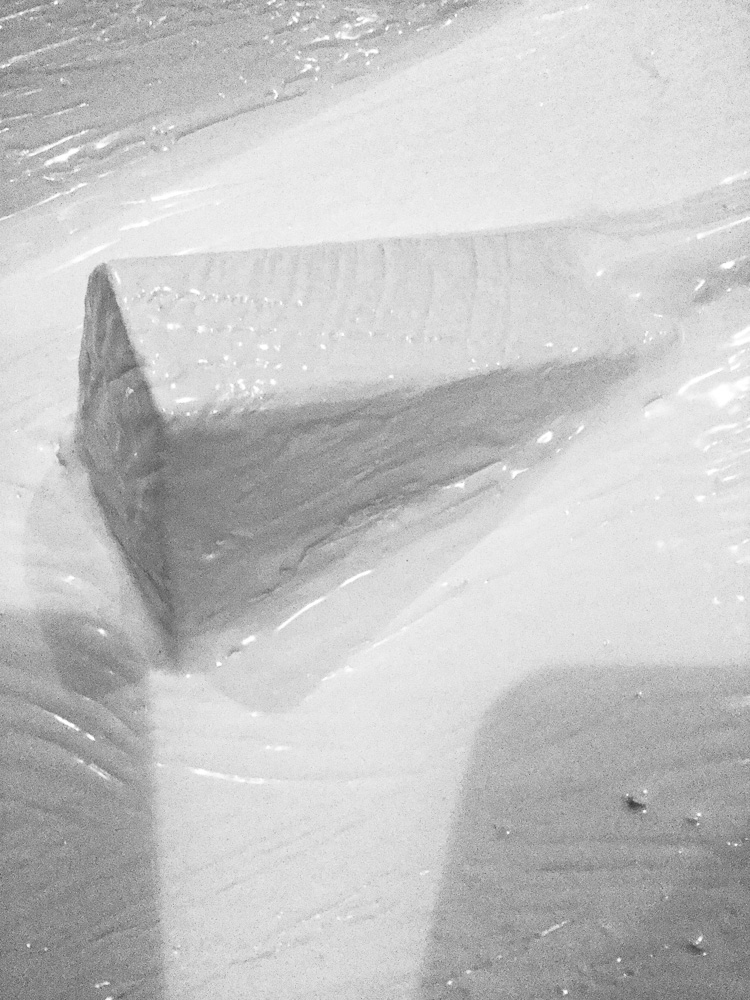
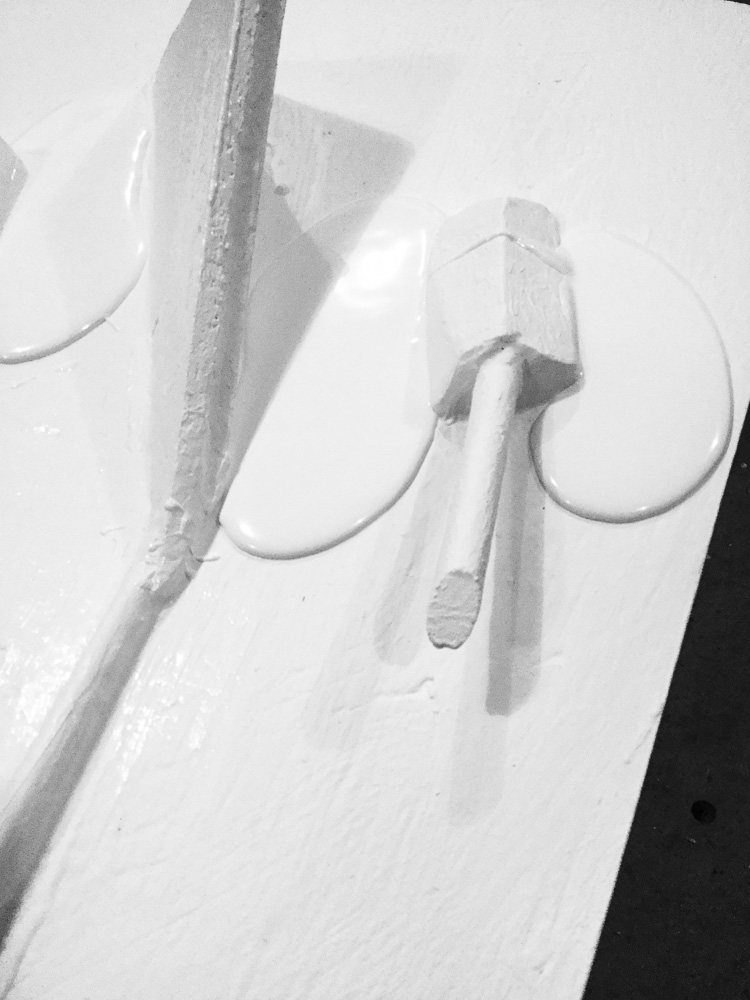
Building a sculpture referencing a drawing is an exciting process, especially if its your first time, like it was mine. One of the initial challenges I faced was to cut the wood pieces at different angles. Some of them were cut at 45 degrees, and some others required more that one sawn. One of them, the big triangle in the last photo of the below gallery, required an extra step: to file down the cut edge to make it fit flat on the wood board.
Assembling the pieces
The next step was to put all the pieces together. Initially, I used masking tape to fix the wood pieces onto the wood board, as you can see in the first photos of the below gallery. Masking tape was not strong enough to fix the parts for a long time, after some minutes they started to fall down on the ground so I changed to Gorilla Tape (a product similar to Duck Tape) which is way more robust than the masking tape but with the inconvenience of not gluing nothing if the surface in which you’re going to use it is full of dust.
Once I was happy on how the wood pieces looked on the wood board, it was time to fix them permanently with the hot glue gun. This is my first time using this kind of glue, and I think it is fantastic.
One thing to notice on the gallery photos in this section is how the pieces have a gap between them and the wood board. I used a big saw to cut the pieces, and the finished result was kind of rough also because some of the cuts were not done in a straight line but at an angle. Next time I’m going to use a more fine saw to cut small pieces of wood.
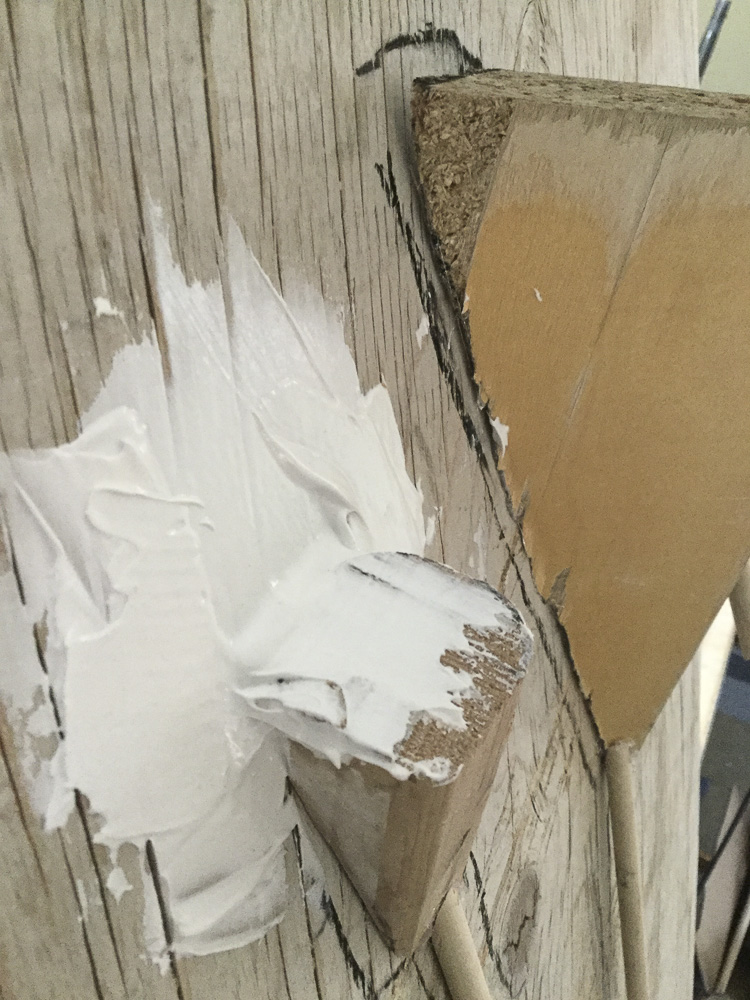
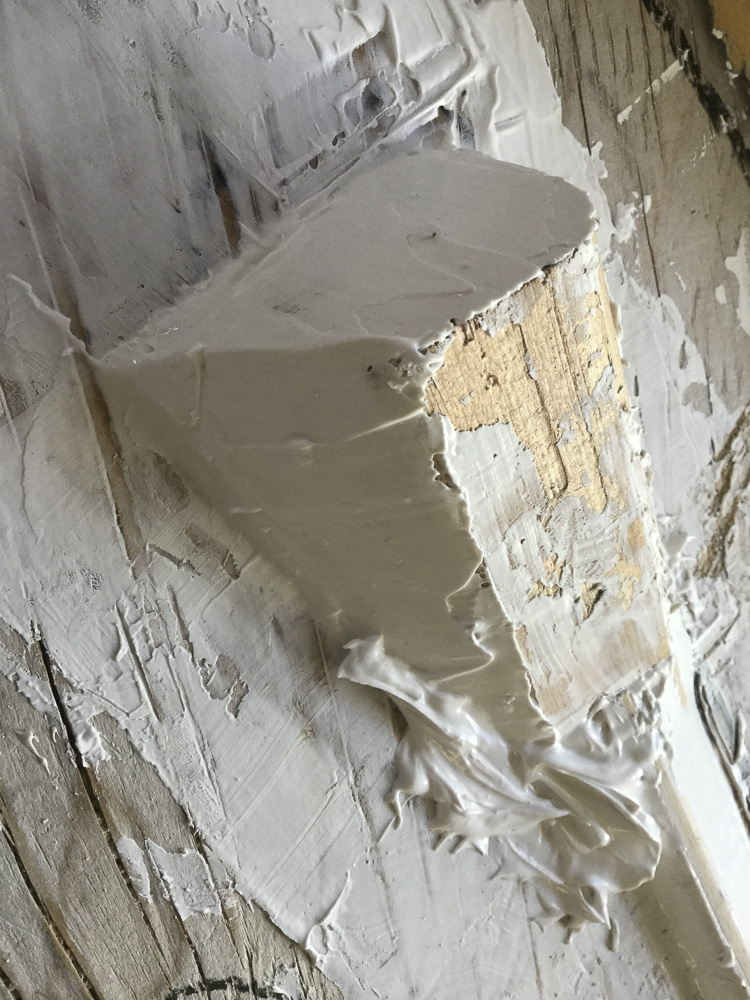
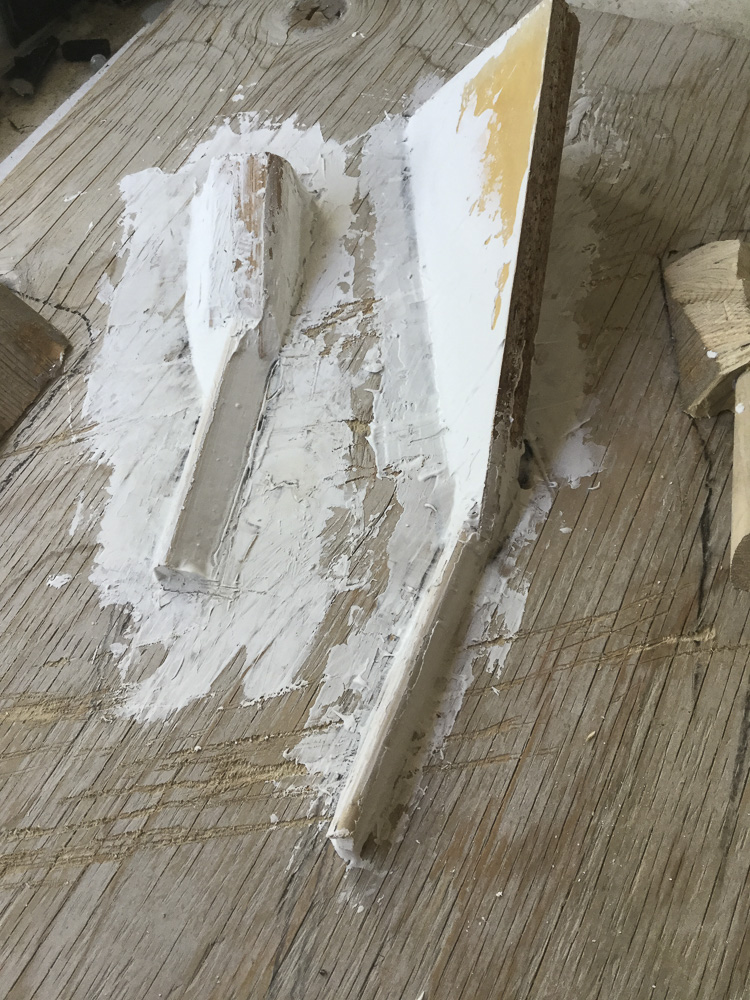
Filling gaps
The title of this piece is “Materialization of a hand,” and with this idea, I decided to fill, with drywall, those unsightly gaps between the wood pieces and the board. I really wanted to give the impression that the pieces of wood were coming out from the wood board and not that they were just left there on top. I wanted unity on my piece, after-all I think that this is precisely what a relief sculpture is, a projection of a unity.
Relief sculpture is an art form that is midway between painting and sculpture in the round. It is a process in which the subject stands out or projects a surface from the background. The surface has several levels. It can be low relief or high relief (deep or almost round) or anywhere in between. The most common example of low relief is a coin where there is very little distance from the background to the top surface. Sculpture that projects from a wall or flat surface is called relief sculpture. (Lawrence, 2005)
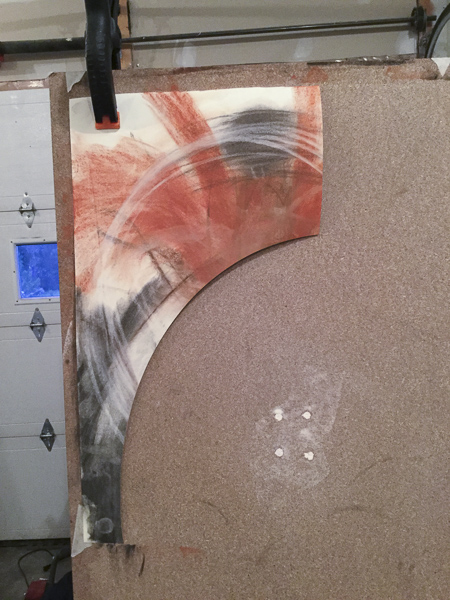
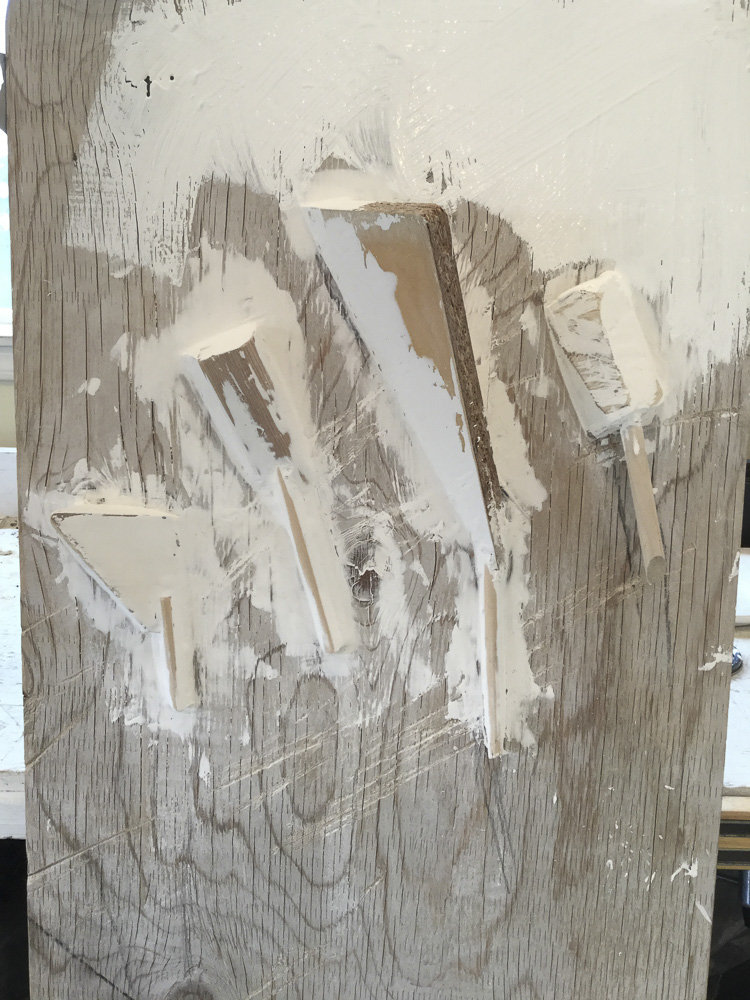
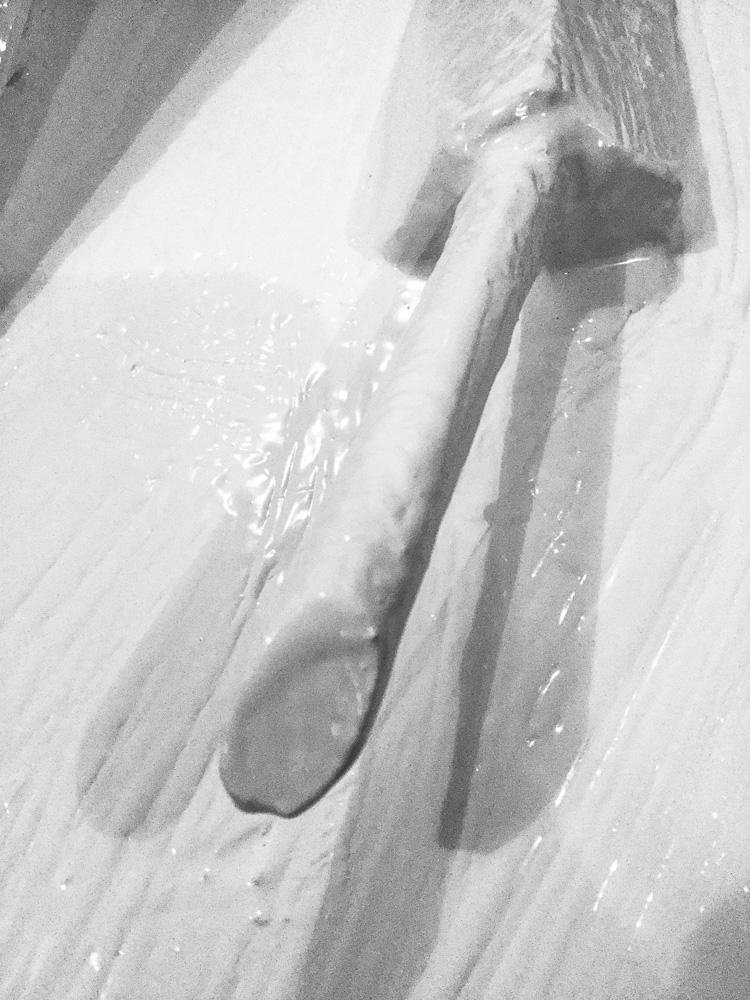
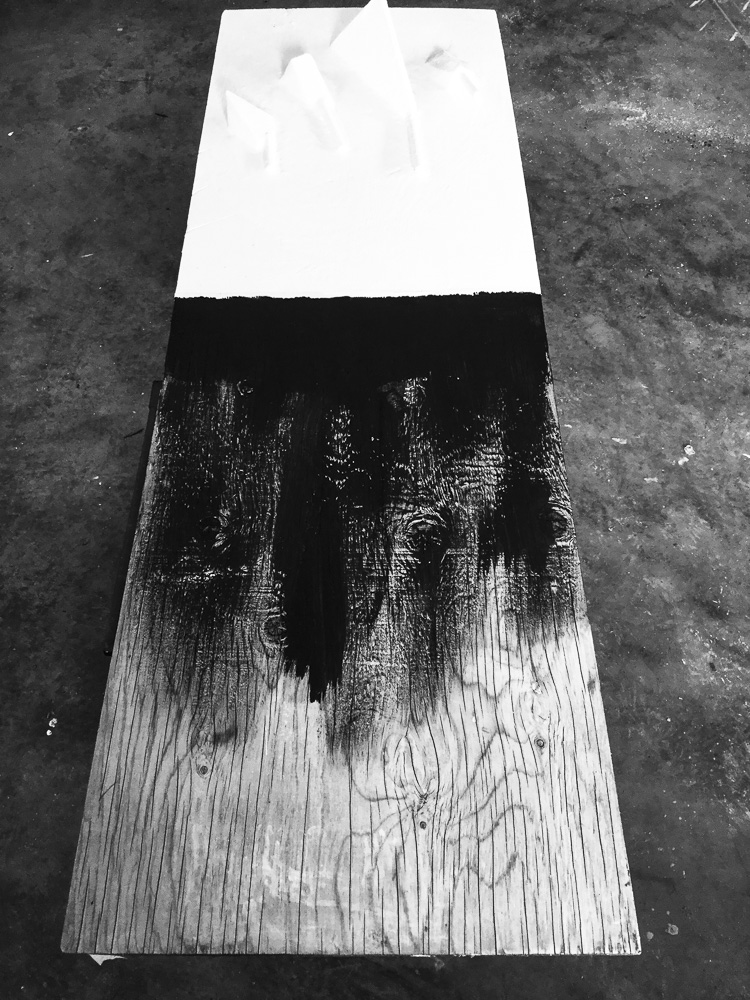
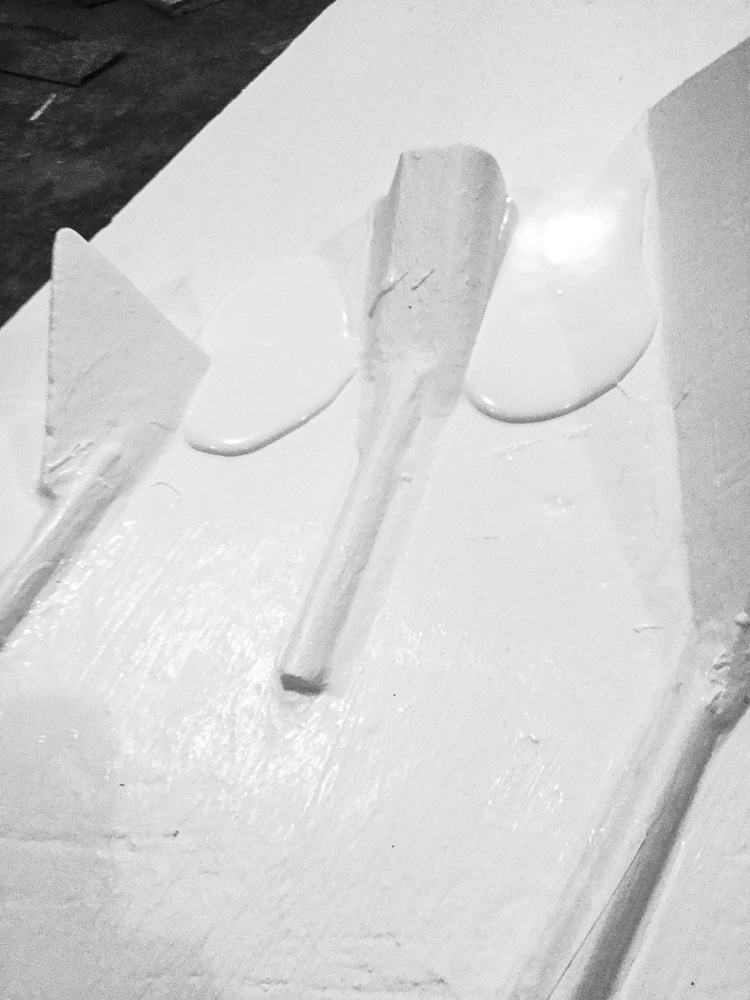
Fixing, sanding and first painting coat
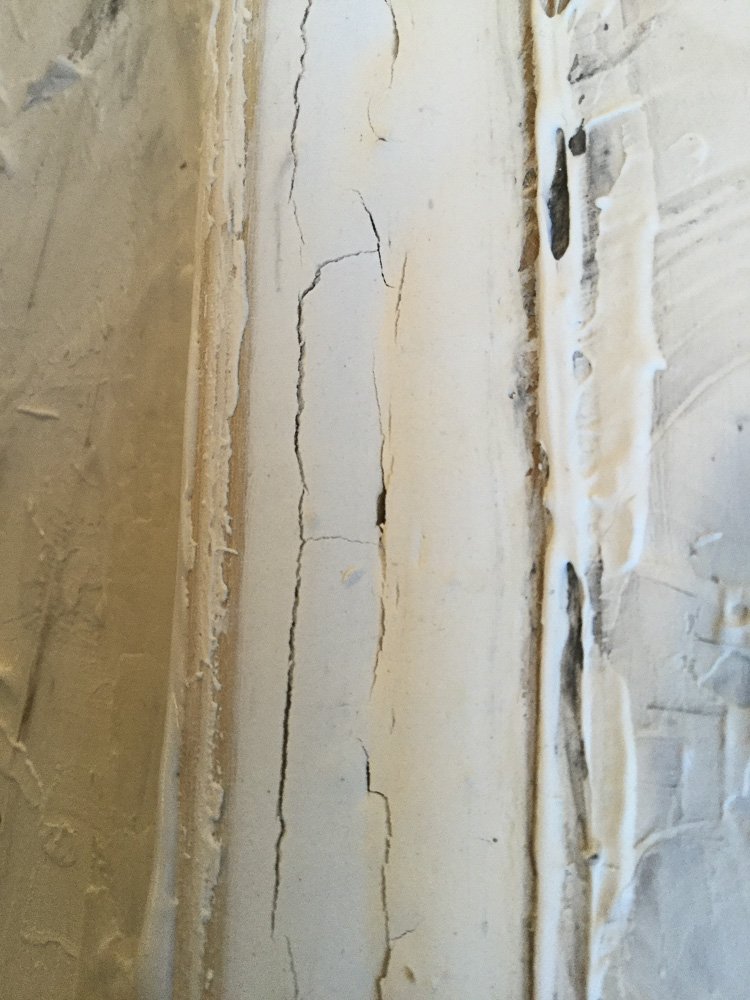
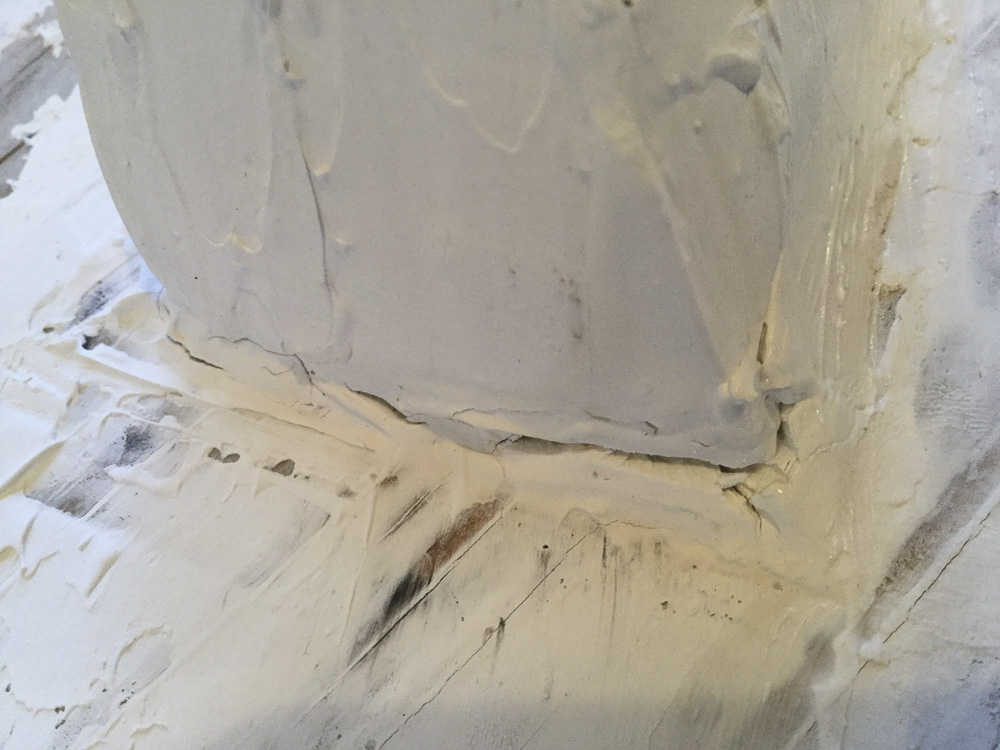
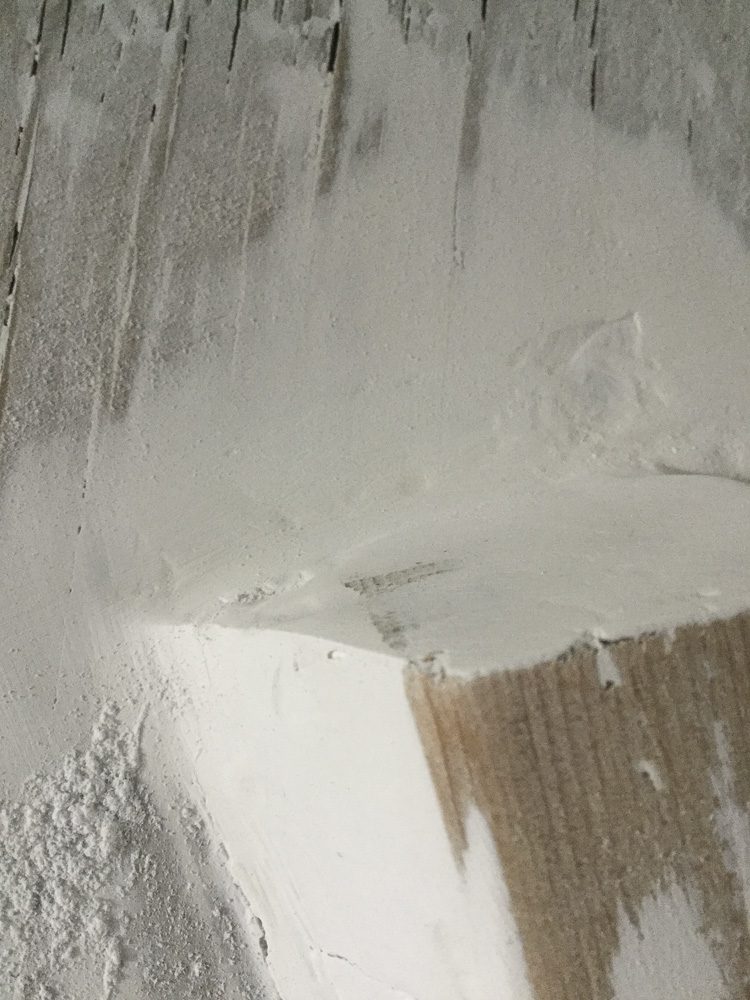
Working with drywall in this way was a first time experience. It took me just a little bit to get used to its materiality: texture, consistency, and even its smell. I think drywall was a great material to fill those gaps, however after the first dry I discovered cracks and some depressions on the drywall, perhaps it was too watery,… I really don’t know. Something to discover down the road, or maybe plaster it is better for sculpture? I’ll find out on Part Three.
So, I fixed the cracks, and I let them dry, and after that, finally, I was able to sand it and paint it. Once the first coat of paint dried I just thought: this is not complete yet. One coat of paint was not enough, it looked a little washout and not with enough unity, and besides that I needed to decide what to do with the long baseboard, cut it out or paint it white all the way down?
Paint materiality
The second coat of paint was thick enough to cover little cuts and holes but not too thick to hide completely the character of an old wood. The sculpture was starting to look good and stable.
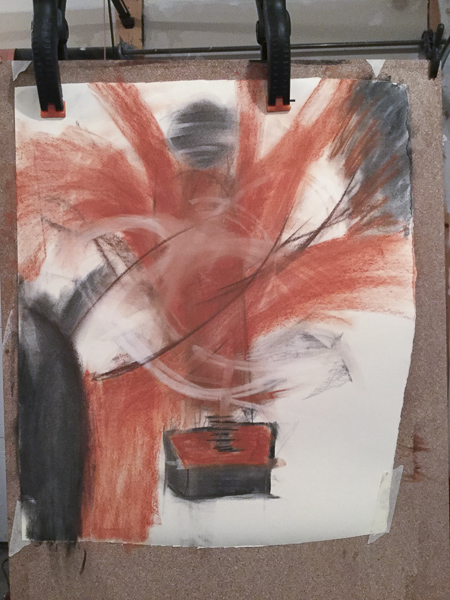
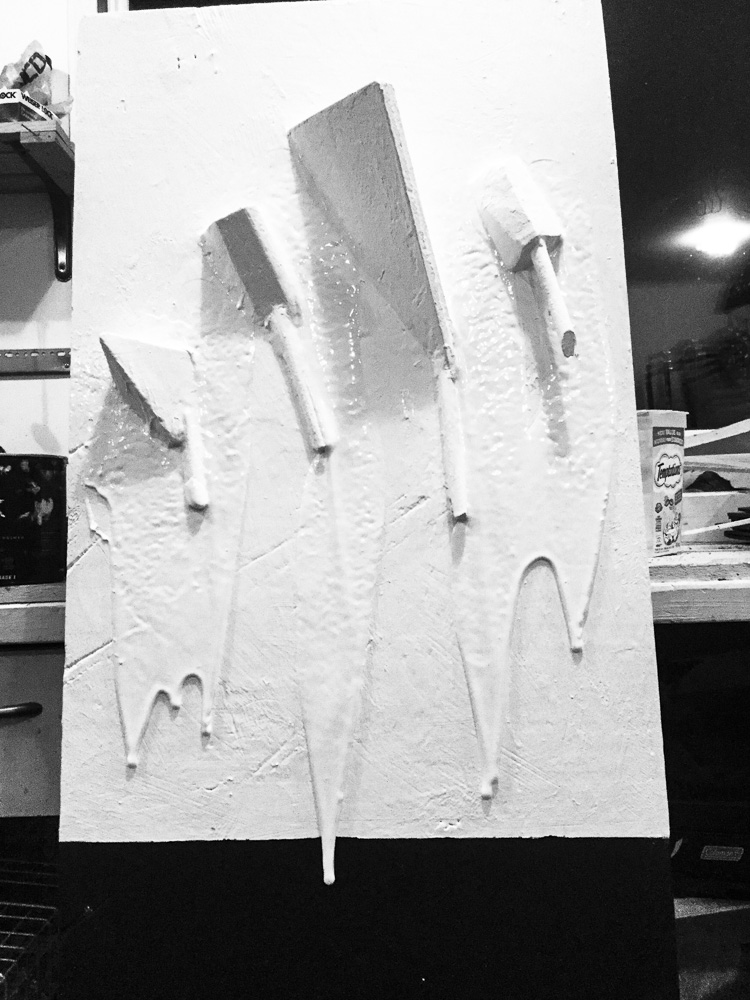
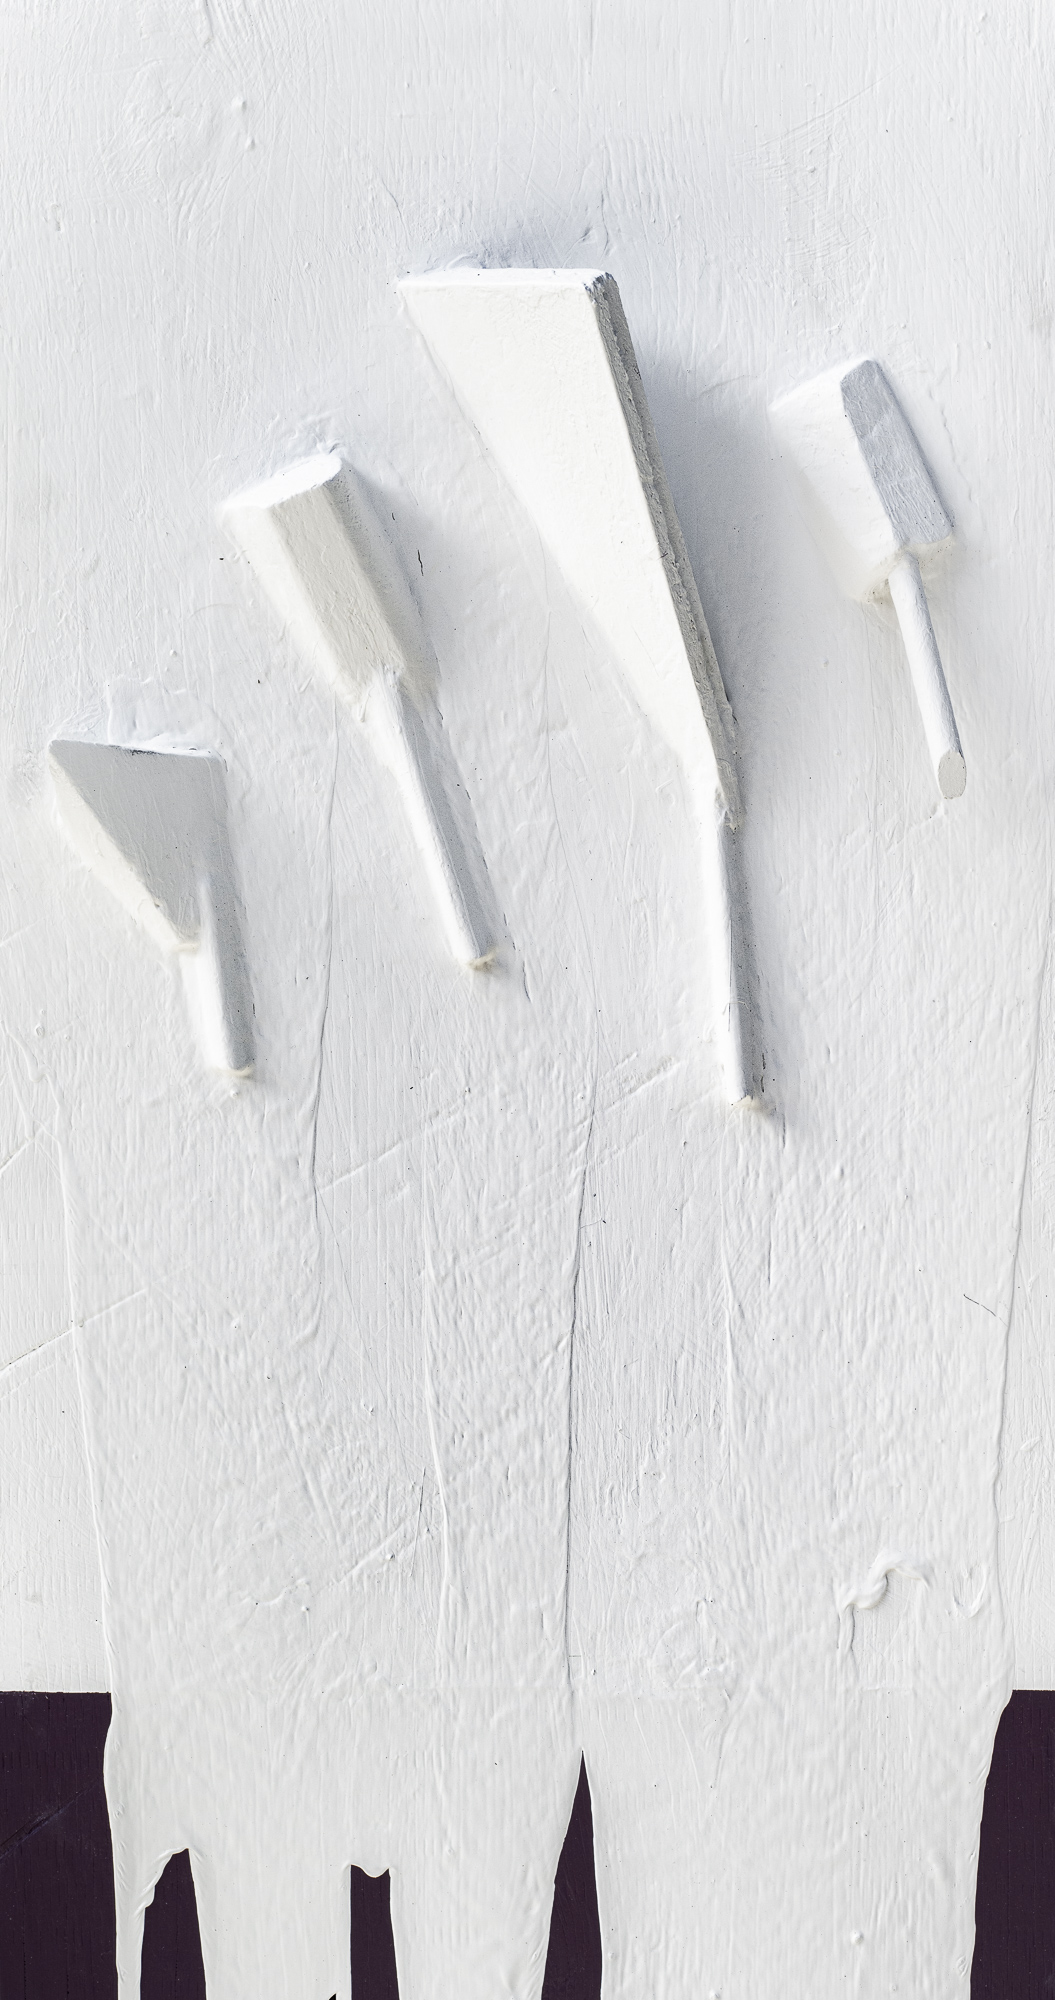
Because I was willing to experiment as much as I could fallowing a Constructivism’s path and its idea of Laboratory as a place to explore new ideas, I decided not to get rid out of the longboard of the sculpture and try to incorporate it as much as I could. I painted the board with the only dark colour that I had in hand: an intense purple
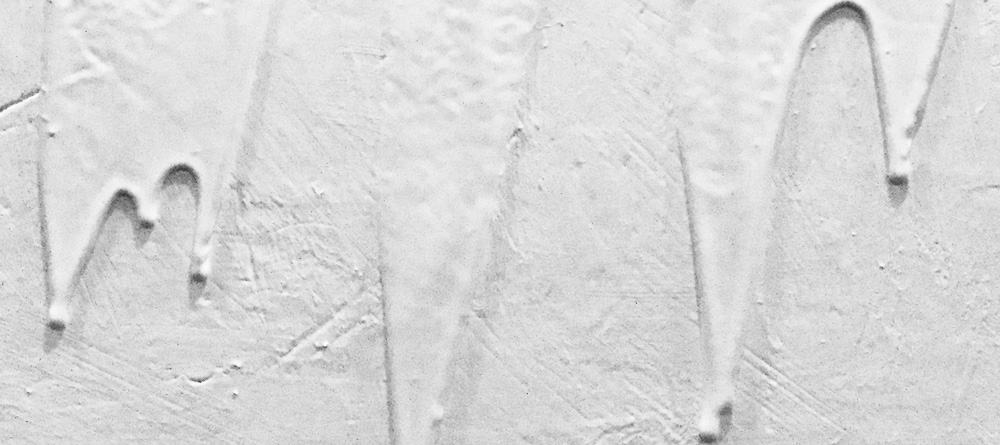
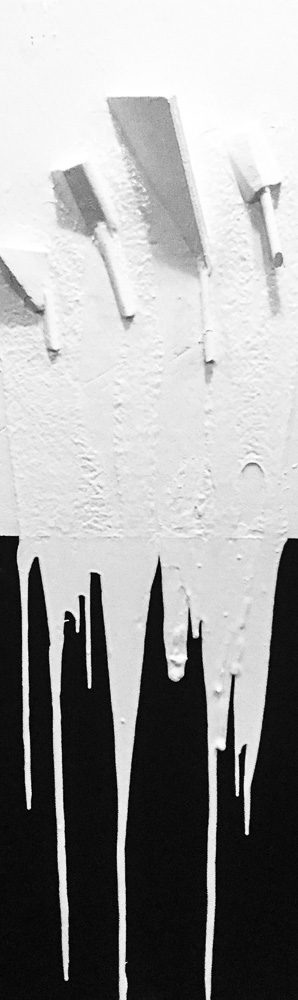
Now my sculpture was divided in two: one part white and one part purple. It was time to experiment once more. My next move was to pour the leftovers of half a litter can of white paint over the top part of the sculpture and let it drip all night, all the way down, in search of a coherence unity of the white entering the purple.
The effect created by the paint coming down to the bottom part of the board is just ok. It was great to experiment with paint and its thick liquidity, however, the result was not as satisfactory as I had expected. For now, I’m going to leave the sculpture as is and I’m going to move forward to project two. I’ll return to my sculpture later just to decide what to do again with the long board.
.
Bibliography
Flusser, Vilém (English Translation of 2014) Gestures . Minneapolis: The University of Minnesota Press
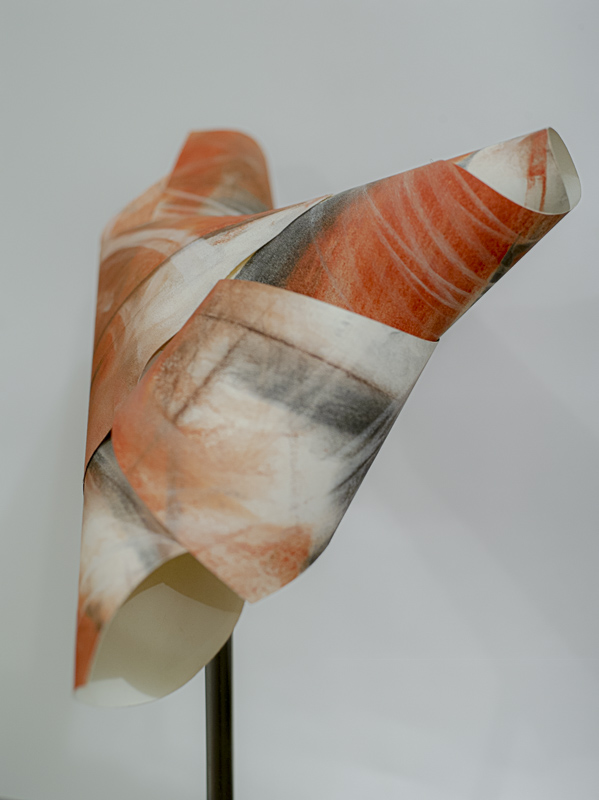
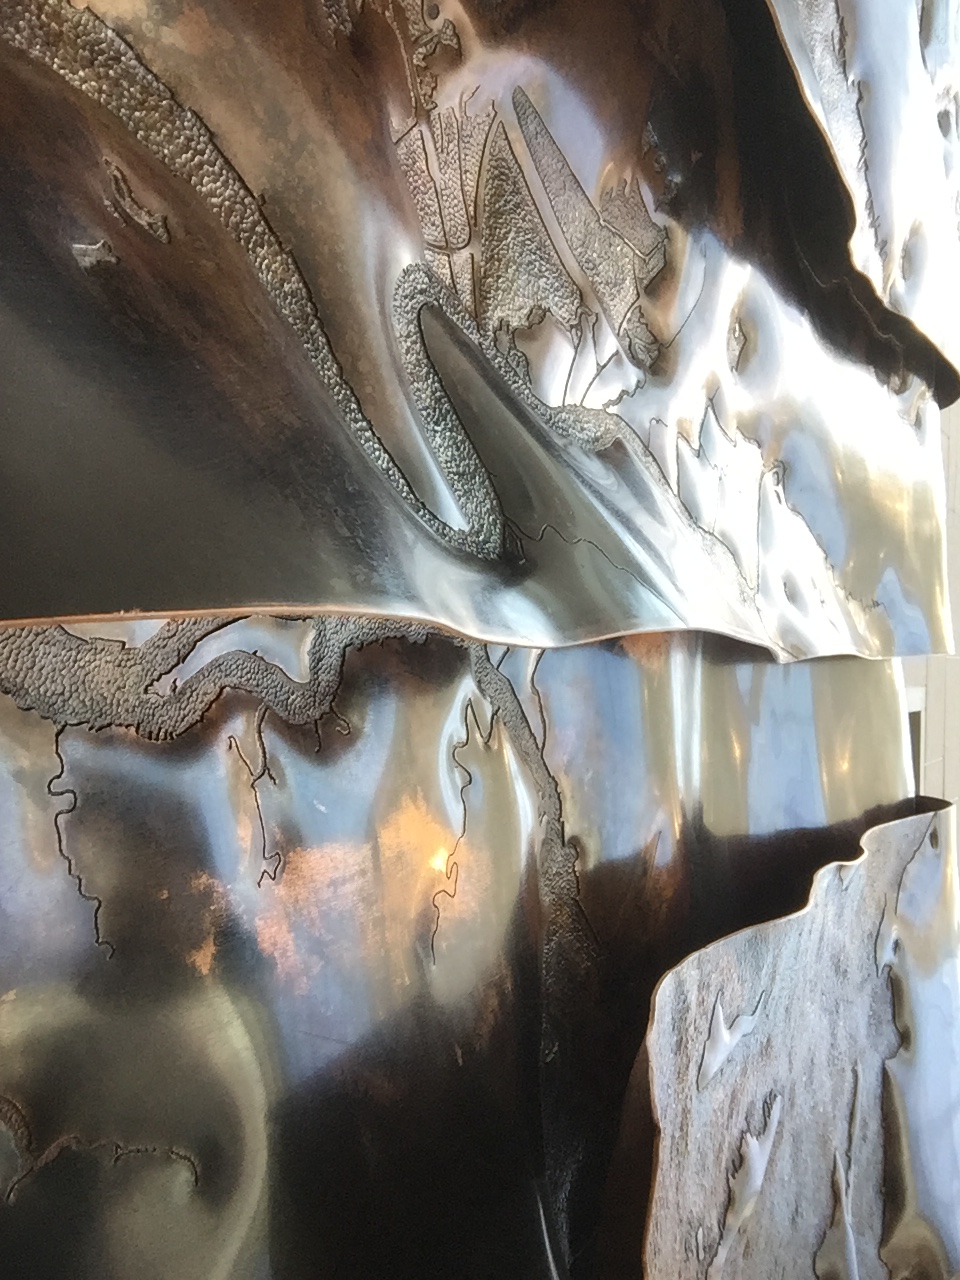
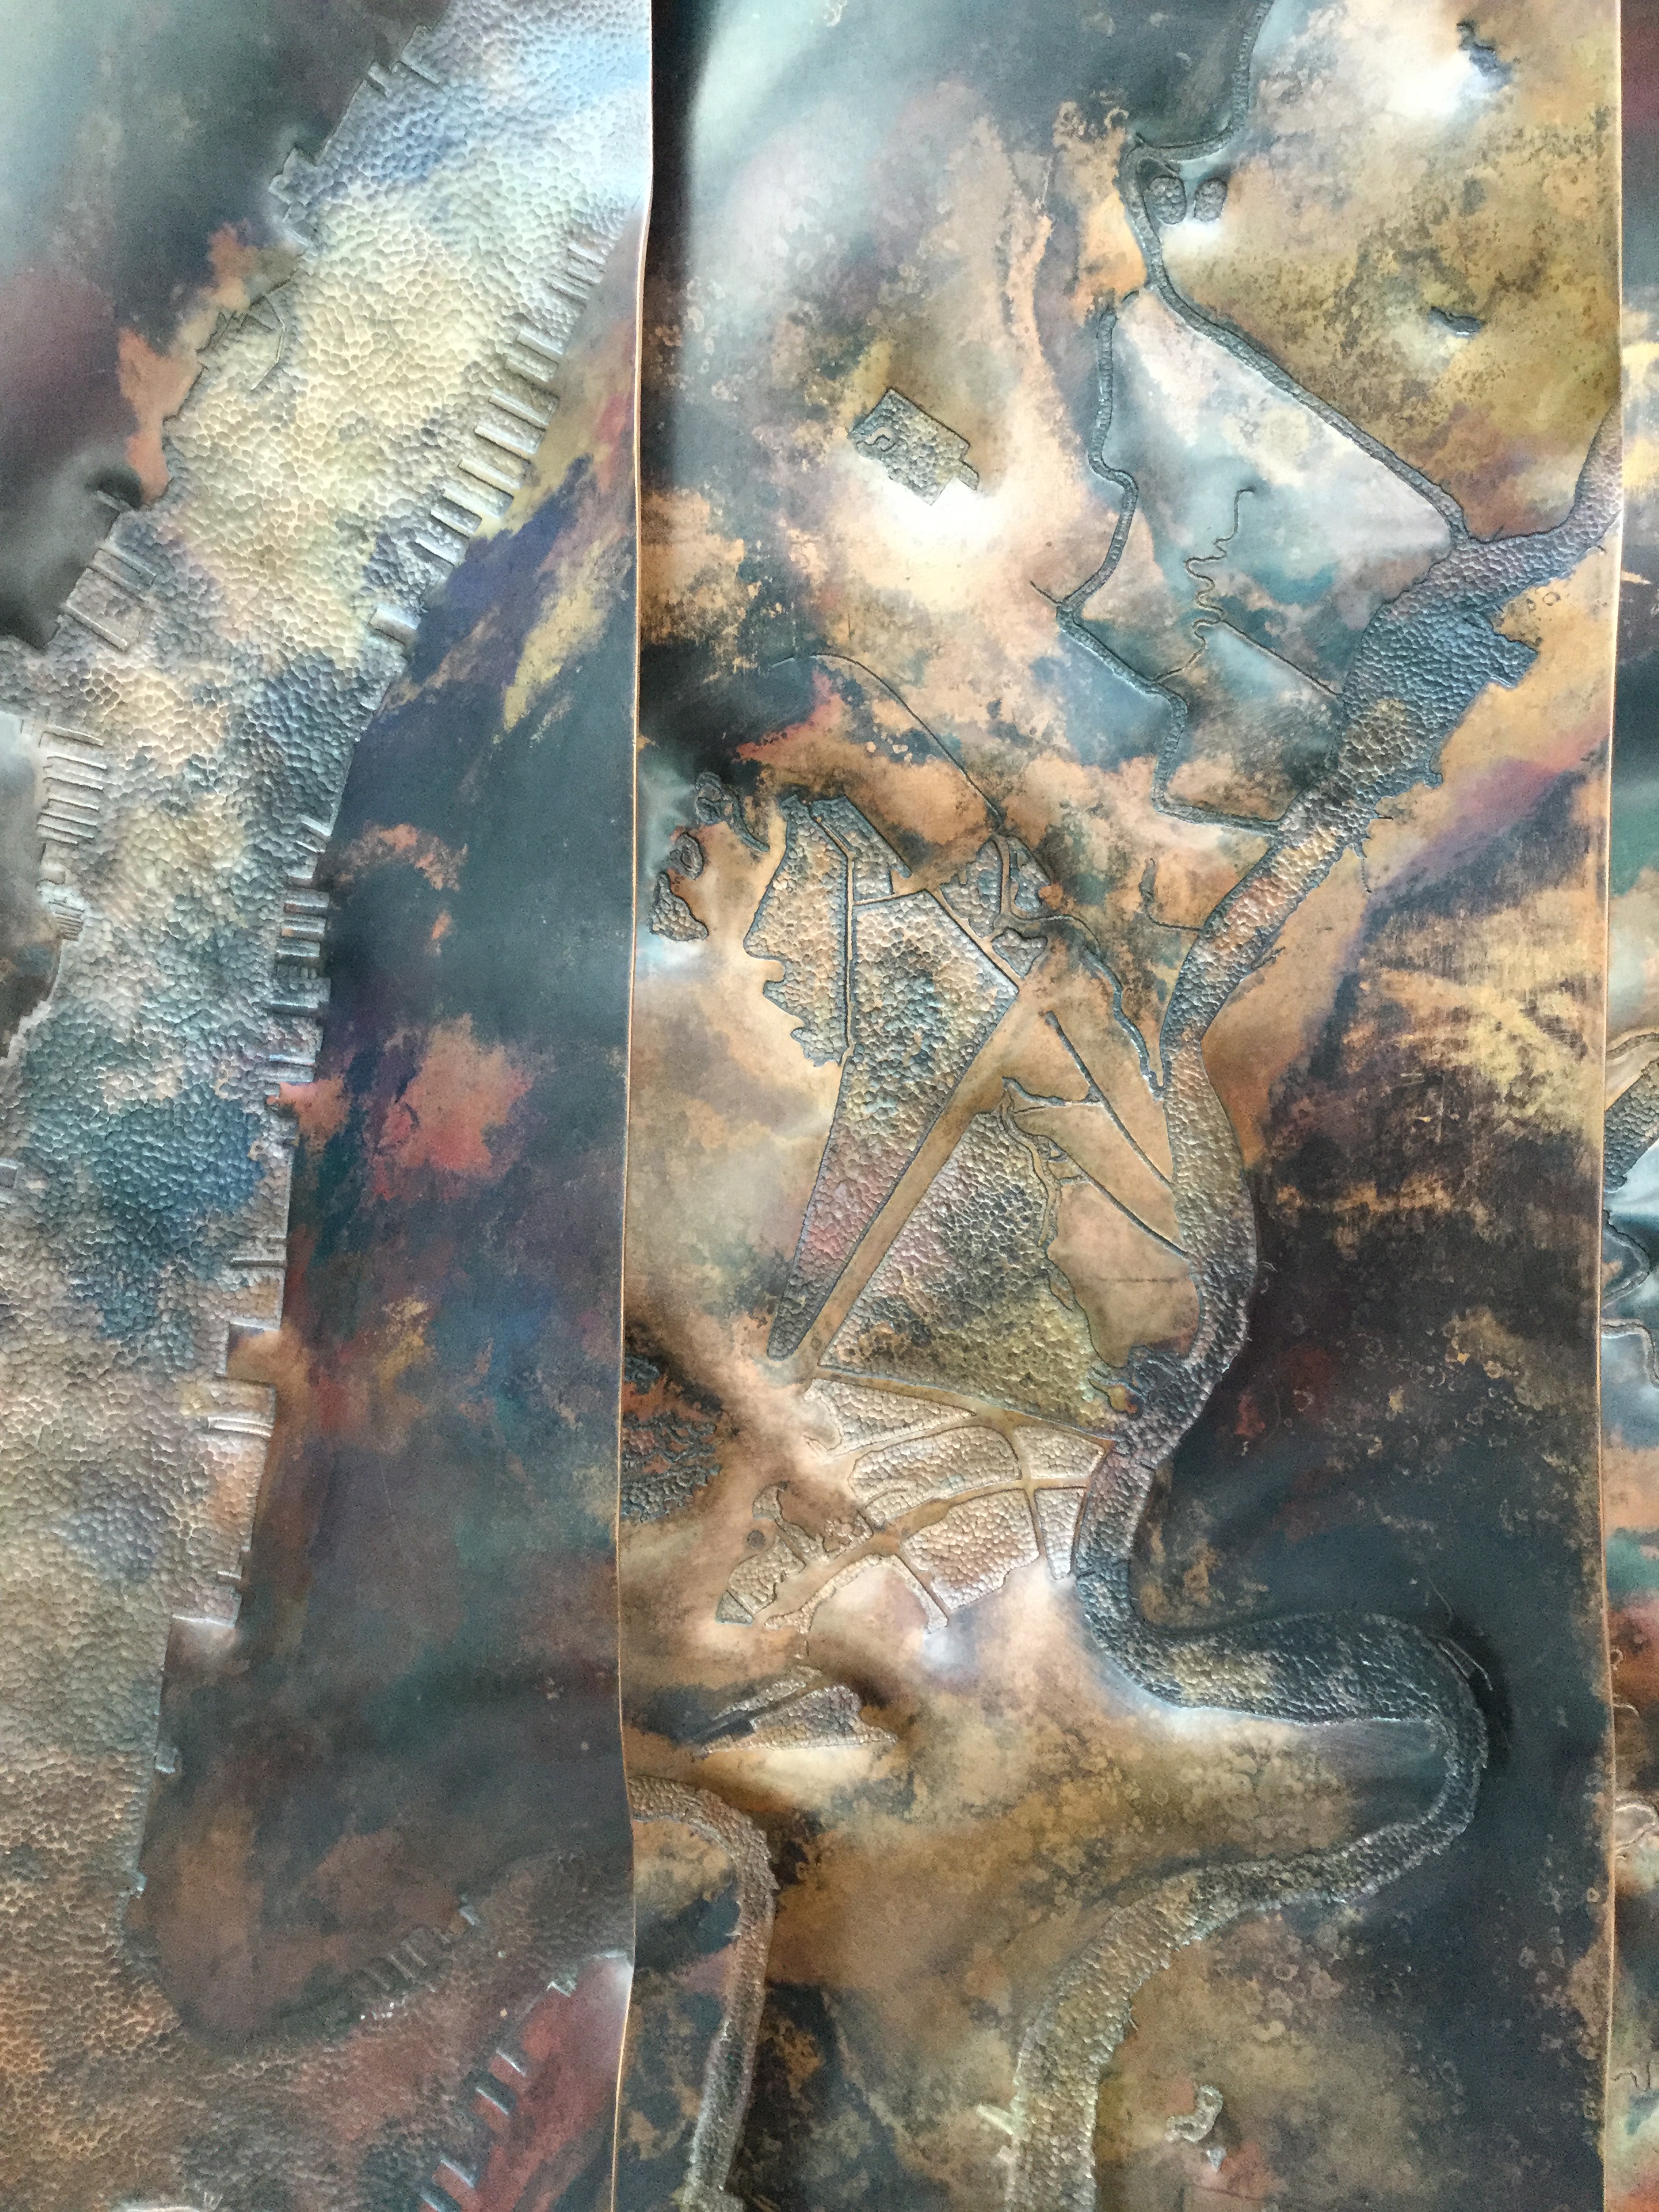
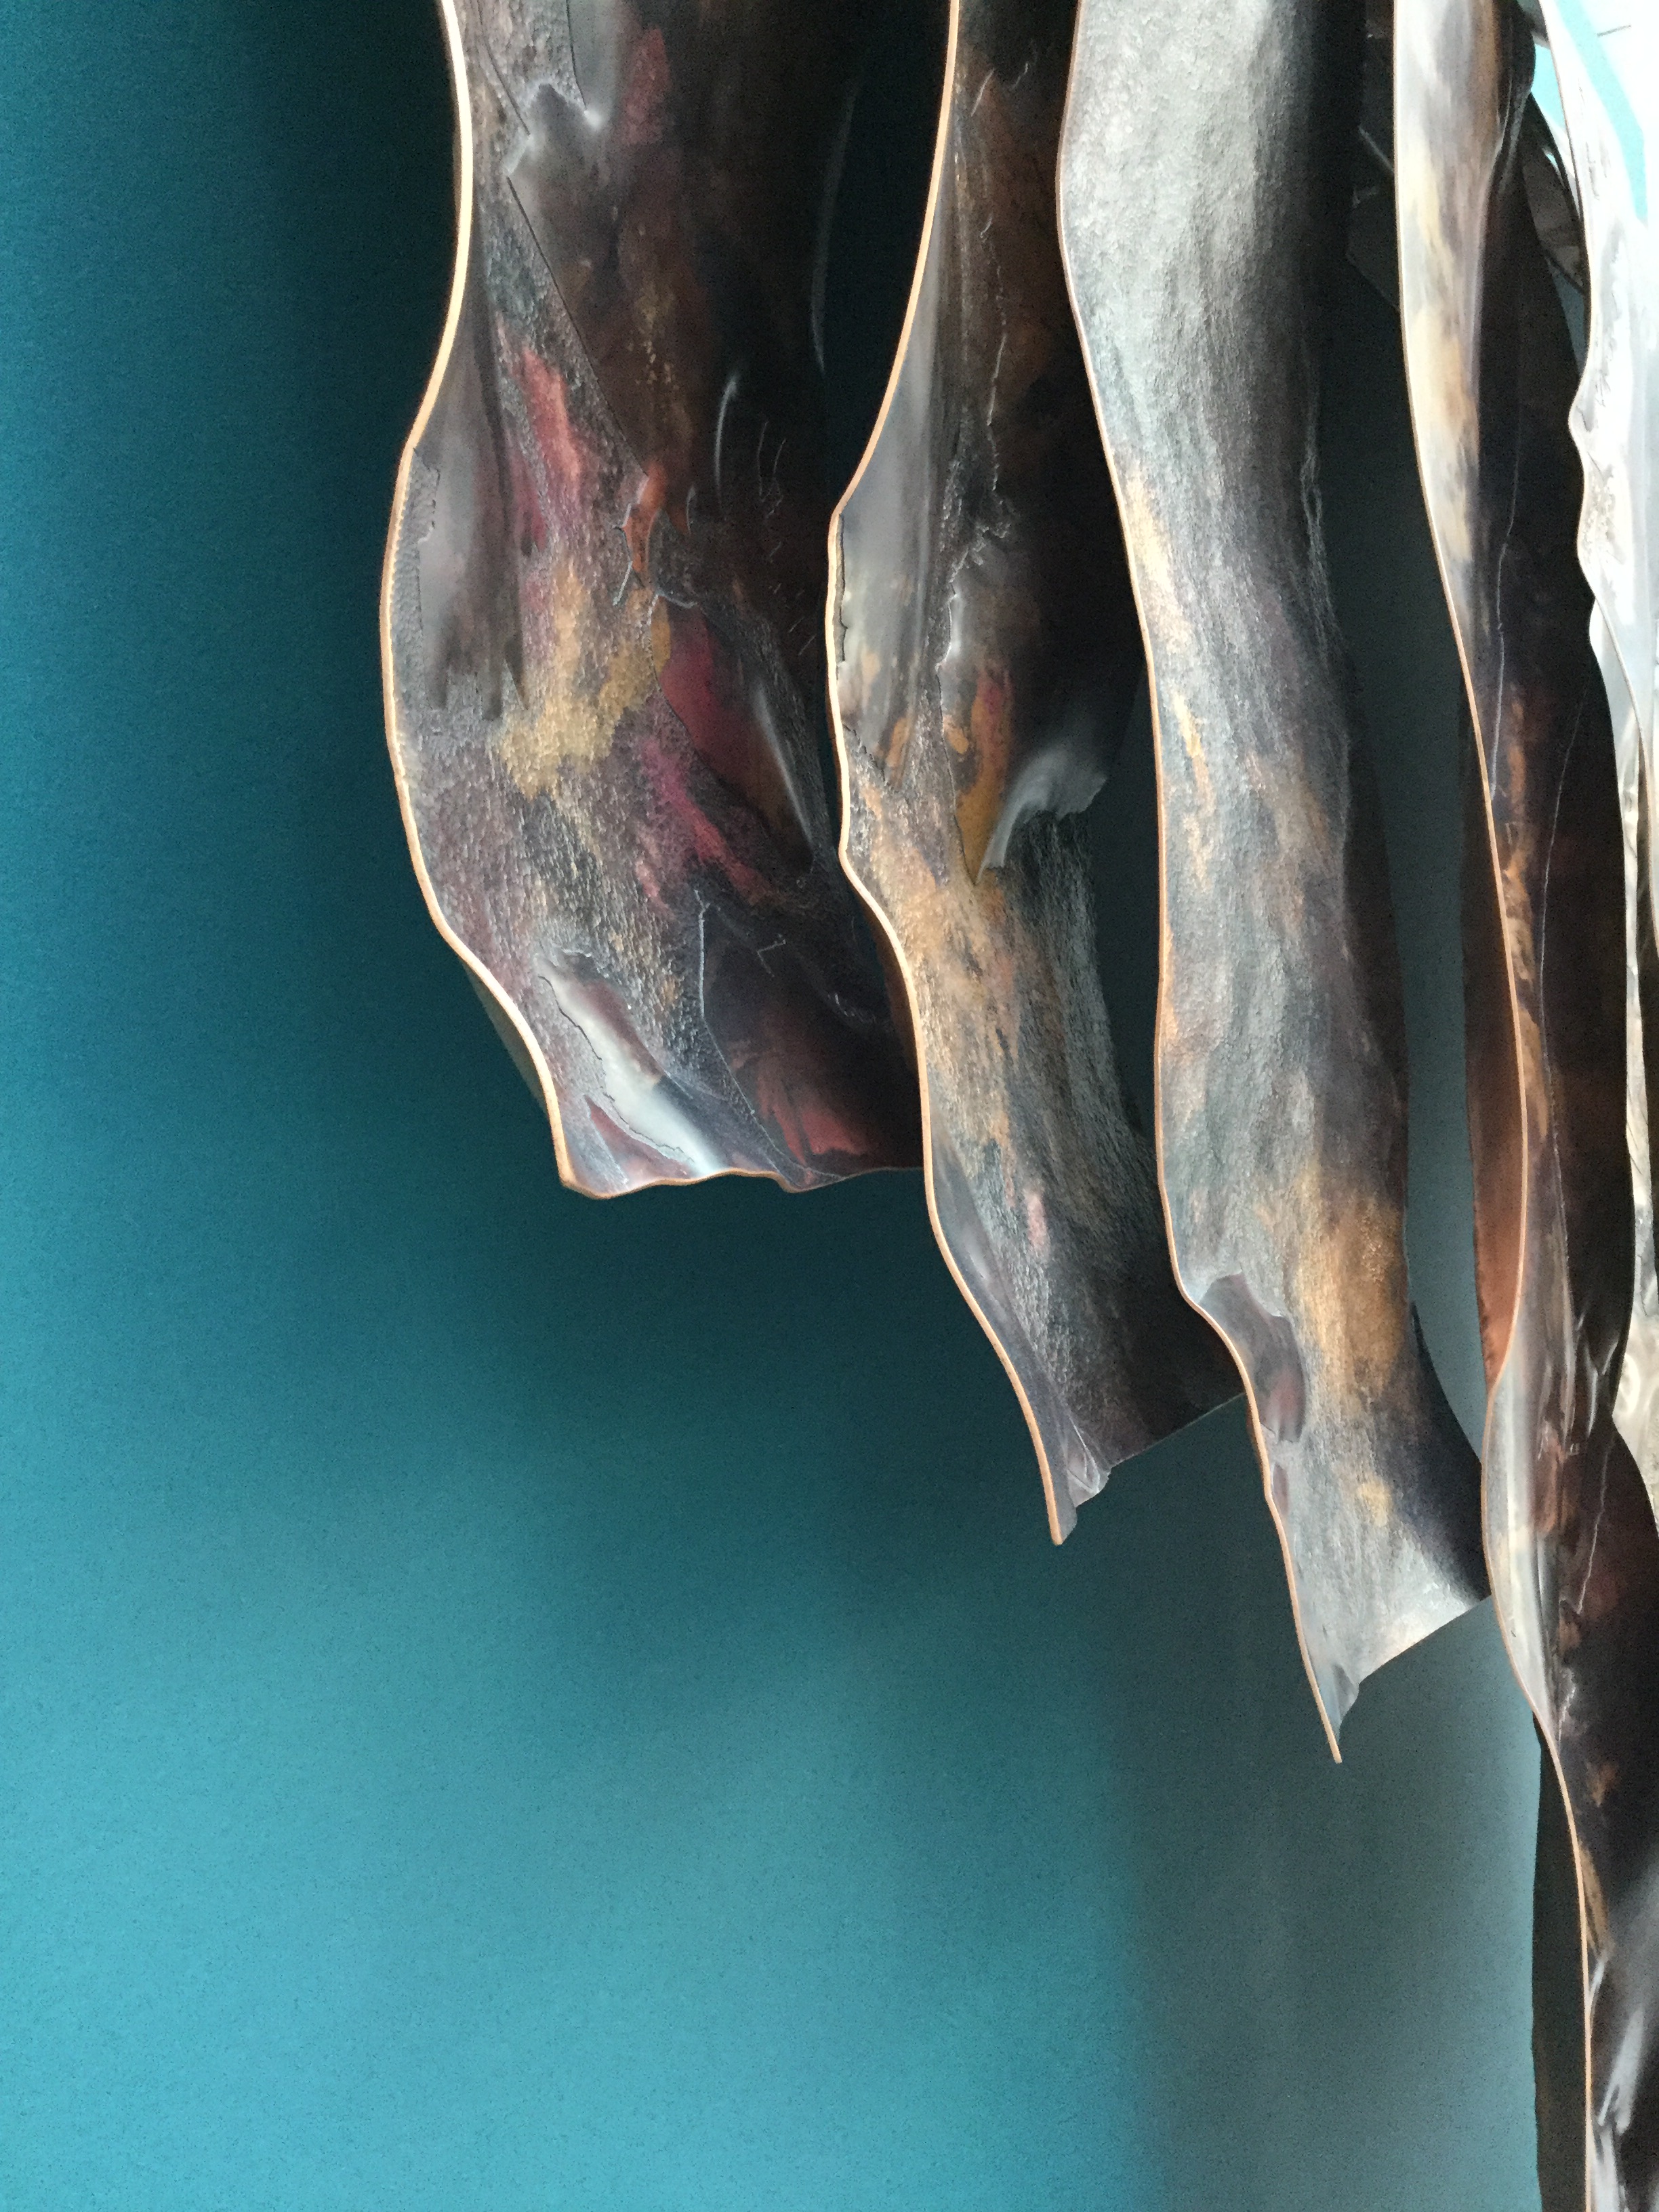
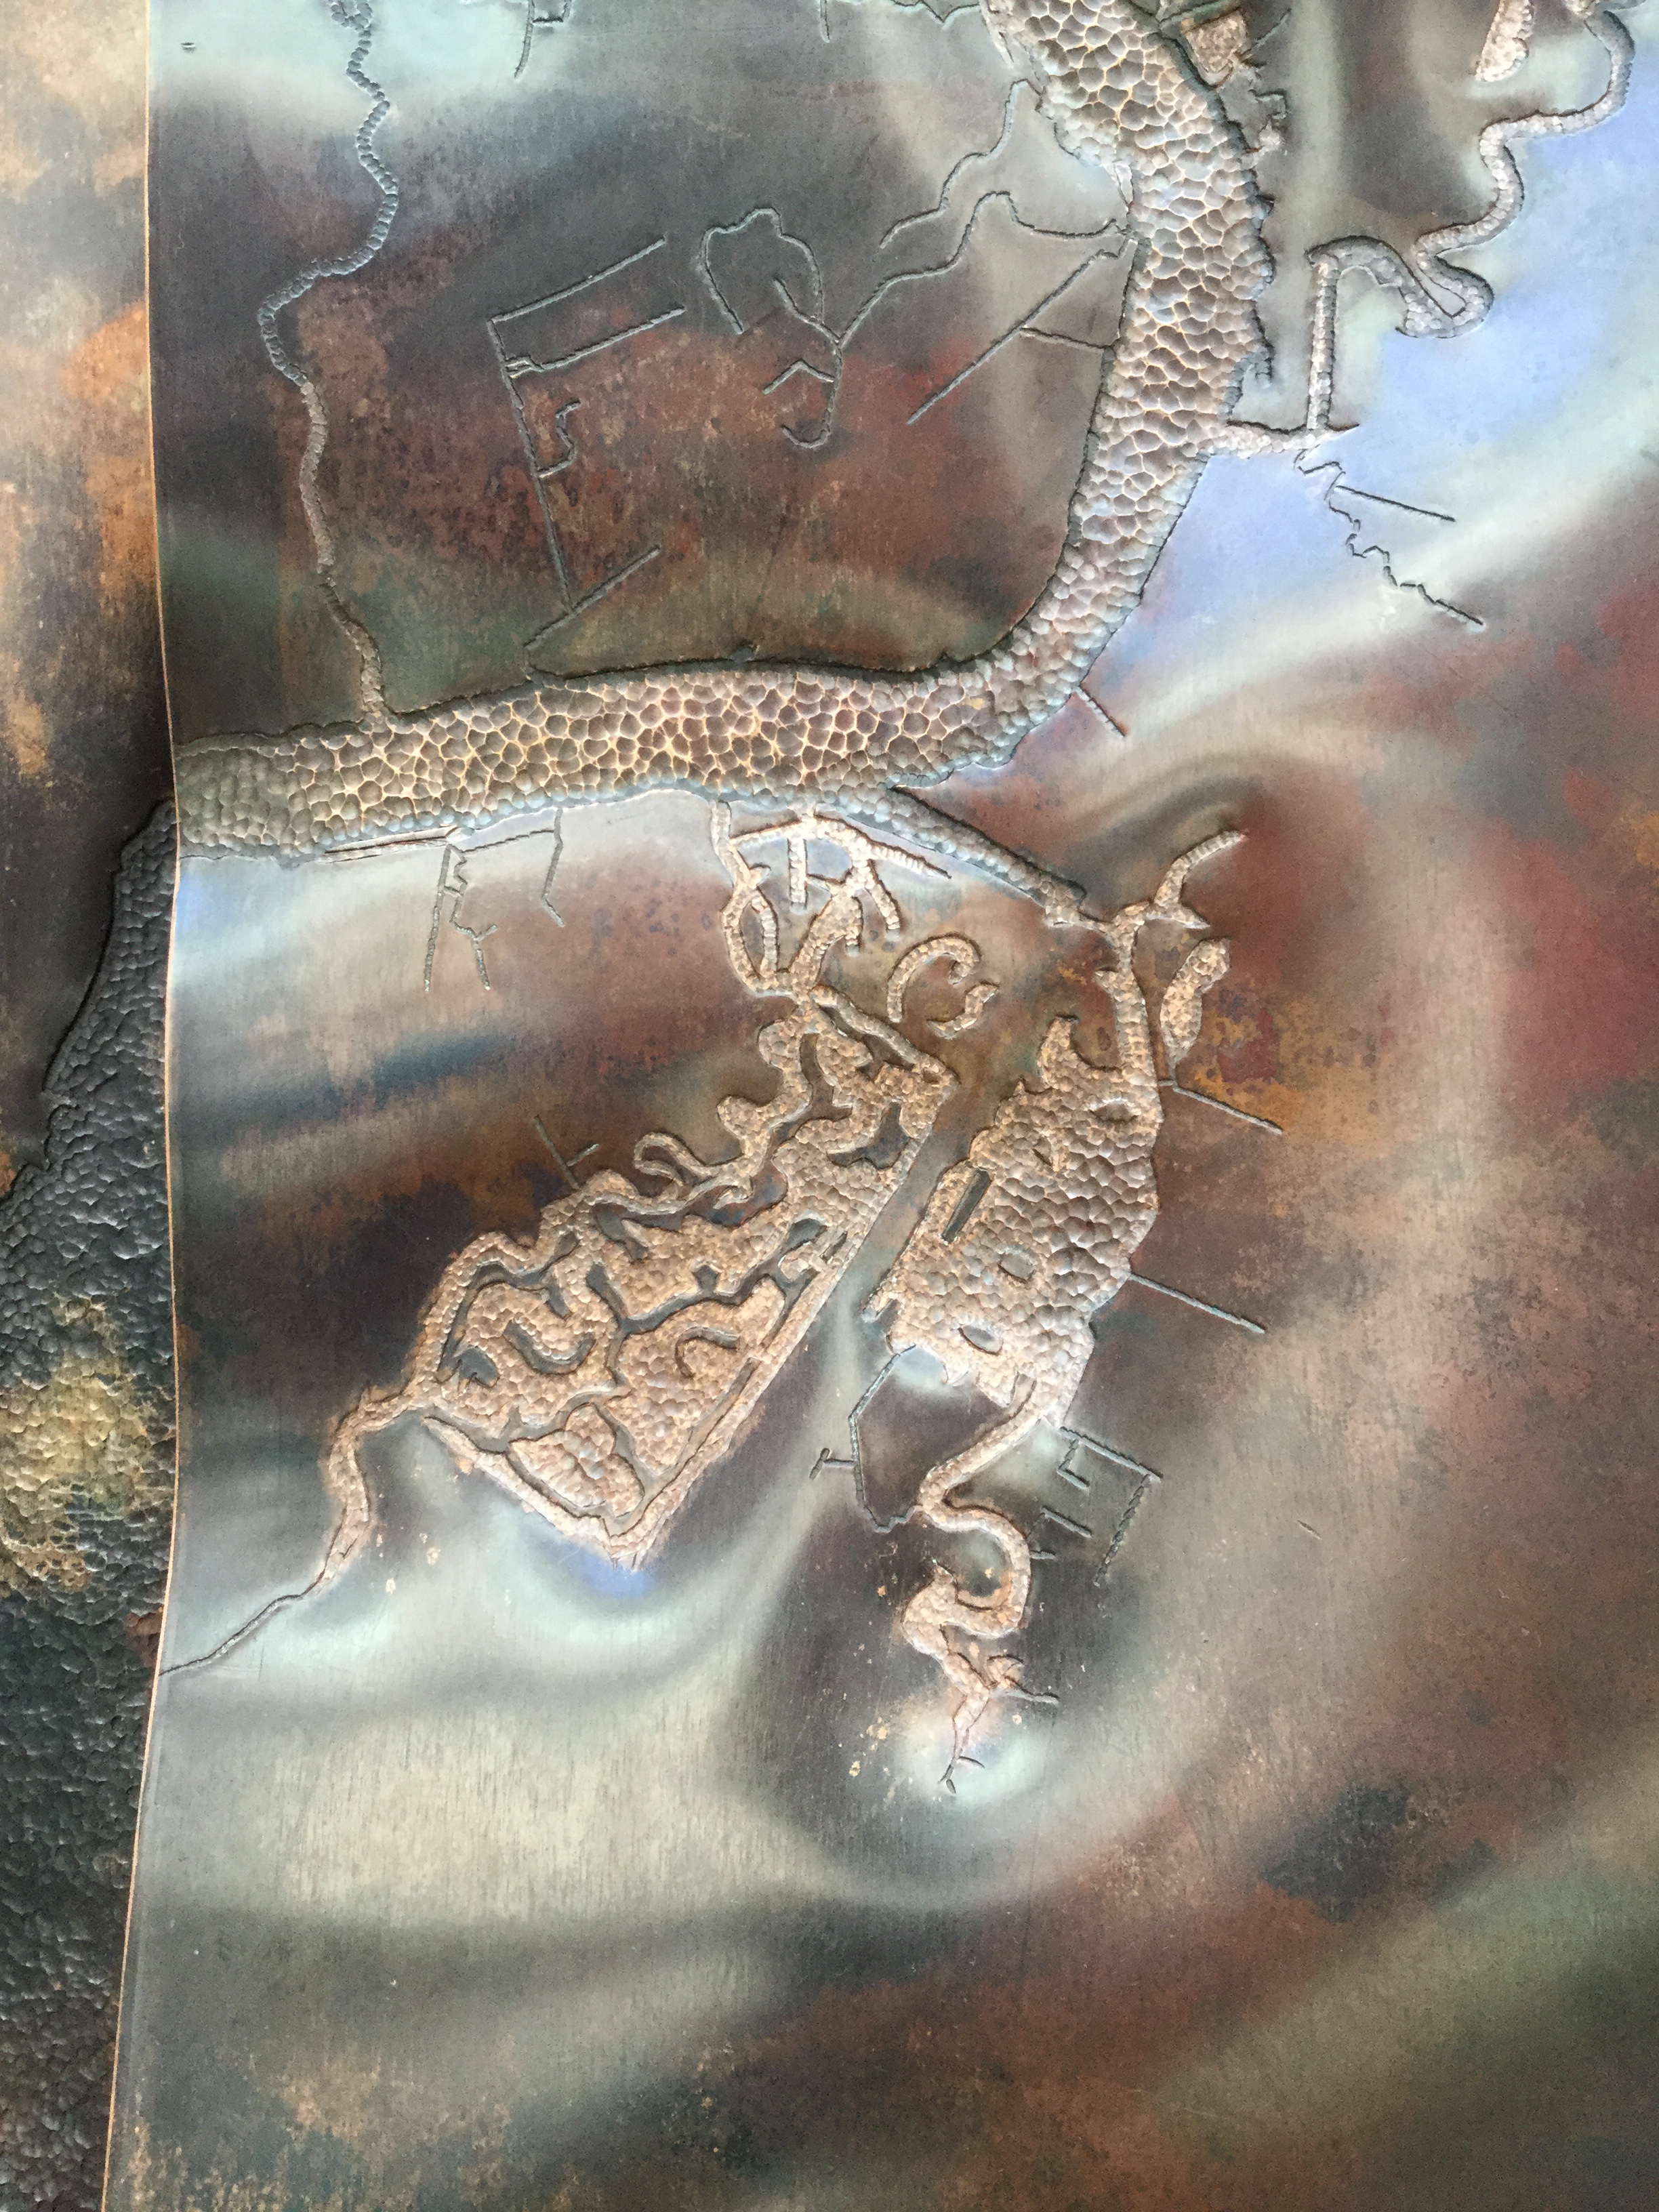
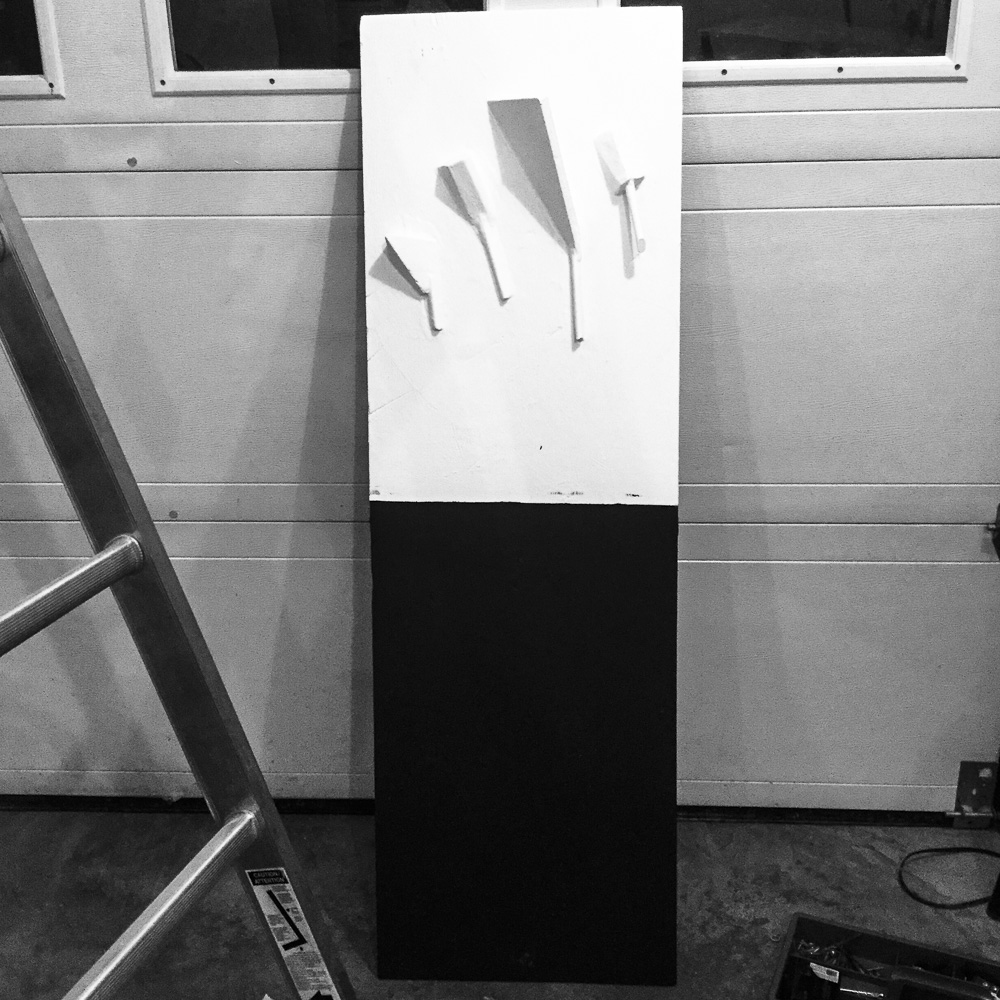
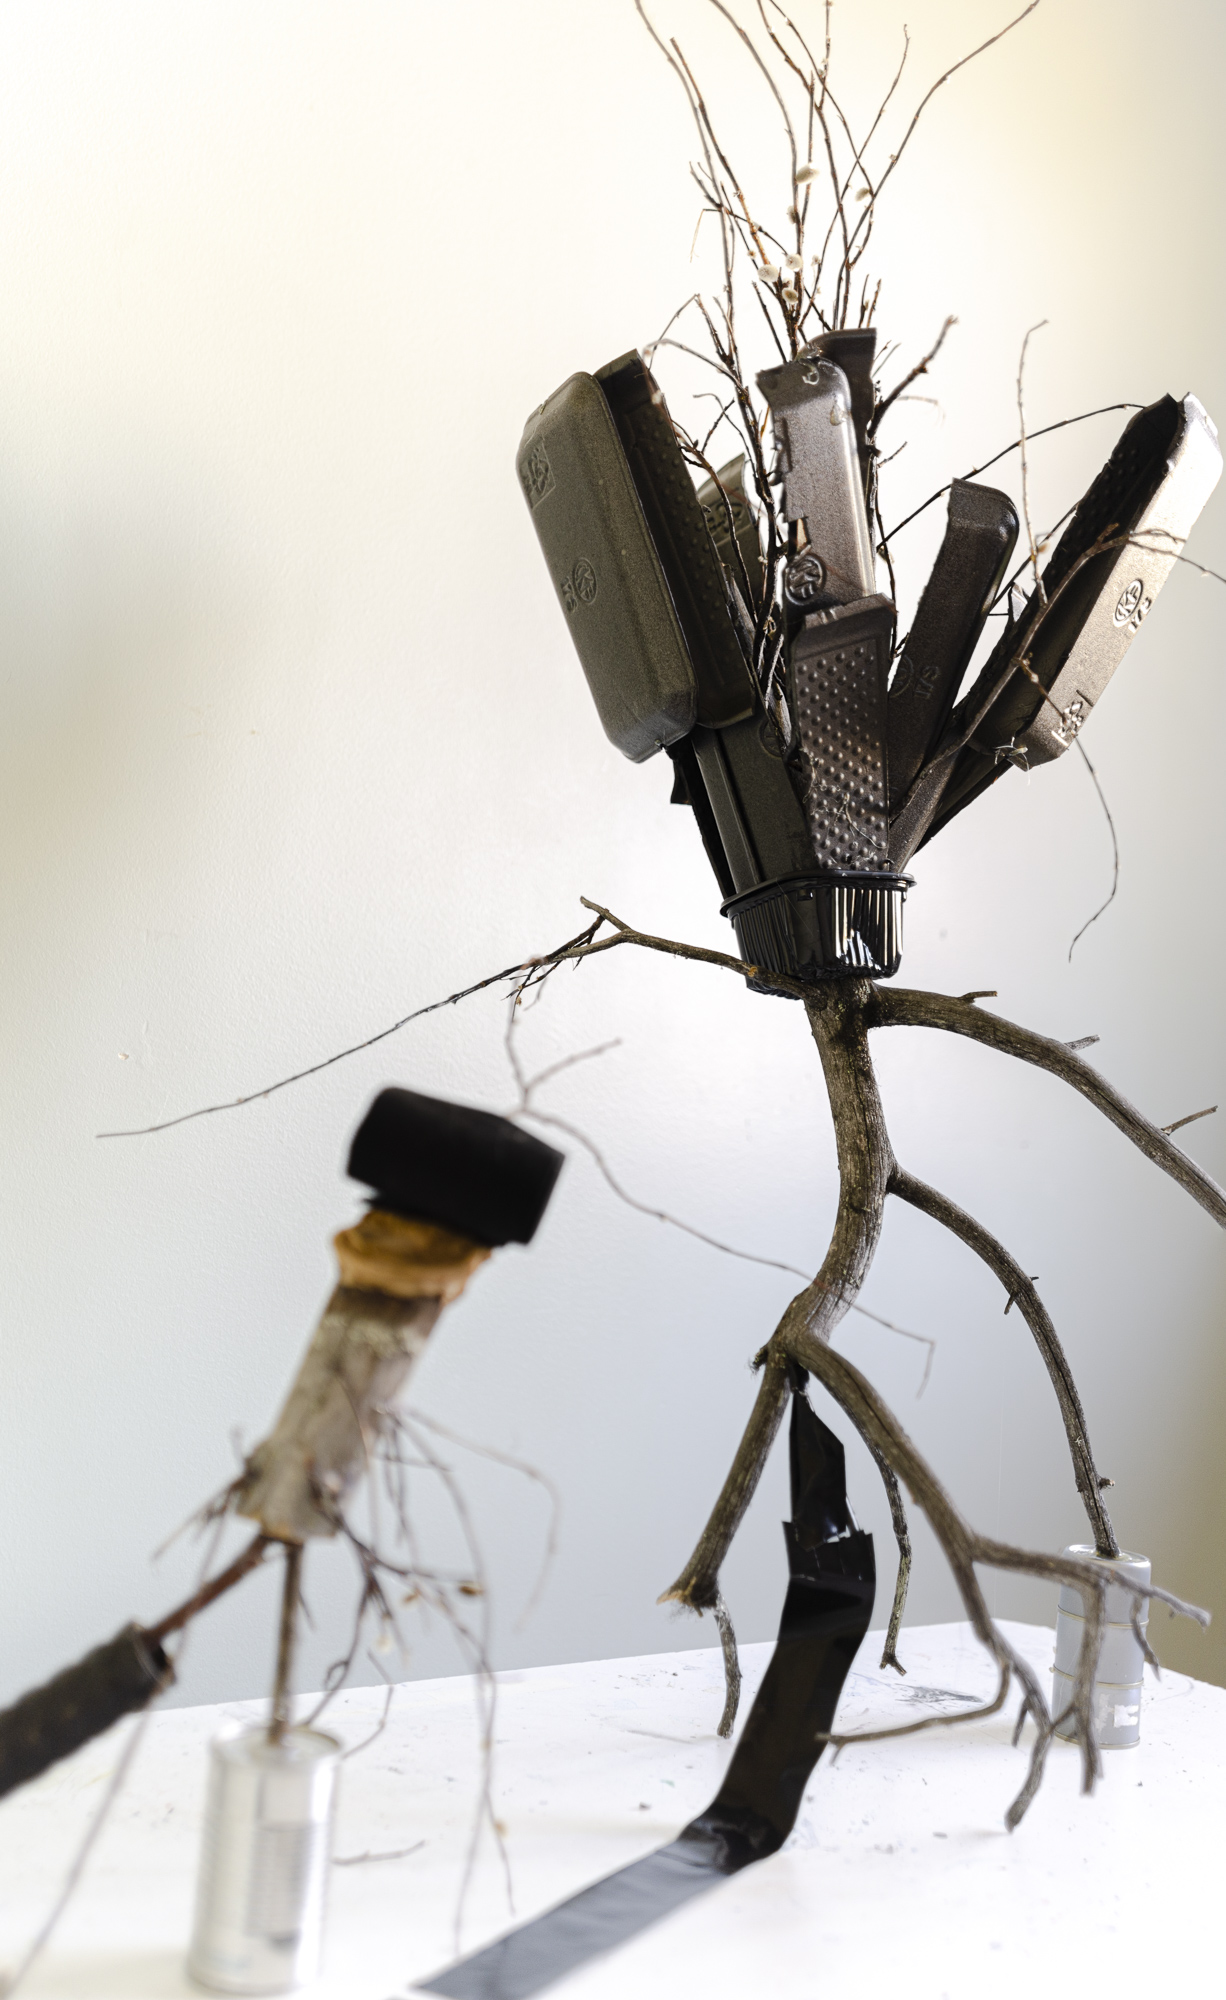
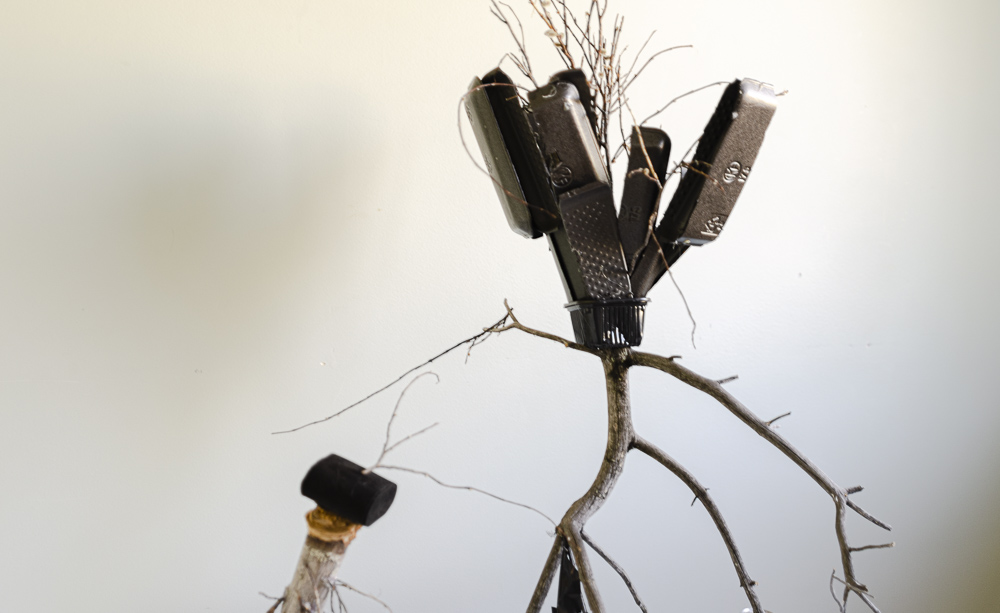
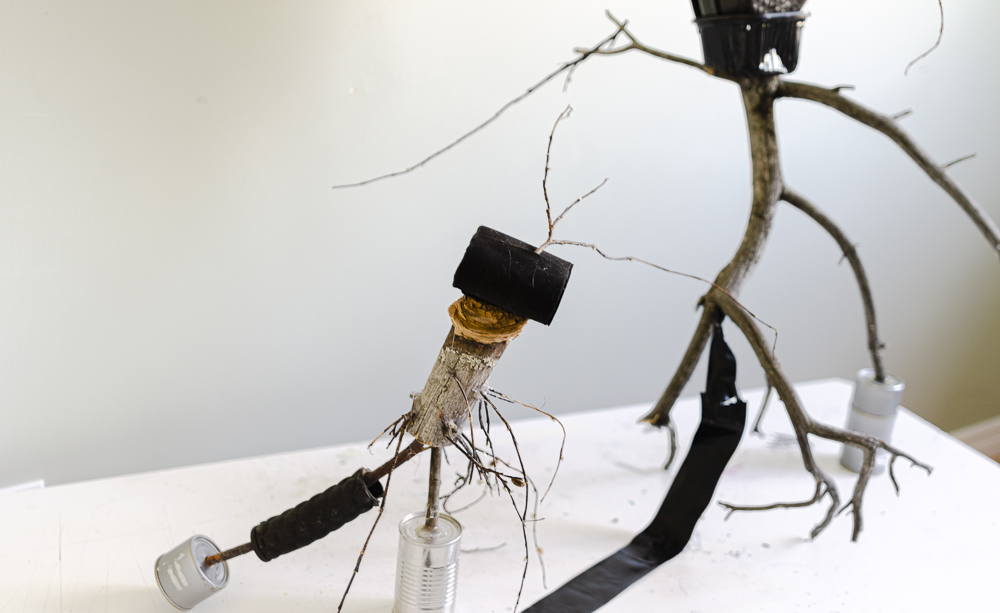
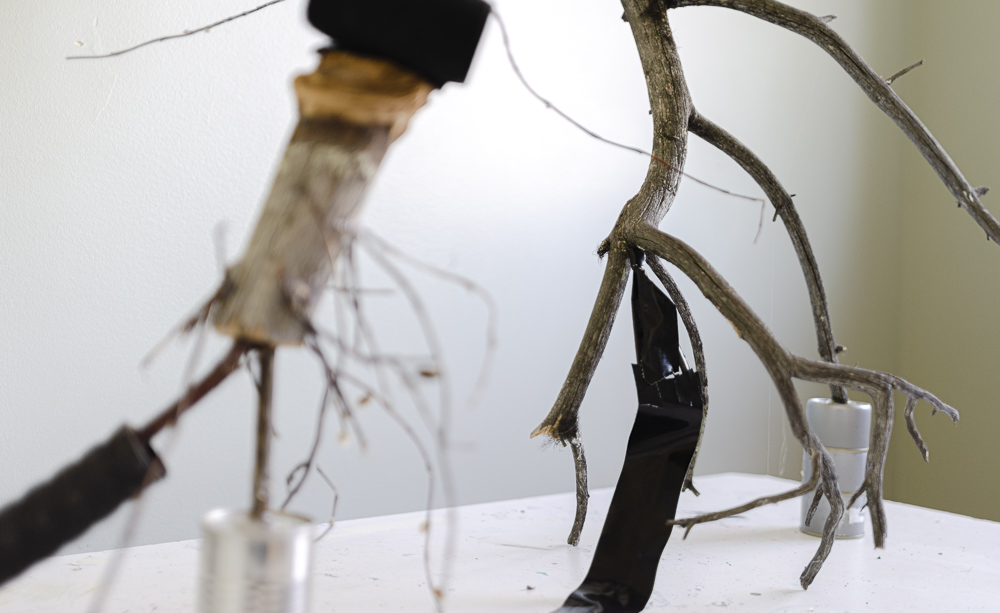
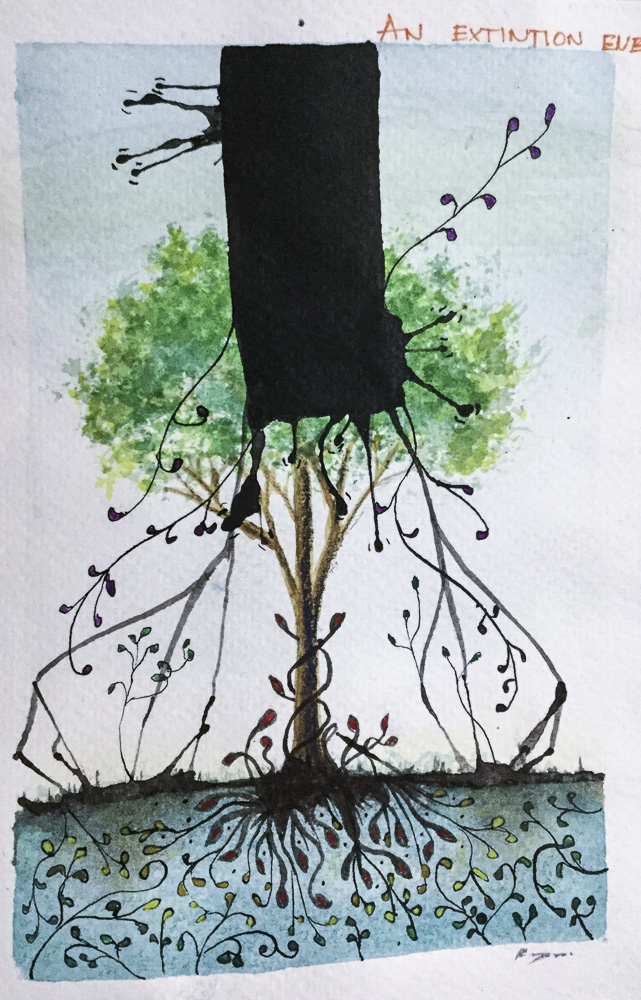
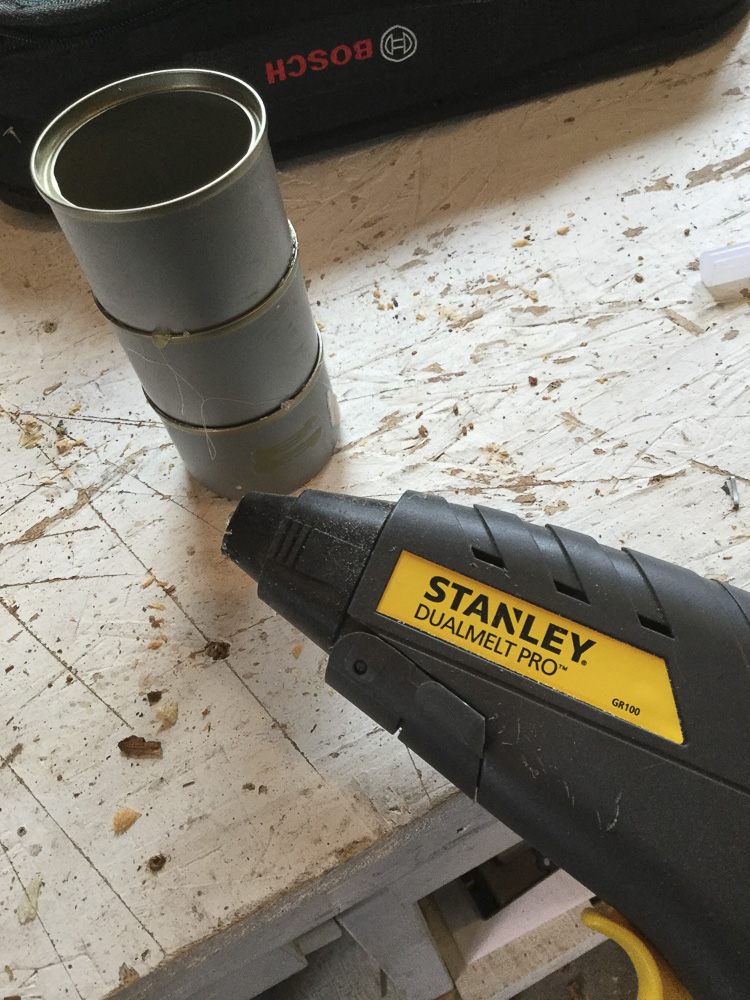
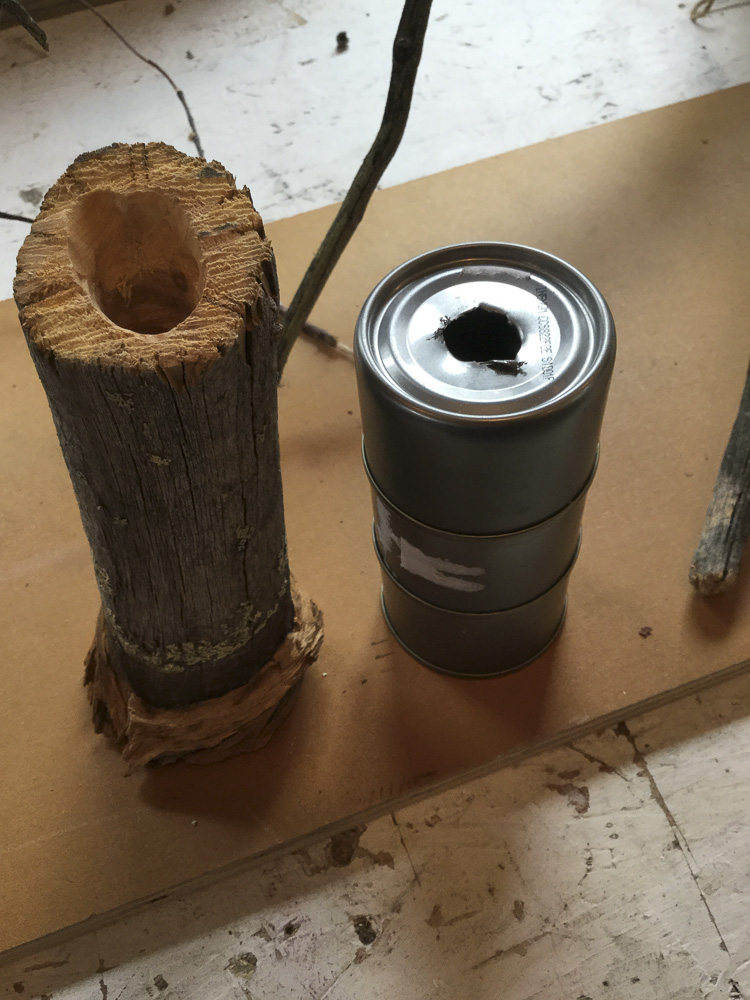
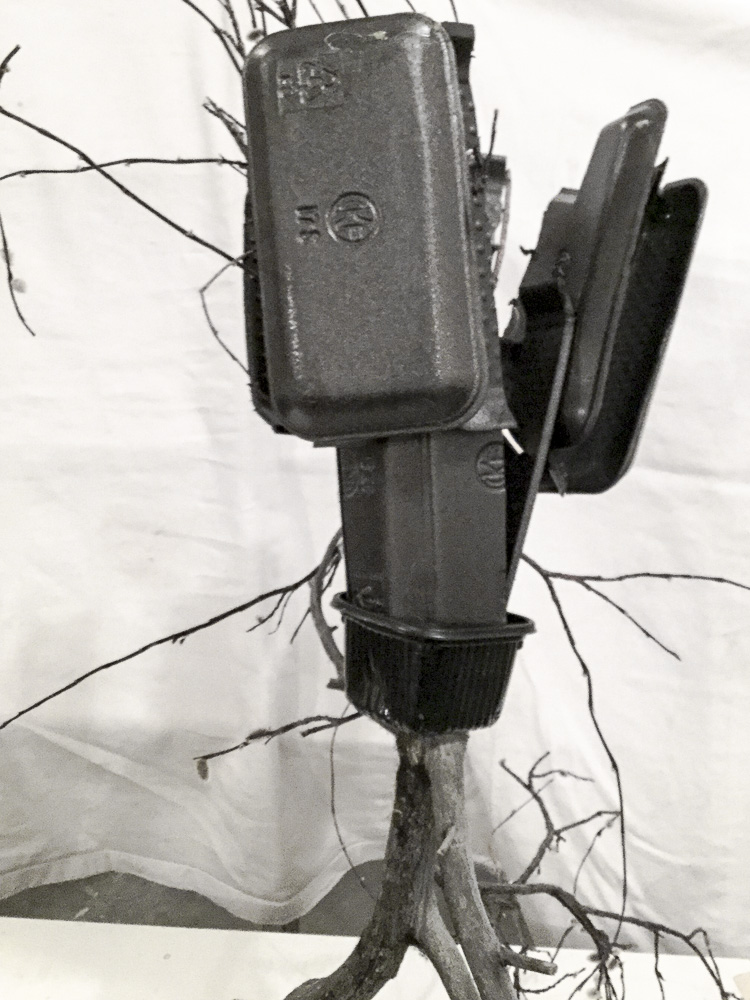
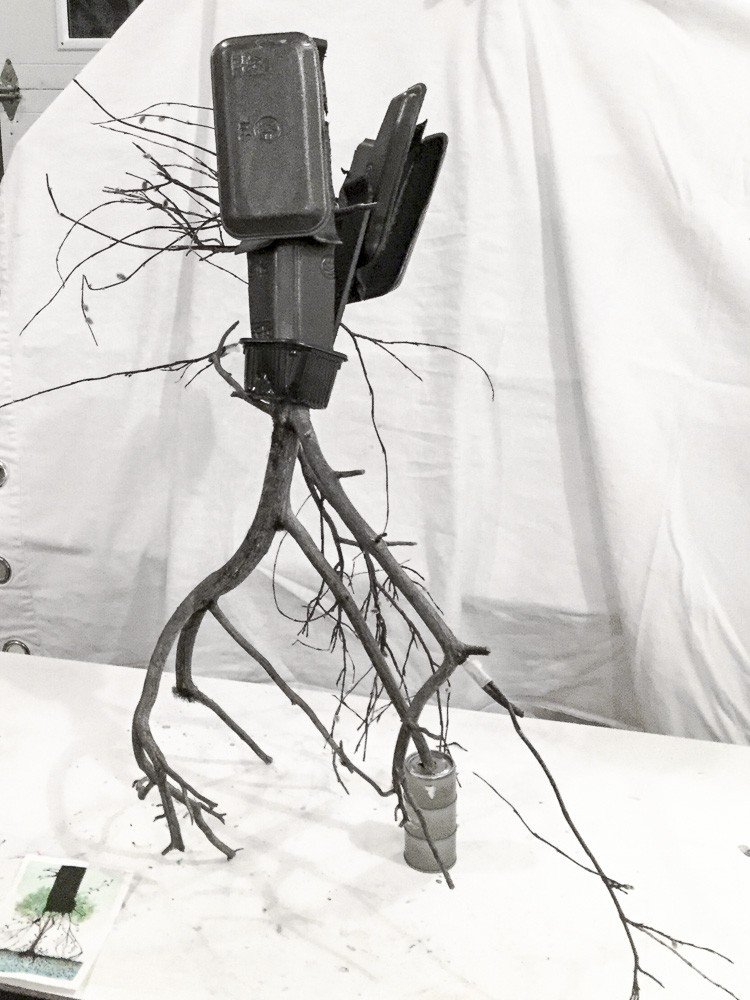
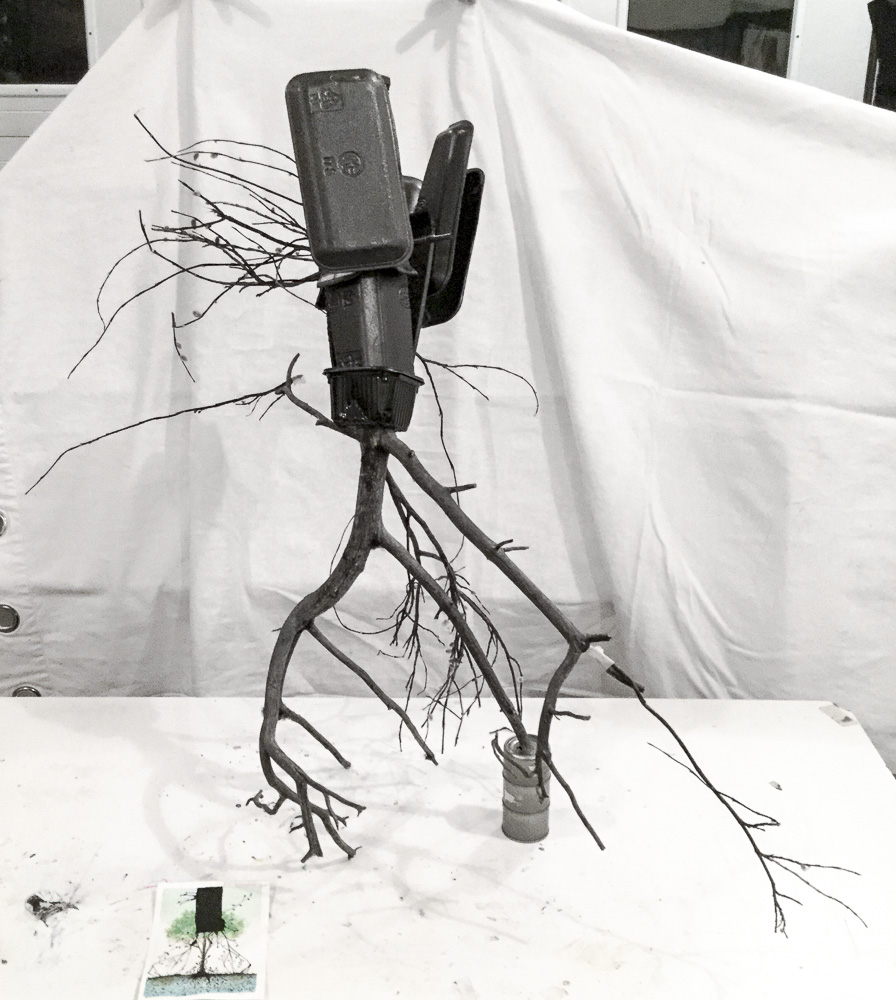
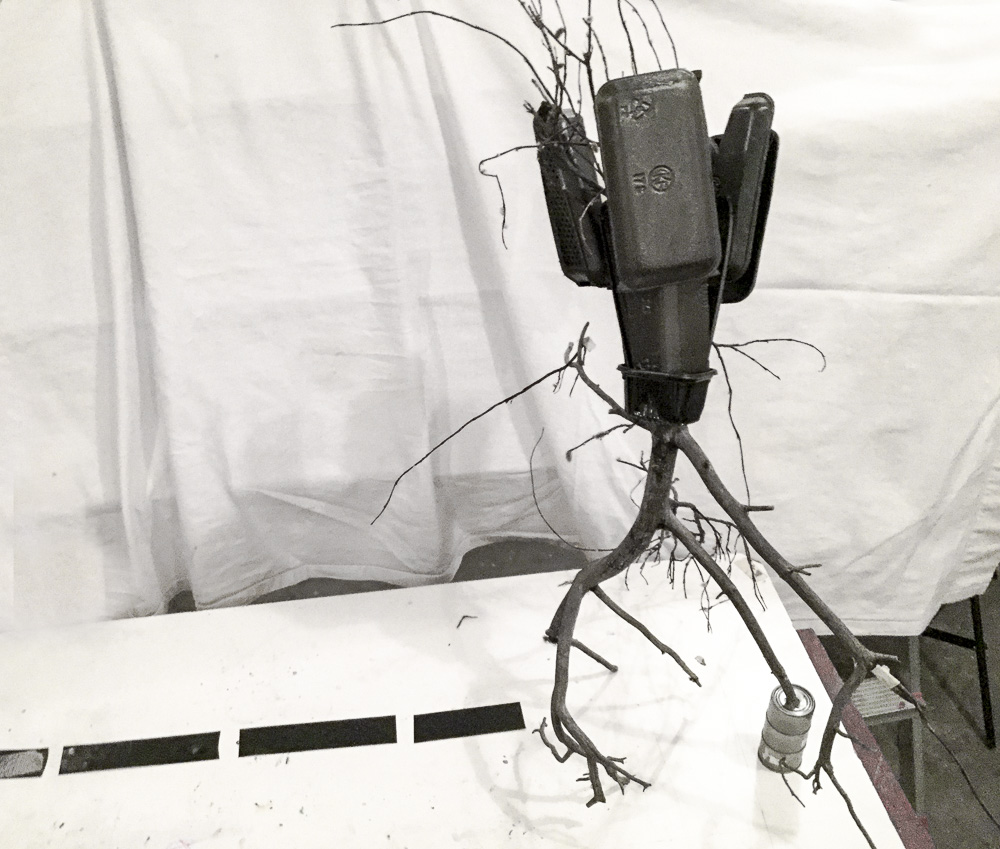
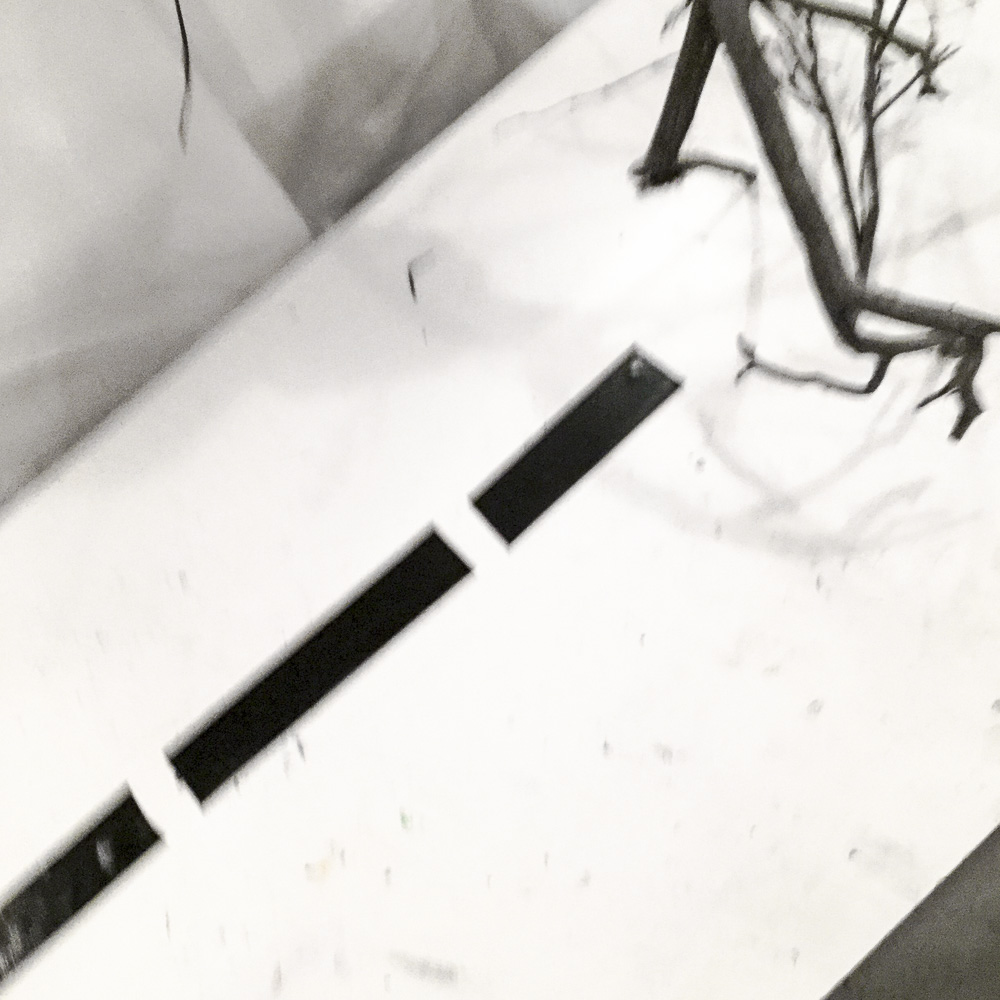
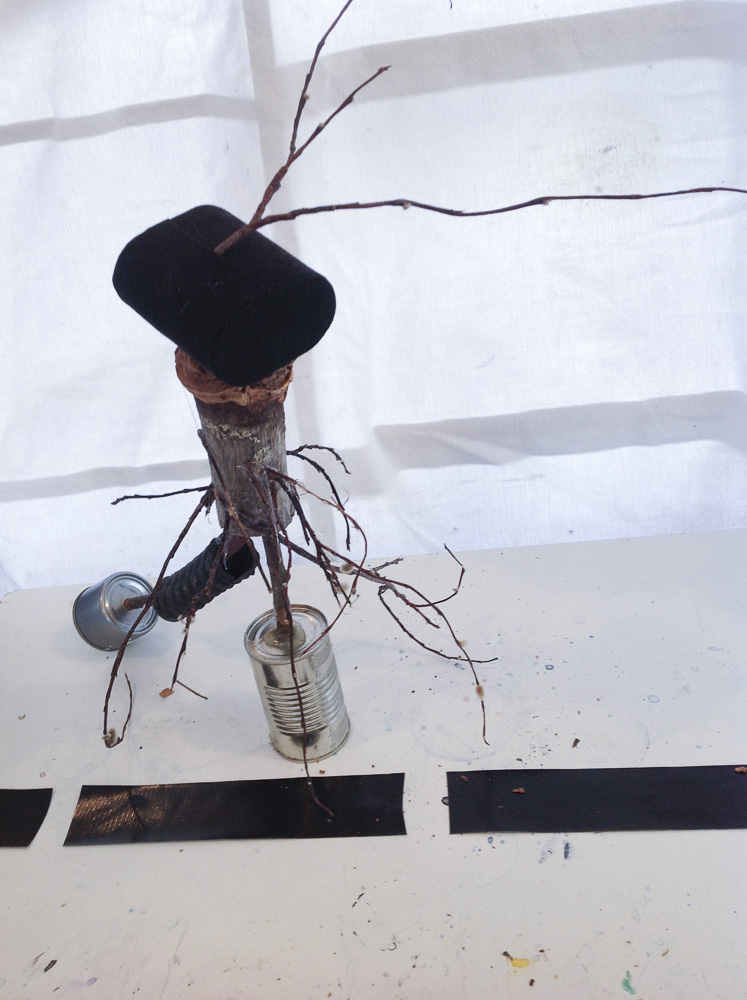
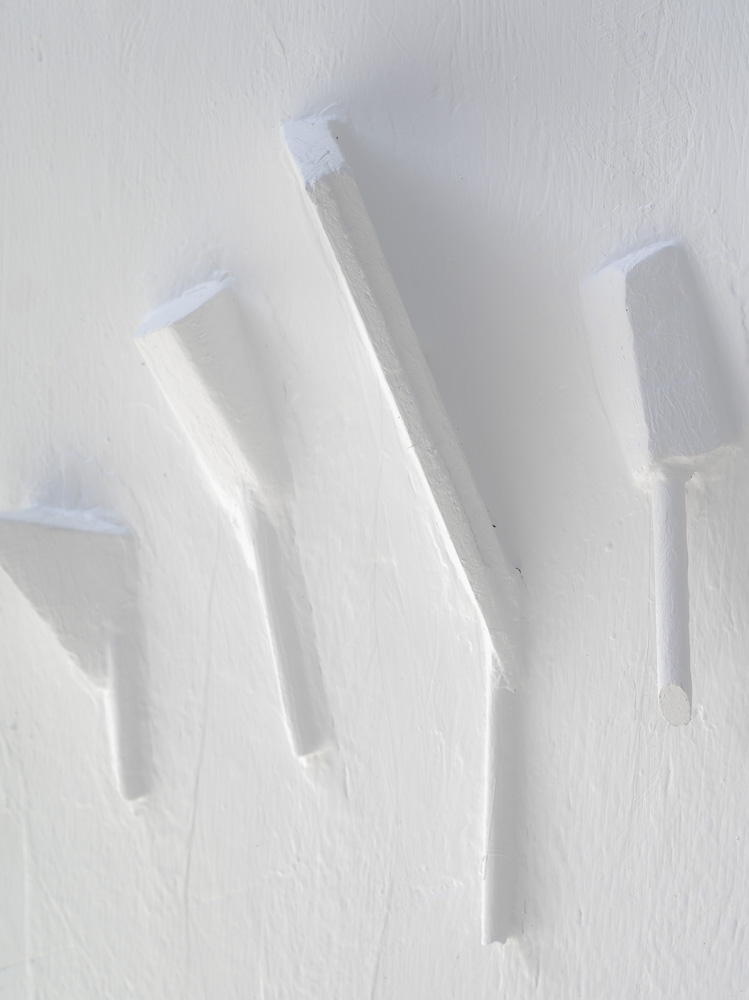
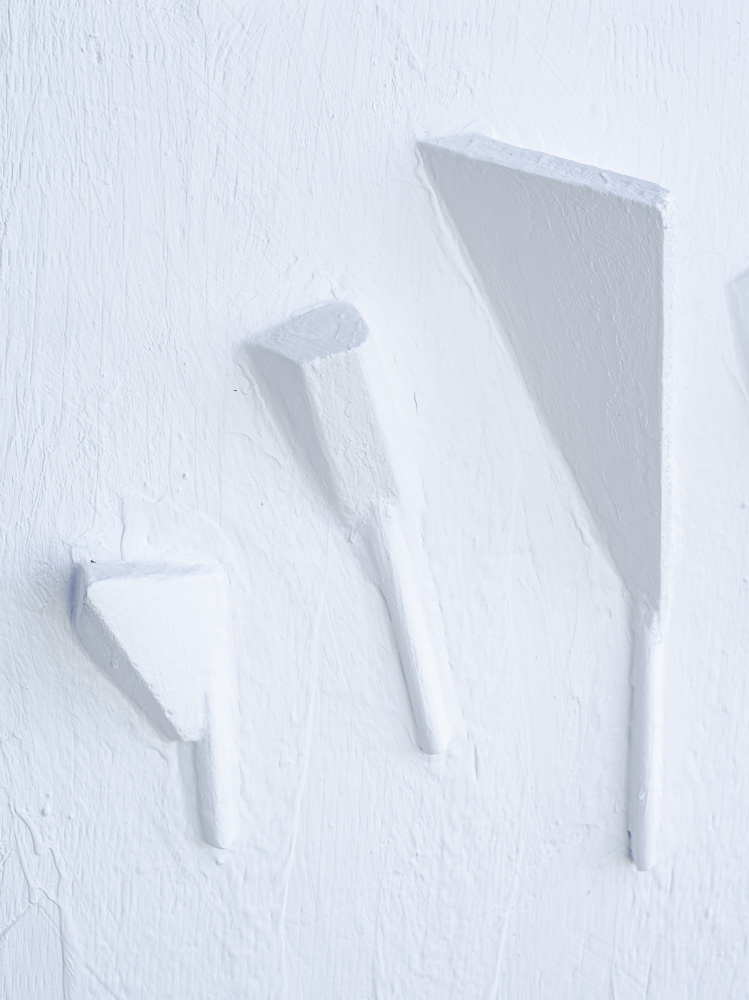
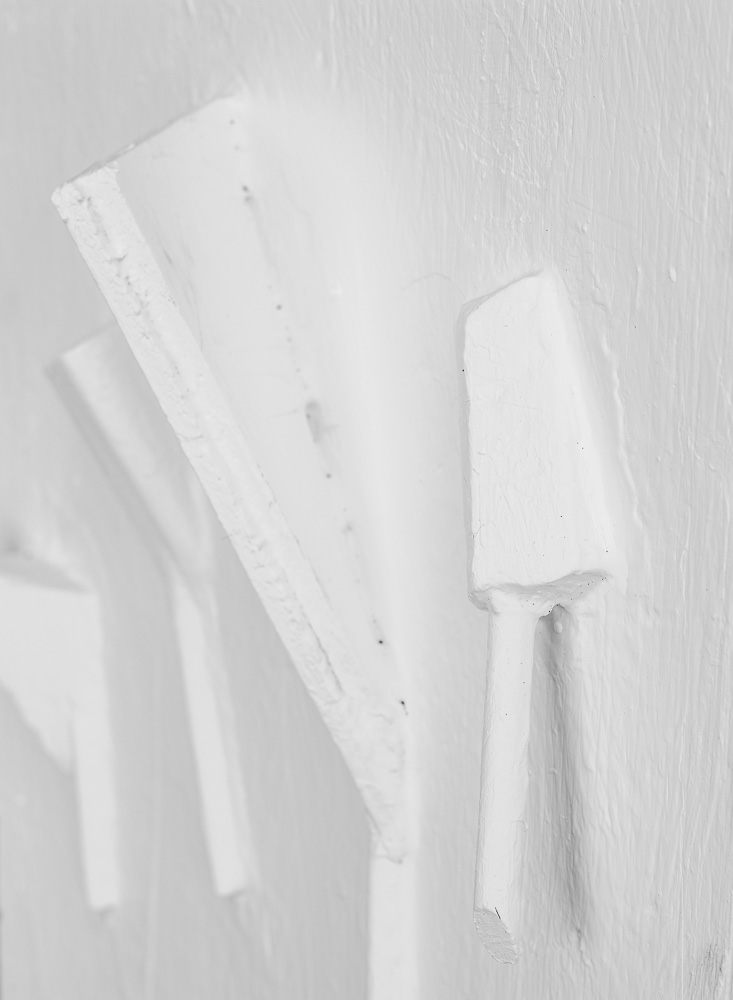
Title: An extinction event Author: Omar Reyna Date: 2019 Place of production: Yukon, Canada Materials: Wood, tin cans, Gorilla tape, glue, dried tree branches, rubbishs Technique: Relief sculpture Comments: Not very stable yet, but it can stand by itself
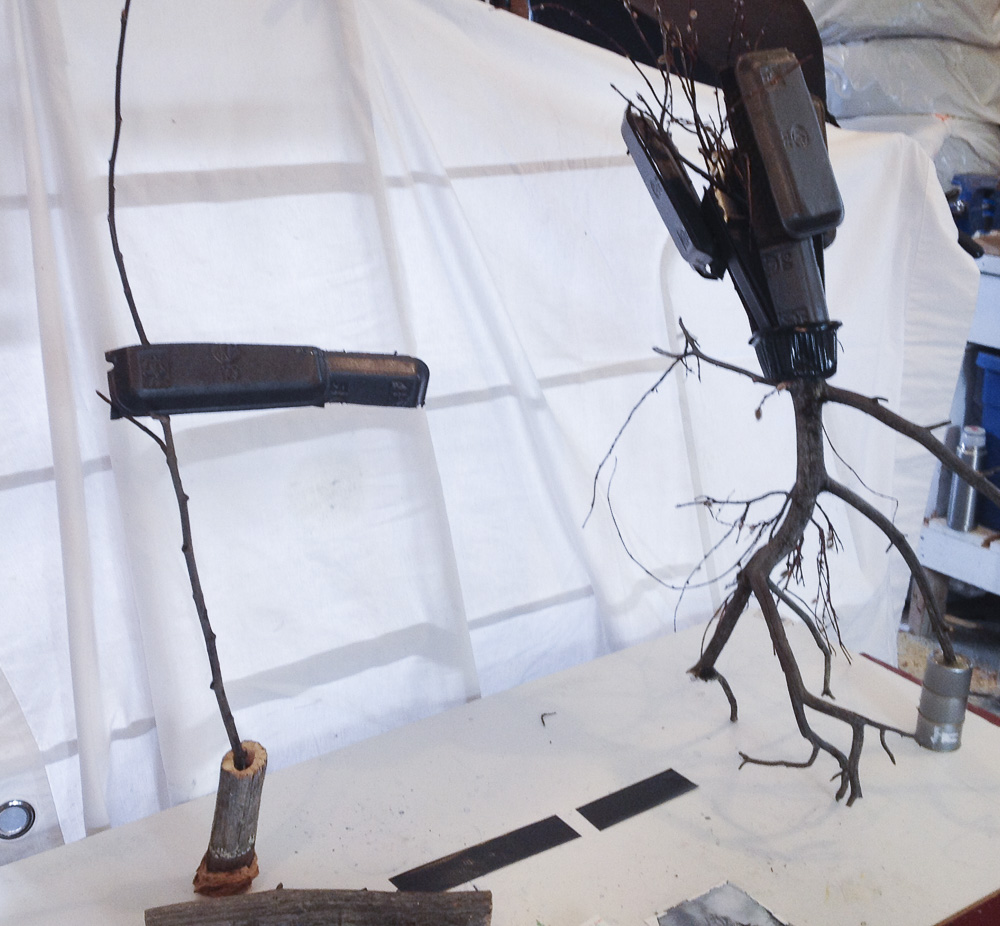
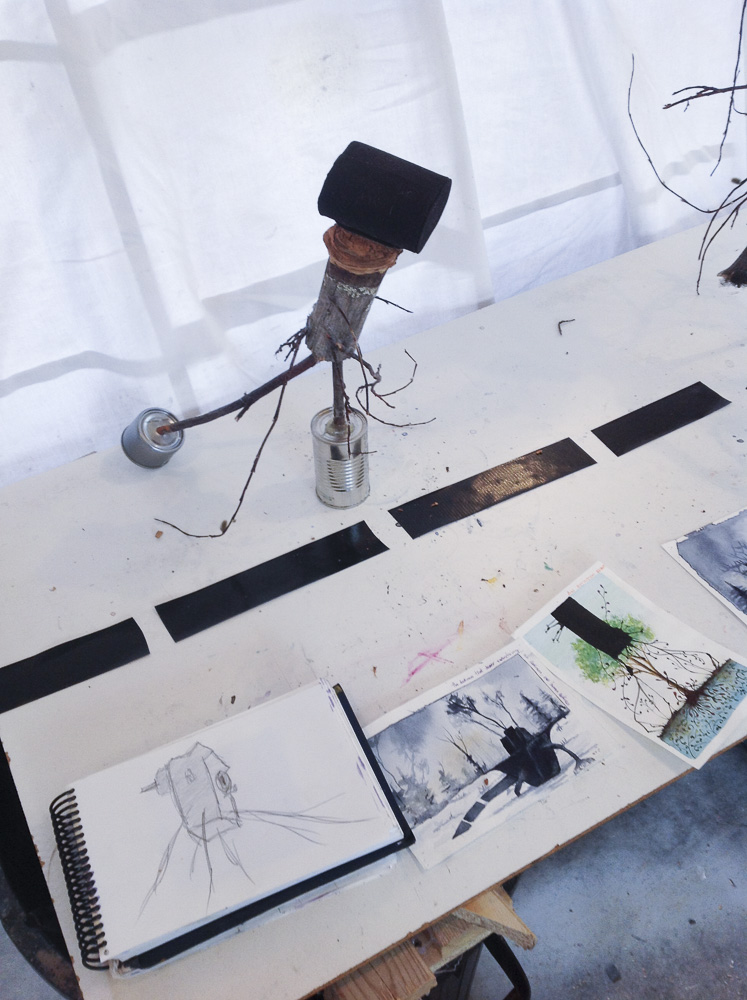
This page is a visual diary of the construction process of the Open-space sculpture. It consists of seven different galleries starting from the research stage (sketches) to the final tonal drawings of the finished sculpture and all the constructions process.
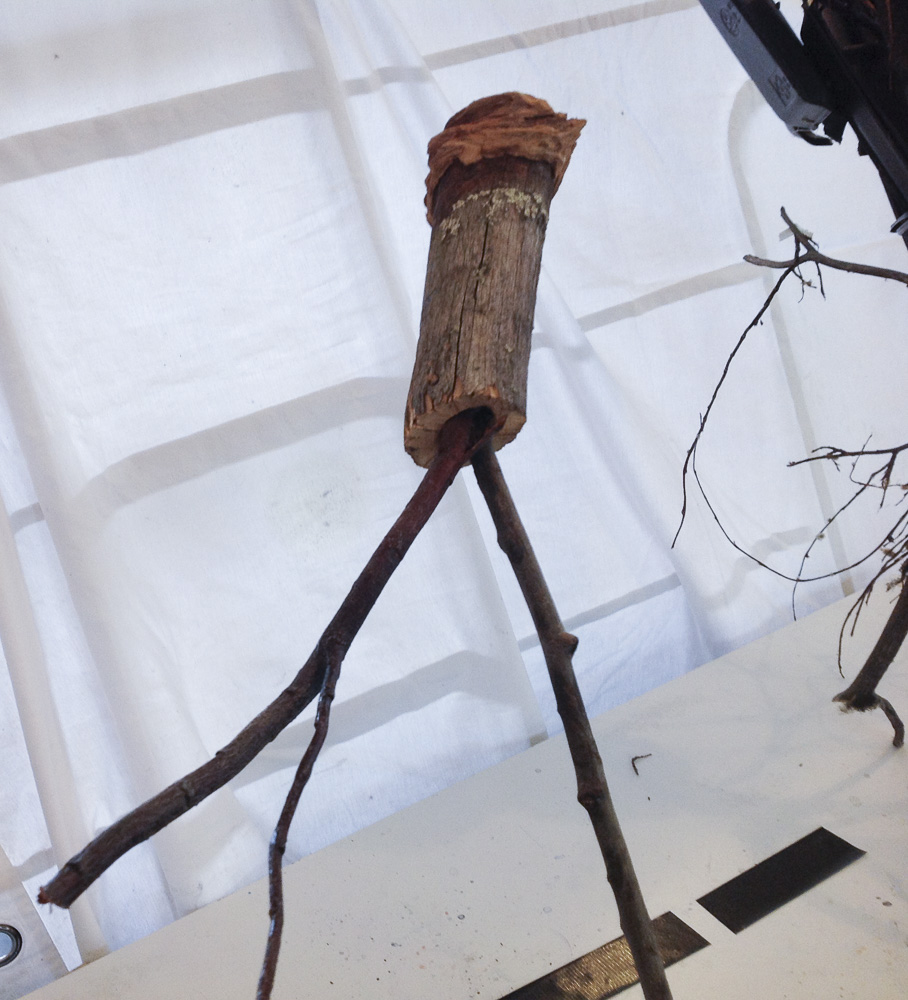
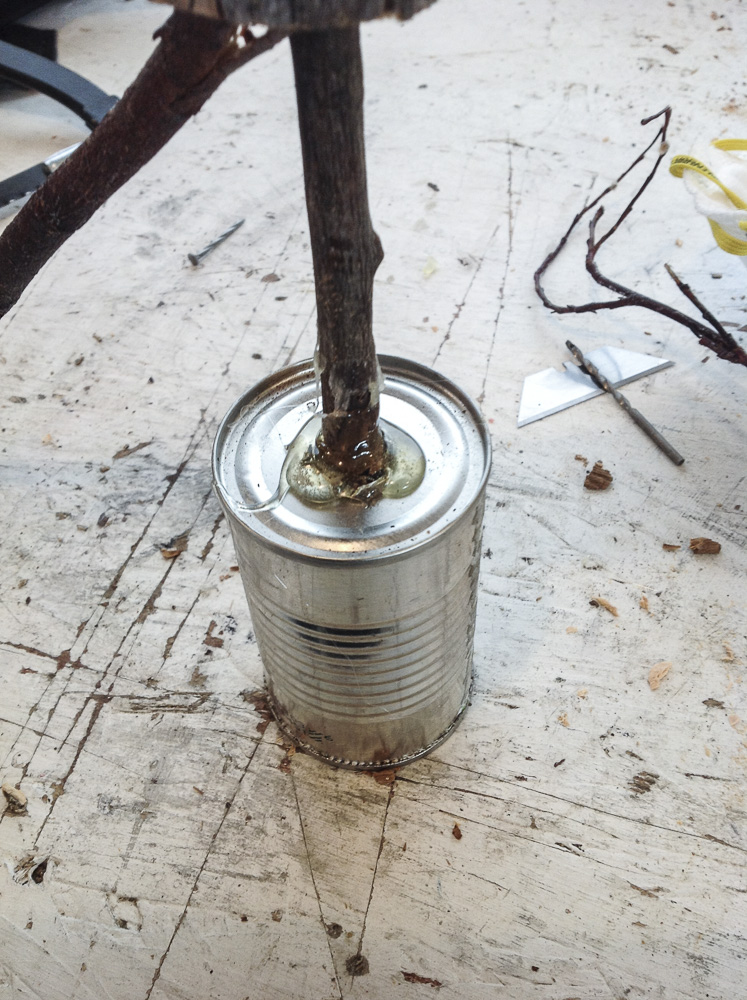
Generally speaking the gathering process of the materials was similar to the Relief Sculpture except for the dried tree branches, I found those in the woods in front o my home. On the other hand, the construction process was different just for the simple fact that in this case I needed to walk around of it to appreciate it completely. This new element of tridimensionality was a game changer from the first exercise.
I think I practiced a lot of construction sculptural techniques, or at least that is the impression I have: I cut, I piled objects of the same shape and form, I glued them, I drilled them, and I cut some of them into pieces to assemble them again into a new shape. It was a great exercise. It was more challenging to create than the relief sculpture.
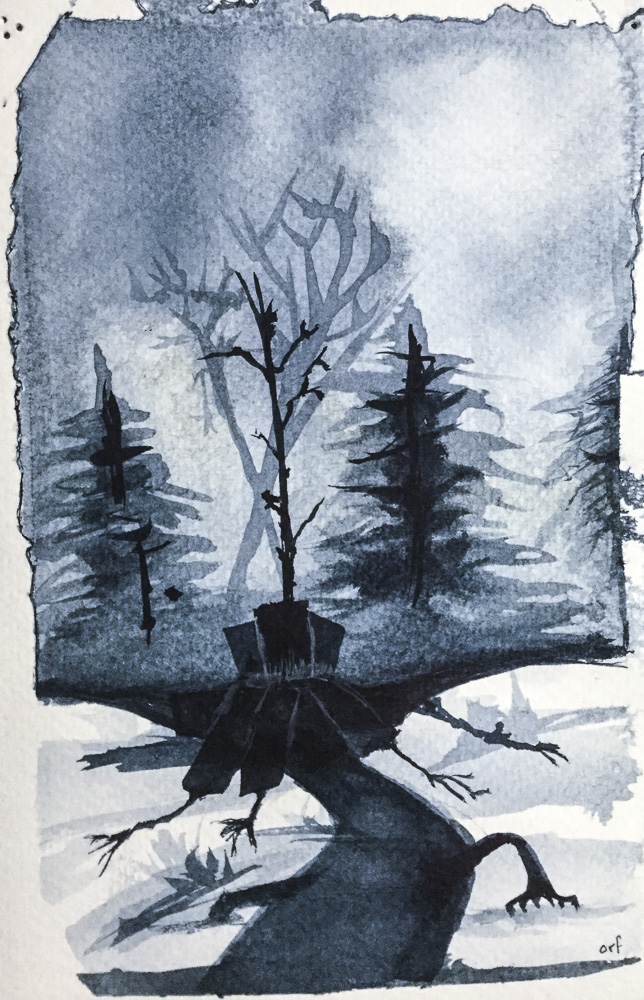
Once again, I base the idea for this sculpture from my previous research about darkness and human intelligence. The first four drawings from the below gallery: Exploration of an idea, show the inspiration source of my sculpture.
Exploration of an idea
Construction begins – First alternative composition for the top part.
Title: Materialization of a hand Author: Omar Reyna Date: 2019 Place of production: Yukon, Canada Materials: Wood, drywall, white and purple paint Technique: Relief sculpture Dimensions: 90cm by 1.5 m.
As a form of conclusion
In the end, the photograph above shows which part of the lower section of the sculpture made it into the final. As I explained in the Coursework Part1, in the last two sections of the document, I was having doubts about what to do with the lower part of the wood board. I must admit that I haven’t made any physical cut to the sculpture to reduce its length documented in the photograph. This reminds me of the relationship David Smith has with photography and perhaps like him, my sculpture’s picture is not a neutral document but an independent image in its own right. (Hamill, 2015:2)
This project still has some future. I need to review it later during the course, to see what I’ll be able to do with the newly acquired knowledge. Or if I decide to let it be seen as is in its official photo. On the other hand, I feel very comfortable with the results of this sculpture. I think that it looks good I have a sense that I accomplished something like kind of a mini-break trough, generally speaking.
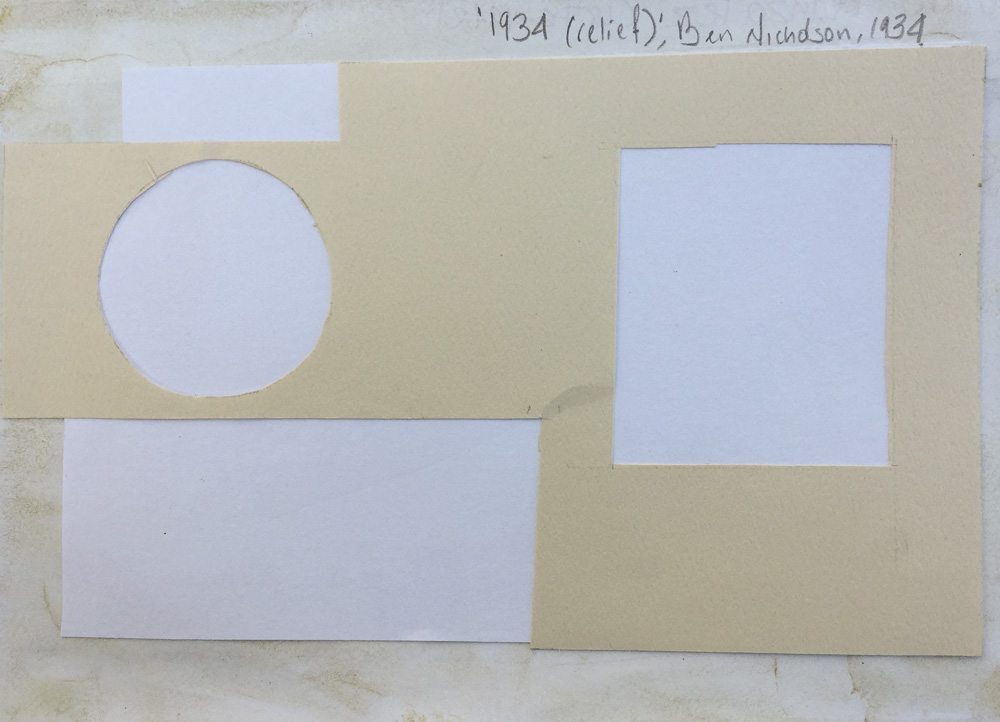
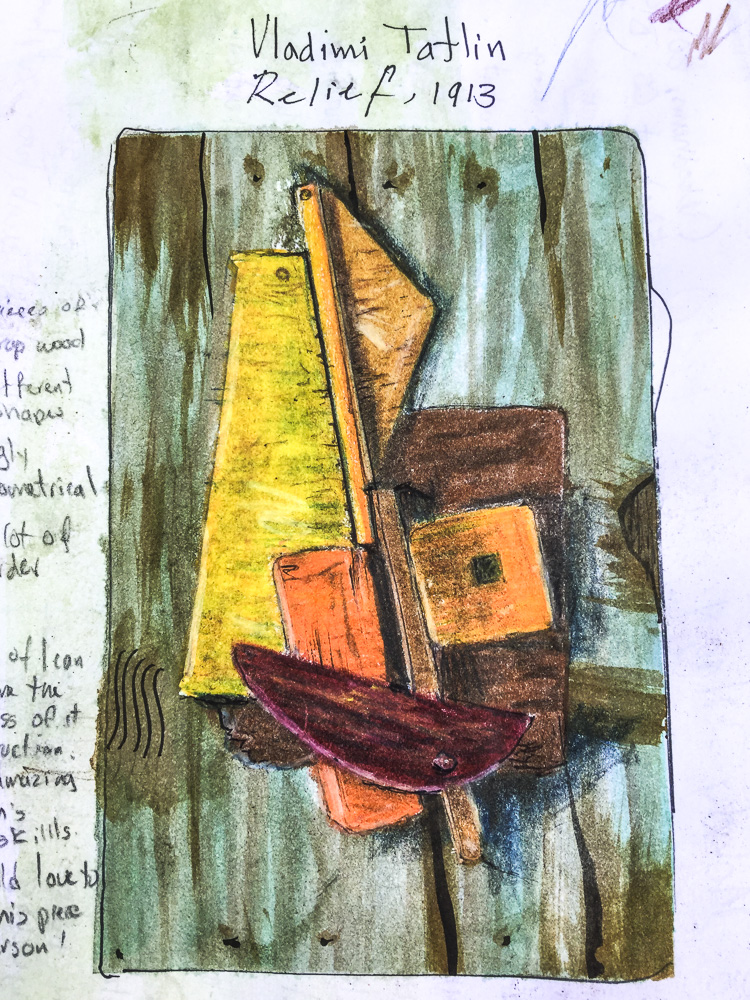
If I have to say who was the most significant influence of all the artists researched, I would say Vladimir Tatlin. I’m glad, Tatlin was one of my top 3 artists in the initial research.
How did I use a range of techniques to create a skilful and effective sculpture?’
I think one of my strengths is that I’m able to work with what I have, and that allows me to be free of preconceived rigid ideas. I found everything that I needed in the garage of my house, objects, and things were limited at first glance, but it is impressive the number of things one can keep throughout the years besides the recycling bins of for different materials: plastics, tin cans, paper, etc. Therefore constructing something out of so many rubbish we produce it was not a difficult thing. Planning, researching, and drawing, were the basis of the creation of my sculpture, along with, experimentation.
How did I use construction techniques involving a variety of media and tools?
Even though I’m not exactly a handy person, I was able to manage the construction part with decent results. My limited knowledge of materials and tool significantly increased with the creation of the two sculptures. Something that I really liked during the construction of the relief sculpture was to use of drywall to create the illusion of unity in my piece.
How I developed basic skills in drawing and used those drawing to develop my ideas
Building a sculpture having as a reference a drawing is a fascinating process: what is in the paper it is not always easy to translate into a physical object. My drawing skills are just ok and good enough for this kind of process; however, next timeI’m going to use a bigger piece of paper for my sketches.
How did I demonstrated the use of research techniques in the study of the history of sculpture and its relevance to my own work
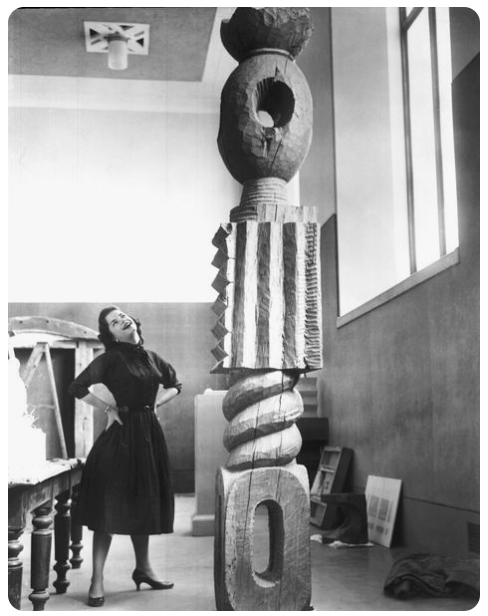
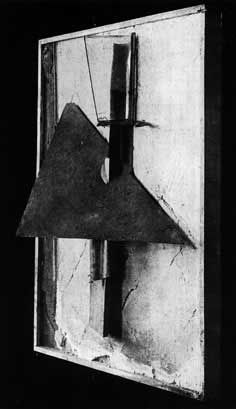
Figure 1. Vladimir Tatlin, “Counter-Relief (Material Combination),” (1914)
First of all, I have to say that I think my relief sculpture is totally Tatlin. The resemblance of my piece with Fig 1 depicting a relief-sculpture of Vladimir Tatlin is undeniable. Perhaps because the significant triangular element in the middle, however, the intention behind my piece is totally different from the counter relief of Tatlin. But besides this comparison of works what I really liked was that I was able to use some of my previous research as an inspiration to build my sculptures and at the same time let myself be influenced by the work of the researched sculptors.
. . .
Bibliography
Hamill, Sarah (2015) David Smith in Two Dimensions: Photography and the Matter of Sculpture. California: University of California Press
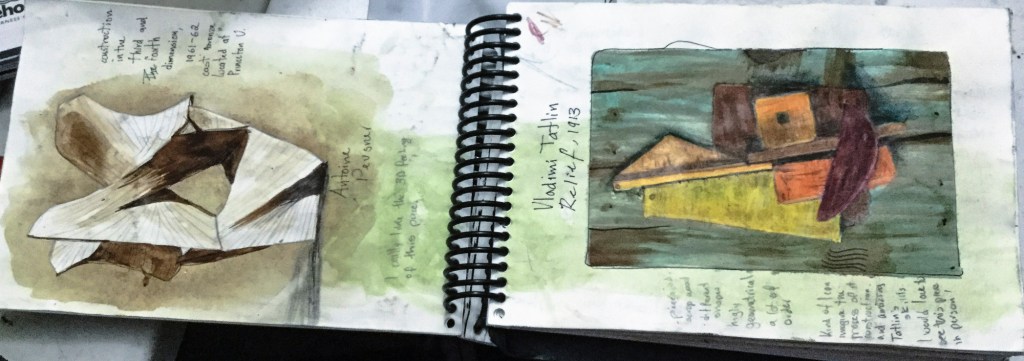
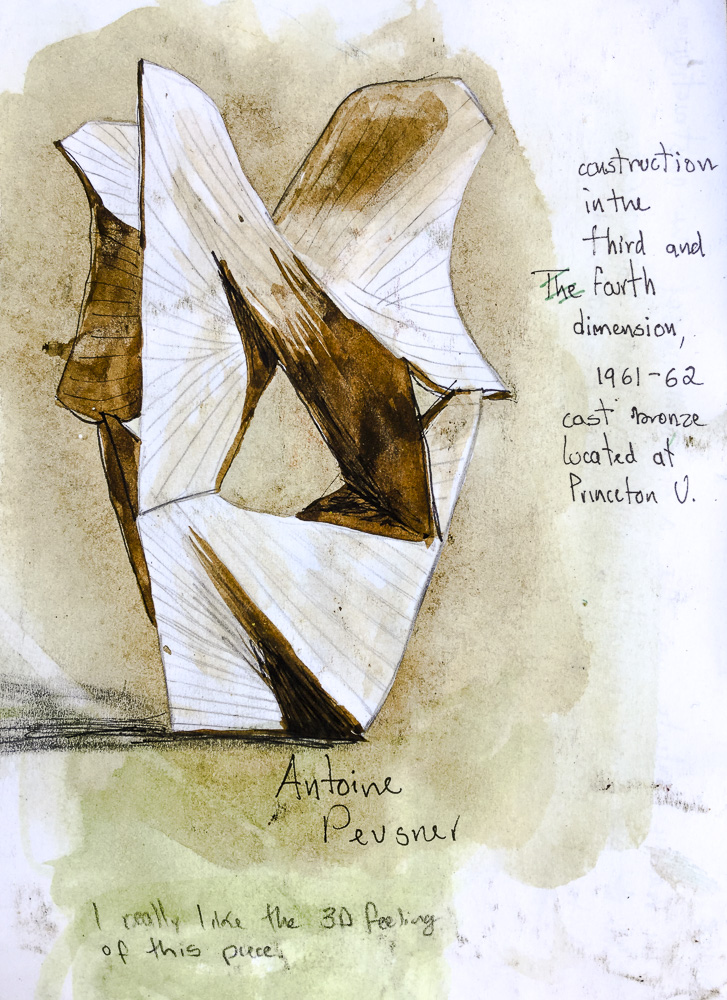
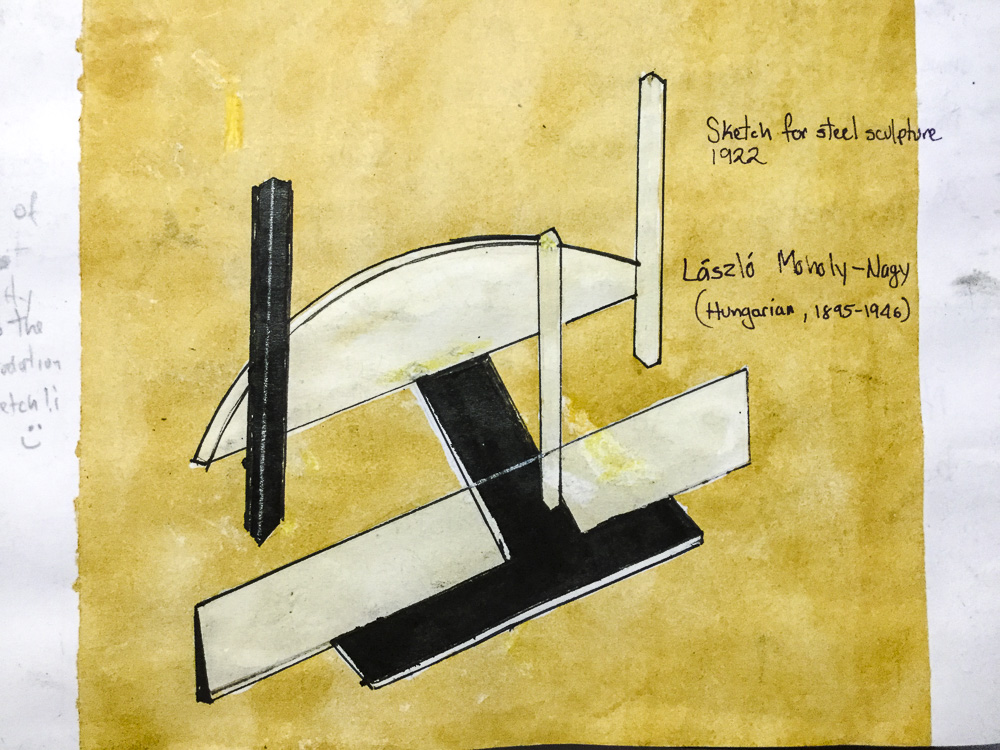
I reviewed all the nineteen artists established on the Research Point. There is way more information available for modern artists than the contemporary ones; hence, I spent more time learning about the beginning of the twentieth century.
It was a fascinating one month endeavour to learn about all those artists. I especially enjoyed learning the possible connections among them, for example between to 3 to 4 years after the creation of the Russian Constructivism in about 1914 (Chilver, 2015) the socialist Russian Revolution of 1918 and its electrifying effects took place and was a significant event that impacted on all aspects of human life in Europe and art was no exception. (Harrison, Wood 2008:223) Personally, I think it was a fantastic time to be an artist full of challenges and changes. I can say the same about the present time with the possibility of humanity to change our natural environment permanently and not in a right way.
From the 19 artists researched, I’ve made drawings of 12 of them, so far. I’m planning to finish the remaining 7 at the end of Part two of the course. However, this time, I’m going to use a significantly bigger piece of paper. My current drawings are on a piece of paper that is in size only 7.8 by 5.3 inches, and even though it was a very satisfactory experience, it was, at some points, quite uncomfortable to deal with a paper that small. I still do not know how big the next drawings are going to be but at least triple this size.
Regarding the quality of my drawings, I think they are ok, they fulfill their function of keeping me practicing my drawing and painting skills. I’ve always liked to pain, so making these drawings was a delightful experience.
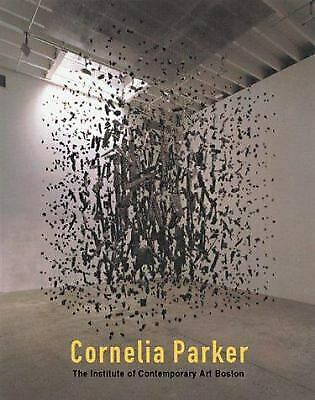
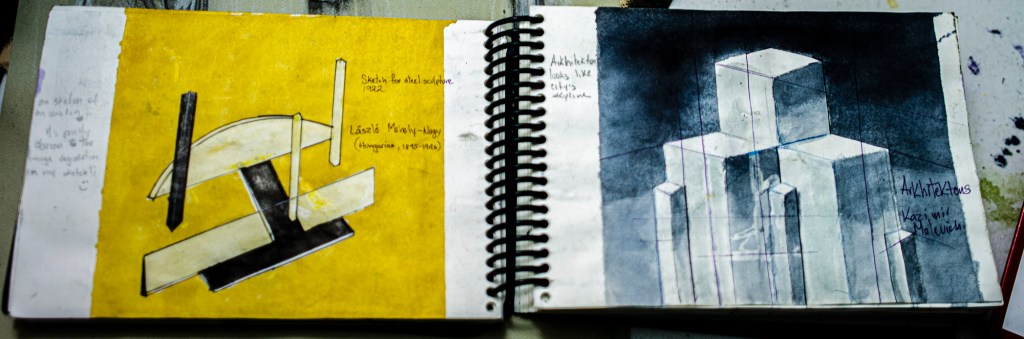
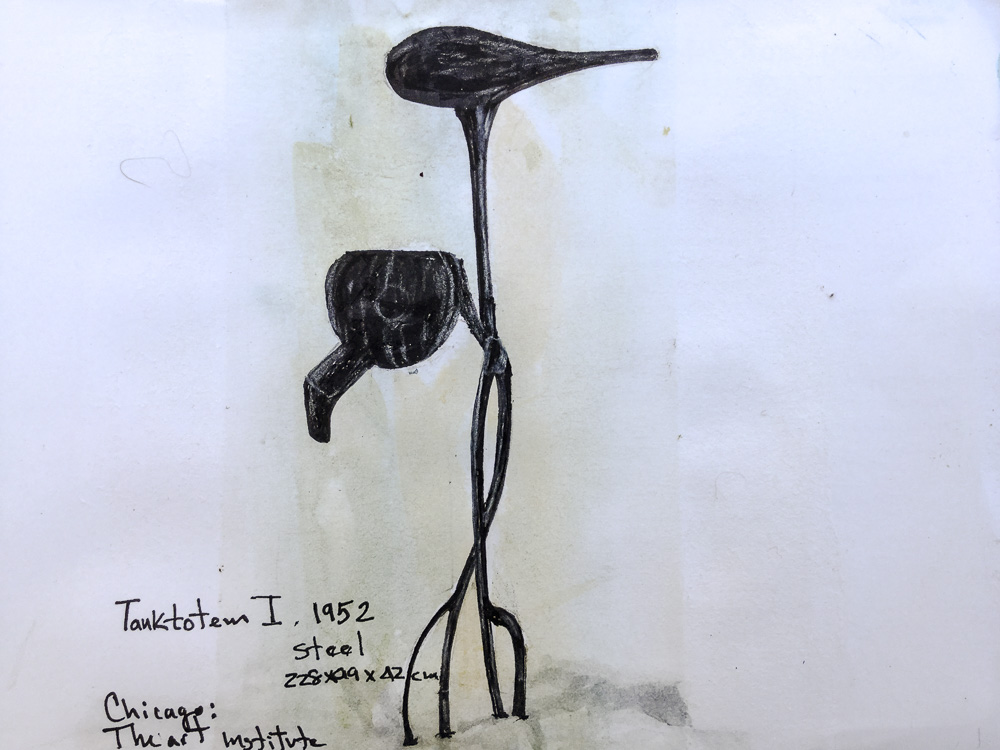
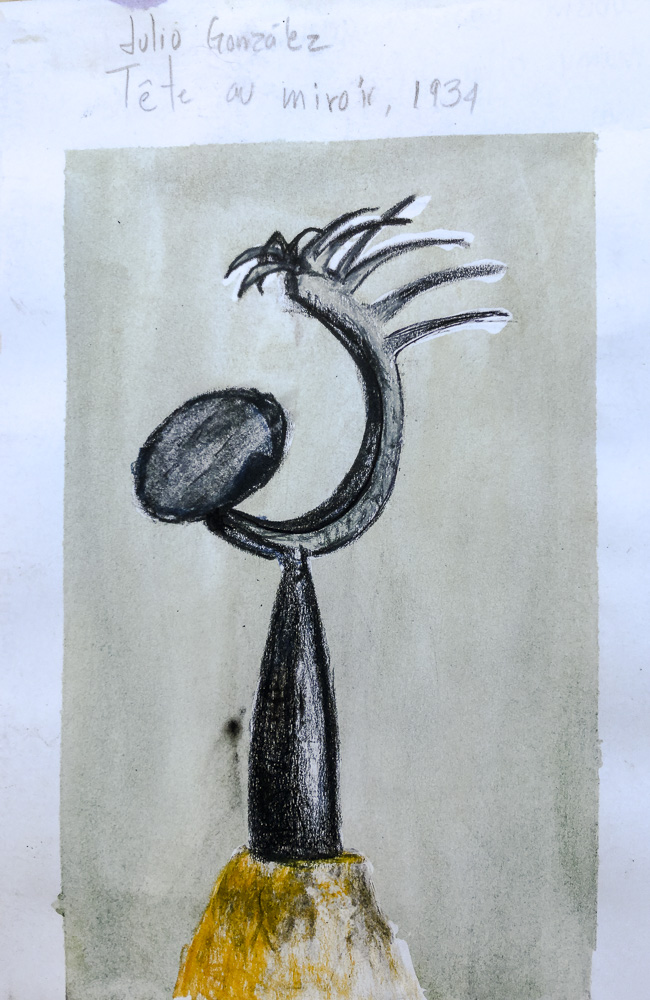
Although I was able to make some kind of connection with almost all the artists with my own art practice, it was only with a few of them that I felt in awe and full of inspiration with their work: Cornelia Parker, Vladimir Tatlin and David Smith are my 3 top favourites… so far. Cathy De Monchaux, Julio Gonzáles, and László Moholy-Nagy are quite fascinating too. Somehow making these drawings made me more conscious of the materials I used when I was building my own sculptures.
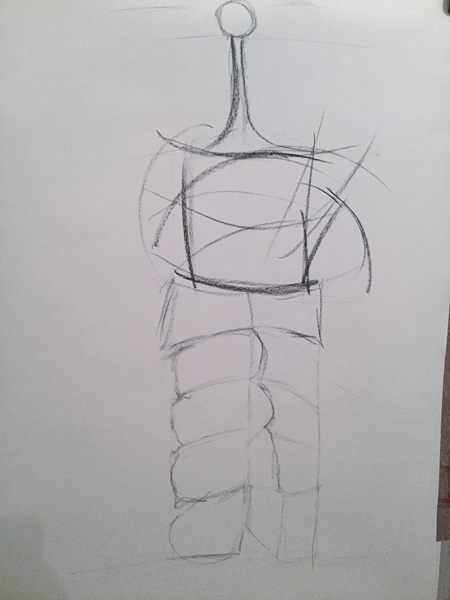
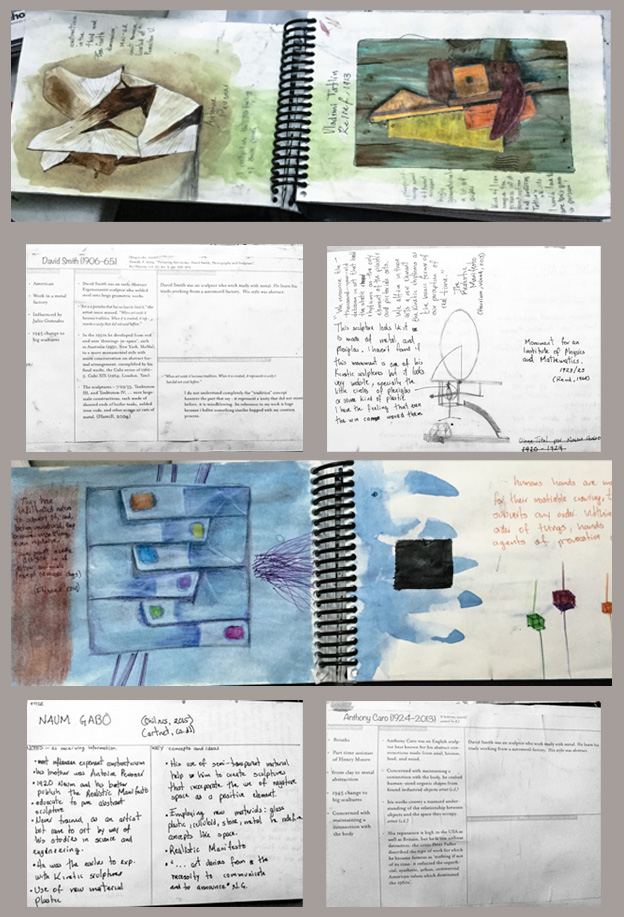
my physical learning log
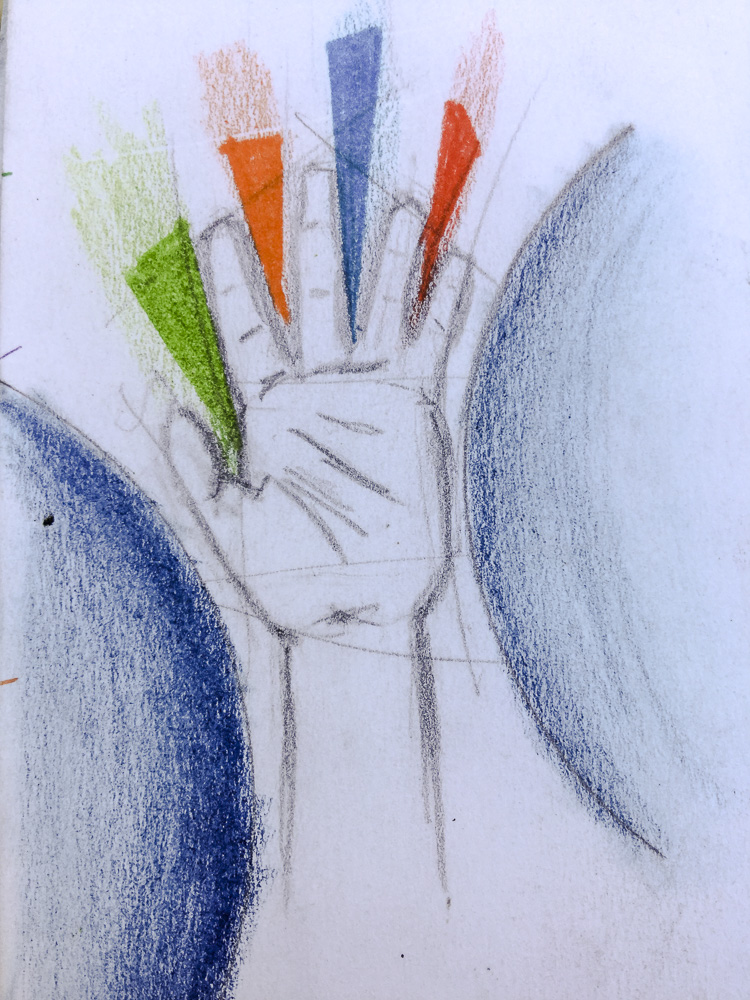
The above image is just to give an idea of how my physical learning log looks like. Something to point out in this image is the blue drawing on the third-row line from top to bottom. That was my first attempt to create something that had a direct link with what I have been working lately which is the concept or idea of darkness, especially human darkness. I have been researching this topic for the last year or so. I’m trying to create something that lives between darkness as something that can do harm and human intelligence, perhaps I’m only after human stupidity. This is the right moment for me to put this research in to practice.
I created this particular sketch a few days before I started working on Project 1. It is an earlier idea of the shallow relief sculpture that I decided not to produce because of its complexity, and perhaps also for its figurative character, not exactly the best way to honour the artists I just researched. For project one, I decided to go more into the abstraction without abandoning the idea of a hand.
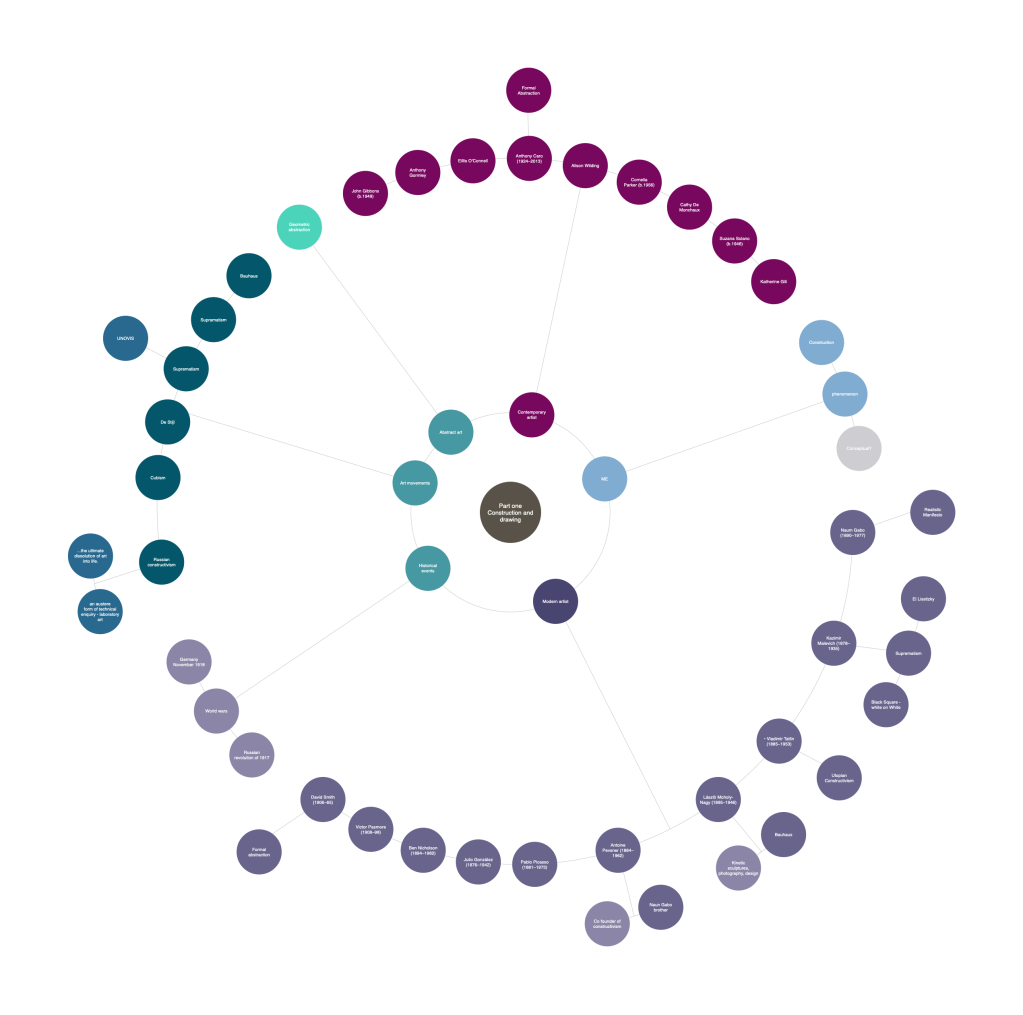
Mind Map
One tool that helped me out to gain a global vision of the elements involved in the researching stage was to create a mind map. It is a work in progress, I’m still learning a lot about artists, movements, materials, decades, events, etc., and sometimes I misplace art movements and things like that. By clicking on the below image you can access to an interactive version of the map.
This is a work in progress as the full potential of this map has not yet been achieved, but it really looks promising. For the moment, the section that refers to me is quite empty. I haven’t connected my ideas with the rest of the elements in the map, yet.
I’ll continue working on the map during the rest of the course and will use it as an essential part of my learning toolkit.
Bibliography Consulted in the writing of this post and in the research project for the Part One of the course.
Brigstocke, Hugh (2001) The Oxford Companion to Western Art. Oxford: Oxford University Press, Published online: 2003
Chilvers, Ian (4th edition, 2009) The Oxford Dictionary of Art and Artist. Oxford: Oxford University Press, Published online: 2009
Chilvers, Ian and Glaves-Smith, John (3 edition, 2015) A Dictionary of Modern and Contemporary Art . Oxford: Oxford University Press, Published online: 2015
Chilvers, Ian (5th edition, 2015) The Oxford Dictionary of Art and Artist. Oxford: Oxford University Press, Published online: 2015
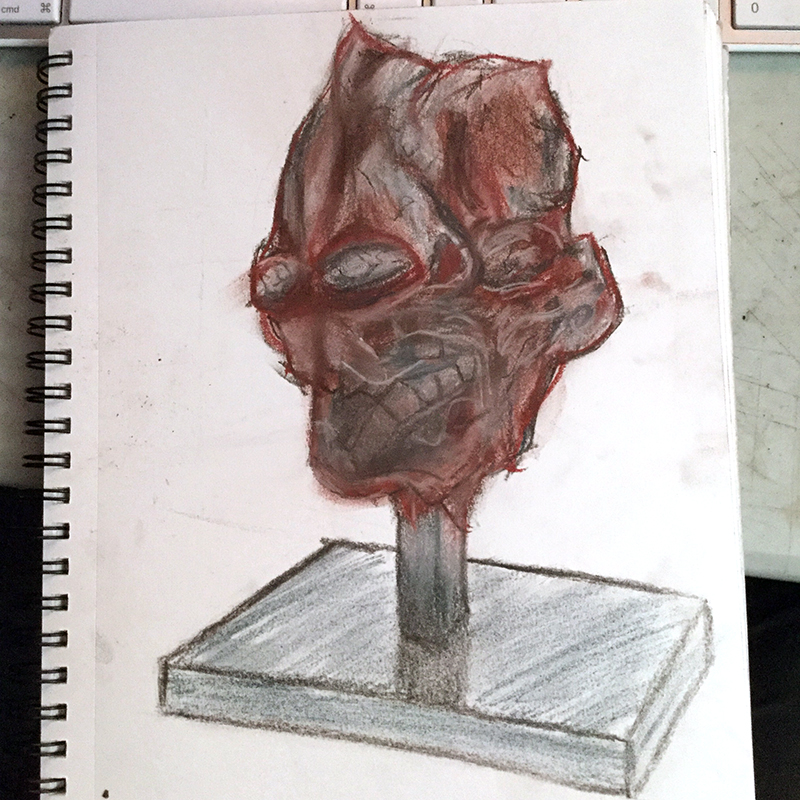
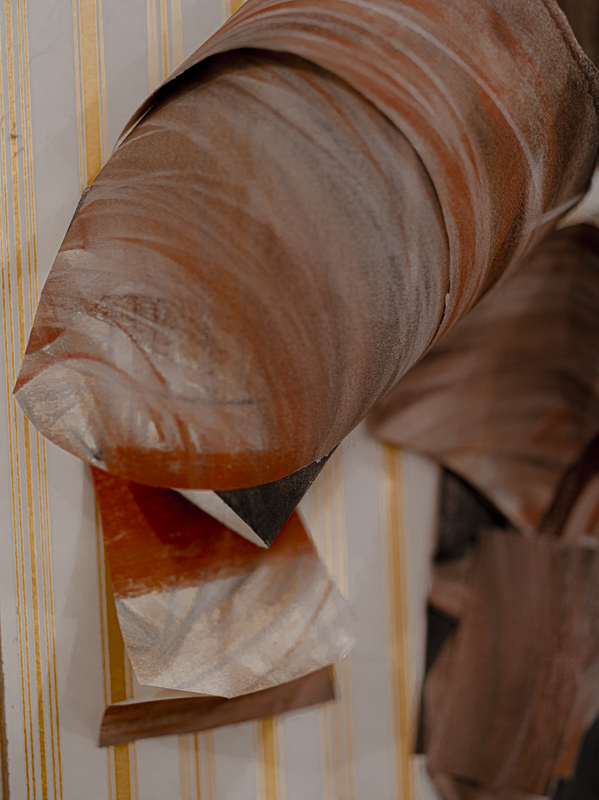
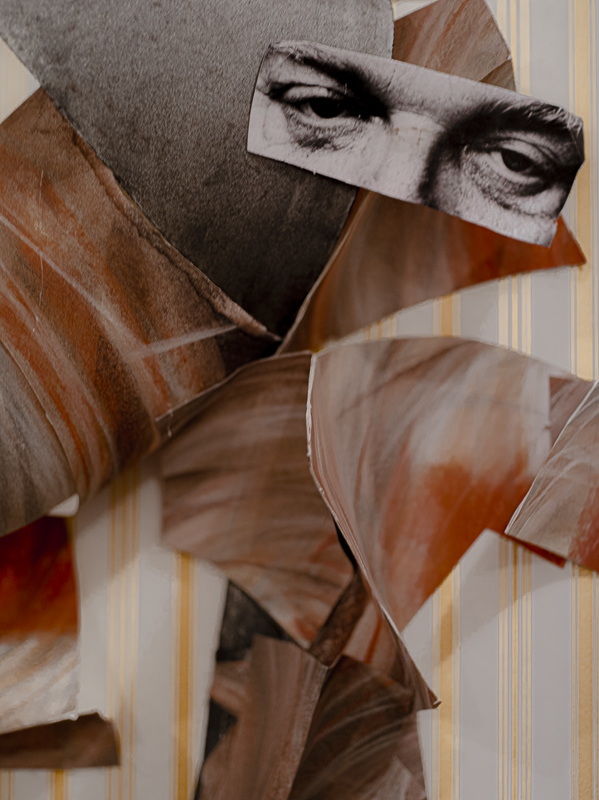
Hello, my name is Omar Reyna. I have been using photography as a medium of representation for some years now. I have reached a point in which I feel the need to add to my art practice a new element from which to grow, and for me, that becomingness is trough sculpture.
The above image is part of the visual research of my latest photo project, “Perishable Corporality.” This image did not make it into the final selection of the project; however, it represents the beginning of sculptural objects in my art practice.
I developed “Perishable Corporality” while studying Contemporary Photography at NODE Center, (fantastic learning centre, highly recommended). This course “Sculpture 1: Starting out in 3D” is offered by OCA and it is my first course with this very-very promising place to learn, so I’m quite trilled.